Arguably the best medium tank sniper at tier 10, the Concept B is getting a successor, which might bring joy to many enjoyers of this vehicle. With its new ability, it might address the only weakness of the tier 10, its clunkiness and mobility, which hampers it from quickly retreating.
The Pinnacle of the British Wheeled Line
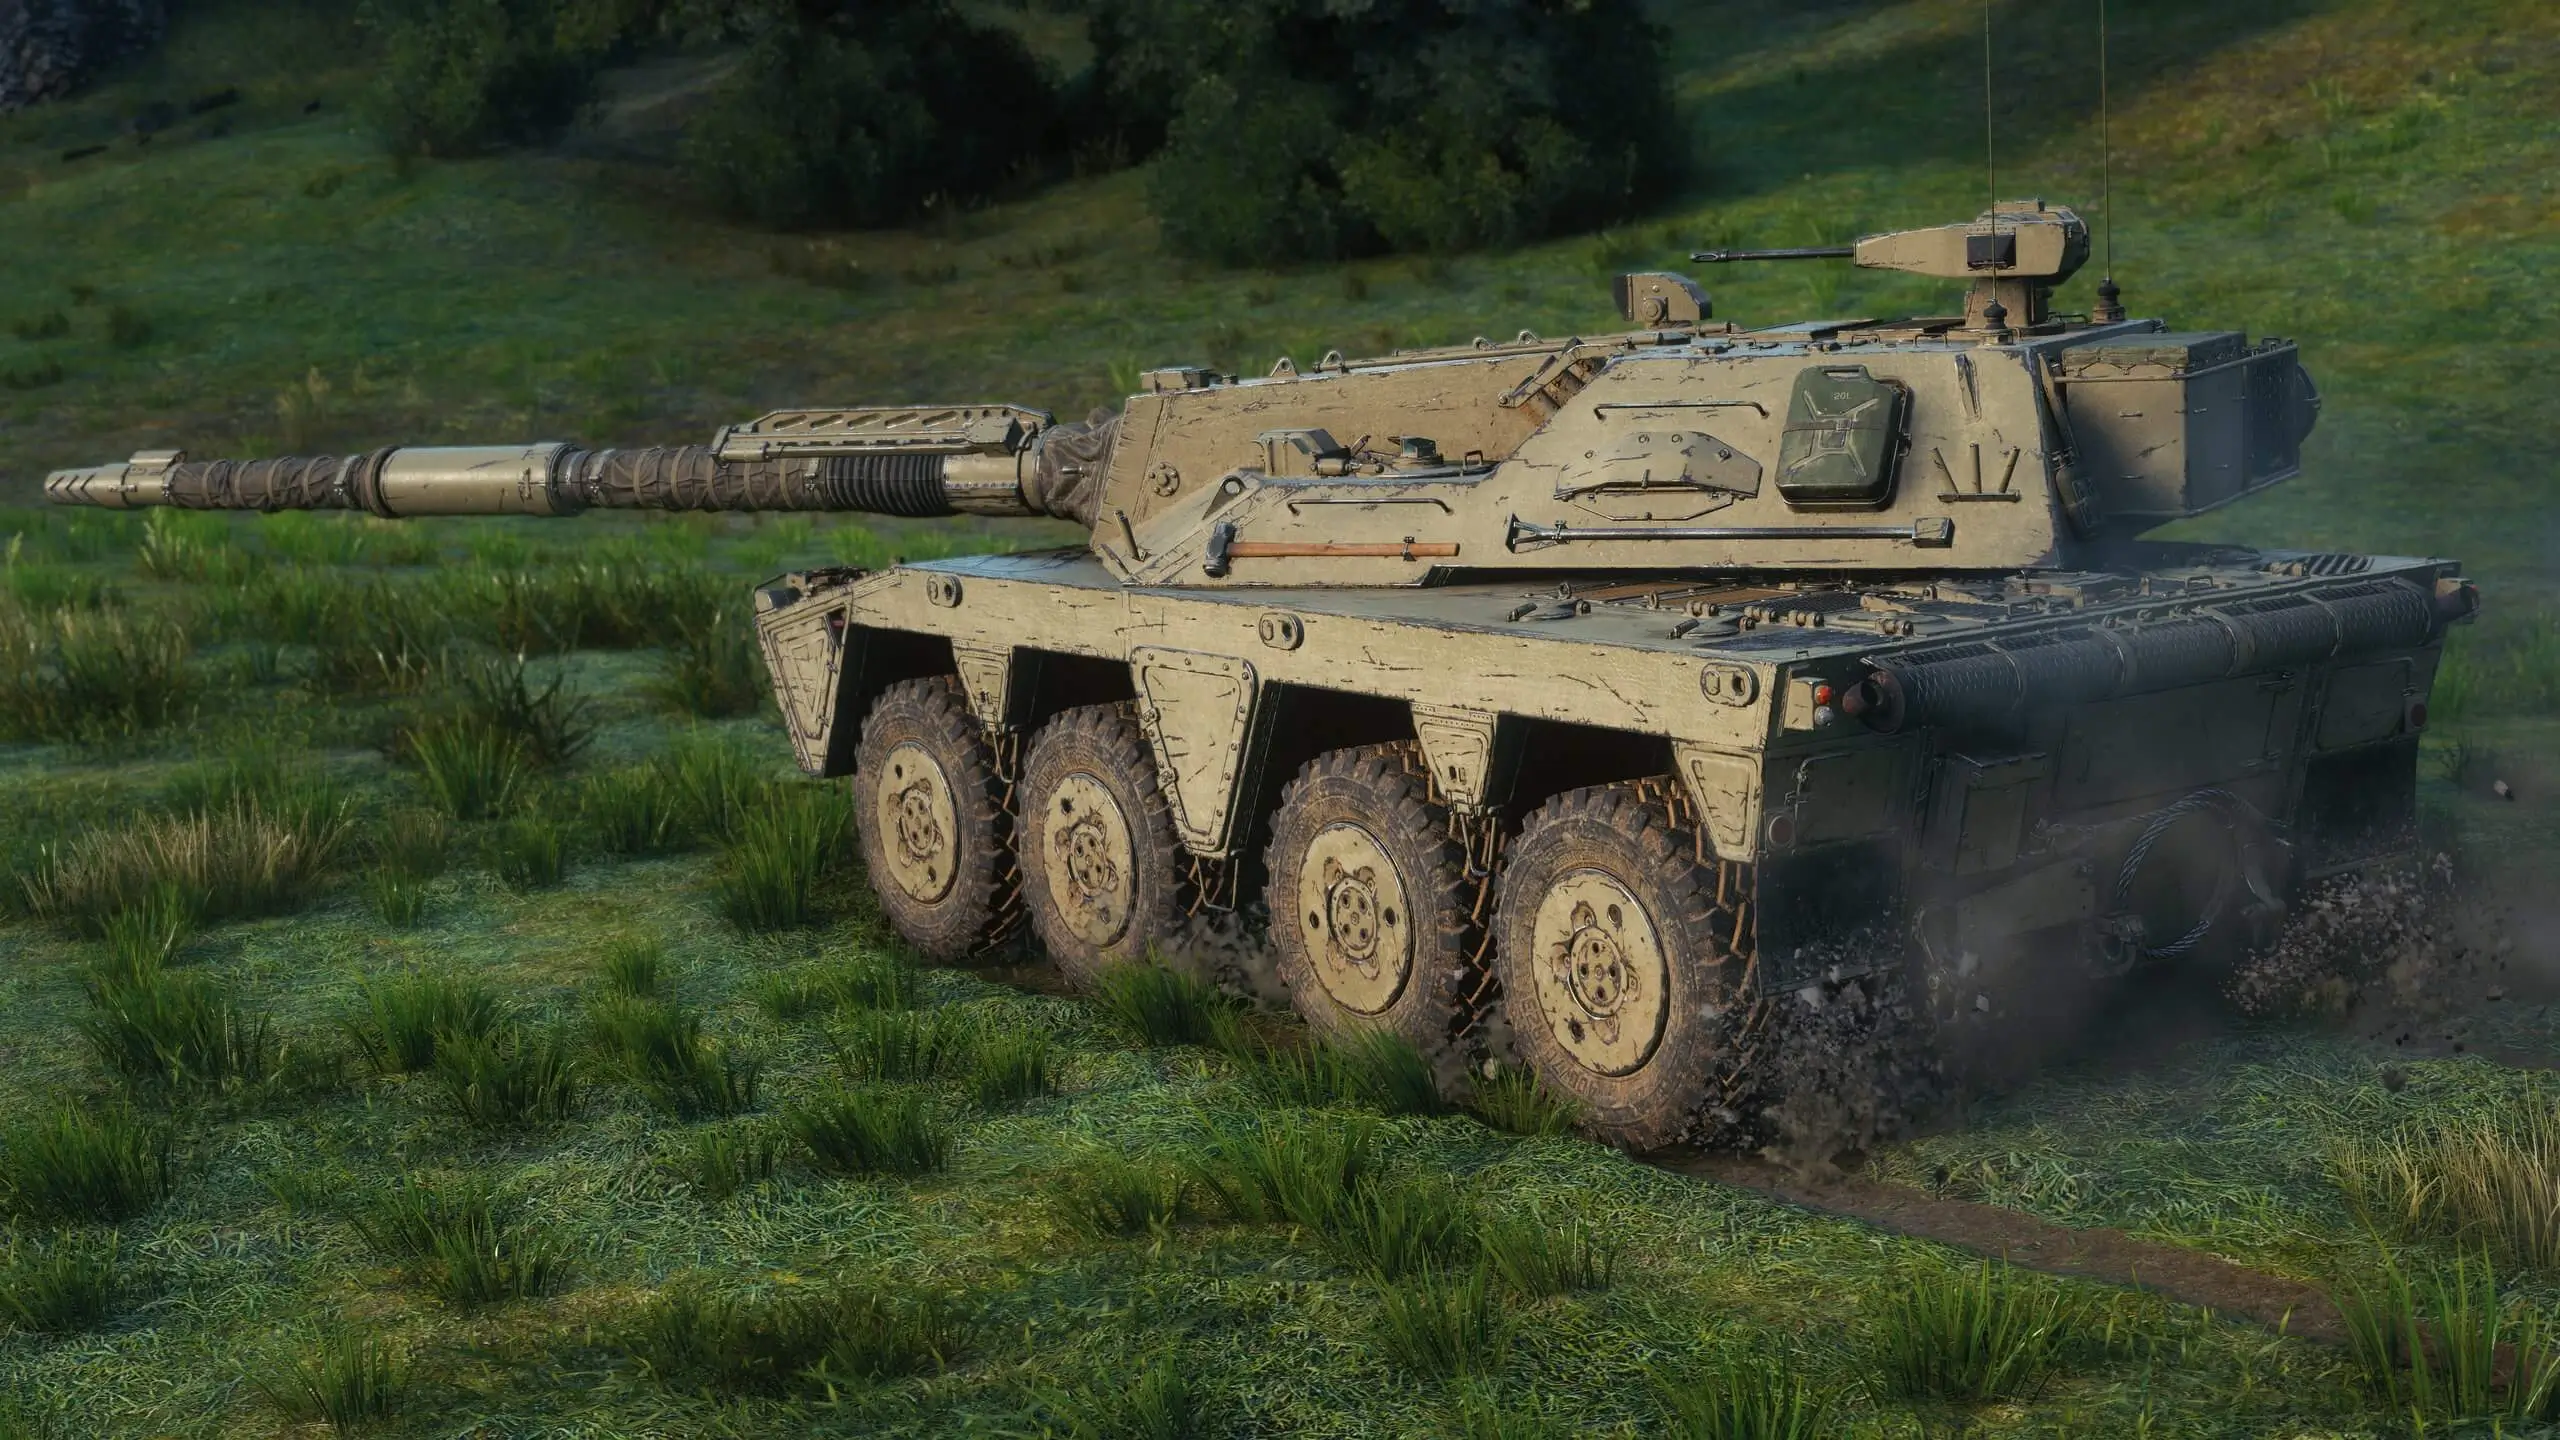
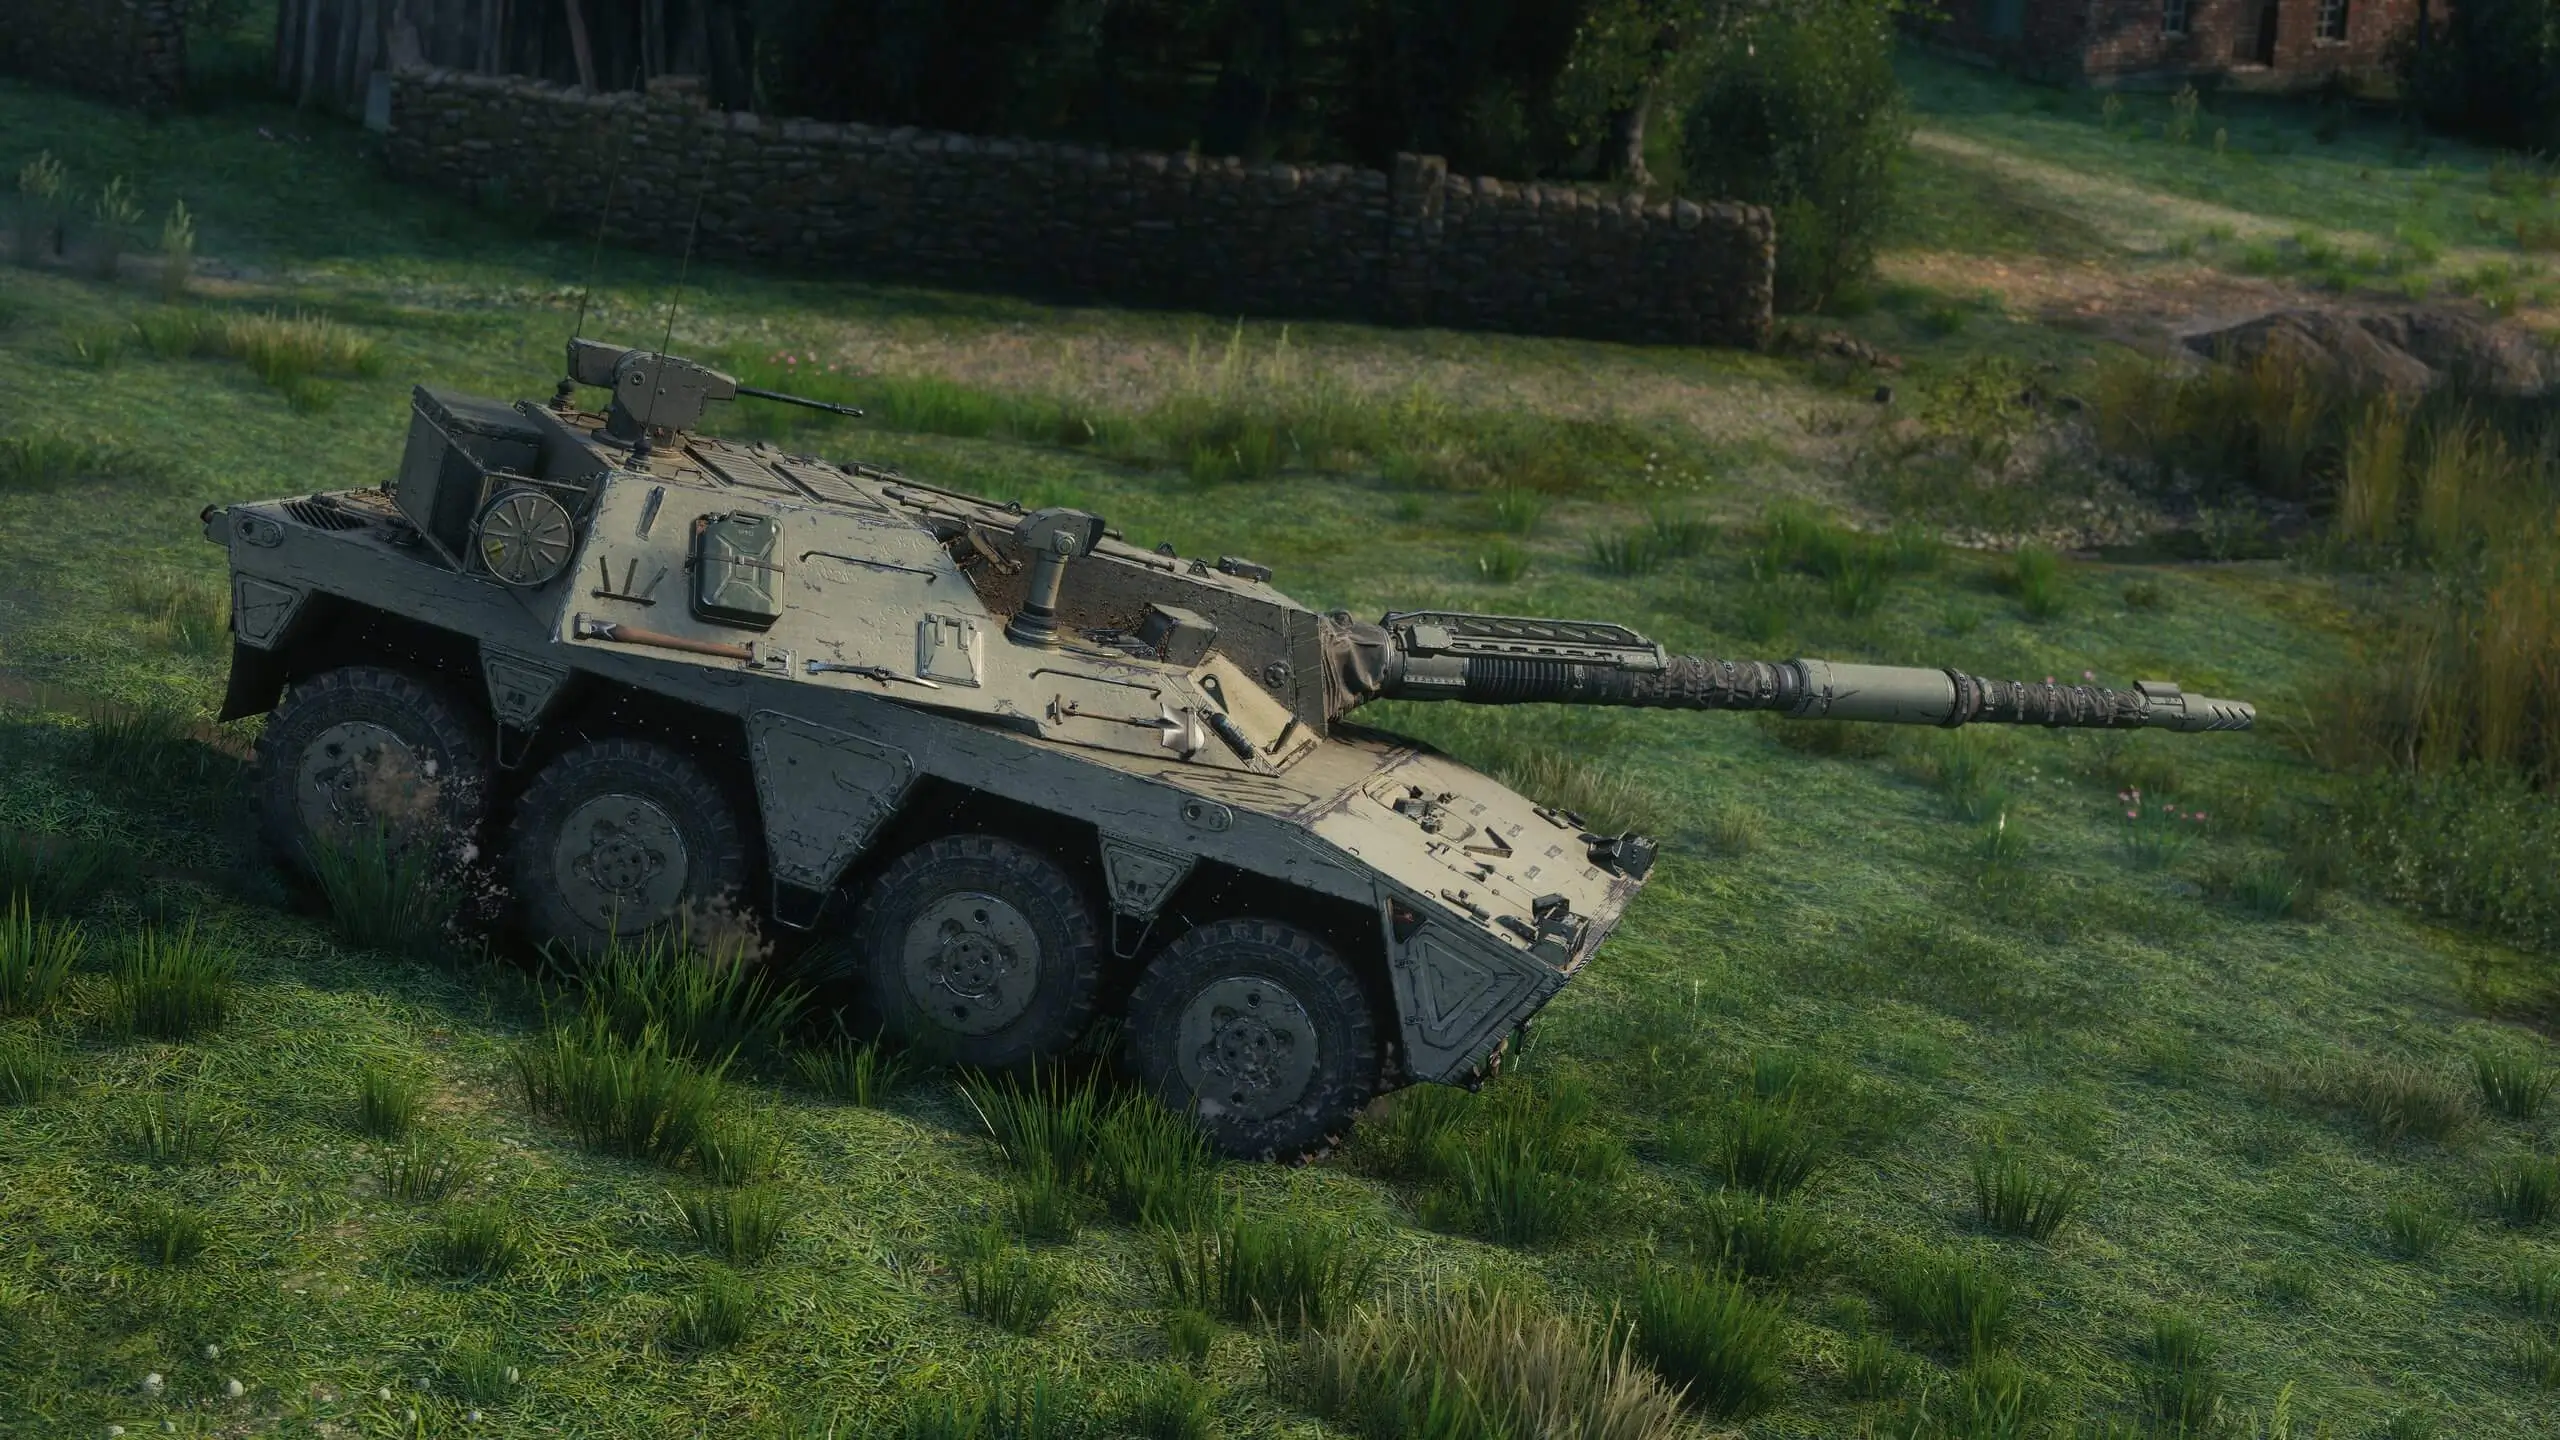
The fast and nimble Executor is the pinnacle of the British wheeled medium tank line. If you’ve been threading through maps on wheeled vehicles and loving every second of it, the Executor is the natural destination — the ultimate expression of what this playstyle can become. Everything the line has been building toward has been refined and pushed to its absolute ceiling.
The High-Pressure Turbocharger Assist: Speed on Demand
The mechanic that defines the Executor is deceptively simple — and devastatingly effective. Its High-Pressure Turbocharger Assist ability boosts its engine power, acceleration, and speed for a few seconds — to catch up with its target, to escape a dangerous area quickly, or to jump out of an enemy’s crosshairs.
And when it activates, you get flaming exhaust pipes to go with it. Style points fully intact.
Think about what this means in practice. Every wheeled medium player knows the nightmare scenario: you’ve committed to a flank, the situation turned, and now you need to get out — fast. On a normal vehicle, you either make it or you don’t. On the Executor, you pop the turbocharger and you’re simply gone. No debate. Meanwhile, on the offensive side, a target that thinks it has enough distance to be safe suddenly finds the Executor right on top of it, with nowhere to run.
What Kind of Playstyle Should You Expect?
The Executor’s signature ability slots naturally into the wheeled medium identity and supercharges the most impactful moments of that playstyle.
The escape artist. Every wheeled medium has some capacity to disengage, but the Executor turns it into a near-guarantee. Pushed by a heavy? Turbocharger. Caught in the open by artillery? Turbocharger. Got spotted in the wrong place at the wrong time? You already know. The ability to reliably escape bad situations means Executor players can take calculated risks that no other vehicle can afford.
The aggressive spotter. Active scouting at Tier XI is dangerous business. You’re pushing into unknown territory, often alone, often deep in enemy territory. The turbocharger means you can extend further than any other vehicle, knowing you have a burst of speed in reserve if something goes wrong. That confidence changes how aggressively you can play the spotting game.
The flanker that can’t be caught. On offense, the turbocharger closes distance on retreating targets and opens distance from pursuing ones. For hunting down damaged enemies or running down light tanks that think they’ve gotten away — the Executor is merciless.
Unlocking the Executor
If you’ve been grinding the British wheeled line, you’re already most of the way there. Accumulate 325,000 XP on the required Tier X predecessor and you’ll be ready to unlock the Executor the moment Update 2.2.1 drops. Given how active wheeled mediums tend to be in the current meta, that XP should come naturally if you’re playing to the line’s strengths.
Final Thoughts
The Executor isn’t trying to reinvent what a wheeled medium is — it’s perfecting it. The High-Pressure Turbocharger Assist doesn’t add a new mechanic you have to learn from scratch; it takes the most critical moments of wheeled gameplay — the chase, the escape, the commitment — and makes them decisive. If you love speed, map control, and the thrill of playing at the very edge of your vehicle’s limits, the Executor was built for you.
No stats confirmed yet, but the concept is pure and focused. Get that Tier X XP banked and be ready.
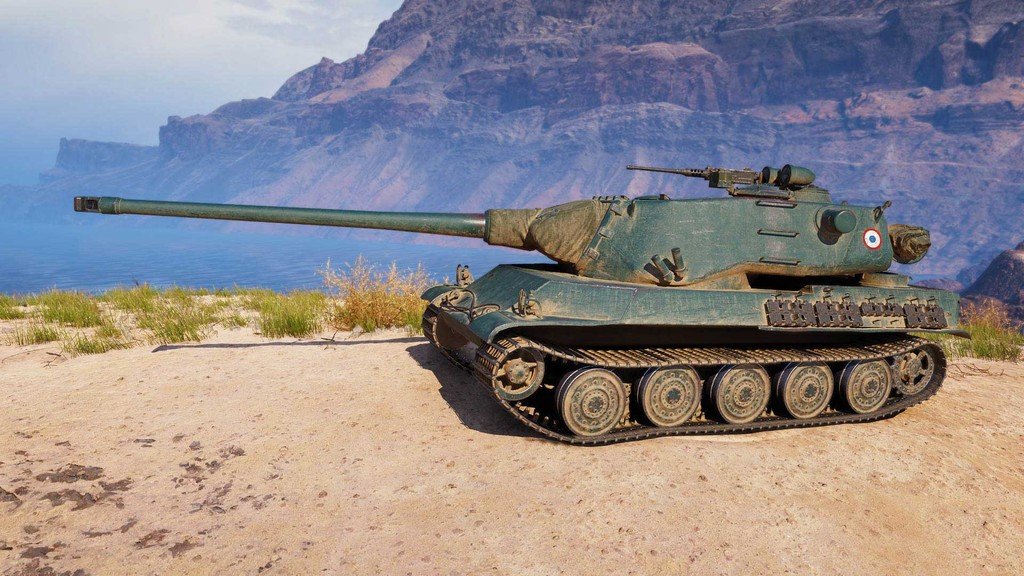
Once one of the most broken lines in World of Tanks, it is getting a tier 11. We are talking about the M4 54, French heavy, which is always either too weak or too strong. It is going to be interesting to see how Fauteur will stack against the existing tier 11 heavies, and the competition is fierce.
The Rightful Heir to the AMX M4 mle. 54
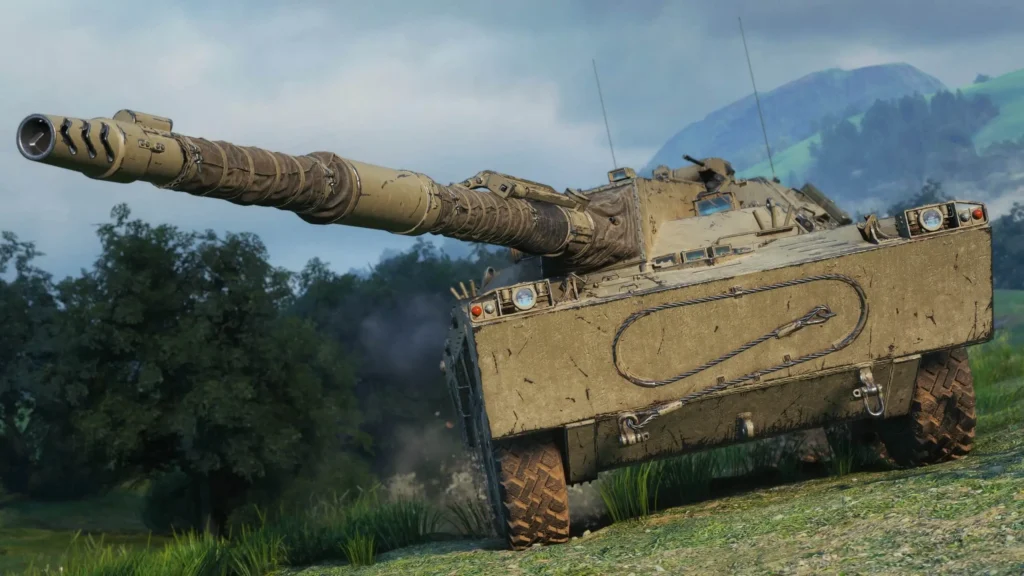
The Fauteur is the rightful heir to the AMX M4 mle. 54, one of the most respected French heavies in the game. If you’ve been playing the M4 54 and loving its combination of strong armor and a punishing gun, the Fauteur is exactly where that journey leads. It inherits the well-armored, top-tier brawler identity of its predecessor — and then adds something nobody has seen before at this tier.
The Induction Propellant Afterburner: Science Meets Carnage
This is the mechanic that makes the Fauteur genuinely exciting. The Fauteur features an Induction Propellant Afterburner that automatically accumulates electrical charge over time, which is partially consumed to boost damage when firing. The charge has a limit that can be manually disabled for even more damage, at the cost of worsened gun handling.
Let that sink in. Your gun is constantly charging between shots. Every second you spend positioning, angling, waiting for the right moment — the Fauteur is building energy. When the moment comes and you pull the trigger, you’re not firing a standard shell. You’re firing an electrically supercharged round that hits harder than anything the AMX M4 mle. 54 could dream of.
And if patience runs out? You can manually override the charge limit and dump everything into a single devastating shot — at the price of your gun handling taking a hit. High risk, higher reward. Very French.
What Kind of Playstyle Should You Expect?
The Induction Propellant Afterburner naturally rewards a particular style of play, and it’s one that suits a well-armored heavy perfectly.
Patience pays off. Unlike the Gorilla, which rewards aggression and staying in the fight, the Fauteur rewards commanders who know when not to fire. Every second you wait behind cover, angling your hull, or waiting for the right trade — your gun is getting more dangerous. Trigger discipline isn’t just good play here, it’s a core mechanic.
The manual override is a big skill check. The ability to disable the charge cap and squeeze out maximum damage at the cost of gun handling is where good Fauteur players will separate themselves. Knowing when to pop that override — for a critical peek on a key target, to finish a low-health enemy, or to punish a badly positioned opponent — will define who gets the most out of this tank.
Armor makes it all possible. None of the above works if you’re constantly getting penned and forced to react. The Fauteur’s strong armor is what gives you the luxury of waiting, of choosing your moment, of letting that charge build. Expect a hull-down or angling-focused playstyle where the goal is to always fire on your terms, not the enemy’s.
Unlocking the Fauteur
If you’re already sitting on a fully researched AMX M4 mle. 54, you’re in great shape. You can prepare in advance by accumulating 325,000 XP on the required Tier X vehicle — the AMX M4 mle. 54 — so you’re ready to unlock the Fauteur the moment Update 2.2.1 goes live.
Final Thoughts
The Fauteur is shaping up to be one of the most conceptually interesting heavies in the Tier XI roster. It’s not about raw speed, clip potential, or gimmick burst damage — it’s about discipline, positioning, and timing. A tank that rewards you for thinking before you shoot is a rare thing at top tier, and that alone makes the Fauteur worth watching very closely.
No final stats yet, but the concept is rock solid. Start banking that AMX M4 mle. 54 XP now.
When I first saw the Gorilla, I thought this is going to be a successor to the Minotaur, but this is actually a tier 11 American turreted TD. While in random battles, the T110E4 is not very popular, it is tho in onslaught, and the majority of the playerbase already has this tier 10.
A New Tier XI Tank Destroyer Joins the Fight
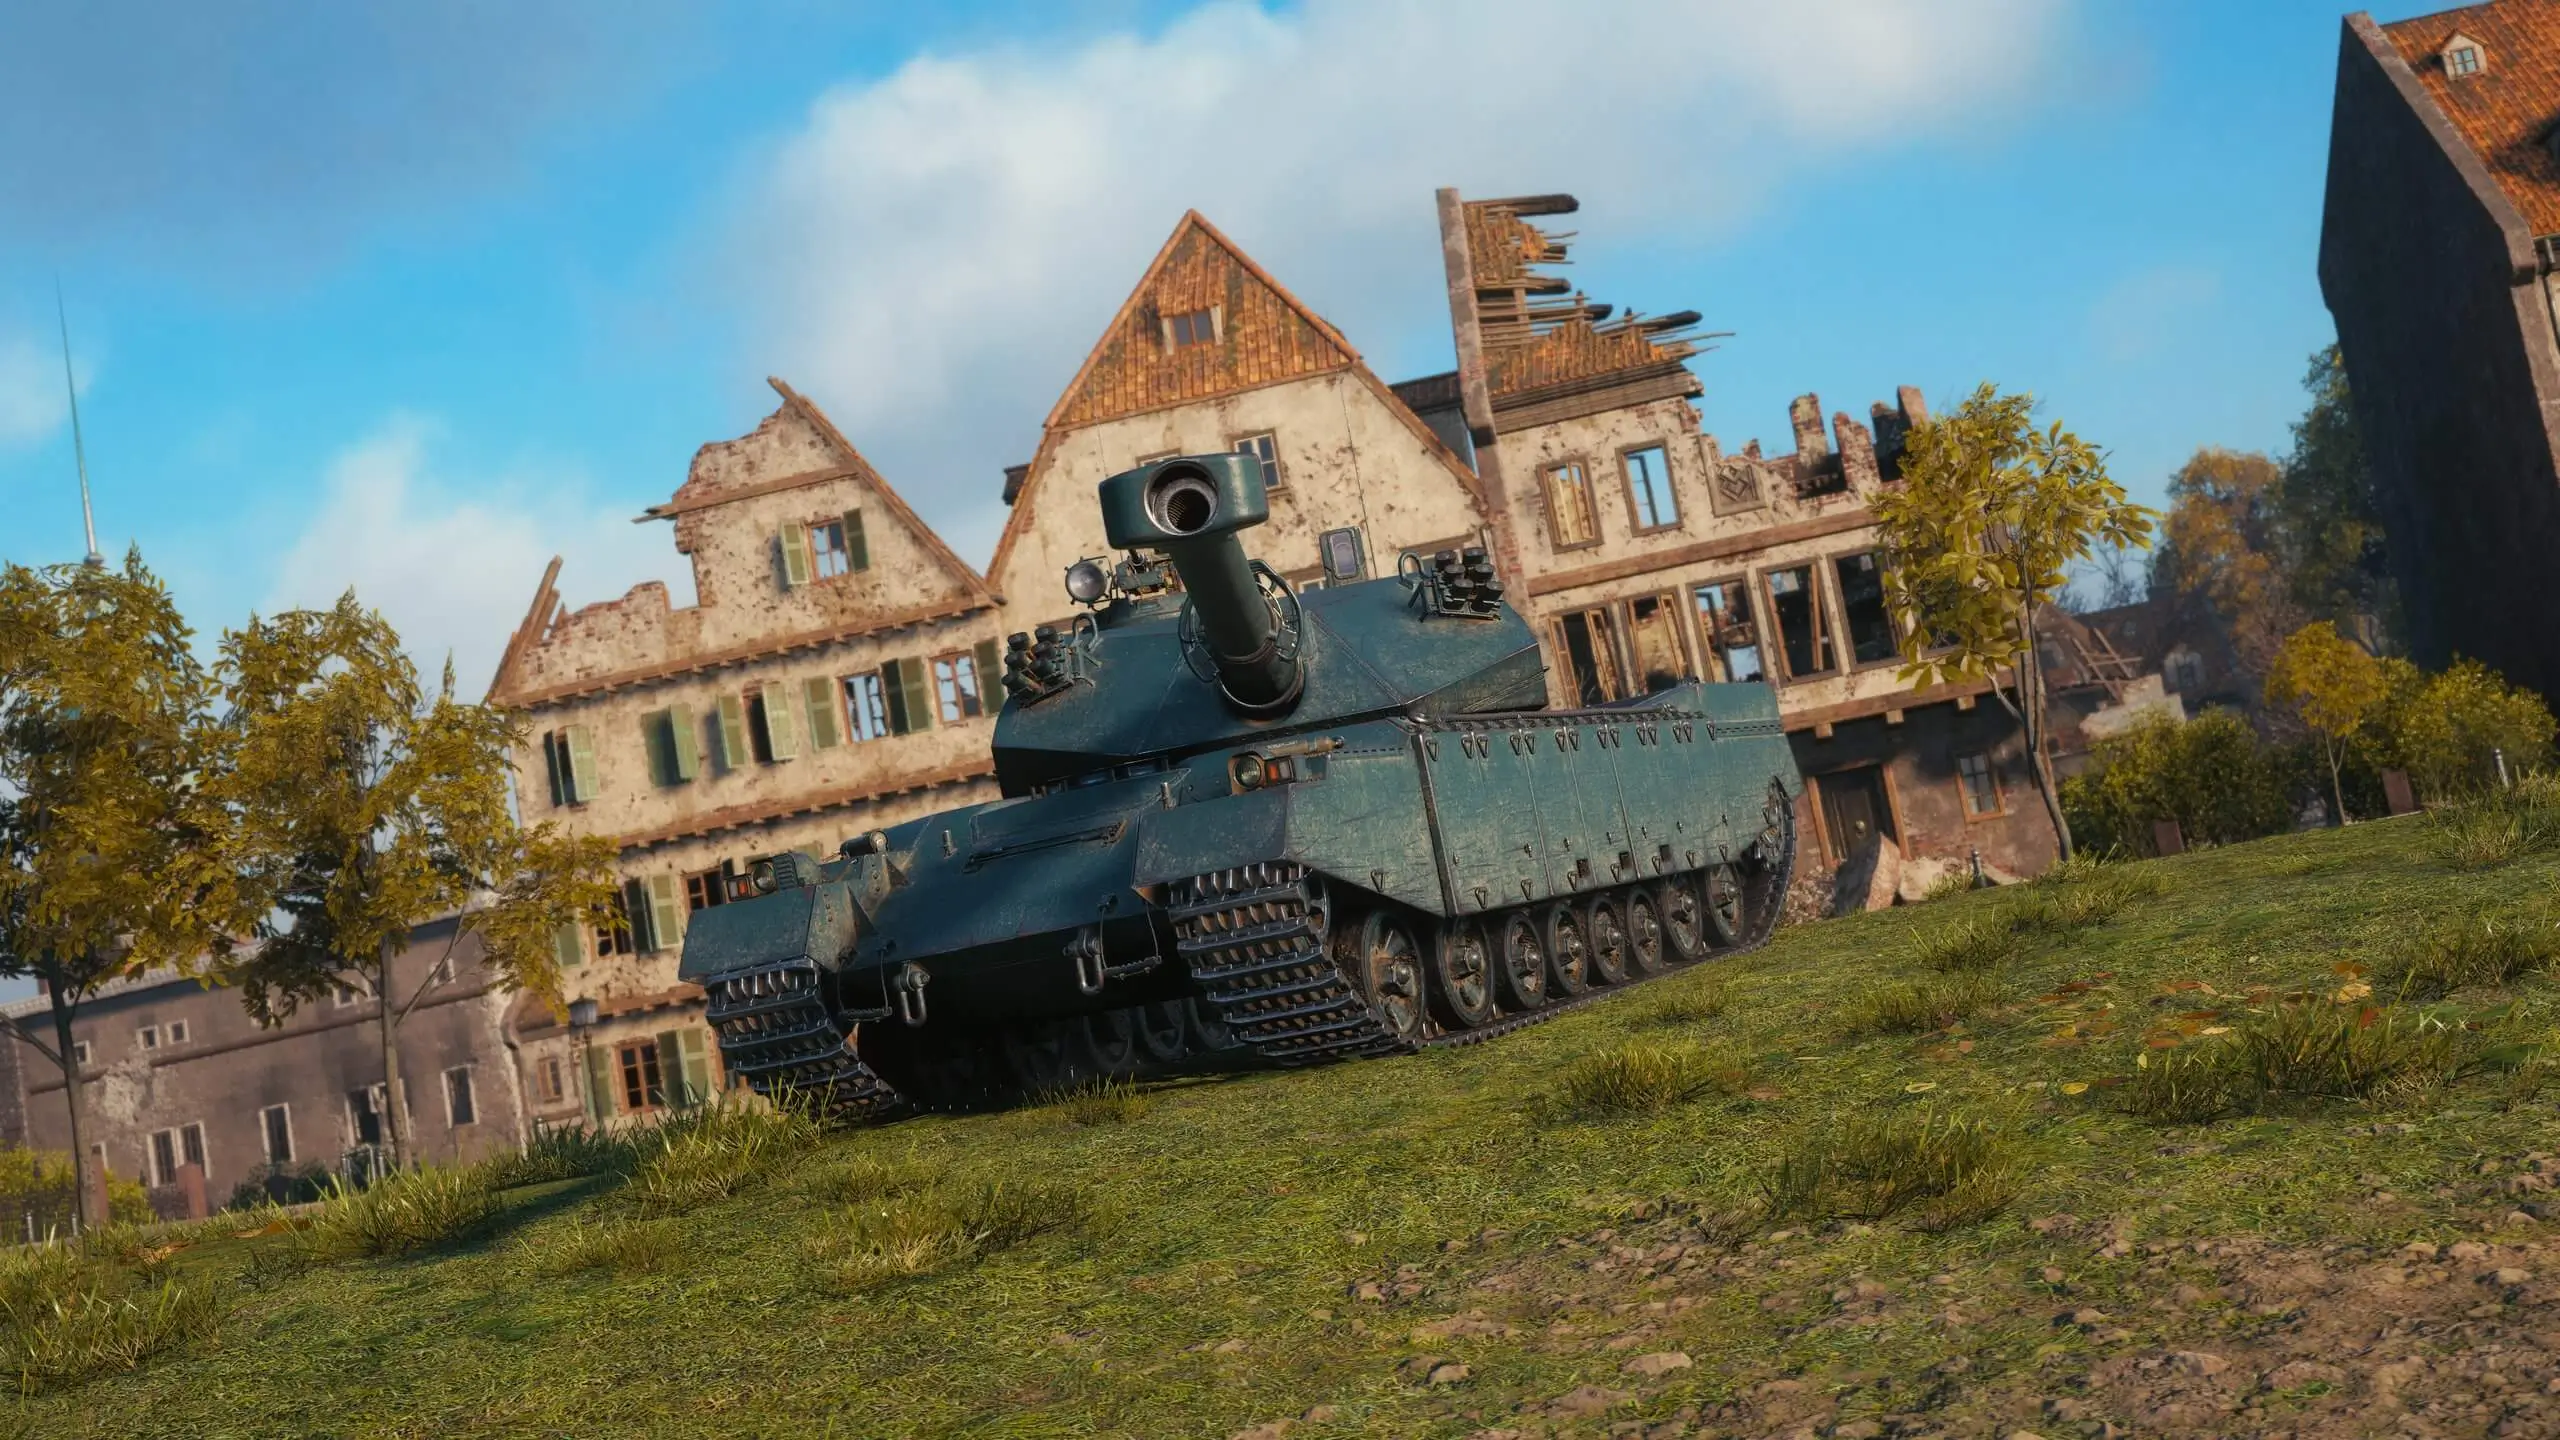
The Gorilla extends the T110E4 line, sporting a powerful gun in a sturdy turret. World of Tanks If you’ve been grinding through the American tank destroyer branch and love the brutish, hard-hitting playstyle of the E4, this is the natural next step. The Gorilla feels like everything the E4 was — but turned up to eleven. Literally.
The Multi-Pack Charge System: Never Be Caught Off Guard Again
What truly sets the Gorilla apart from every other tank destroyer in the game is its signature ability. Its Multi-Pack Charge System allows it to take reduced-power shots long before its gun has fully reloaded — meaning it’s very hard to catch the Gorilla off guard.
This is a genuinely fresh mechanic for a TD. Think about it: most tank destroyers live and die by their reload. Miss a shot, and you’re sitting exposed for potentially 15–20 seconds with nothing to show for it. The Gorilla flips that vulnerability on its head. Even mid-reload, it can still bark back at enemies who think they’ve found a window to push. The shots won’t hit as hard, but a suppressed enemy is a safer enemy — and in high-tier play, that psychological pressure alone is worth a lot.
What Kind of Playstyle Should You Expect?
Based on what we know about the Gorilla’s heritage and its unique mechanic, a few playstyle patterns seem very likely:
Aggressive sniper with a safety net. The classic E4 experience was sniping from range with a punishing gun, occasionally getting caught on reload. The Gorilla’s Multi-Pack Charge System turns that weakness into a feature — you can fire a warning shot to deter pushers even when your main charge isn’t ready, giving you time to reposition or finish reloading for the real hit.
Second-line brawler. The “sturdy turret” description is interesting. If the Gorilla carries over any of the T110E4’s turreted nature, it might actually be more comfortable fighting at mid-range than a typical casemate TD. Turret + punishing gun + the ability to always have something in the chamber makes it a threatening second-line presence.
Counter-push deterrent. In the current Tier XI meta, momentum swings fast. A vehicle that can always reply — even at reduced damage — is incredibly valuable in stopping enemy flanks from snowballing.
Unlocking the Gorilla
You can prepare in advance by accumulating 325,000 XP on the required Tier X vehicle — in this case the T110E4 — to be ready to unlock the Gorilla the moment Update 2.2.1 drops. If you’ve been sitting on a fully researched E4 and haven’t made the jump yet, now is the time to start banking that XP.
Final Thoughts
The Gorilla isn’t just a bigger E4 with more hit points — it’s a rethink of what a tank destroyer can be when it’s never truly helpless. No stats are confirmed yet, but the concept alone is compelling. A TD that always has something to say, even when the main gun isn’t ready? That’s a vehicle worth watching closely.
Stay tuned for full stats when they drop, and start farming that T110E4 XP in the meantime.
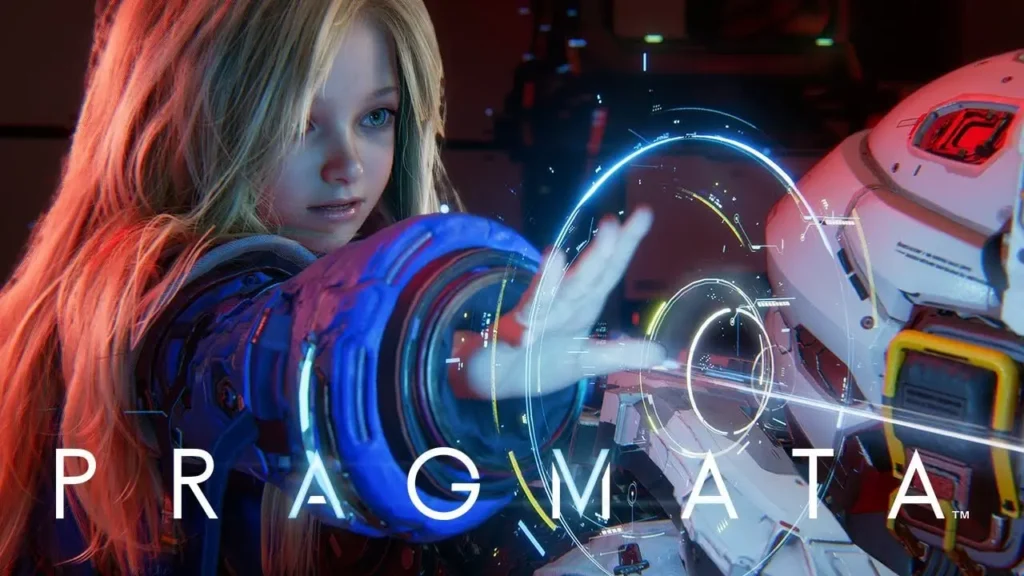
Six years in the making, Pragmata is Capcom’s most ambitious original IP since Devil May Cry. Set aboard a hostile lunar research station overrun by a rogue AI, you play as spacefarer Hugh Williams alongside his android companion Diana — and their dynamic is the heart of everything.
Diana can hack enemy robots mid-combat in real time, turning what could have been a standard third-person shooter into a layered tactical action experience. You can incapacitate enemies through the hacking grid for Hugh to finish off, chain hacks to create chain reactions across groups of enemies, or push Diana’s system to its limits against bosses that actively adapt and counter her abilities. The difficulty scales intelligently, and multiple approaches — aggressive, stealth-adjacent, hack-heavy — are all viable.
The free demo, Pragmata: Sketchbook, crossed two million downloads before the full game even launched. Capcom moved the release date forward by a week, which is practically unheard of — a strong signal that the finished product is in excellent shape.
Why it’s unmissable: Genuinely fresh combat mechanics in a genre that rarely surprises. If you play one action game this April, make it this one.
2. Saros — April 30 (PS5 Exclusive)
Housemarque built their reputation on Returnal’s punishing, endlessly replayable bullet-hell action. Saros is their next step — a new IP set on Carcosa, an alien world locked beneath a permanent eclipse, with a tone that’s darker and more atmospheric than anything the studio has done before.
You play as Soltari Enforcer Arjun Devraj, voiced and motion-captured by Rahul Kohli (Midnight Mass, iZombie). The combat is classic Housemarque: fast, relentless third-person shooting with swarms of projectiles filling the screen at all times. The new Soltari Shield adds a risk-reward layer — absorb incoming fire, build up charge, release it back as a devastating discharge. Timing it correctly against elite enemies and bosses is deeply satisfying.
The big accessibility change from Returnal is permanent progression. Weapons and suit upgrades now persist between runs, so death stings but doesn’t erase your growth. The core roguelike loop is intact, but the frustration ceiling is meaningfully lower.
Why it’s unmissable: The best pure action game on PS5 this spring. Housemarque don’t miss.
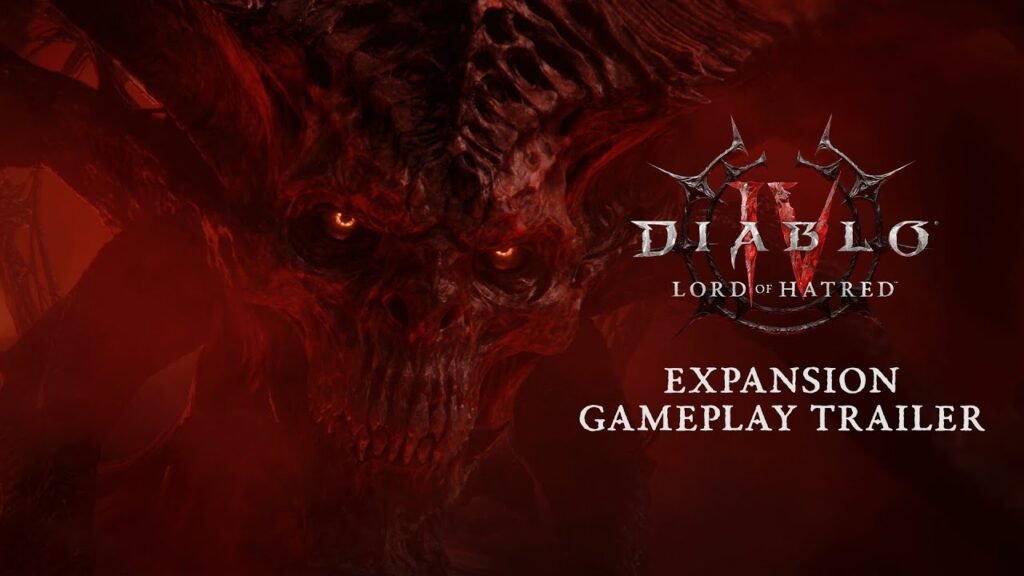
3. Diablo IV: Lord of Hatred — April 28 (PC, PS5, Xbox)
Blizzard’s second major Diablo IV expansion isn’t a new game, but its action credentials are beyond question. Lord of Hatred takes players to the Skovos Isles as Mephisto, the Prime Evil of Hatred, makes his long-awaited full appearance as the central villain.
The two new classes both lean into aggressive, high-intensity playstyles. The Paladin returns with updated skills built around holy damage and defensive counters — a tank that hits back hard. The Warlock is brand new: a dark caster who binds and weaponises demonic forces, turning enemies against each other in ways that feel genuinely chaotic and powerful at high difficulty.
The endgame overhaul is substantial too. The Horadric Cube returns for item crafting, War Plans lets you sequence your own dungeon run playlists, and the skill tree has been rebuilt from the ground up for all classes — not just the new ones. If you’ve been away from Diablo IV, this expansion is a strong reason to return.
Why it’s unmissable: The Warlock class alone justifies the purchase. The endgame overhaul makes it even better.
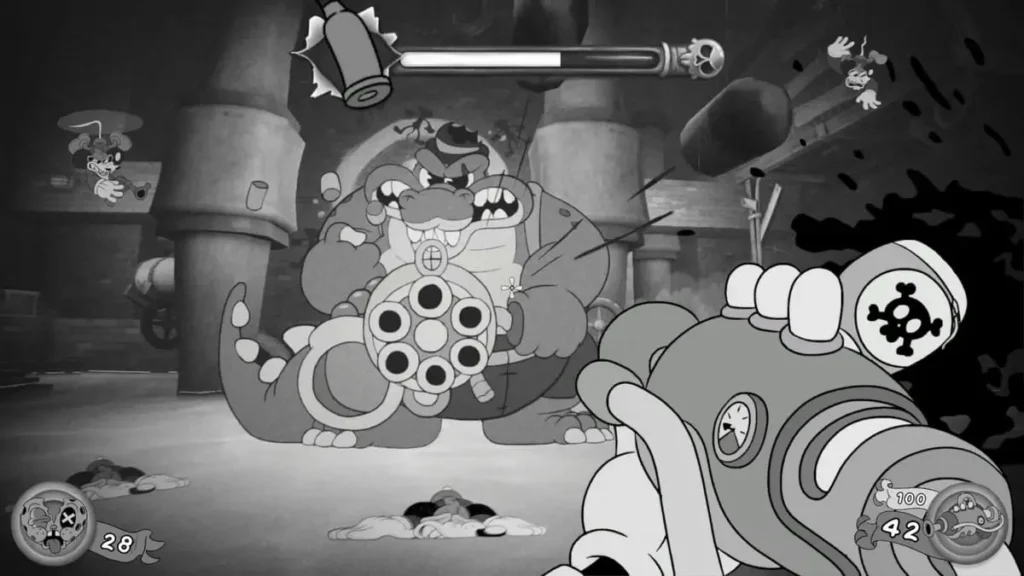
5. Mouse: P.I. for Hire — April 16 (PS5, Xbox, Switch, PC)
Don’t let the charming 1930s cartoon aesthetic fool you — Mouse: P.I. for Hire is a tight, demanding action platformer with serious mechanical depth. You play as Mouse, a hard-boiled rodent detective navigating a world of crime and corruption rendered entirely in the rubber-hose animation style of early Fleischer Studios cartoons.
The combat blends platforming precision with melee and ranged attacks, all animated with extraordinary fluidity. Every move feels deliberate and weighty despite the playful visual style. The game has been praised in previews for nailing the rare balance between approachable surface and genuinely satisfying depth — easy to pick up, hard to master.
It arrives on the same day as Pragmata, which will steal most of the headlines on April 16. But Mouse deserves just as much attention.
Why it’s unmissable: The best-looking indie action game of the year so far, with the gameplay to back it up.
7. Invincible VS — April 30 (PS5, Xbox, PC)
Based on Robert Kirkman’s hit animated series, Invincible VS is a full-fledged fighting game that captures the show’s signature style — brutal, fast, and visually spectacular. The roster pulls from across the Invincible universe, from Mark Grayson himself to Omni-Man, Atom Eve, and a host of other heroes and villains.
The standout mechanic is mid-battle character switching. You can swap between fighters on the fly and chain their moves together into extended combos, rewarding players who invest time into learning multiple move-sets. Each character plays meaningfully differently, with their own strengths, weaknesses, and special moves drawn directly from the show’s fight choreography.
For fans of the series, seeing these characters animated in a fighting game context — and interacting with each other in ways the show hasn’t explored — is a genuine treat. For fighting game fans who haven’t watched Invincible, the deep combo system stands on its own merits.
Why it’s unmissable: A fighting game with personality, a strong roster, and mechanics that reward mastery.
Quick Comparison
Game
Release
Platform
Subgenre
Pragmata
Apr 16
PS5, Xbox, Switch 2, PC
Action-Adventure
Mouse: P.I. for Hire
Apr 16
All Platforms
Action Platformer
Diablo IV: Lord of Hatred
Apr 28
PC, PS5, Xbox
Action RPG
Saros
Apr 30
PS5 Exclusive
Roguelike Shooter
Invincible VS
Apr 30
PS5, Xbox, PC
Fighting Game
April is genuinely one of the best months for action games in recent memory. If you can only pick one, Pragmata is the safe bet — but Saros and Invincible VS closing out the month mean the whole of April is worth staying plugged in for.
The Ultimate Guide to Saving Fuel While Driving: 15 Proven Tips to Cut Your Gas Costs
With fuel prices constantly fluctuating and environmental concerns growing, learning to drive more efficiently isn’t just good for your wallet—it’s good for the planet too. Whether you’re commuting daily or planning a road trip, these proven strategies can help you maximize every gallon.
🚗 Master the Art of Acceleration
1. Drive Smoothly and Steadily
Aggressive acceleration is one of the biggest fuel wasters. Rapid acceleration can increase fuel consumption by up to 40% in stop-and-go traffic. Instead, accelerate gradually and anticipate traffic flow. Think of it like this: every time you floor the pedal, you’re essentially throwing money out the window.
2. Use Cruise Control on Highways
Maintaining a constant speed is more efficient than fluctuating speeds. Cruise control helps you avoid unconscious speed variations that burn extra fuel. Use it on flat highway stretches, but be prepared to disengage on hilly terrain where manual control can be more efficient.
⚡ Optimize Your Speed
3. Find Your Vehicle’s Sweet Spot
Most cars achieve peak fuel efficiency between 50-60 mph (80-95 km/h). For every 5 mph you drive over 60 mph, you’re paying approximately an additional $0.30 per gallon in fuel costs due to aerodynamic drag. On highways, staying in the right lane and driving at moderate speeds can significantly improve your MPG.
4. Avoid Excessive Idling
Idling gets you 0 miles per gallon. If you’re stopped for more than 30-60 seconds (waiting for a train, in a drive-thru line, or parked), turn off your engine. Modern engines use less fuel restarting than idling for extended periods. Many newer vehicles come with auto start-stop systems—use them.
🛑 Braking and Coasting Techniques
5. Anticipate Stops and Coast
Look ahead and anticipate when you’ll need to stop. Take your foot off the accelerator early and let your car coast to a stop rather than braking hard at the last second. This technique, often called “driving with your eyes,” reduces both fuel consumption and brake wear.
6. Maintain Safe Following Distances
Keeping a 3-4 second gap between you and the vehicle ahead gives you room to react smoothly to traffic changes. This prevents the “speed up, brake hard” cycle that destroys fuel efficiency and creates traffic waves.
🛠️ Vehicle Maintenance Matters
7. Keep Tires Properly Inflated
Under-inflated tires create more rolling resistance, forcing your engine to work harder. Check your tire pressure monthly (including the spare) and inflate to the manufacturer’s recommended PSI—usually found on a sticker inside the driver’s door jamb. Proper inflation can improve fuel economy by up to 3%.
8. Remove Excess Weight
For every 100 pounds of extra weight in your vehicle, your MPG drops by approximately 1%. Clean out your trunk and back seat of unnecessary items. If you have a roof rack or cargo carrier that you don’t use regularly, remove it—the aerodynamic drag can reduce efficiency by 2-8% in city driving and 6-17% on the highway.
9. Use the Recommended Motor Oil
Using the manufacturer’s recommended grade of motor oil improves engine efficiency. Look for oils labeled “Energy Conserving” or “Resource Conserving” on the API performance symbol. Using 10W-30 motor oil in an engine designed for 5W-30 can lower your gas mileage by 1-2%.
10. Keep Your Engine Tuned
A well-tuned engine runs more efficiently. Fixing a serious maintenance problem, such as a faulty oxygen sensor, can improve your mileage by as much as 40%. Regular tune-ups, air filter replacements, and spark plug maintenance all contribute to optimal fuel economy.
🌡️ Climate Control Strategies
11. Use Air Conditioning Wisely
Air conditioning can reduce MPG by 5-25% depending on the vehicle and conditions. At lower speeds, open windows are more efficient. At highway speeds (above 55 mph), closed windows with A/C are actually better because open windows create aerodynamic drag. Use the “recirculate” setting once the interior is cool—it requires less energy than cooling outside air.
12. Park Smart to Reduce Cooling Needs
When possible, park in the shade or use a windshield sunshade. A cooler cabin requires less A/C to reach comfortable temperatures, saving fuel on startup.
🗺️ Trip Planning and Route Optimization
13. Combine Errands into One Trip
A cold engine is less efficient and produces more emissions. Several short trips taken from a cold start can use twice as much fuel as a longer multipurpose trip covering the same distance. Plan your route to minimize backtracking and avoid rush hour when possible.
14. Use Navigation Apps with Traffic Data
Apps like Google Maps or Waze can help you avoid traffic jams and find the most efficient routes. Getting stuck in stop-and-go traffic is one of the worst scenarios for fuel economy.
⛽ Fuel and Driving Habits
15. Avoid Topping Off Your Tank
When filling up, stop at the first click. Overfilling can lead to spillage and evaporation. Additionally, fuel expands when heated, so filling up during cooler parts of the day (early morning or evening) can give you slightly more fuel density for your money.
📊 Quick Reference: Fuel Economy Impact
Table
Practice
Potential Savings
Smooth acceleration
Up to 40% in traffic
Proper tire inflation
Up to 3%
Removing 100 lbs of weight
~1%
Fixing faulty oxygen sensor
Up to 40%
Driving 55 mph vs 70 mph
15-20%
Reducing idle time
Significant in heavy traffic
Using cruise control
7-14% on highways
Final Thoughts
Fuel efficiency isn’t about driving slowly—it’s about driving smart. By adopting these habits, you can improve your fuel economy by 15-30% without any vehicle modifications. The best part? These techniques also make you a safer, more aware driver while reducing wear and tear on your vehicle.
Start with 2-3 tips this week and gradually incorporate more. Your wallet (and the environment) will thank you.
Announced during Sony’s PS5 reveal in 2020, Pragmata is Capcom’s first original franchise in nearly a decade — and after six years, it’s finally here. You play as spacefarer Hugh Williams and his android companion Diana, navigating a hostile lunar research station whose AI has gone catastrophically rogue.
The standout mechanic is Diana’s ability to hack enemy robots mid-combat, creating a puzzle-action hybrid that forces split-second tactical decisions in every encounter. Enemies can be incapacitated via the hacking grid and finished off by Hugh — but the threat constantly escalates with foes that can block hacking entirely and bosses that demand using every tool available. Multiple playstyles are supported, including a near-full hacking approach for those who want it.
Previews have been glowing, and the free demo — Pragmata: Sketchbook — has already surpassed two million downloads. Capcom even moved the release date forward by a week, a rare sign of confidence in the finished product.
Verdict: The most original Capcom release since Devil May Cry 5. If the full game delivers on its previews, this is the game of the month — possibly the season.
2. Saros — April 30 (PS5 Exclusive)
Housemarque’s spiritual successor to Returnal arrives on April 30, set on the alien planet Carcosa — a world caught under a permanent, ominous eclipse. You play as Soltari Enforcer Arjun Devraj (voiced by Rahul Kohli of Midnight Mass fame), investigating a lost colony and the nightmarish creatures that have overtaken it.
Unlike Returnal’s brutal permadeath loop, Saros introduces permanent progression: weapons and suit upgrades carry over between runs, making the game meaningfully more accessible without sacrificing the bullet-hell tension that defined its predecessor. A new Soltari Shield lets you absorb enemy projectile energy and discharge it back — adding a risk-reward layer to every firefight.
Verdict: The PS5’s most anticipated exclusive of the spring. A must-play for Returnal fans and newcomers alike.
3. Diablo IV: Lord of Hatred — April 28 (PC, PS5, Xbox)
Blizzard’s second major expansion for Diablo IV sends players to the sacred Skovos Isles as Mephisto — the Prime Evil of Hatred — threatens all of Sanctuary. Lord of Hatred introduces two new classes: the returning fan-favourite Paladin (already playable for pre-purchasers) and the brand-new Warlock, a dark caster who binds demonic forces against their own masters.
Beyond new classes, the expansion overhaults the entire skill tree, reintroduces the legendary Horadric Cube for item crafting, and adds the War Plans endgame system that lets players curate their own dungeon experience. Fishing — of all things — also makes its Diablo debut.
Verdict: An ambitious expansion for one of the biggest live-service games on the market. The Warlock class alone makes this worth the price of entry.
4. Tomodachi Life: Living the Dream — April 16 (Nintendo Switch / Switch 2)
Thirteen years after the original charmed its way onto the 3DS, Nintendo brings its beloved Mii life-sim back. The concept is delightfully simple: create a cast of Mii characters — based on friends, family, celebrities, or whoever you like — populate an island, and watch their hilariously unpredictable lives unfold.
Living the Dream expands on every front. Miis now live in individual houses rather than apartments, the island is fully customizable, and relationships are now player-directed rather than purely random. Notably, Nintendo has included same-sex relationships and non-binary Mii options — addressing long-standing criticism of the series. This was one of the most enthusiastically received Nintendo Direct announcements of 2025.
Verdict: The comfort game of the month. Perfect for all ages and ideal in handheld mode.
5. Mouse: P.I. for Hire — April 16 (PS5, Xbox, Switch, PC)
This stylish action platformer draws deeply on 1930s Fleischer-era animation — rubber-hose characters, a stark black-and-white aesthetic, and big-band energy. You play as Mouse, a wisecracking rodent private investigator navigating a world of crime, corruption, and cartoon mayhem.
Mouse has been generating serious indie buzz for its silky animation, hand-drawn art direction, and tight platforming mechanics. It releases on the same day as Pragmata and Tomodachi Life, making April 16 arguably the most crowded single release day of the year.
Verdict: The indie sleeper pick of April. A love letter to a golden era of animation.
6. Outbound — April 23 (PC, PS5, Xbox, Switch)
An open-world co-op survival adventure for up to four players, Outbound lets you build and drive your own vehicle through procedurally generated wilderness. Think Valheim meets road trip — explore, gather resources, set up camps, and face escalating environmental challenges the further you venture from civilization.
The game supports drop-in/drop-out co-op and emphasizes player creativity in vehicle building and base upgrades. It’s a quieter release amid April’s blockbusters, but for fans of open-world survival and cooperative exploration, it could be the sleeper hit of the month.
7. Invincible VS — April 30 (PS5, Xbox, PC)
Based on Robert Kirkman’s acclaimed animated series, Invincible VS brings the show’s roster of heroes and villains into a full-fledged fighting game. Players can switch between fighters mid-battle to chain devastating combos, reflecting the series’ brutally kinetic action style.
With colorful characters, distinct move-sets, and deep combo systems, this is a strong contender for fans of arena fighters and animation enthusiasts. It arrives on the same day as Saros, making April 30 a one-two punch of wildly different but equally compelling experiences.
Full April Release Calendar
Date
Game
Platform
Type
Apr 1
Goat Simulator 3
Switch 2
Indie
Apr 16
Pragmata
PS5, Xbox, Switch 2, PC
AAA
Apr 16
Tomodachi Life: Living the Dream
Switch / Switch 2
Nintendo
Apr 16
Mouse: P.I. for Hire
All Platforms
Indie
Apr 16
Opus: Prism Peak
Switch 2, PC
Indie
Apr 21
Vampire Crawlers
PC, Consoles
Indie Roguelike
Apr 23
Outbound
All Platforms
Co-op Survival
Apr 23
Kingdom’s Return: Time-Eating Fruit and the Ancient Monster
All Platforms
JRPG
Apr 28
Diablo IV: Lord of Hatred
PC, PS5, Xbox
Expansion
Apr 30
Saros
PS5 Exclusive
Roguelike Shooter
Apr 30
Invincible VS
PS5, Xbox, PC
Fighting Game
Apr 30
InKonbini: One Store, Many Stories
All Platforms
Cosy Sim
April release dates are subject to change. Prices vary by platform and region.
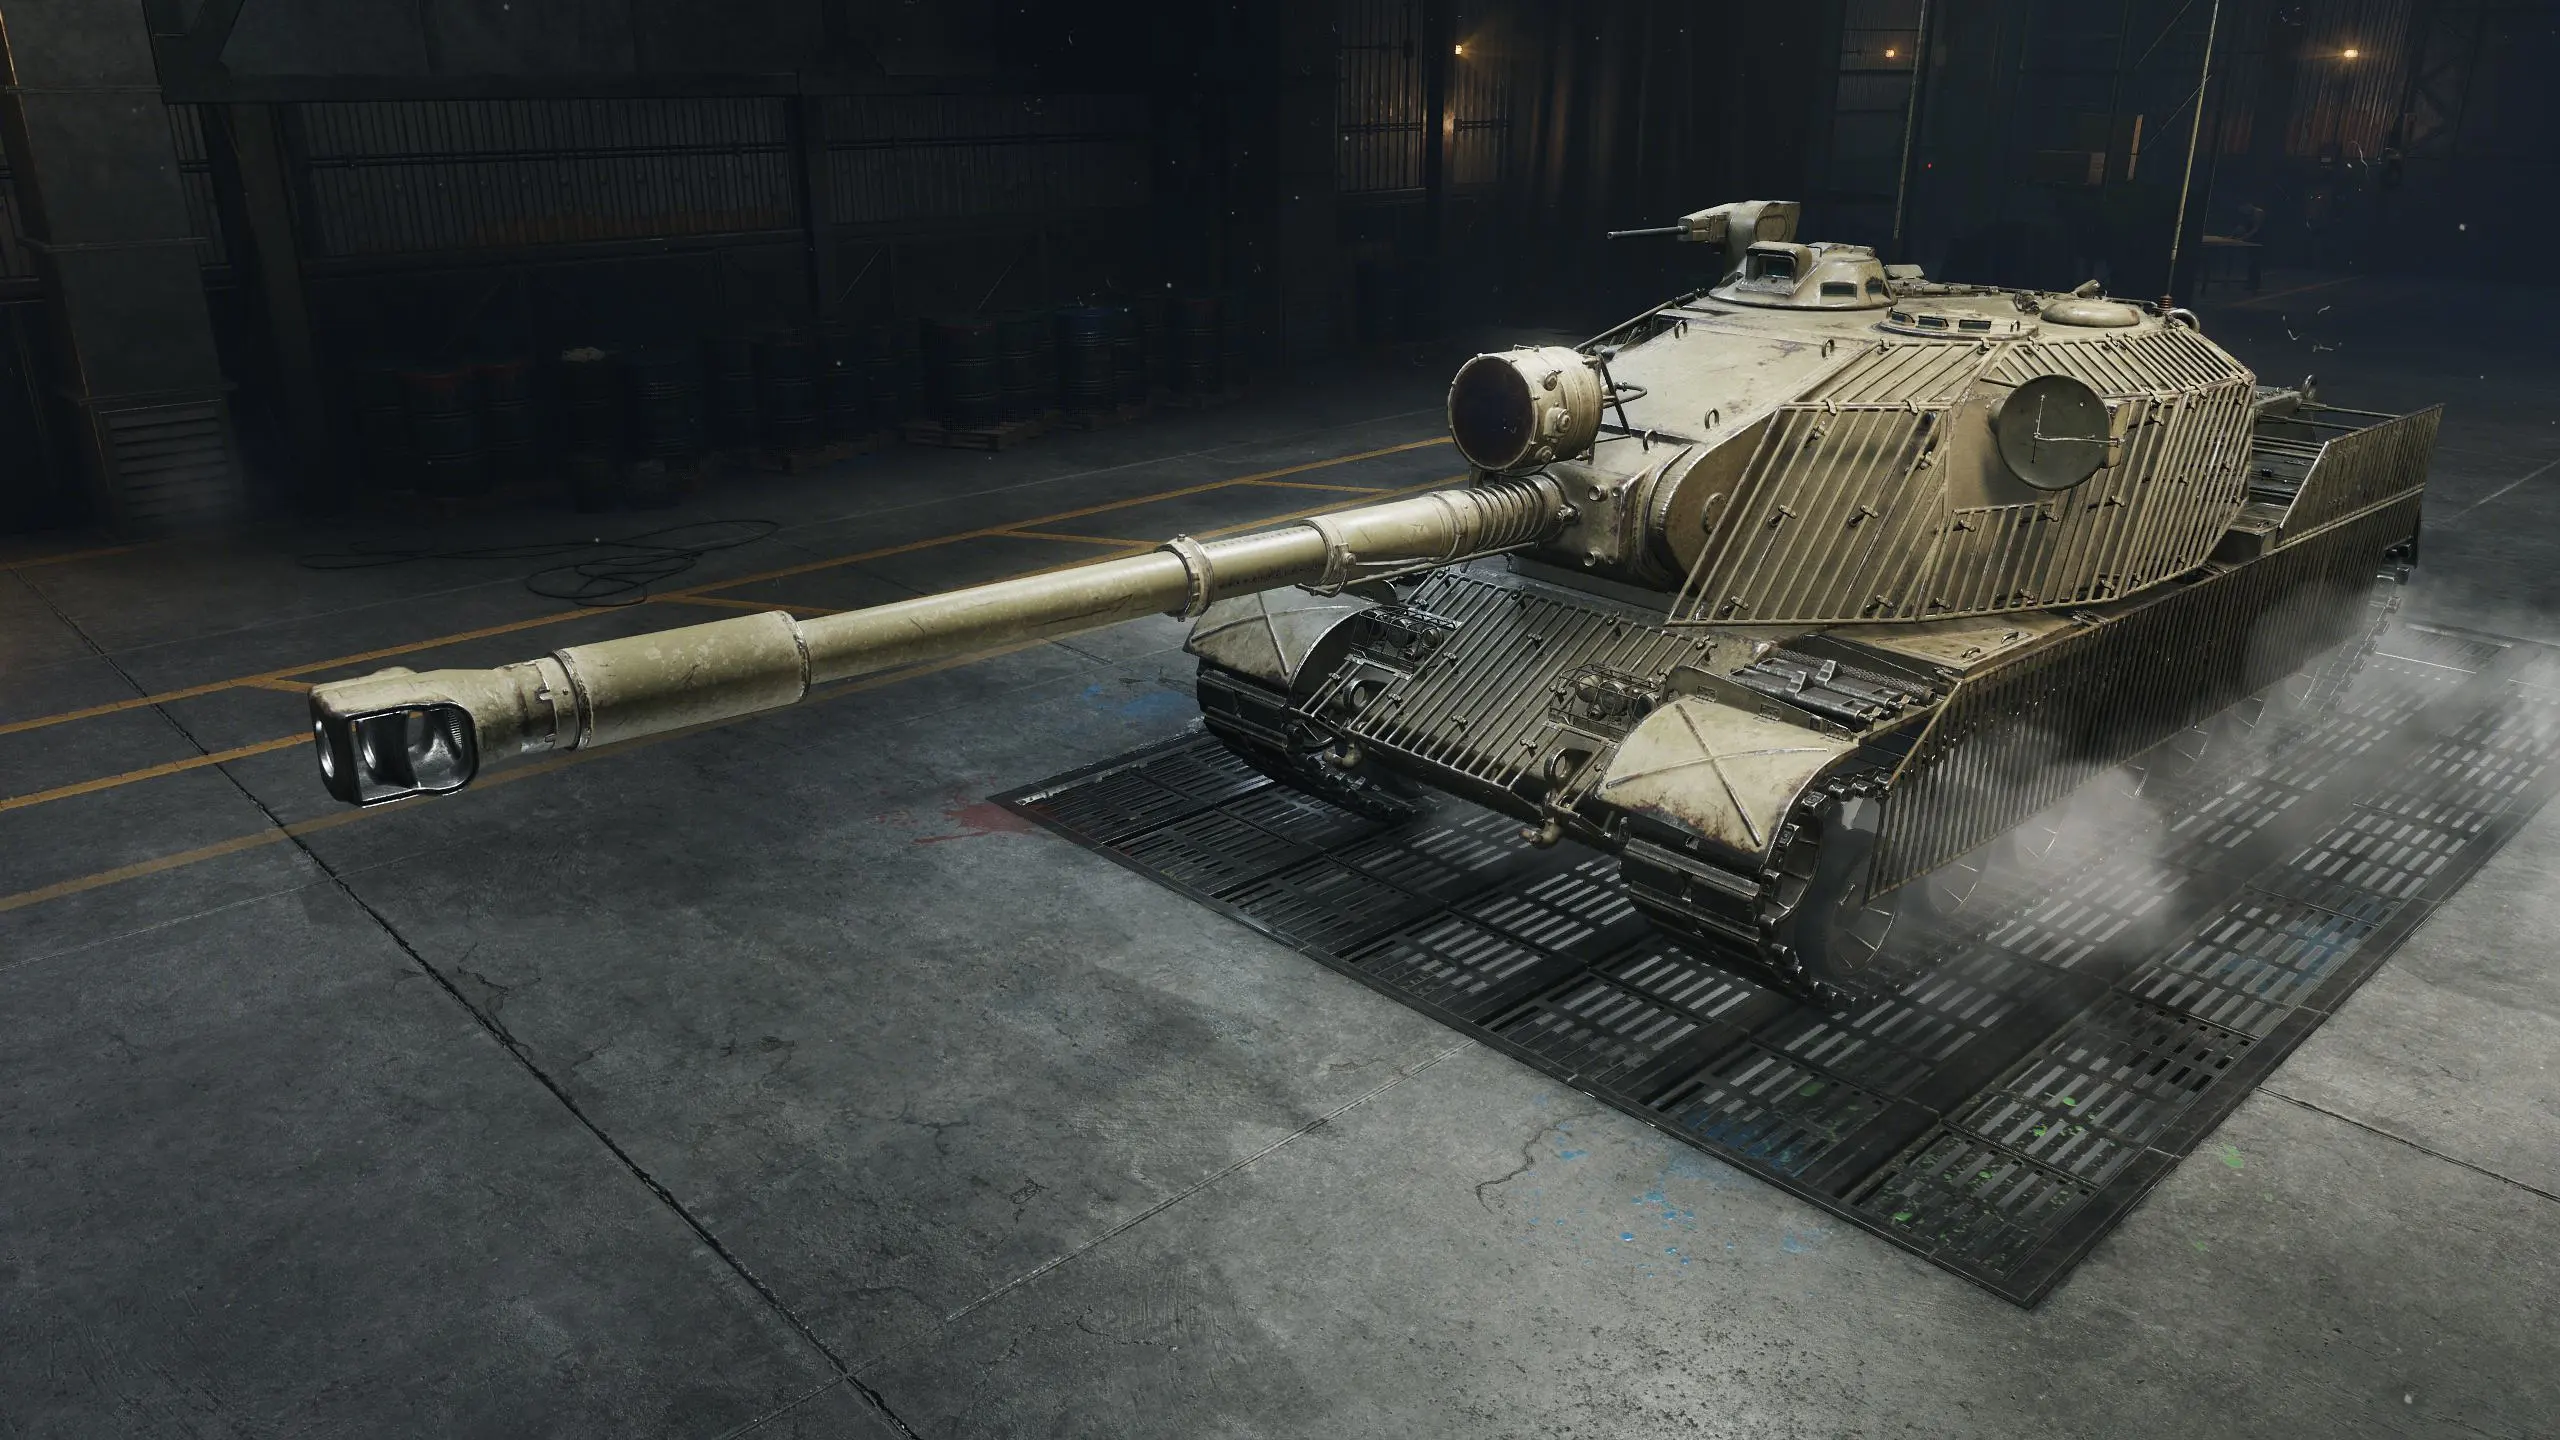
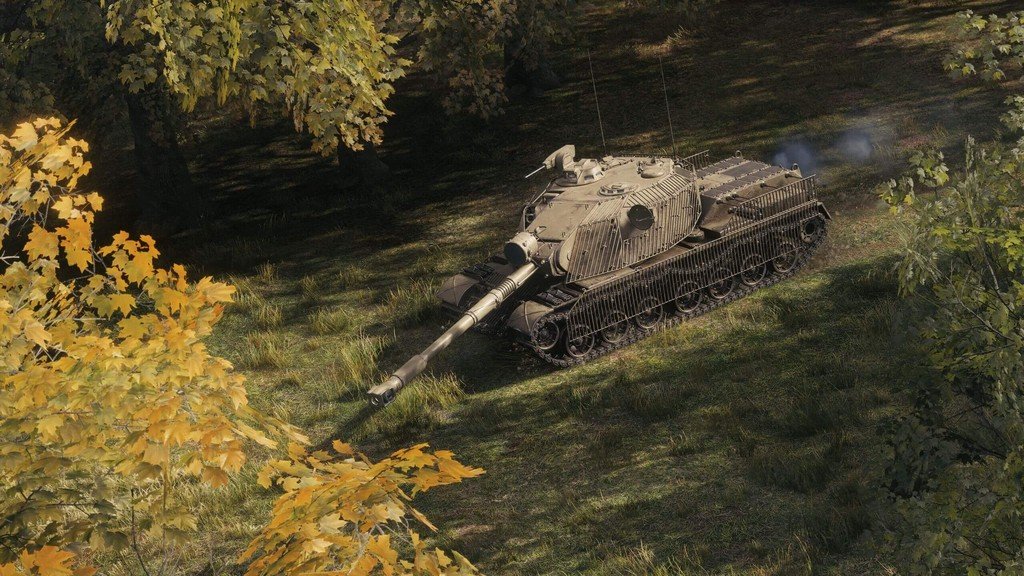
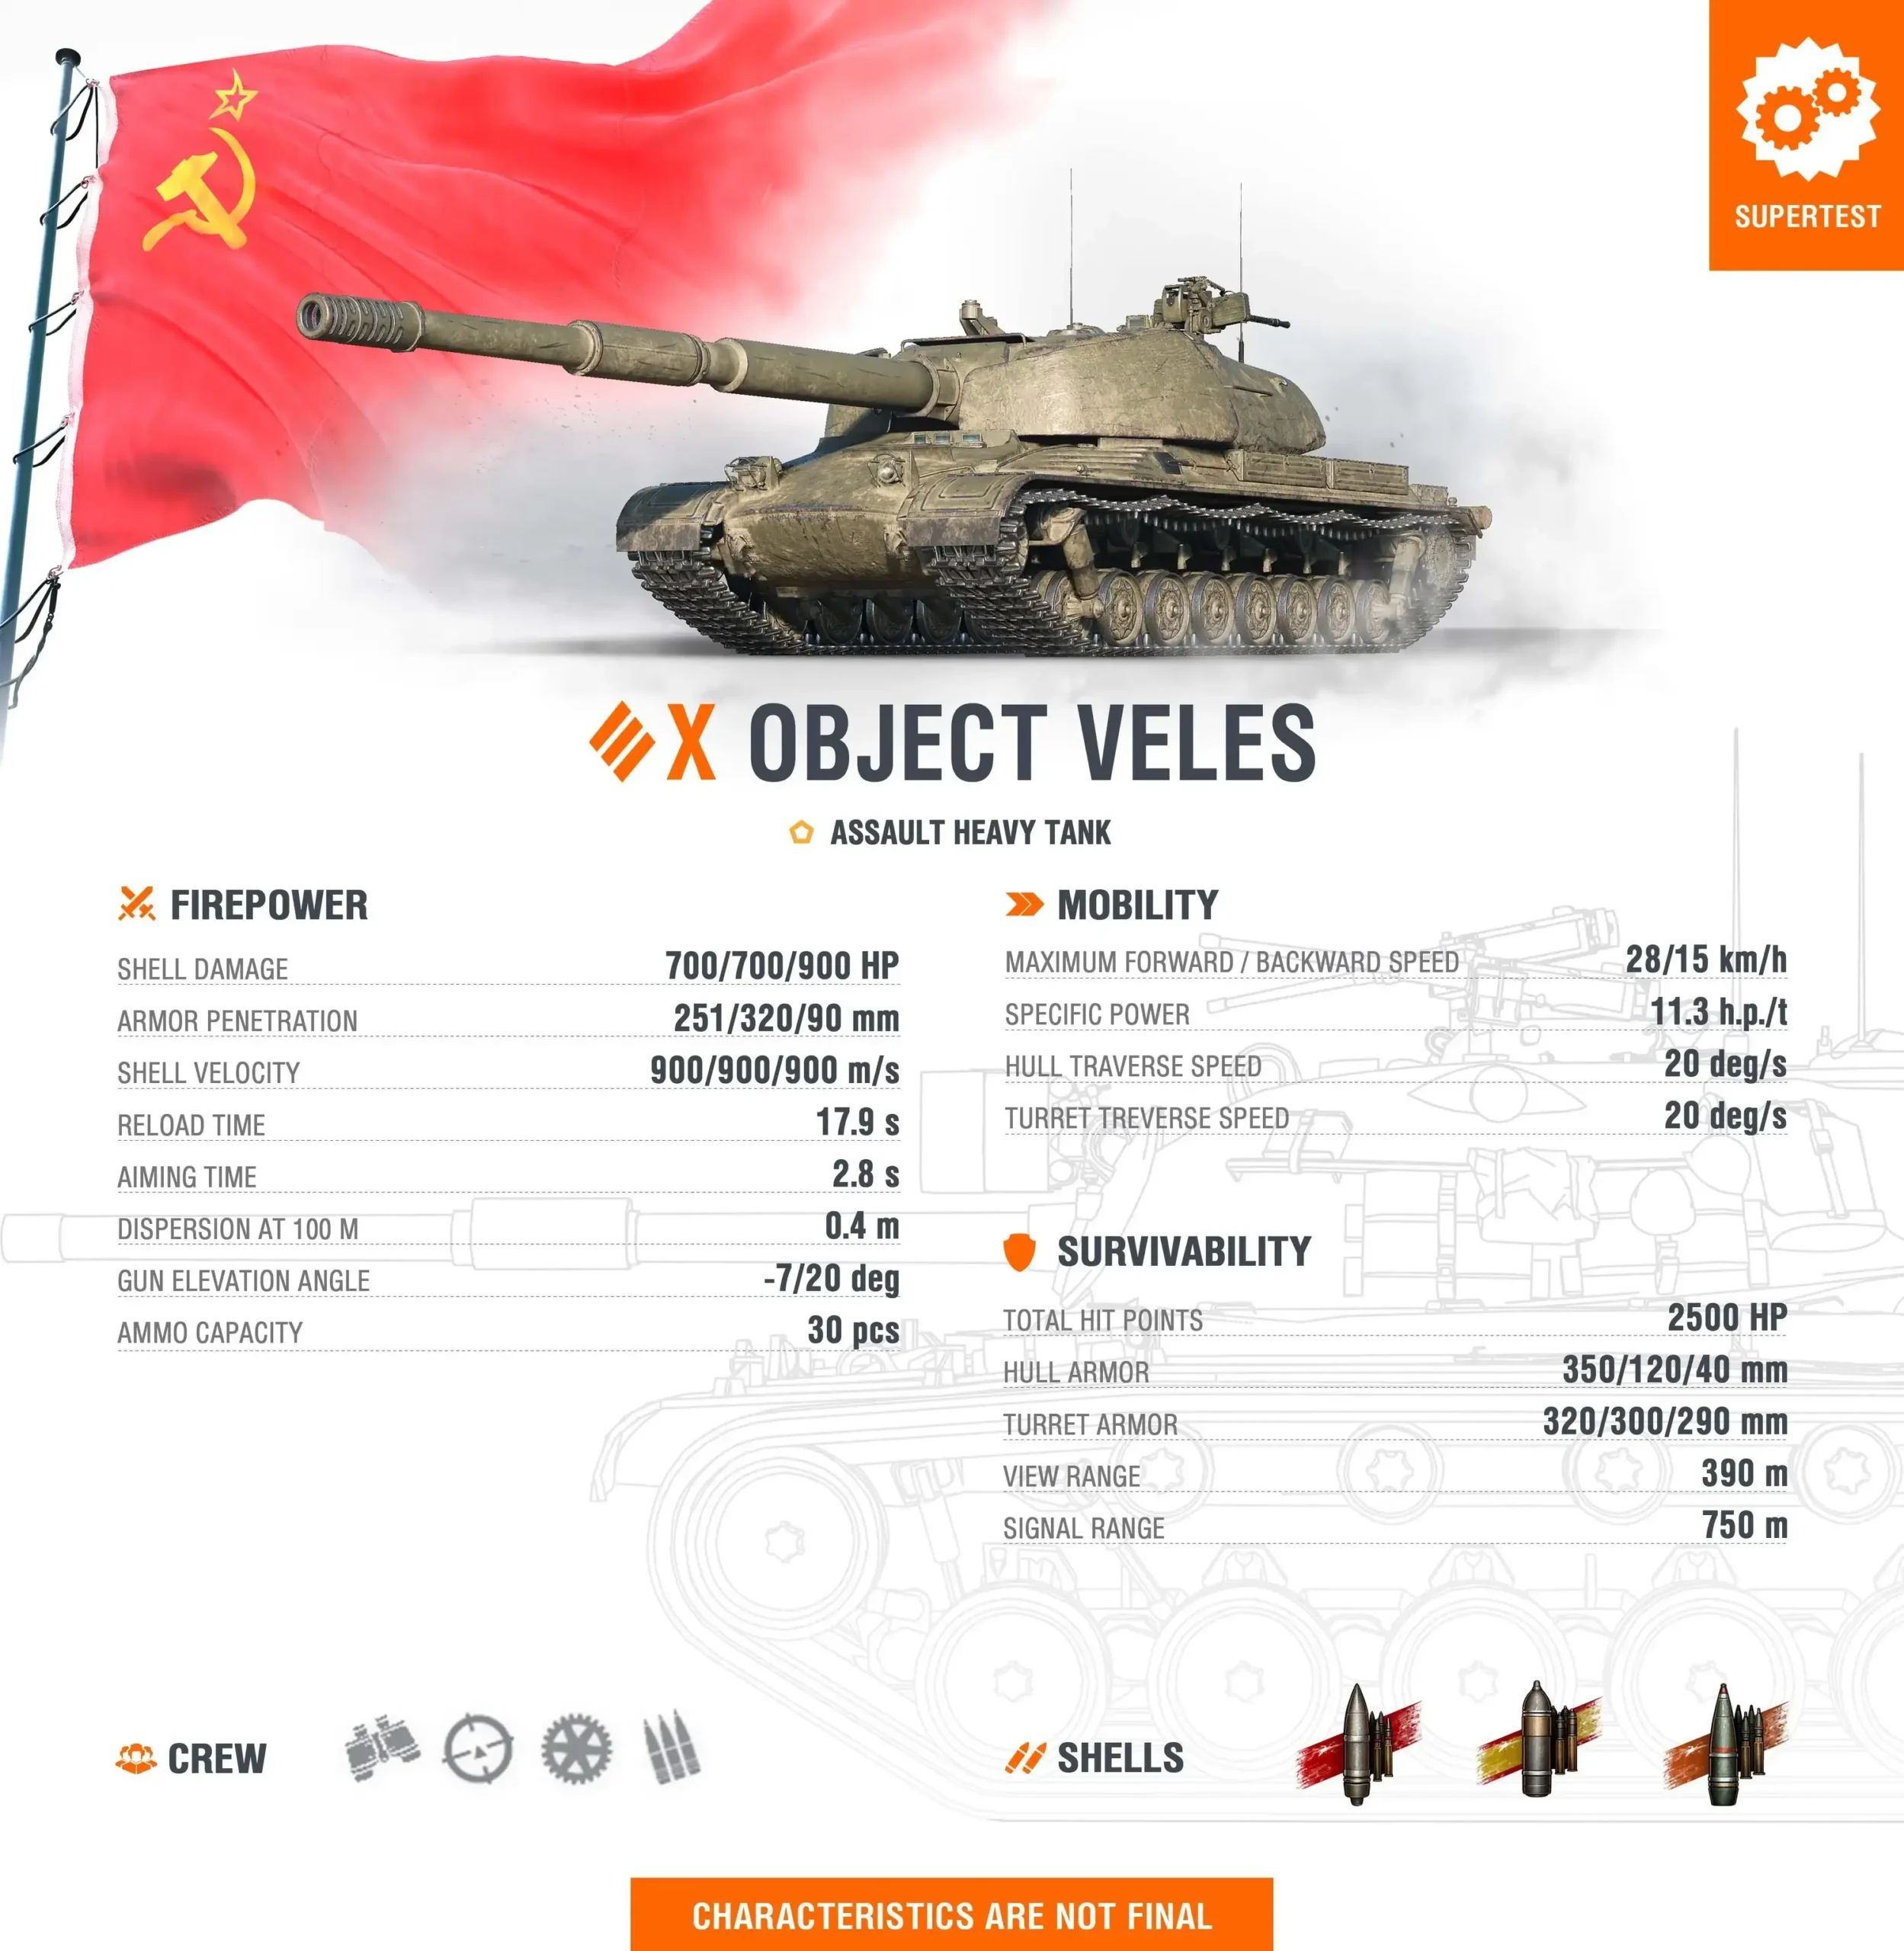
The World of Tanks Supertest has welcomed a formidable addition to the Soviet heavy tank lineup: the Object Veles, a Tier X assault heavy tank named after the ancient Slavic deity of earth, waters, and the underworld. For players who appreciate Soviet armor philosophy and want a straightforward, no-compromises assault platform that prioritizes protection and firepower over mobility and finesse, the Object Veles offers a compelling package built around exceptional frontal armor, devastating alpha damage, and position-holding dominance.
700 HP Alpha Damage: Devastating Firepower
The Object Veles brings exceptional per-shot damage to Tier X:
700 HP Per Shot: The alpha damage sits at the high end of Tier X heavy tank firepower, matching vehicles like the E 100 and delivering more damage than the standard 440-490 HP guns common to Soviet heavies. Each shot carries devastating impact.
Two-Shot Eliminations: The 700 HP alpha enables eliminating many wounded opponents in just two shots. Targets sitting at 1,400 HP or below—a common state after mid-battle attrition—can be destroyed before they retreat to cover.
Trading Superiority: The massive alpha creates overwhelming trading advantages. Even 1-for-1 exchanges favor the Object Veles significantly, as opponents with 440-560 HP guns lose far more HP per trade.
Psychological Pressure: The threat of 700 HP damage per shot creates enormous psychological impact. Opponents must respect every potential Object Veles shot as a catastrophic HP loss, forcing defensive play and hesitation.
Finishing Power: The Object Veles excels at cleanup work. After teammates soften opponents, the Object Veles can efficiently eliminate wounded enemies before they escape or receive support, securing kills through raw alpha advantage.
350mm Frontal Hull Armor: Fortress Protection
The Object Veles brings exceptional hull armor to Tier X:
350mm Nominal Frontal Hull Armor: The hull armor features a nominal value of 350mm at the front, representing some of the thickest protection available at Tier X. This raw thickness creates near-impenetrable defense when properly positioned.
Standard Ammunition Immunity: The 350mm frontal armor reliably bounces standard ammunition from virtually all Tier X opponents. Enemies are forced to load premium rounds or target weak spots, creating economic disadvantages and reducing damage consistency.
Premium Ammunition Resistance: Even against premium ammunition with 300-350mm penetration, the 350mm hull armor combined with proper angling can bounce shots or force enemies into low-percentage weak spot targeting.
Position-Holding Capability: The exceptional hull armor enables the Object Veles to “hold positions” confidently, anchoring defensive lines and resisting enemy pushes through sheer durability rather than mobility or gun depression.
Frontal Confrontation Excellence: The armor profile suggests the Object Veles excels in direct frontal engagements where opponents must challenge its strongest protection while risking 700 HP responses.
320mm Frontal Turret Armor: Impenetrable Top
The Object Veles features equally formidable turret protection:
320mm Nominal Frontal Turret Armor: The turret armor carries a nominal value of 320mm at the front, creating protection that rivals or exceeds most Tier X heavy tanks and enables confident hull-down fighting when terrain permits.
Complete Frontal Protection: The combination of 350mm hull and 320mm turret armor creates a vehicle with exceptional frontal protection across both surfaces, eliminating the common weak point vulnerabilities that plague many heavy tanks.
Hull-Down Potential: When terrain enables hull-down positioning—despite likely limited gun depression—the 320mm turret armor becomes nearly impossible to penetrate frontally, creating position-holding capability that rivals legendary hull-down specialists.
Reduced Weak Spots: The “excellent” designation for both hull and turret armor suggests the Object Veles features minimal conventional weak spots, forcing opponents into difficult cupola shots or complete flanking maneuvers.
Turret Armor Philosophy: The 320mm turret continues Soviet heavy tank tradition of prioritizing turret protection, creating vehicles that can peek, fire devastating shots, and retreat knowing return fire will likely bounce.
Classic Assault Heavy Tank: Straightforward Design
The Object Veles embodies traditional assault heavy philosophy:
Classic Assault Tank Classification: The explicit “classic example of an assault” heavy tank designation indicates the Object Veles adheres to traditional design principles—exceptional armor, devastating firepower, methodical mobility—without experimental mechanics or gimmicks.
No Special Mechanics: Unlike many recent additions featuring autoloaders, reverse autoreloaders, double guns, or other complex systems, the Object Veles apparently features a conventional single-gun design, creating straightforward gameplay.
Push and Hold Philosophy: The vehicle is designed to “push directions” and “hold positions,” embodying the assault heavy tank role through raw capability rather than tactical complexity or innovative mechanics.
Soviet Design Tradition: The Object Veles continues the legendary Soviet heavy tank lineage of vehicles like the IS-7 and Object 277, prioritizing frontal durability and alpha damage while accepting limitations in gun handling or depression.
Reliability Through Simplicity: The classic design creates a vehicle that performs predictably and reliably, rewarding fundamental heavy tank skills—armor angling, positioning, target selection—rather than mechanical mastery.
Position Holding: Defensive Excellence
The Object Veles excels at static position dominance:
Everything Needed to Hold Positions: The combination of 350mm hull, 320mm turret, and 700 HP alpha creates a vehicle that can “hold positions” against overwhelming odds, resisting pushes through superior protection and punishing engagement attempts.
Breakthrough Capability: The exceptional frontal armor enables the Object Veles to lead pushes into defended positions, absorbing fire that would destroy lesser vehicles while delivering 700 HP responses to defenders.
Area Denial: Once established in a strong position, the Object Veles creates an area of denial through sheer presence. Enemies must either commit massive resources to dislodge it or concede the territory entirely.
Anchor Tank Role: In team compositions, the Object Veles serves as the anchor—the immovable object around which teammates position, knowing the Object Veles will absorb punishment and hold ground absolutely.
Last-Stand Capability: The combination of exceptional armor and devastating firepower creates a vehicle that can contest positions even when outnumbered, trading favorably through armor and alpha until the position falls.
Slavic Deity Namesake: Veles
The tank’s name carries cultural significance:
Named After Veles: The Object Veles derives its name from Veles, a major deity in Slavic mythology associated with earth, waters, livestock, and the underworld—a god of abundance, transformation, and the boundary between worlds.
Cultural Connection: The naming choice connects the vehicle to Slavic heritage, continuing Wargaming’s occasional practice of using mythological or culturally significant names for vehicles (similar to the Varyag or Rudy).
Symbolism: Veles’s association with earth and foundations metaphorically aligns with the Object Veles’s role as an unshakable foundation for team advances—rooted in position, immovable like earth itself.
Underworld Association: In some interpretations, Veles governs the underworld and transitions between life and death, perhaps symbolically fitting for a vehicle that sends opponents to the garage with 700 HP devastation.
Identity and Recognition: The distinctive mythological name creates immediate recognition and identity, distinguishing the Object Veles from generic numerical Soviet designations.
Methodical Frontline Pressure
The Object Veles’s design emphasizes deliberate, armor-supported advances:
Direction Selection: Choose a direction early in battle and commit to it absolutely. The Object Veles excels when advancing steadily into chosen areas, using armor to absorb fire while delivering 700 HP punches.
Armor-First Philosophy: Trust the exceptional frontal protection. Advance confidently into positions where lesser vehicles would be destroyed, knowing the 350mm hull and 320mm turret will bounce most incoming fire.
Calculated Aggression: The combination of fortress armor and devastating firepower enables aggressive plays that would be suicidal for other vehicles. Lead pushes, challenge defended positions, force enemies into unfavorable fights.
Static Defense: When defending, position the Object Veles at critical choke points where its armor creates impenetrable barriers. Enemies must either load premium ammunition, attempt difficult flanks, or concede territory.
Team Coordination: The Object Veles performs best when teammates leverage the space it creates. As the Object Veles anchors positions and absorbs fire, teammates can deliver damage from supporting positions.
Tactical Considerations
The Object Veles’s characteristics create specific tactical opportunities:
Frontal Positioning Priority: Always face opponents frontally. The 350mm hull and 320mm turret armor work best when enemies must engage the strongest surfaces. Avoid exposing sides or rear unnecessarily.
Weak Spot Awareness: Despite exceptional armor, the Object Veles likely features cupolas or other small weak points. Master positioning that minimizes weak spot visibility while maintaining offensive capability.
Premium Ammunition Forcing: The armor forces opponents to load expensive premium ammunition, creating economic disadvantages for enemies while enabling the Object Veles to sustain credit-positive gameplay.
700 HP Shot Discipline: Each shot represents massive damage potential. Ensure fully-aimed fire rather than rushing shots, as the reload time (likely 14-16 seconds for 700 HP alpha) makes wasted shots costly.
Hull-Down When Possible: If the Object Veles features workable gun depression (likely 5-6 degrees), prioritize hull-down positions where the 320mm turret armor becomes the only targetable surface.
Playstyle Implications
The Object Veles rewards commanders who embrace patient, armor-supported brawling:
Trust the Armor: The exceptional protection enables aggressive positioning. Don’t hide—advance confidently, absorb fire, and deliver devastating 700 HP responses.
Patience Over Speed: The Object Veles likely features limited mobility (35-40 km/h maximum speed typical for heavily armored Soviet heavies). Accept this limitation and advance methodically rather than attempting rapid maneuvers.
Frontal Engagement Focus: The Object Veles thrives in direct frontal confrontations. Seek head-on battles where armor and alpha create overwhelming advantages rather than attempting flanking or mobile gameplay.
Position Commitment: Limited mobility likely means position choices carry enormous weight. Select directions carefully at battle start, as correcting mistakes or relocating takes significant time.
Commanders looking to master the Object Veles should consider:
Prioritizing positions where frontal armor can be leveraged absolutely
Learning armor angling to maximize the already exceptional 350mm hull protection
Practicing weak spot concealment while maintaining offensive firing capability
Using the 700 HP alpha to trade favorably even in 1-for-1 exchanges
Accepting limited mobility and choosing initial directions carefully
Leading team pushes confidently, knowing armor will absorb punishment
Forcing enemies to expend premium ammunition through superior protection
Coordinating with teammates to capitalize on the space the Object Veles creates through its presence
Community Reception
Initial community reactions to the Object Veles reveal measured perspectives:
“Finally, a Classic Heavy”: Many players expressed appreciation for a straightforward assault heavy tank without complex mechanics, viewing the Object Veles as a refreshing return to fundamental heavy tank design.
Armor Creep Concerns: Community discussion immediately focused on the 350mm hull and 320mm turret armor values, with questions about whether such protection creates power creep or makes the vehicle frustrating to face.
700 HP Alpha Interest: The high alpha damage generated positive reactions from commanders who enjoy devastating per-shot impact, though some questioned whether this creates unfair trading scenarios.
Mobility Speculation: With no mobility stats released, community speculation centered on whether the Object Veles will feature typical Soviet heavy mobility (35-40 km/h) or more severe limitations given the exceptional armor.
Premium/Reward Questions: With no tech tree placement mentioned and “promotional” tags on similar vehicles, speculation immediately turned to whether the Object Veles would be a premium tank, reward vehicle, or special event exclusive.
What Sets the Object Veles Apart
The Object Veles occupies a unique position in the Tier X heavy tank landscape:
Exceptional All-Around Frontal Armor: The combination of 350mm hull and 320mm turret armor creates protection that rivals or exceeds virtually all Tier X heavy tanks, establishing the Object Veles as potentially the most heavily armored frontal vehicle at the tier.
Classic Assault Design: The straightforward assault heavy tank classification without complex mechanics creates a vehicle that rewards fundamental skills rather than mechanical mastery or gimmick exploitation.
700 HP Soviet Heavy: The Object Veles brings E 100-level alpha damage to the Soviet heavy tank arsenal, combining devastating firepower with Soviet armor philosophy in ways unavailable in the existing tech tree.
Mythological Identity: The naming after Veles, a Slavic deity, creates cultural connection and distinctive identity that separates the Object Veles from generic numerical Soviet designations.
Pure Protection Philosophy: Unlike vehicles that balance armor with mobility or gun handling, the Object Veles apparently commits absolutely to protection and firepower, creating extreme specialization in its domain.
What’s Next?
As a Supertest vehicle, the Object Veles’s characteristics remain subject to adjustment. Key questions for testing include:
What are the mobility values, and can the Object Veles reach positions before battles develop?
What is the gun depression, and does it enable any hull-down capability?
Are there significant weak points that counterbalance the exceptional frontal armor?
What is the reload time for the 700 HP gun, and does it enable adequate DPM?
Will this be a premium vehicle, reward tank, or potential tech tree addition?
How will the Object Veles coexist with the IS-7, Object 277, and Object 780 in the Soviet Tier X heavy lineup?
Does the exceptional armor create balance concerns or power creep issues?
Final Thoughts
The Object Veles represents an uncompromising vision of assault heavy tank design. By combining fortress-level frontal armor with devastating 700 HP firepower, Wargaming has created a vehicle that embodies Soviet heavy tank philosophy at its most extreme—exceptional protection and alpha damage without compromise or complexity.
For commanders who appreciate straightforward gameplay, enjoy position-holding and breakthrough assaults, and value armor and firepower over mobility and finesse, the Object Veles offers immense appeal. The 350mm hull and 320mm turret armor create protection that enables aggressive plays impossible for lesser vehicles, while the 700 HP alpha ensures every shot carries catastrophic impact.
However, the Object Veles likely demands significant compromises. The exceptional armor almost certainly comes with severely limited mobility, making poor position choices difficult to correct. The likely limited gun depression will prevent effective ridge-line fighting, forcing the Object Veles into flat-ground engagements. If reload times are long (15+ seconds for 700 HP alpha), the DPM may prove inadequate in extended engagements against rapid-fire opponents.
The “classic assault heavy tank” designation suggests the Object Veles eschews the complex mechanics and tactical flexibility that define many modern additions. This simplicity is simultaneously a strength—creating reliable, predictable performance—and a potential limitation—lacking the adaptive capabilities that enable success across diverse situations.
Whether you’re excited about a Soviet heavy tank with E 100-level armor and alpha damage or skeptical about whether such exceptional protection creates balance concerns, the Object Veles undeniably offers something distinctive. If Wargaming successfully balances the armor values, mobility limitations, and firepower characteristics, the Object Veles could become a favorite for players who enjoy leading assaults and anchoring defenses through sheer durability.
For those who have wanted a Soviet heavy tank that combines the IS-7’s armor philosophy with devastating 700 HP firepower, accepting severe mobility limitations as the price, the Object Veles might be exactly what you’ve been waiting for.
Characteristics Are Not Final — all information sourced from World of Tanks Supertest announcements.
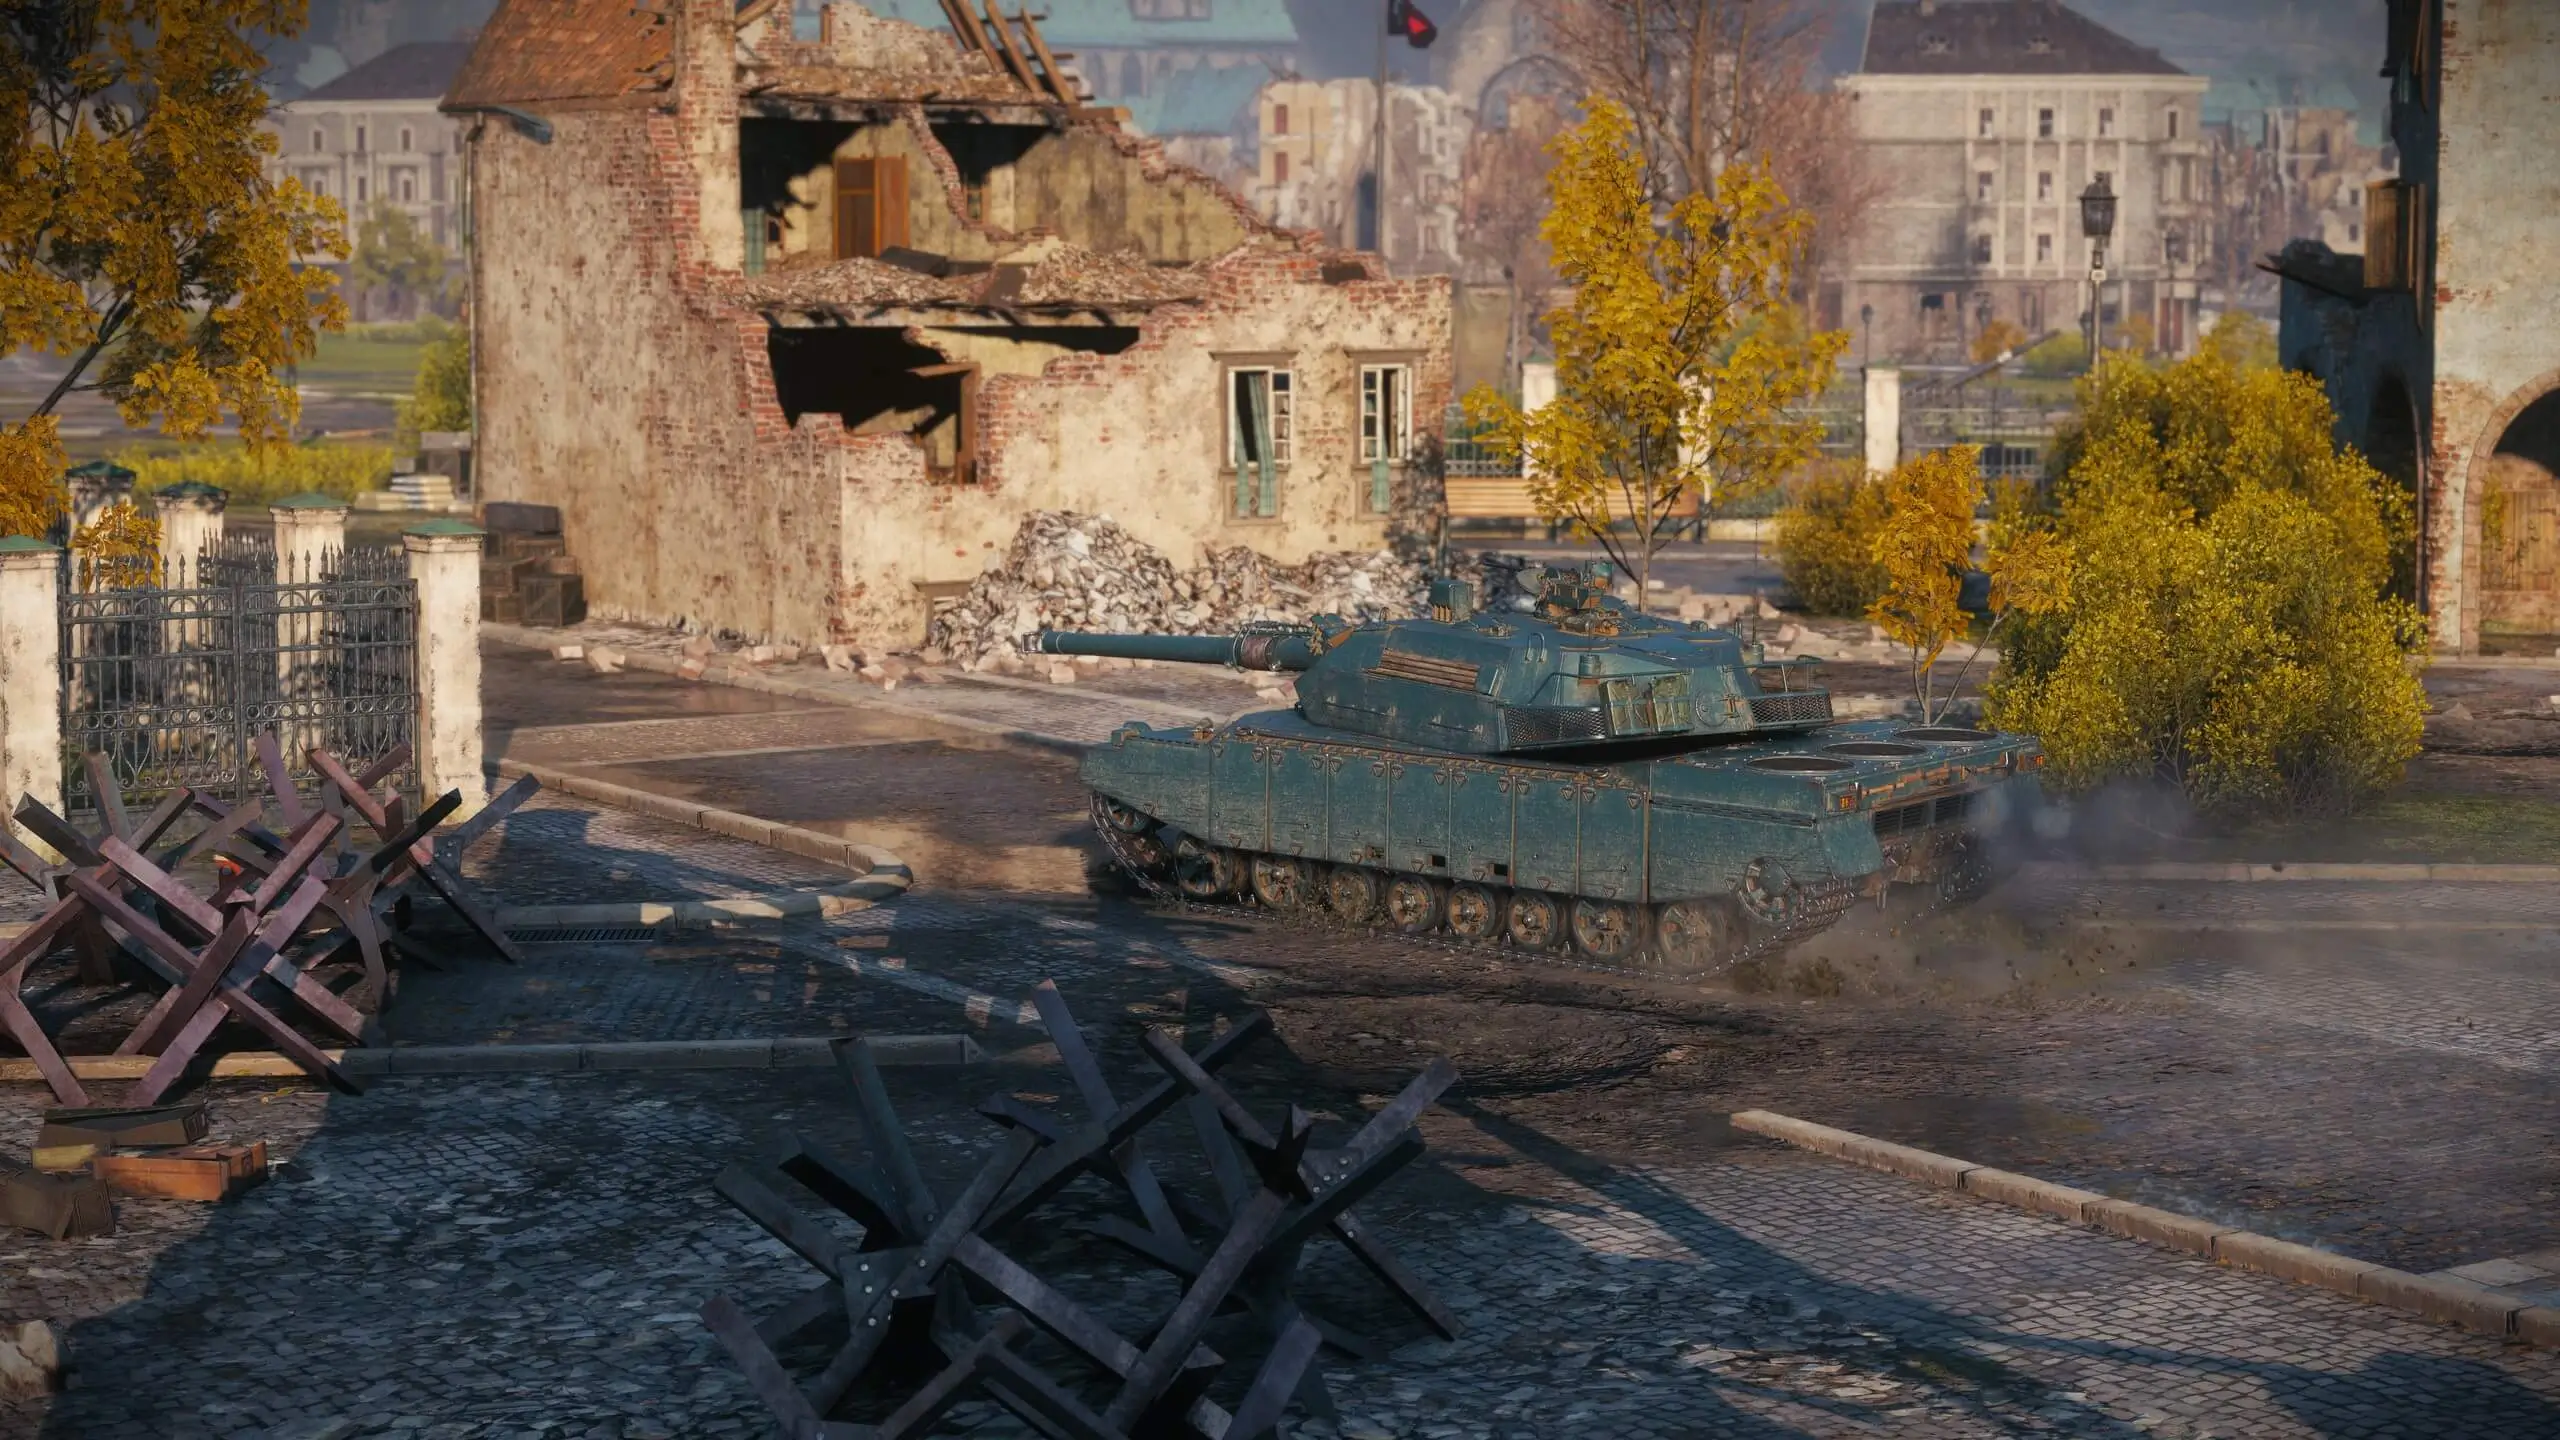
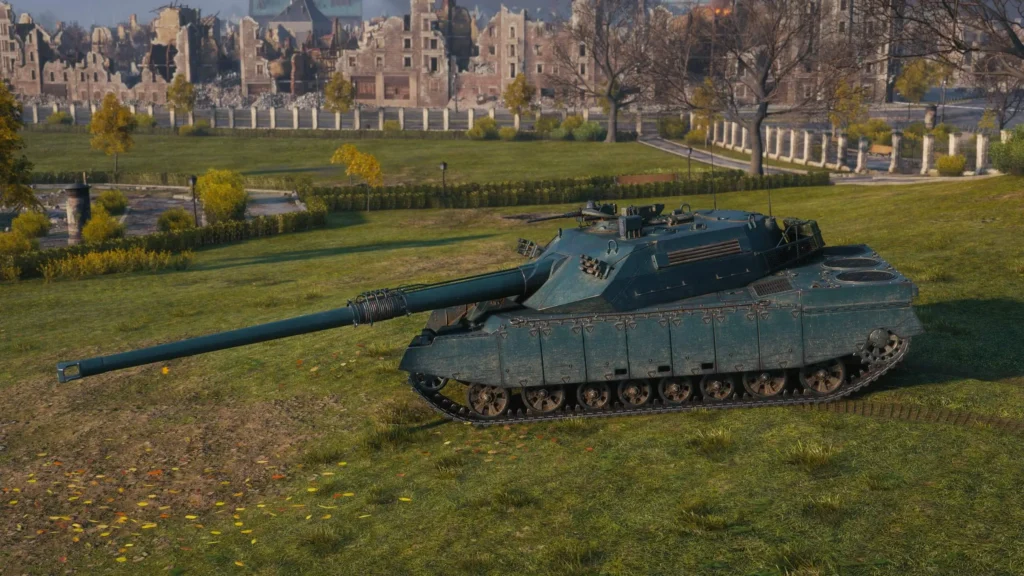
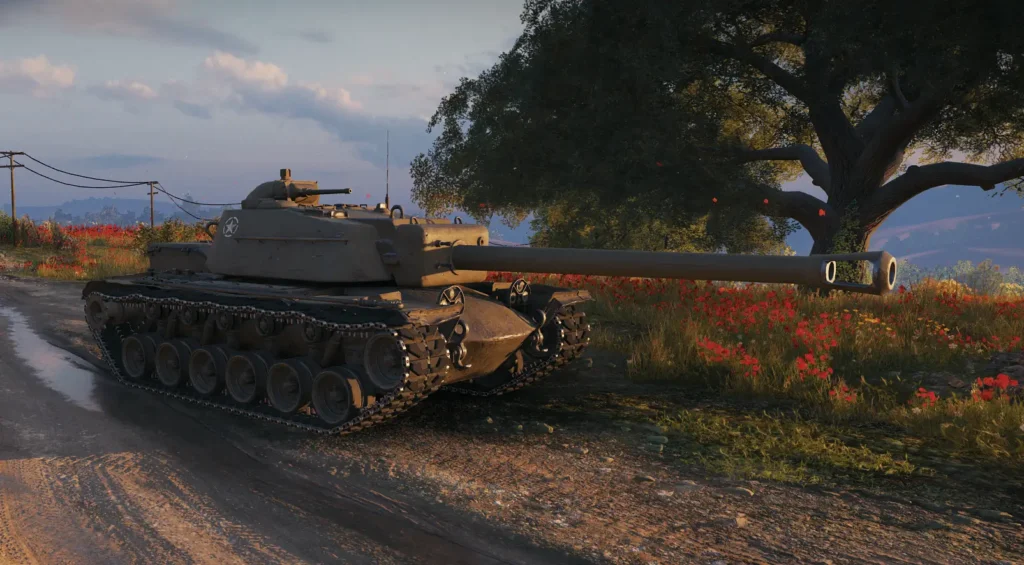
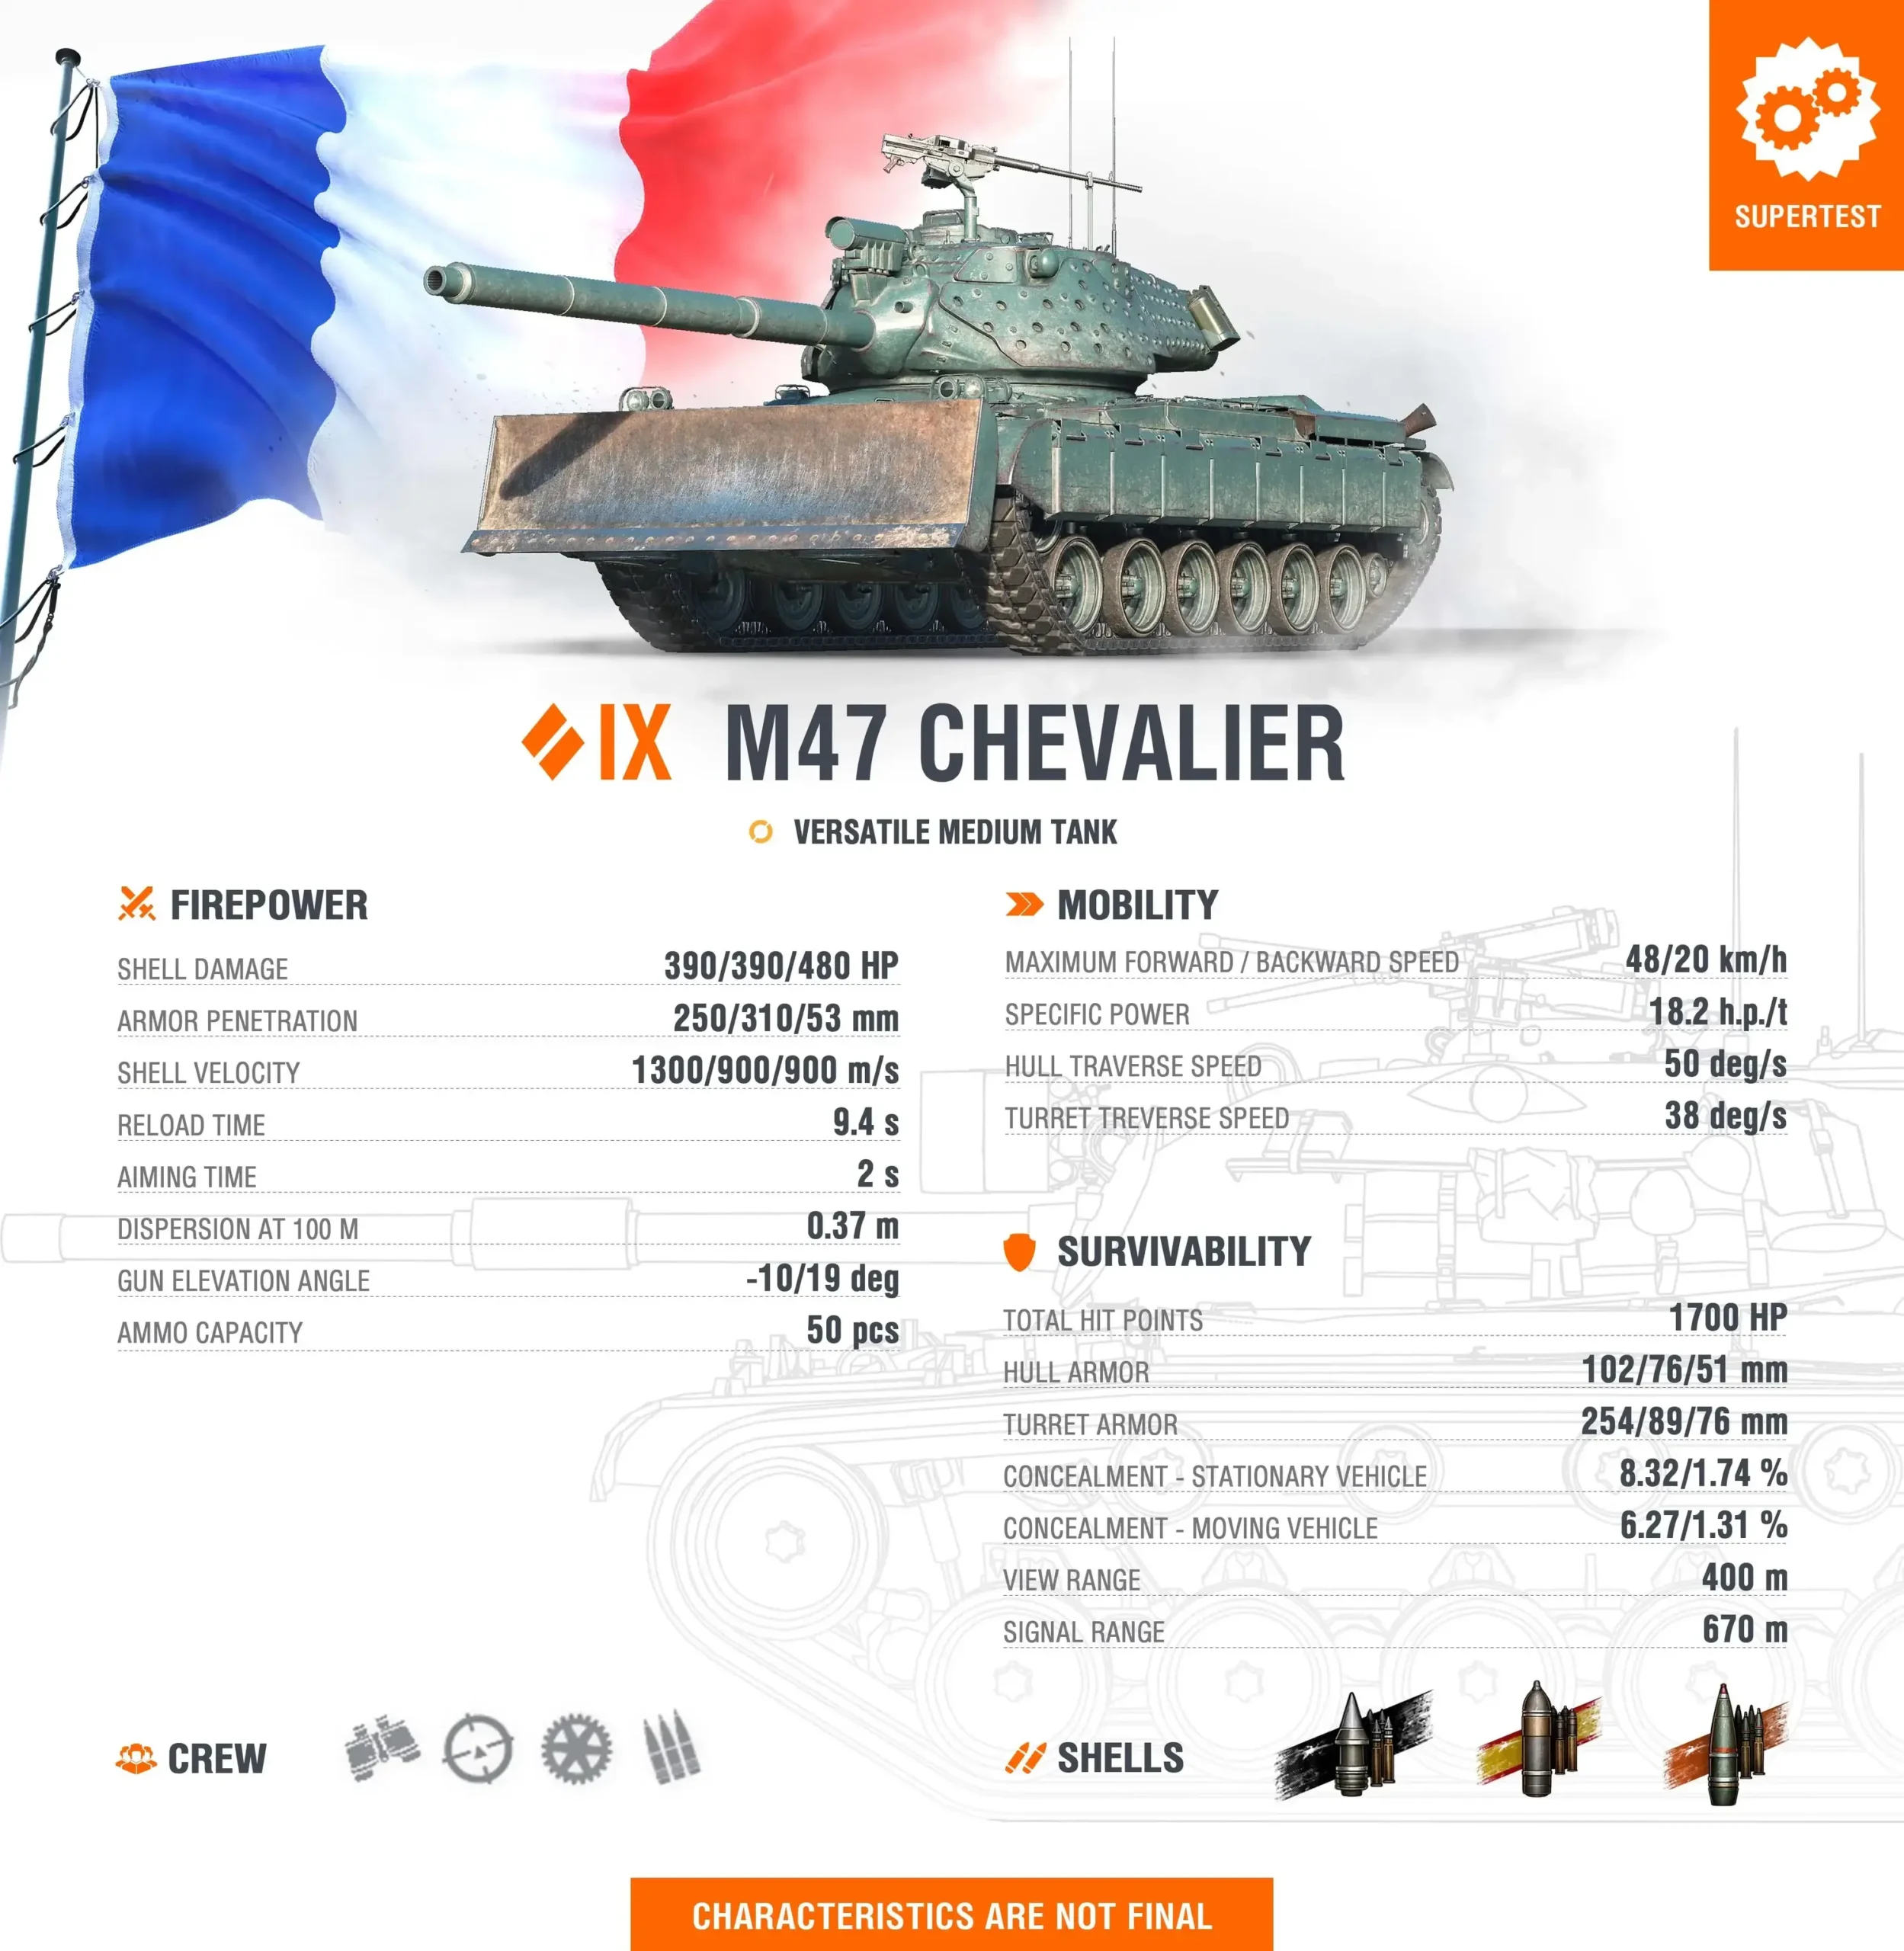
The World of Tanks Supertest has welcomed an intriguing addition to the French medium tank lineup: the M47 Chevalier, a Tier IX premium versatile medium tank based on the American M47 Patton extensively used and modified by the French military. For players who appreciate French flexibility but want something fundamentally different from the oscillating turret autoloaders or the wheeled light tanks, the M47 Chevalier offers a compelling package built around terrain exploitation, consistent firepower, and balanced performance across multiple combat situations.
390 HP Alpha Damage: Reliable Impact
The M47 Chevalier delivers competitive per-shot damage for Tier IX:
390 HP Per Shot: The alpha damage is solid for a Tier IX medium tank, matching many contemporaries and creating meaningful trades in direct engagements. Each shot carries sufficient impact to matter without requiring extended clip commitments.
Consistent Damage Output: Unlike autoloaders that alternate between devastating clips and lengthy reloads, the M47 Chevalier maintains steady damage delivery throughout battles. The 390 HP alpha enables continuous pressure without vulnerability windows.
Medium Tank Parity: The damage matches standard Tier IX medium expectations, enabling the M47 Chevalier to trade favorably against same-class opponents while remaining competitive against heavies when properly positioned.
2,596 DPM: The damage-per-minute of 2,596 is respectable for Tier IX, creating sustainable damage output in extended engagements. The M47 Chevalier can contribute meaningful damage throughout battles without relying on burst mechanics.
Finishing Capability: The 390 HP alpha is well-positioned to finish wounded opponents who have taken moderate damage. Targets sitting between 400-800 HP can be eliminated in two well-placed shots, enabling efficient cleanup work.
250mm APCR Standard Penetration: Premium Performance
The M47 Chevalier brings exceptional standard ammunition:
250mm APCR Penetration: The standard ammunition features APCR rounds with 250mm of penetration—values that would be premium rounds on many vehicles. This penetration enables confident engagement against most Tier IX opponents without gold ammunition dependency.
APCR Standard Philosophy: Using APCR as standard ammunition provides high shell velocity, reducing lead time on moving targets and maintaining penetration better over distance compared to standard AP rounds. This characteristic supports accurate fire at medium-to-long ranges.
Economic Efficiency: The high standard penetration reduces reliance on expensive premium ammunition, improving credit earnings and enabling sustainable gameplay for commanders without premium accounts or extensive credit reserves.
Versatile Engagement Capability: The 250mm standard penetration opens frontal engagement options against many targets that would force AP-standard vehicles to load premium ammunition. The M47 Chevalier can participate confidently in direct combat without constant ammunition economics management.
Reliable Damage Delivery: High standard penetration combined with good accuracy (0.35 dispersion) creates consistent damage output. The frustration of bouncing shots off seemingly vulnerable targets is minimized, enabling focus on positioning and target selection.
The M47 Chevalier offers legendary gun depression:
10 Degrees of Gun Depression: The exceptional -10° gun depression is among the best at Tier IX and enables the M47 Chevalier to leverage terrain features that are completely inaccessible to vehicles with standard -5° to -6° depression. This capability fundamentally defines the vehicle’s tactical identity.
Ridge-Line Fighting Excellence: The combination of 10° depression and solid turret armor creates devastating ridge-line capability. The M47 Chevalier can crest hills, deliver accurate 390 HP shots, and retreat to safety while exposing only the well-protected turret.
Minimal Exposure Requirement: Deep gun depression enables firing from positions where only the turret is visible, dramatically reducing the target profile and protecting the hull from return fire. This characteristic multiplies survivability in hull-down positions.
Versatile Terrain Exploitation: The M47 Chevalier can fight effectively from slopes, hills, and uneven terrain that forces other medium tanks into suboptimal flat-ground engagements. This versatility provides significant tactical advantages across diverse map types.
American Heritage: The 10° gun depression continues the M47 Patton’s American design philosophy, bringing legendary terrain adaptation to the French tech tree and creating a medium tank that excels where geography creates firing opportunities.
Solid Turret Armor: Hull-Down Protection
The M47 Chevalier brings meaningful turret protection:
Solid Turret Armor: The turret armor is described as “solid,” suggesting reliable frontal protection that can bounce standard ammunition from many Tier IX opponents when properly positioned and potentially resist some premium rounds.
Hull-Down Synergy: The solid turret armor combined with 10° gun depression creates exceptional hull-down capability. When positioned on ridge lines with only the turret exposed, the M47 Chevalier becomes difficult to dislodge.
Face-Hardening Potential: While specific armor values have not been released, the “solid turret armor” designation suggests the M47 Chevalier can confidently engage in hull-down positions without immediate concern about turret penetrations.
Protection Philosophy: The armor design prioritizes the turret over the hull, creating a vehicle that survives through intelligent positioning and terrain exploitation rather than raw thickness across all surfaces.
Trading Confidence: The solid turret protection enables confident trading when hull-down, knowing that properly positioned, return fire will likely bounce while the M47 Chevalier delivers accurate 390 HP responses.
Spaced Armor: HEAT Protection
The M47 Chevalier features additional defensive characteristics:
Extensive Spaced Armor: The vehicle is equipped with “extensive spaced armor” that provides “additional protection from HEAT shells,” creating defensive advantages against premium ammunition that many opponents rely on at Tier IX.
HEAT Degradation: Spaced armor disrupts HEAT shell penetration mechanics, reducing their effectiveness and potentially causing bounces or reduced damage from shells that would penetrate conventional armor configurations.
Premium Ammunition Counter: At Tier IX, many opponents load premium HEAT rounds when facing medium tanks. The M47 Chevalier’s spaced armor directly counters this tendency, creating survivability advantages in matchups where enemies expect easy penetrations.
Survivability Enhancement: The additional HEAT protection improves overall durability, enabling the M47 Chevalier to sustain frontline presence longer than the base armor values might suggest.
Historical Authenticity: The spaced armor represents French experimentation with the M47 Patton platform, including modifications intended to improve protection against contemporary anti-tank weapons.
Good Mobility: Responsive Positioning
The M47 Chevalier offers competitive mobility for a medium tank:
48 km/h Maximum Forward Speed: The top speed is solid for Tier IX medium tanks, enabling the M47 Chevalier to keep pace with most contemporaries and respond to developing battlefield situations in a timely manner.
20 km/h Reverse Speed: The reverse speed is excellent and enables safe retreat from unfavorable positions. The M47 Chevalier can peek over ridge lines, fire, and reverse to safety quickly, supporting aggressive ridge-fighting gameplay.
Repositioning Flexibility: Good mobility supports the versatile medium tank role by enabling the M47 Chevalier to respond to changing battlefield conditions, relocate between ridge-line positions, and support different flanks as opportunities develop.
Early Position Securing: The mobility allows the M47 Chevalier to reach premium ridge-line positions early in battles, securing control over key terrain before slower opponents arrive and establishing dominance over critical areas.
Balanced Performance: The 48 km/h forward speed combined with 20 km/h reverse creates a mobility profile that supports both aggressive advances and tactical withdrawals, enabling flexible gameplay across diverse situations.
Versatile Medium Tank Classification: Flexible Combat
The M47 Chevalier’s design philosophy emphasizes adaptability:
No Single Specialization: The M47 Chevalier is explicitly described as having “no one area where it’s especially good, but it does well in a wide range of combat situations.” This versatility creates a vehicle that adapts to circumstances rather than forcing specific playstyles.
Wide Situational Effectiveness: The combination of good gun handling (1.92s aim time, 0.35 dispersion), 10° depression, solid turret armor, and good mobility creates a medium tank that performs competently across sniping, ridge-fighting, flanking, and support roles.
Comfortable Gun Characteristics: The weapon is described as “comfortable,” suggesting good overall gun handling that enables accurate fire without frustrating bloom penalties or excessive aim times.
Balanced Trade-Offs: Unlike specialized vehicles that excel dramatically in one area while suffering in others, the M47 Chevalier maintains balanced characteristics that prevent severe weaknesses from undermining overall effectiveness.
Adaptable Gameplay: The versatile classification enables commanders to read battlefield developments and position accordingly—sniping when terrain permits, ridge-fighting when opportunities exist, flanking when defenses weaken, or supporting when teammates need assistance.
Dozer Blade: Unique Equipment
The M47 Chevalier features distinctive visual and potentially functional equipment:
Dozer Blade Present: The vehicle is equipped with a dozer blade, creating a unique visual profile and potentially offering functional advantages related to terrain modification or additional frontal protection.
Historical Accuracy: The dozer blade represents authentic French modifications to the M47 Patton platform, where engineering equipment was occasionally mounted for field fortification and obstacle clearance operations.
Visual Distinction: The dozer blade creates immediate visual recognition, distinguishing the M47 Chevalier from standard M47 Patton variants and other French medium tanks in the lineup.
Frontal Protection Potential: While specifics have not been confirmed, dozer blades in World of Tanks occasionally provide additional armor or track protection, potentially enhancing survivability in frontal engagements.
French Experimentation: The blade exemplifies the French military’s experimental approach to the M47 Patton platform, testing various modifications to adapt the American design to French operational requirements.
Methodical Frontline Pressure
The M47 Chevalier’s design supports calculated, position-focused gameplay:
Ridge-Line Priority: Success requires identifying and controlling key ridge-line positions where the 10° gun depression creates maximum advantage. These positions transform the M47 Chevalier from competent to exceptional.
Versatile Engagement Selection: The balanced characteristics enable the M47 Chevalier to engage from multiple ranges and positions. Choose engagement types based on terrain availability and enemy composition rather than being locked into single approaches.
Hull-Down Discipline: When terrain permits hull-down positioning, leverage the solid turret armor and 10° depression to create nearly impenetrable firing positions while delivering consistent 390 HP damage.
Mobility Leverage: Use the good mobility and excellent reverse speed to rotate between multiple firing positions, relocate when spotted, and respond to battlefield developments rather than remaining static.
Consistent Contribution: The 2,596 DPM and reliable 250mm penetration enable steady damage output throughout battles. The M47 Chevalier contributes consistently rather than in devastating bursts followed by vulnerability windows.
Tactical Considerations
The M47 Chevalier’s characteristics create specific tactical opportunities:
Terrain Reading: Develop map knowledge focused on ridge-line positions and hull-down opportunities. Understanding where the M47 Chevalier excels versus where it struggles directly impacts battle performance.
Gun Depression Exploitation: Maximize the 10° depression advantage by seeking slopes, hills, and elevated positions where other medium tanks cannot operate effectively. This creates local superiority through positioning.
Turret Positioning: Master turret weak point concealment and positioning to maximize the solid armor’s effectiveness. Even well-protected turrets have vulnerabilities that skilled opponents will target.
Ammunition Economics: The 250mm standard APCR penetration enables credit-positive gameplay. Reserve premium ammunition for super-heavy opponents or critical situations requiring guaranteed penetration.
Reverse Speed Usage: The excellent 20 km/h reverse enables aggressive peek-and-shoot gameplay. Crest ridges, fire, and reverse to safety in smooth sequences that minimize exposure time.
Playstyle Implications
The M47 Chevalier rewards commanders who embrace flexible, terrain-focused gameplay:
Adaptability Over Specialization: Success requires reading battlefield conditions and adapting tactics. The M47 Chevalier performs across multiple roles but excels when commanders leverage the right capability for each situation.
Hull-Down When Possible: Prioritize hull-down positions when terrain permits. The combination of 10° depression and solid turret armor creates maximum effectiveness in these locations.
Consistent Contribution: Focus on steady damage delivery rather than dramatic plays. The M47 Chevalier wins through reliable 390 HP shots throughout battles, not single devastating moments.
Terrain Awareness: Constantly evaluate terrain for hull-down opportunities. The M47 Chevalier’s effectiveness varies dramatically based on whether ridge lines and elevation changes are available.
Commanders looking to master the M47 Chevalier should consider:
Learning premium ridge-line positions on each map where 10° depression creates overwhelming advantages
Practicing reverse-speed discipline to maximize hull-down peek-and-shoot efficiency
Understanding when to prioritize sniping versus ridge-fighting versus flanking based on circumstances
Using the 250mm standard penetration to maintain credit-positive gameplay
Developing map reading skills to identify where the M47 Chevalier’s versatility matters most
Mastering turret positioning to maximize solid armor effectiveness while concealing weak points
Leveraging the good mobility to secure early positions and relocate based on developments
Maintaining consistent damage output rather than forcing dramatic but risky plays
Community Reception
Initial community reactions to the M47 Chevalier reveal measured perspectives:
“Finally, a Normal French Medium”: Many players expressed appreciation for a French medium tank without oscillating turret mechanics, autoloaders, or wheeled configurations, viewing the M47 Chevalier as a refreshing return to conventional gameplay.
Versatility Skepticism: Community discussion immediately questioned whether “versatile” translates to “mediocre across the board” or genuinely effective in multiple roles, with concerns that specialized opponents might dominate in their preferred engagement types.
Depression Appreciation: The 10° gun depression generated universal praise, with commanders recognizing this characteristic as the M47 Chevalier’s most valuable asset and the feature that could elevate it beyond simple “average medium tank” status.
“Another Premium Medium”: Some community members expressed fatigue with premium medium tank releases, questioning whether Tier IX needs another versatile medium when tech tree options exist.
Historical Interest: The M47 Patton platform with French modifications generated interest from history-focused players who appreciate the real-world experimentation France conducted with American-supplied equipment during the Cold War era.
What Sets the M47 Chevalier Apart
The M47 Chevalier occupies a unique position in the Tier IX medium tank landscape:
American Depression in French Colors: The M47 Chevalier is the first French medium tank at Tier IX to offer legendary American-style 10° gun depression, opening tactical possibilities historically unavailable to the nation.
True Versatile Medium: Unlike vehicles that claim versatility but excel in only one area, the M47 Chevalier genuinely adapts across multiple roles—sniping with good gun handling, ridge-fighting with 10° depression, and supporting with consistent DPM.
APCR Standard Ammunition: The 250mm APCR standard penetration is exceptional for Tier IX medium tanks and reduces economic pressure compared to vehicles dependent on premium ammunition for reliable performance.
Spaced Armor HEAT Protection: The extensive spaced armor creates defensive advantages against premium HEAT shells that many opponents rely on, providing survivability beyond the base armor values.
Balanced Without Extremes: The M47 Chevalier avoids extreme specialization in any direction, creating a vehicle that performs competently across diverse situations without the severe weaknesses that plague highly specialized designs.
What’s Next?
As a Supertest vehicle, the M47 Chevalier’s characteristics remain subject to adjustment. Key questions for testing include:
What are the exact turret armor values, and can they reliably bounce Tier IX standard ammunition?
How effective is the spaced armor against HEAT shells in practical gameplay?
Does the dozer blade provide functional benefits beyond visual distinction?
Will this be a premium tank for direct purchase, or potentially a reward vehicle?
Can the M47 Chevalier’s versatility compete against specialized opponents in their preferred domains?
How will the M47 Chevalier differentiate itself from other versatile Tier IX mediums like the Centurion 7/1?
Does the 390 HP alpha combined with 2,596 DPM create adequate damage output for competitive gameplay?
Final Thoughts
The M47 Chevalier represents a refreshing approach to French medium tank design. By bringing American-style 10° gun depression to a versatile platform with solid turret armor, good mobility, and excellent standard penetration, Wargaming has created a vehicle that rewards intelligent positioning and adaptive gameplay without forcing commanders into rigid playstyle commitments.
For commanders who appreciate terrain exploitation, enjoy flexible gameplay that adapts to battlefield conditions, and value consistent performance over extreme specialization, the M47 Chevalier offers appealing potential. The 10° gun depression creates positioning opportunities unavailable to most French mediums, while the balanced characteristics enable effectiveness across diverse combat situations.
However, the M47 Chevalier’s versatility is both its greatest strength and potential limitation. Vehicles that perform well across multiple areas sometimes lack the extreme effectiveness in specific domains that defines memorable tanks. Against highly specialized opponents—dedicated snipers at long range, autoloader burst damage at close quarters, or heavily armored brawlers in direct confrontations—the M47 Chevalier may find itself outmatched in head-to-head comparisons.
The “no one area where it’s especially good” description could prove prophetic. If the balanced characteristics create merely adequate performance across all situations rather than genuine excellence in adapted roles, the M47 Chevalier risks becoming forgettable despite its solid fundamentals. Success will depend on whether the 10° gun depression, solid turret armor, and versatile characteristics combine into a cohesive, effective package that rewards skilled play.
Whether you’re excited about a French medium with American-style gun depression and versatile characteristics or skeptical about whether balanced performance translates to competitive effectiveness, the M47 Chevalier undeniably offers something different for the French tech tree. If Wargaming successfully balances the armor profile, gun handling, and versatility elements, the M47 Chevalier could become a favorite for players who enjoy reading battlefields and adapting tactics rather than forcing single approaches.
For those who have wanted a French medium tank with legendary gun depression and flexible gameplay without oscillating turret or autoloader commitments, the M47 Chevalier might be exactly what you’ve been waiting for.
Characteristics Are Not Final — all information sourced from World of Tanks Supertest announcements.
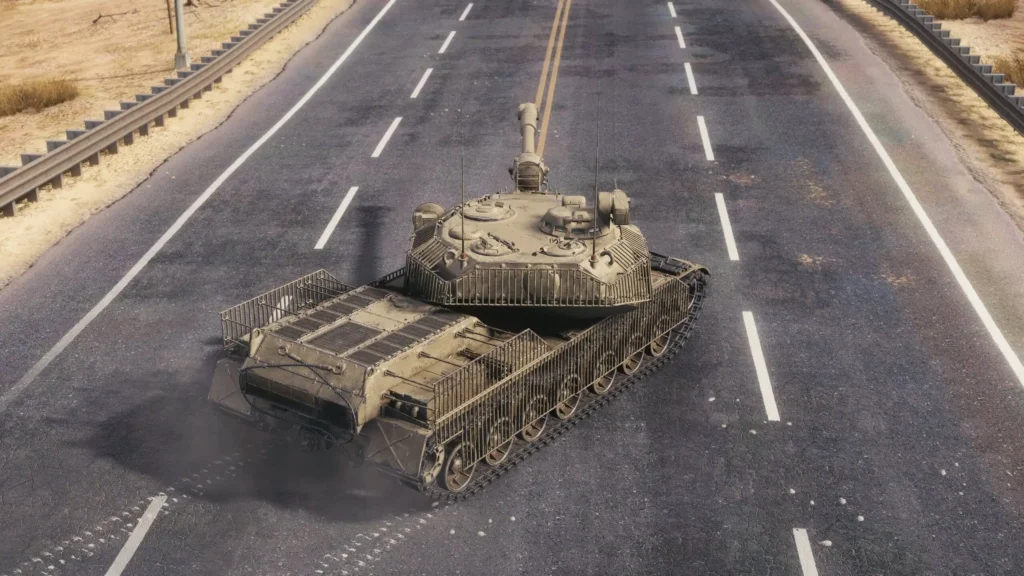
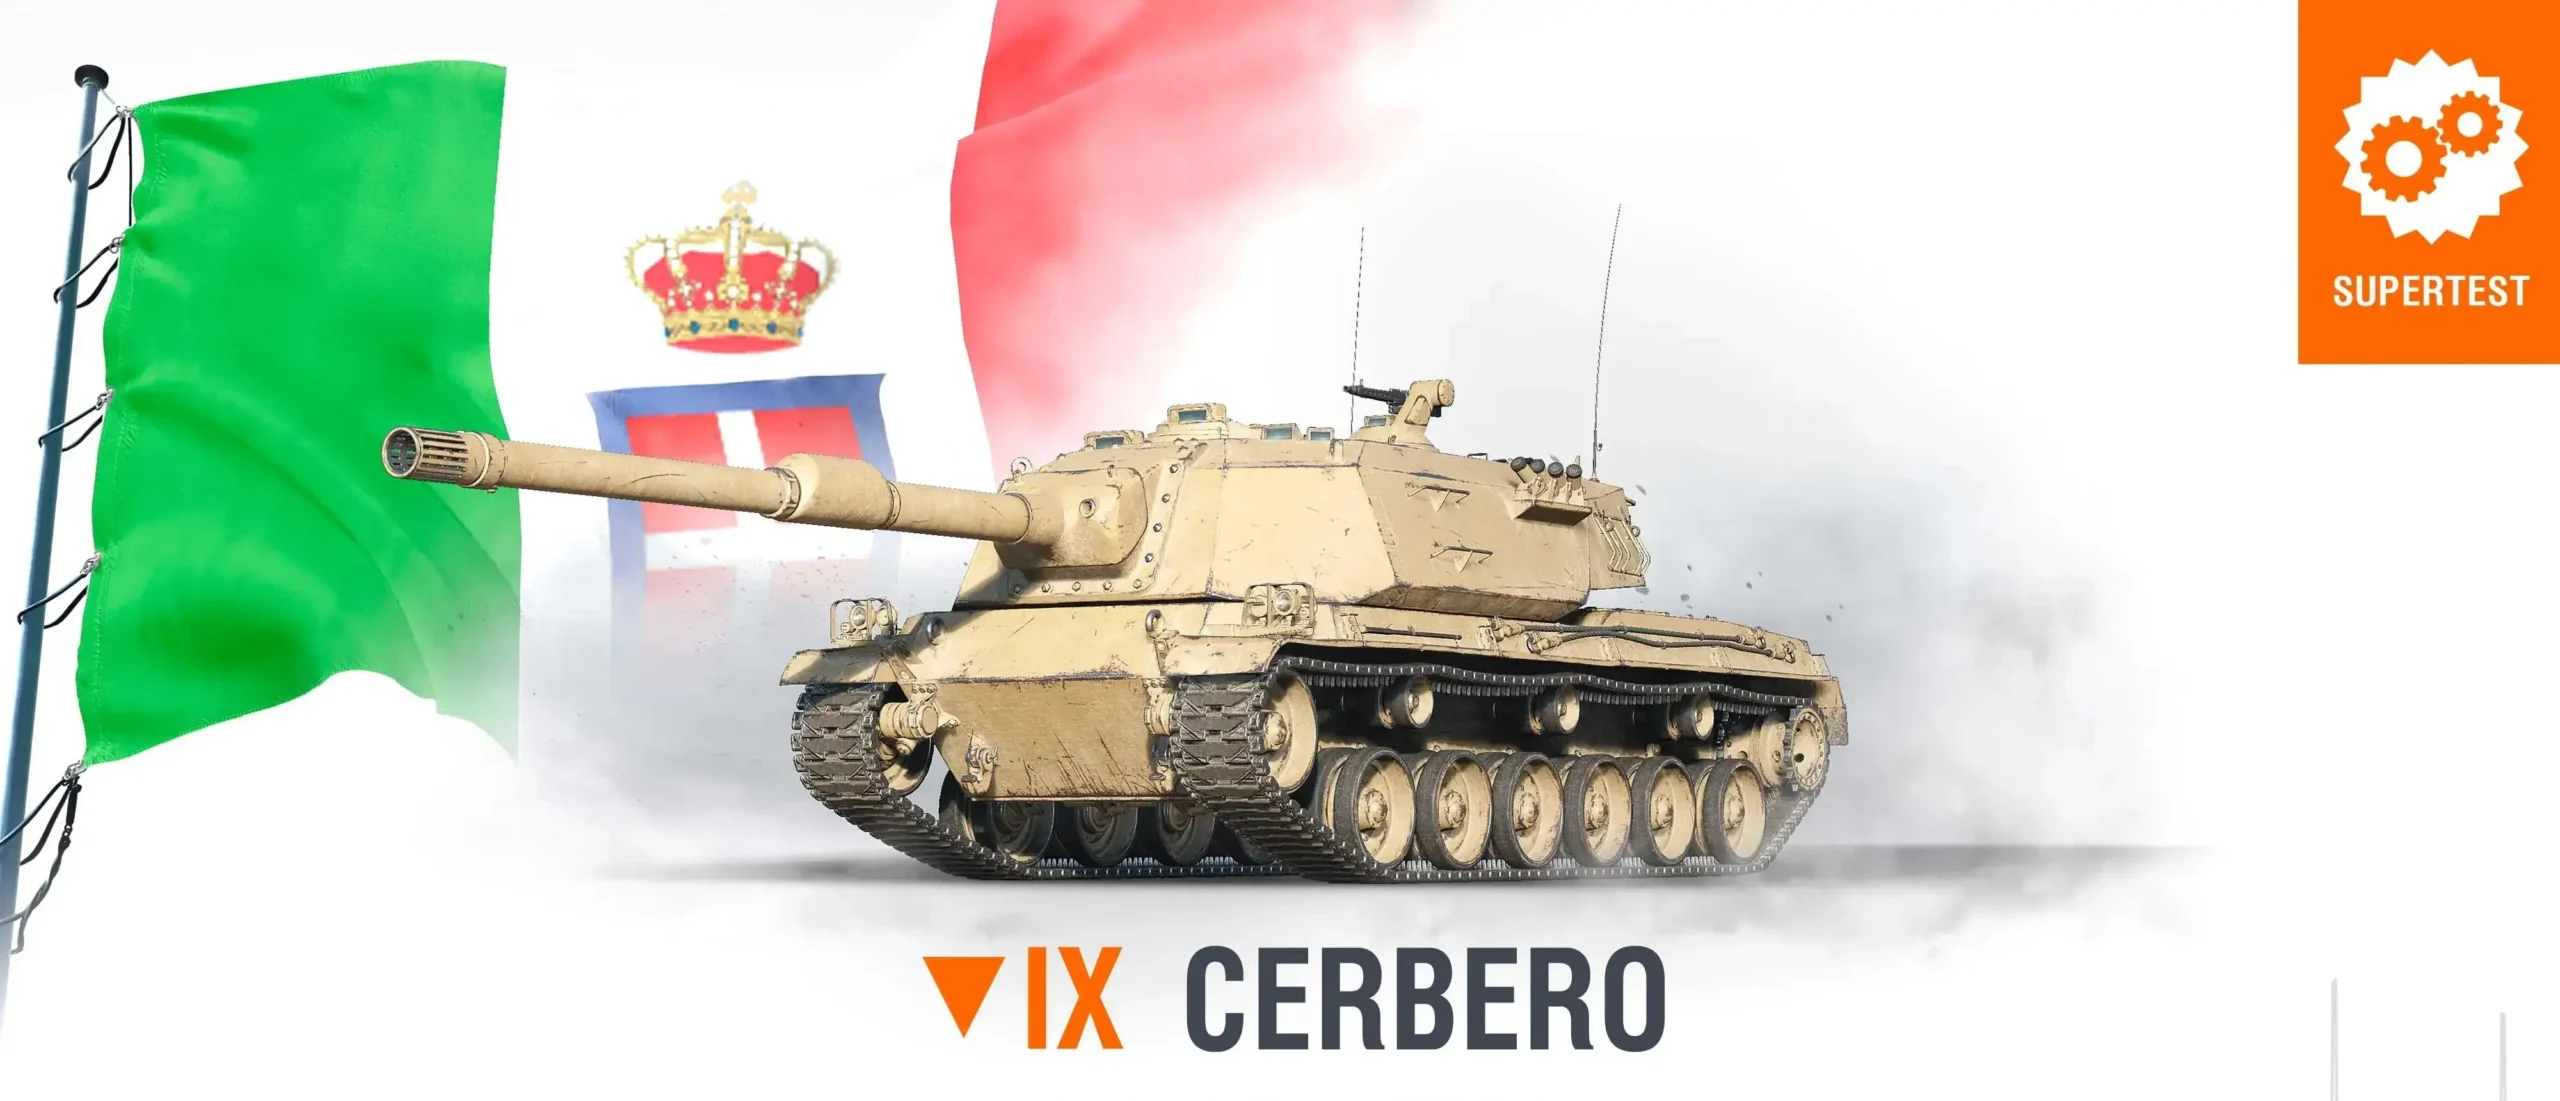
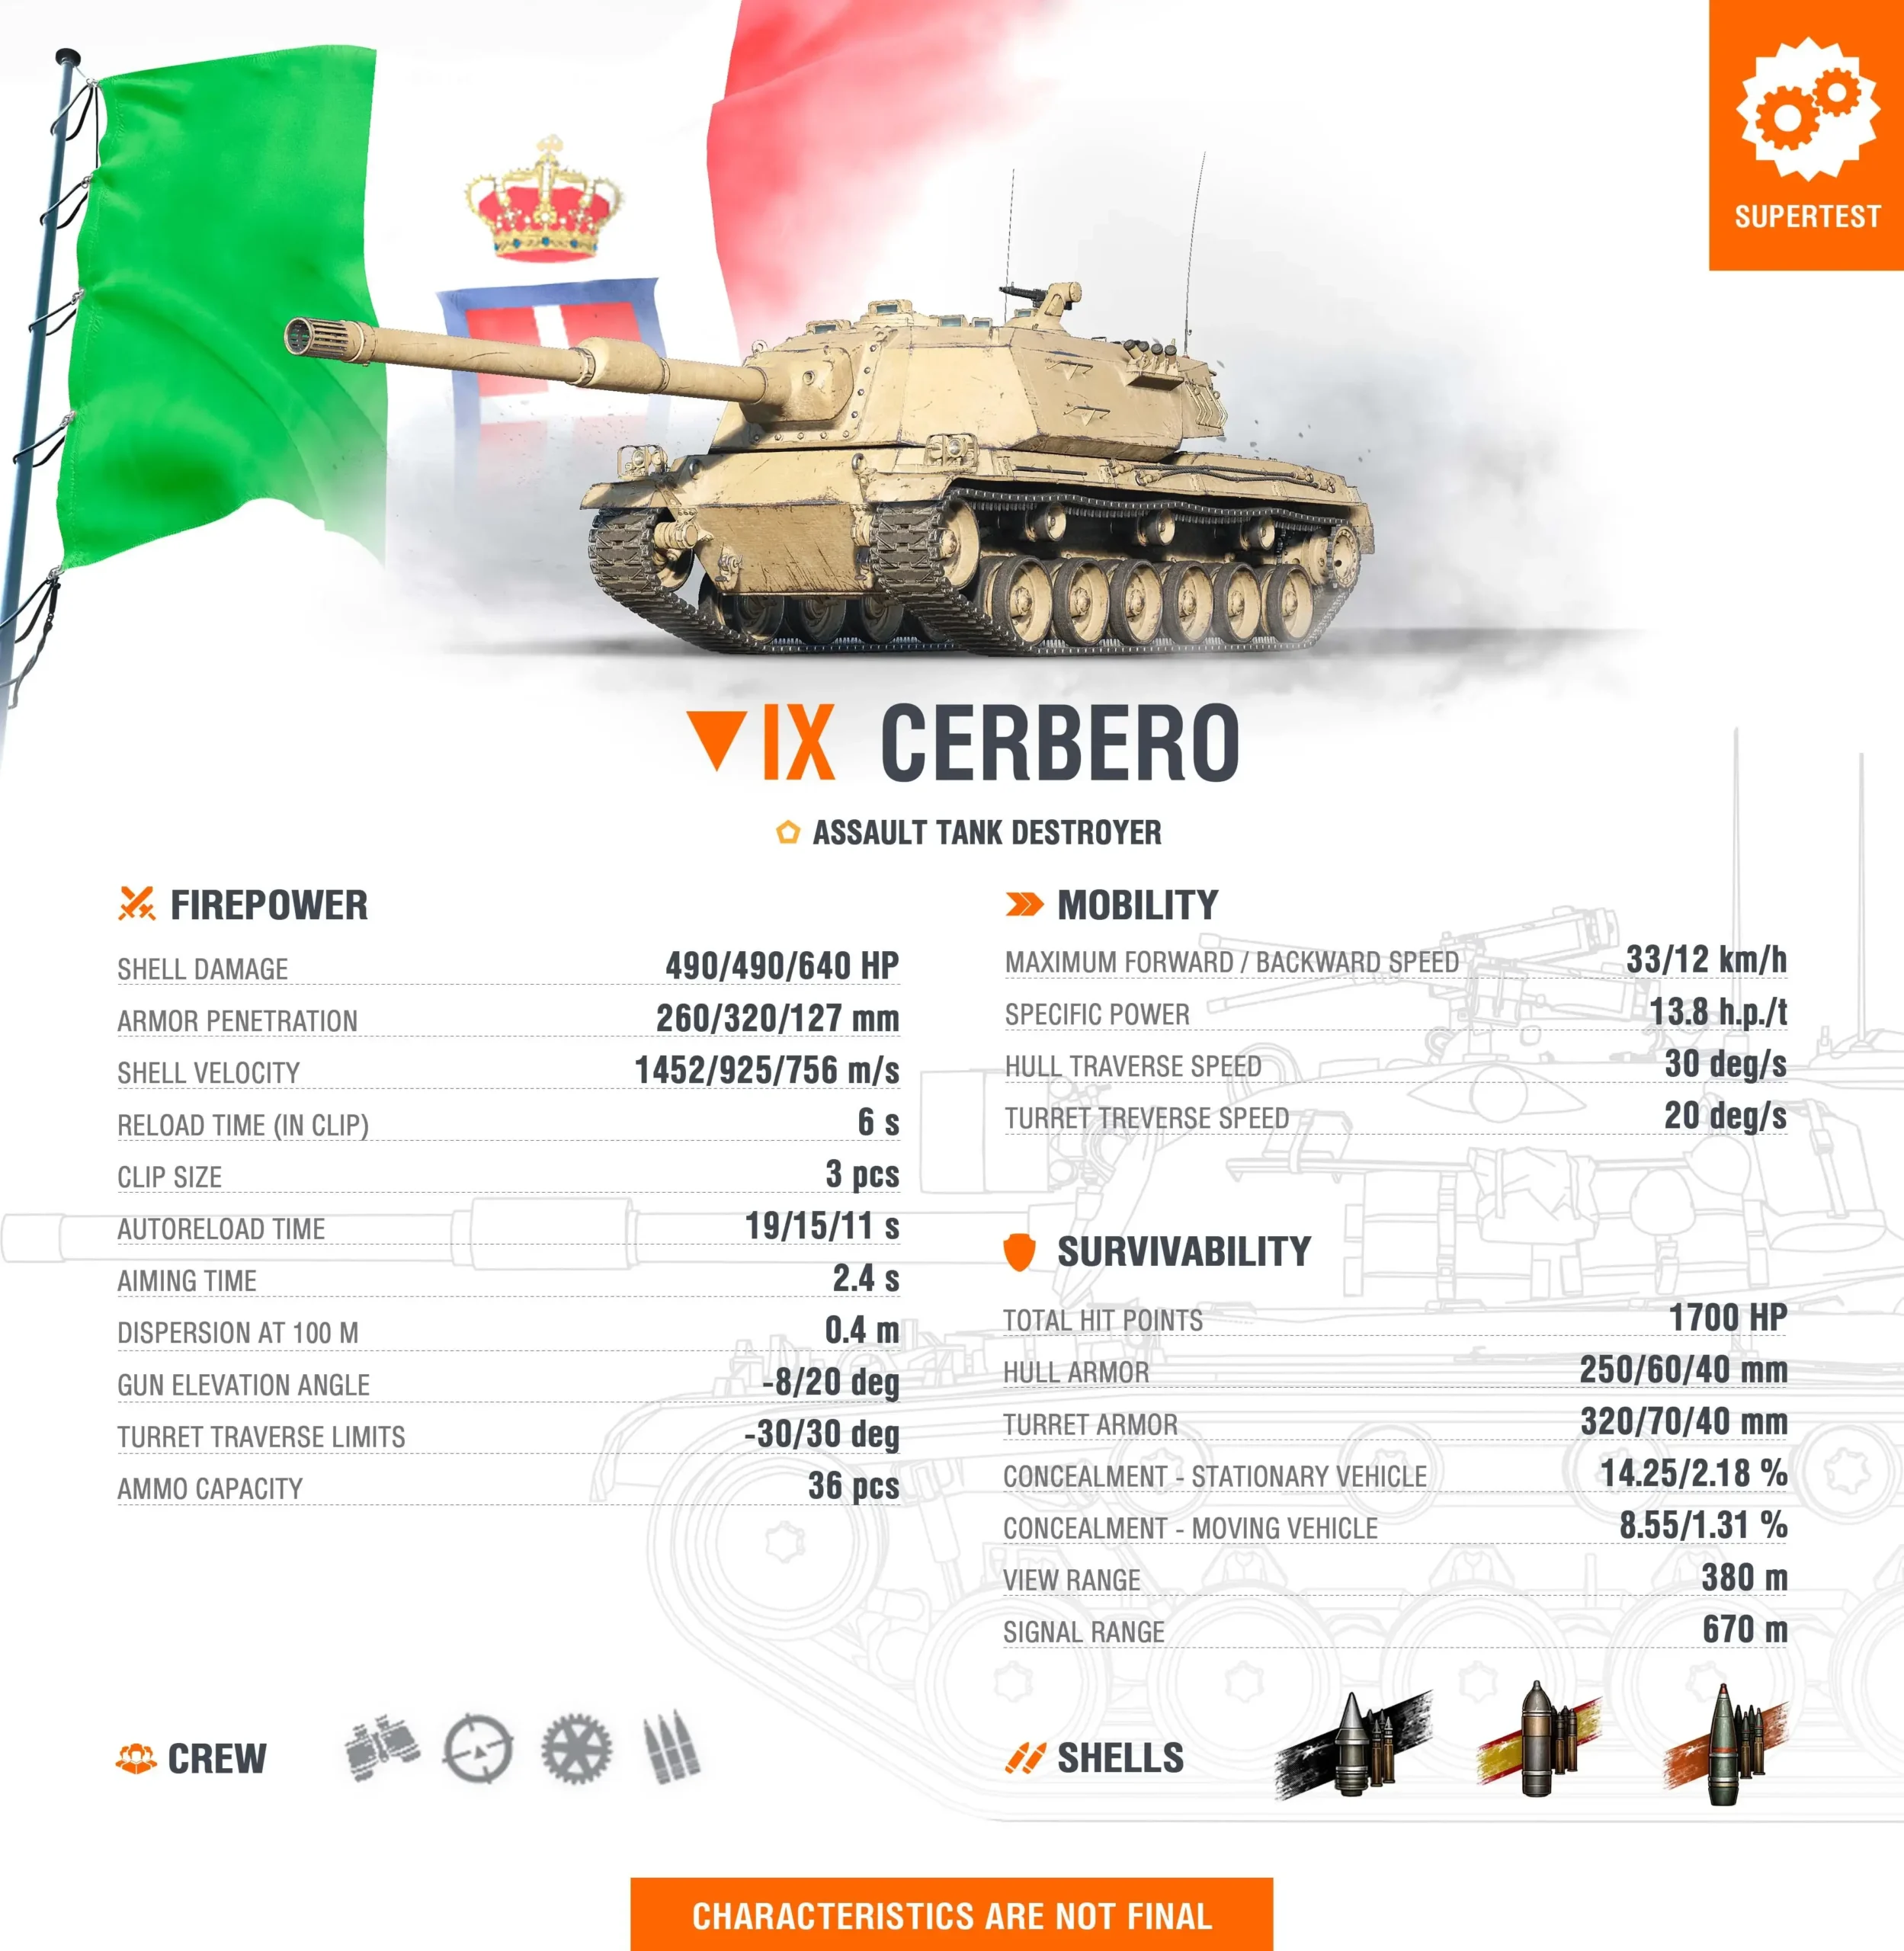
The World of Tanks Supertest has welcomed an intriguing addition to the Italian tank destroyer lineup: the Cerbero, a Tier IX assault tank destroyer whose defining characteristic is its three-shell reverse autoreloader system. For players who appreciate Italian armored design but want something fundamentally different from the five-shell magazines of the tech tree Minotauro line, the Cerbero offers a compelling alternative built around consistent firepower delivery, frontline durability, and tactical flexibility through its unique reload mechanics.
The Cerbero’s primary identity revolves around its innovative ammunition system:
Three-Shell Reverse Autoreloader: Unlike traditional autoloaders that reload all shells equally or autoreloaders where the first shell reloads fastest, the Cerbero features a reverse autoreloader where the last (third) shell in the magazine reloads most quickly. This mechanic creates unique tactical considerations.
Consistent Firepower Philosophy: The reverse autoreloader system is specifically designed to provide “consistent firepower regardless of tactical circumstances.” This means the Cerbero maintains combat effectiveness whether firing single shots or deploying the full three-shell burst.
No Subsequent Disadvantage: The system provides “the added benefit of being able to use the first two shells at the start of an engagement with no subsequent disadvantage.” Commanders can commit partial clips without creating extended vulnerability windows that plague traditional autoloaders.
Fastest Third Shell Reload: The last shell in the magazine reloads faster than the first two shells, creating an inverted reload priority compared to standard autoreloaders. This characteristic encourages aggressive use of the first two shells while knowing the third will return to combat readiness quickly.
Flexible Engagement Options: The reverse autoreloader enables both single-shot trading (functioning like a conventional gun) and burst damage delivery (deploying two or three shells when opportunities arise) without forcing commanders to commit to one playstyle.
490 HP Alpha Damage: Meaningful Impact
The Cerbero delivers respectable per-shot damage:
490 HP Per Shot: The alpha damage is competitive for Tier IX and matches many heavy tanks at this tier. Each shell carries meaningful impact, creating favorable trades and enabling efficient cleanup of wounded opponents.
Three-Shell Burst Potential: When deploying the full magazine, the Cerbero can deliver 1,470 HP of damage. This total burst damage is respectable and sufficient to eliminate many wounded enemies or severely punish opponents who remain exposed.
Heavy Tank Alpha Parity: The 490 HP damage matches or exceeds many Tier IX heavy tanks, enabling the Cerbero to trade favorably in direct confrontations. Opponents must respect each Cerbero shell as a meaningful HP threat.
Efficient Target Finishing: The 490 HP alpha is perfectly positioned to finish opponents who have taken moderate damage. Targets sitting at 500-900 HP can be eliminated with two well-placed Cerbero shots, enabling efficient cleanup work.
Psychological Pressure: The combination of respectable alpha and the ability to deploy it in rapid bursts creates psychological pressure. Opponents facing a Cerbero must constantly consider whether it will fire one shot and retreat or commit multiple shells.
Good Penetration Values: Confident Engagement
The Cerbero brings meaningful penetration characteristics:
260mm Standard APCR Penetration: The standard ammunition features APCR rounds with 260mm of penetration—competitive values for Tier IX that enable reliable engagement against most opponents without premium ammunition dependency.
320mm HEAT Premium Penetration: The premium HEAT round provides 320mm of penetration, sufficient for challenging heavily armored opponents and penetrating specific weak spots on super-heavy tanks. However, community reception suggests this value may be considered modest for a Tier IX tank destroyer.
127mm HE Penetration: The HE round offers 127mm of penetration, providing a viable option against lightly armored targets and enabling module damage/crew injuries when direct HP damage is difficult to achieve.
APCR Standard Characteristics: APCR standard ammunition travels at high velocity, reducing lead time on moving targets and maintaining penetration better over distance compared to standard AP rounds. This characteristic supports accurate fire at medium ranges.
Penetration Concerns: Community discussion has noted that “it takes a certain kind of optimism to call 320 HEAT good pen for a T9 tank destroyer,” suggesting the premium penetration may be viewed as insufficient compared to dedicated sniping tank destroyers.
Good Frontal Armor: Frontline Capability
The Cerbero brings meaningful protection for an assault tank destroyer:
Good Frontal Armor on Hull: The Cerbero is specifically described as having “good frontal armor on its hull,” enabling it to absorb shots when properly positioned and supporting the assault tank destroyer classification.
Frontline Operation Capability: The armor is sufficient to “stay on the frontline,” indicating the Cerbero is designed to operate at the forefront of advances rather than from second-line sniping positions.
Assault Tank Destroyer Classification: The explicit “assault tank destroyer” designation emphasizes this vehicle is built for close-to-medium range direct combat rather than long-range fire support.
Armor Limitations: While the frontal armor is good, the absence of terms like “excellent” or “exceptional” suggests the Cerbero’s protection is solid but not impenetrable. Proper angling and positioning remain essential.
Durability Philosophy: The combination of good frontal armor and the reverse autoreloader’s consistent firepower creates a vehicle designed to sustain frontline presence, trading shots confidently while maintaining damage output.
Limited-Rotation Turret: Tactical Flexibility with Constraints
The Cerbero features a turret with restricted traverse:
Limited-Rotation Turret: The turret does not rotate a full 360 degrees, instead offering limited traverse angles. This characteristic is common among Italian tank destroyers from Tier VII onward and creates specific tactical considerations.
Improved Over Turretless: While limited, the turret traverse is a significant improvement over completely turretless tank destroyers, enabling target tracking without constant hull repositioning within the turret’s arc.
Arc Management Requirement: Success requires maintaining hull positioning that keeps targets within the turret’s traverse limits. Enemies who flank beyond the turret arc force hull rotation or repositioning.
Positioning Discipline: The limited-rotation turret demands careful initial positioning. Commanders must anticipate likely enemy approach angles and position the hull to maximize the turret’s effective coverage.
Italian TD Tradition: The limited-rotation turret continues the design philosophy of the Italian tank destroyer line, balancing between turretless vehicles and fully turreted tank destroyers.
Adequate Mobility: Frontline Responsiveness
The Cerbero offers functional mobility for its role:
33 km/h Maximum Forward Speed: The top speed is modest but adequate for an assault tank destroyer. The Cerbero won’t reach positions as quickly as medium tanks but maintains reasonable responsiveness for frontline repositioning.
Adequate Mobility Classification: The explicit mention of “adequate mobility” suggests the Cerbero provides functional movement characteristics without exceptional speed or agility. The vehicle is competent but not particularly mobile.
Frontline Redeployment: The mobility is sufficient for relocating between frontline positions, responding to developing flanks, and extracting from unfavorable situations when necessary, though slower opponents may catch up.
Assault TD Appropriate: The mobility matches the assault tank destroyer role—fast enough to advance with team pushes and maintain frontline presence, but not so fast as to enable aggressive flanking or rapid map traversal.
Trade-Off Balance: The modest mobility is balanced against the good frontal armor and consistent firepower, creating a vehicle that advances deliberately rather than racing to forward positions.
The unique reload system creates distinctive gameplay patterns:
Last Shell Fastest Reload: With the third shell reloading faster than the first two, the Cerbero encourages using the initial shells aggressively while knowing combat readiness returns quickly.
Single-Shot Viability: The system enables effective single-shot trading without the extended reload penalties of traditional autoloaders. Fire one shell, retreat, and the magazine replenishes faster than opponents expect.
Burst When Needed: When opportunities arise—enemies crossing open ground, distracted opponents, or wounded targets—the Cerbero can deploy two or three shells rapidly without subsequent disadvantage.
No Clip Commitment Pressure: Unlike autoloaders that suffer extended reloads after partial clip usage, the reverse autoreloader removes the pressure to commit entire magazines, enabling more flexible engagement choices.
Consistent Threat Level: The fast third-shell reload ensures the Cerbero maintains consistent threat potential throughout battles rather than alternating between devastating and vulnerable states.
Methodical Frontline Pressure
The Cerbero’s design philosophy emphasizes steady frontline presence:
Assault Tank Destroyer Identity: The Cerbero is designed to operate at the frontline, using its good armor and consistent firepower to create pressure and punish opponents who challenge its position.
Armor-Supported Advances: The good frontal armor enables the Cerbero to advance with team pushes, absorbing shots while delivering 490 HP counters through its reverse autoreloader system.
Flexible Fire Delivery: The unique reload mechanics enable the Cerbero to adapt its fire pattern to situations—single shots when trading conservatively, two-shell bursts for medium opportunities, three-shell commitments for critical moments.
Limited-Arc Management: Success requires positioning that maximizes the turret’s limited traverse coverage while maintaining frontal armor toward primary threats. This discipline is essential for effective frontline operation.
Sustained Combat Presence: The reverse autoreloader’s design philosophy—consistent firepower regardless of circumstances—enables the Cerbero to maintain frontline engagement throughout extended battles.
Tactical Considerations
The Cerbero’s unique characteristics create specific tactical opportunities:
Shell Count Awareness: Constantly monitor which shell is loaded. The fast third-shell reload creates different tactical options compared to having only one or two shells available.
Burst Timing: Deploy two or three shells when enemies are committed to other engagements, crossing open ground, or presenting vulnerable angles. Single-shot trade when situations are ambiguous.
Hull Positioning: Position the hull to maximize turret traverse coverage over likely enemy approach angles. Anticipate where opponents will appear and pre-position accordingly.
Armor Angling: While the frontal armor is good, proper angling remains important. Don’t rely solely on raw thickness—use geometry to maximize effective protection.
Mobility Limitations: Accept that the 33 km/h top speed limits rapid redeployment. Choose initial positions carefully since correcting poor positioning takes time.
Playstyle Implications
The Cerbero rewards commanders who embrace adaptive frontline gameplay:
Frontline Commitment: The Cerbero thrives at the frontline where its good armor, consistent firepower, and reverse autoreloader mechanics create maximum advantage. Avoid passive second-line sniping.
Reload Mechanics Mastery: Understanding when to fire one shell versus committing two or three is the highest-skill expression of Cerbero gameplay. Master the reload system’s nuances.
Position-First Mentality: The limited-rotation turret and modest mobility demand careful initial positioning. Think several moves ahead—where will enemies approach, where should the hull face, what escape routes exist?
Flexible Aggression: The reverse autoreloader enables aggressive plays that would be risky for traditional autoloaders. Use this flexibility to capitalize on opportunities other vehicles must decline.
Commanders looking to master the Cerbero should consider:
Learning the exact reload timings for each shell position in the magazine
Practicing hull positioning to maximize turret traverse coverage over battle areas
Developing judgment for when single shots suffice versus when burst damage is justified
Using the good frontal armor to lead team advances and create space
Understanding that the third shell’s fast reload enables more aggressive first-shot usage
Accepting the 33 km/h mobility limitations and choosing positions that don’t require rapid relocation
Reserving HEAT ammunition for heavily armored targets given the modest 320mm penetration
Reading battlefield developments to position where the limited turret arc covers primary threats
Community Reception
Initial community reactions to the Cerbero reveal polarized perspectives:
“Reverse Autoreloader is Interesting”: Many players expressed curiosity about the reverse autoreloader mechanics, viewing the system as a creative alternative to standard Italian autoreloader designs.
Penetration Criticism: Community discussion immediately focused on the 320mm HEAT penetration, with comments noting “it takes a certain kind of optimism to call 320 HEAT good pen for a T9 tank destroyer.” Comparisons to the Controcarro’s premium ammunition suggest the Cerbero’s penetration is viewed as insufficient.
“Another Limited-Rotation Turret”: Some players expressed fatigue with Italian tank destroyers featuring limited turret traverse, questioning whether the mechanic creates more frustration than tactical depth.
Assault TD Classification Questions: Community members debated whether the Cerbero’s characteristics truly support effective assault tank destroyer gameplay or if the modest mobility and limited turret create frontline vulnerabilities.
Premium/Reward Speculation: With no tech tree placement mentioned and the existing Italian TD tech tree already established, speculation immediately turned to whether the Cerbero would be a premium vehicle, reward tank, or potential branch addition.
What Sets the Cerbero Apart
The Cerbero occupies a unique position in the Tier IX tank destroyer landscape:
Reverse Autoreloader Innovation: The Cerbero is the first tank destroyer to feature a reverse autoreloader where the last shell reloads fastest, creating gameplay patterns distinct from both traditional autoloaders and standard autoreloaders.
Three-Shell Consistency: Unlike the five-shell magazines of tech tree Italian tank destroyers, the three-shell system provides more consistent firepower delivery without extended vulnerability windows after clip depletion.
Assault TD with Modest Mobility: The combination of assault classification with only 33 km/h top speed creates a deliberate, position-focused playstyle rather than the aggressive rushes enabled by faster assault vehicles.
Flexible Firepower Philosophy: The reverse autoreloader’s design specifically enables “consistent firepower regardless of tactical circumstances,” distinguishing the Cerbero from autoloaders that force specific engagement patterns.
Good Armor Without Excellence: The Cerbero brings meaningful protection without the exceptional armor of super-heavies, creating a vehicle that can absorb some punishment but must still leverage positioning and tactics.
What’s Next?
As a Supertest vehicle, the Cerbero’s characteristics remain subject to adjustment. Key questions for testing include:
Will the 320mm HEAT penetration be increased to address community concerns about inadequate premium ammunition performance?
What are the exact reload timings for each shell position in the reverse autoreloader?
Does the good frontal armor provide sufficient survivability for effective assault tank destroyer gameplay?
How does the limited-rotation turret perform in dynamic frontline situations?
Will this be a premium vehicle, reward tank, or addition to the existing Italian TD branch?
Can the 33 km/h mobility enable the Cerbero to fulfill its assault tank destroyer role effectively?
Does the three-shell reverse autoreloader provide adequate burst damage compared to larger-magazine alternatives?
Final Thoughts
The Cerbero represents an ambitious attempt to evolve Italian tank destroyer design through innovative reload mechanics. By introducing a reverse autoreloader where the last shell reloads fastest, Wargaming has created a vehicle that addresses the consistency concerns of traditional autoloaders while maintaining the burst damage potential that defines the Italian tank destroyer philosophy.
For commanders who appreciate frontline combat, enjoy adaptive gameplay that alternates between single shots and burst damage, and value consistent firepower over devastating but inconsistent performance, the Cerbero offers intriguing potential. The reverse autoreloader mechanics create genuinely different tactical considerations compared to both standard guns and traditional autoloaders.
However, the Cerbero faces significant challenges. The 320mm HEAT penetration has drawn immediate criticism as insufficient for a Tier IX tank destroyer, potentially forcing excessive premium ammunition usage or limiting engagement options against heavily armored opponents. The modest 33 km/h mobility combined with the limited-rotation turret creates positional vulnerabilities that skilled opponents will exploit. If the initial positioning proves poor, correcting the mistake takes significant time.
The three-shell magazine provides less total burst damage than the five-shell systems of tech tree Italian tank destroyers, creating questions about whether the consistency advantages of the reverse autoreloader adequately compensate for reduced clip potential. In situations where maximum burst damage determines battle outcomes, the Cerbero may find itself at a disadvantage.
Whether you’re excited about innovative reverse autoreloader mechanics or skeptical about whether 320mm premium penetration and modest mobility can support effective Tier IX gameplay, the Cerbero undeniably offers something different. If Wargaming successfully balances the penetration values, reload timings, and armor profile, the Cerbero could become a favorite for players who enjoy position-focused frontline combat with flexible firepower delivery.
For those who have wanted an Italian tank destroyer that maintains consistent threat potential throughout battles rather than alternating between devastating clips and extended vulnerability windows, the Cerbero might be exactly what you’ve been waiting for.
Characteristics Are Not Final — all information sourced from World of Tanks Supertest announcements.
The World of Tanks Supertest has welcomed a formidable addition to the Soviet heavy tank lineup: the Object 265-II, a Tier IX assault heavy tank whose defining characteristic is its twin 122mm gun configuration. For players who appreciate Soviet armor philosophy and want something fundamentally different from the reverse autoloader Object 265T, the Object 265-II offers a compelling alternative built around devastating double-shot firepower, impenetrable frontal protection, and rear-turret side-scraping dominance.
Twin 122mm Guns: Double Devastation
The Object 265-II’s primary identity revolves around its unique dual-gun system:
Two Formidable 122mm Guns: The Object 265-II is equipped with twin 122mm cannons mounted side-by-side, each capable of firing independently or together in devastating salvo mode. This dual-weapon system is the vehicle’s defining characteristic and creates gameplay unlike any other Soviet heavy tank.
440 HP Per Gun: Each 122mm gun delivers 440 HP of damage per shot, matching the alpha of conventional Soviet 122mm weapons. When firing guns independently, the Object 265-II functions similarly to traditional Soviet heavies but with doubled firepower potential.
880 HP Salvo Mode: When both guns fire simultaneously in salvo mode, the Object 265-II delivers a crushing 880 HP of damage in a single devastating burst. This alpha damage is exceptional for Tier IX and rivals the firepower of Tier X super-heavy tanks.
3-Second Salvo Preparation: Activating salvo mode requires a 3-second preparation time before both guns can fire together. This mechanic demands anticipation and tactical planning—commanders must predict when the massive burst damage will be needed and prepare accordingly.
Massive Damage Potential: The twin-gun system enables the Object 265-II to deliver damage in ways unavailable to conventional heavy tanks. Fire guns independently for consistent DPM, or coordinate salvos for devastating burst damage when opportunities arise.
Excellent Hull and Turret Armor: Fortress-Level Protection
The Object 265-II brings exceptional armor protection:
Excellent Hull Armor: The hull armor is described as “excellent,” suggesting thick, well-angled protection that can withstand standard ammunition from Tier IX opponents and potentially resist even premium rounds when properly positioned.
Excellent Turret Armor: The turret protection is equally formidable, creating a vehicle that can confidently hold positions knowing that frontal engagements will likely result in bounces rather than penetrations.
Position-Holding Capability: The combination of excellent hull and turret armor enables the Object 265-II to “confidently hold positions,” anchoring defensive lines and resisting enemy pushes through sheer durability.
Assault Heavy Classification: The “assault heavy tank” designation indicates the Object 265-II is designed to advance under fire, using its exceptional armor to absorb shots while closing to positions where its twin guns can deliver devastating damage.
Frontal Confrontation Excellence: The armor profile suggests the Object 265-II excels in direct frontal engagements where opponents must challenge its strongest protection while risking 880 HP salvo responses.
Rear-Mounted Turret: Side-Scraping Dominance
The Object 265-II’s turret placement creates specific tactical advantages:
Rear-Mounted Turret Configuration: The turret is positioned toward the rear of the hull rather than centered, creating unique geometry that fundamentally changes how the vehicle uses cover and angles its armor.
Side-Scraping Convenience: The rear-mounted turret makes “side-scraping tactics more convenient” by enabling the Object 265-II to expose minimal hull surface while keeping the guns trained on enemies. This geometry creates exceptional corner-fighting capability.
Corner Control: When positioned at corners with the rear-turret geometry, the Object 265-II can fire around obstacles while exposing only the heavily-armored side and turret, protecting the hull from direct fire.
Urban Combat Excellence: On city maps and close-quarters environments where corner fighting dominates, the rear-turret configuration transforms the Object 265-II into a nearly unstoppable position-holder.
Geometric Advantage: The rear-turret placement enables firing angles and cover usage that center-turret or forward-turret vehicles cannot replicate, creating tactical options unique to this design philosophy.
Limited Mobility: Deliberate Positioning
The Object 265-II’s mobility characteristics demand careful initial positioning:
35 km/h Maximum Forward Speed: The top speed is notably limited for Tier IX, restricting the Object 265-II’s ability to rapidly relocate or respond to developing battlefield situations. This vehicle commits to positions more than most contemporaries.
12 km/h Reverse Speed: The reverse speed is poor even by Soviet heavy tank standards, making extraction from unfavorable positions extremely difficult. Once committed, the Object 265-II struggles to retreat safely.
Limited Mobility Classification: The explicitly mentioned “limited mobility” indicates this vehicle prioritizes armor and firepower over maneuverability. The Object 265-II advances deliberately rather than racing to positions.
Direction Commitment: The limited mobility means “it’s important to make the most of the direction you choose at the start of battle.” Initial positioning decisions carry enormous weight since correcting mistakes is time-consuming and dangerous.
Slow but Steady: The Object 265-II embodies the Soviet heavy tank philosophy of trading speed for protection and firepower. It arrives late to positions but holds them absolutely once established.
Poor Gun Performance: The Firepower Trade-Off
The devastating twin guns come with significant handling limitations:
Very Long Aim Time: The Object 265-II suffers from “very long” aim time, making snapshot accuracy poor and requiring extended exposure to achieve fully-aimed shots. This characteristic forces patient, deliberate gameplay.
Very Poor Dispersion: 0.42: The accuracy value of 0.42 is abysmal for Tier IX, creating significant frustration at medium-to-long ranges where shells frequently miss even when fully aimed. The Object 265-II must operate at close range to land shots reliably.
Close-Range Optimization: The combination of very long aim time and 0.42 dispersion forces the Object 265-II into close-quarters combat where the gun handling limitations are less punishing and the devastating 880 HP salvos are most reliable.
Patience Requirement: Poor gun performance demands extreme patience. Rushing shots wastes the devastating firepower potential, while waiting for full aim can expose the vehicle to unnecessary return fire.
Accuracy Frustration: The 0.42 dispersion creates frustrating moments where perfectly positioned shots miss due to bloom, particularly when engaging moving targets or firing at medium ranges.
5 Degrees Gun Depression: Terrain Limitations
The Object 265-II struggles with terrain exploitation:
Low Gun Depression: 5 Degrees: The limited -5° gun depression is poor even by Soviet standards and “makes terrain utilization difficult,” forcing the Object 265-II into flat-ground engagements where its armor can compensate.
Ridge-Line Inability: The limited depression prevents effective ridge-line fighting, denying the Object 265-II access to hull-down positions that would leverage its excellent turret armor while protecting the hull.
Flat-Ground Preference: The Object 265-II performs best on flat terrain and in urban environments where gun depression is less critical and the vehicle can leverage its exceptional armor and rear-turret side-scraping advantages.
Positioning Constraints: Hills, slopes, and uneven terrain create firing difficulties that force the Object 265-II into suboptimal positions or complete withdrawal from otherwise advantageous areas.
Soviet Heavy Tradition: The limited gun depression continues the traditional Soviet heavy tank design philosophy, prioritizing armor and firepower over terrain adaptability.
Salvo Fire Mode: Tactical Devastation
The twin-gun system’s salvo capability creates unique tactical opportunities:
3-Second Preparation Time: Activating salvo mode requires 3 seconds of preparation, during which both guns align for simultaneous fire. This preparation must occur before enemies present opportunities, requiring anticipation.
880 HP Burst Damage: The salvo delivers massive damage in a single moment—sufficient to destroy many wounded opponents outright or severely cripple full-health targets.
Psychological Impact: The threat of an 880 HP salvo creates enormous psychological pressure. Opponents facing the Object 265-II must constantly consider whether peeking will result in a devastating double-gun strike.
Mode Management: Commanders must decide when to fire guns independently for sustained DPM versus preparing salvos for maximum burst damage. This decision-making is central to effective Object 265-II gameplay.
Finishing Power: The 880 HP salvo is perfectly positioned to eliminate wounded enemies who might otherwise escape. Targets sitting at 900 HP or below can be deleted in a single coordinated strike.
Methodical Frontline Pressure
The Object 265-II’s design philosophy emphasizes deliberate, armor-supported advances:
Position-Holding Excellence: The combination of excellent armor and devastating firepower enables the Object 265-II to “confidently hold positions,” anchoring defensive lines and resisting enemy pushes.
Assault Heavy Identity: The Object 265-II is designed to advance under fire, using its exceptional protection to absorb shots while moving into positions where its twin guns create overwhelming local superiority.
Direction Commitment: Limited mobility forces careful initial planning. Choose a direction at battle start, commit to it, and dominate that area through superior armor and firepower rather than attempting flexible repositioning.
Corner Control: The rear-turret configuration excels at corner fighting and side-scraping. Position at critical corners and deny enemy access through devastating 880 HP salvos when they attempt to push.
Armor-Supported Gameplay: The excellent armor enables aggressive positioning that would be suicidal for less protected vehicles. Trust the armor, advance confidently, and punish enemies who challenge your position.
Tactical Considerations
The Object 265-II’s unique characteristics create specific tactical opportunities:
Salvo Preparation Timing: Anticipate when enemies will peek and prepare salvos before they appear. The 3-second preparation time demands prediction rather than reaction.
Corner Positioning: Leverage the rear-turret geometry by positioning at corners where side-scraping creates maximum advantage. The Object 265-II dominates corner fights.
Range Management: Accept the poor gun performance and operate at close range where accuracy matters less. The Object 265-II is a close-quarters brawler, not a sniper.
Initial Direction Selection: Choose your starting direction carefully based on map, team composition, and enemy lineup. The limited mobility makes changing your mind mid-battle nearly impossible.
Independent vs. Salvo Fire: Fire guns independently for sustained DPM against multiple targets or when salvo overkill is likely. Reserve salvos for critical moments or high-value targets.
Playstyle Implications
The Object 265-II rewards commanders who embrace patient, armor-supported brawling:
Patience Over Impulse: Poor gun handling punishes hasty shots. Wait for full aim despite the long aim time—landing devastating hits matters more than firing frequently.
Armor Trust: The excellent armor enables aggressive plays. Don’t hide—advance, absorb fire, and deliver crushing responses through the twin guns.
Terrain Acceptance: Accept the 5-degree depression limitation and avoid hills or slopes. Seek flat ground and urban areas where the Object 265-II’s strengths dominate.
Salvo Discipline: Don’t waste 880 HP salvos on low-HP targets or fully-armored opponents. Reserve massive burst damage for medium-HP enemies or critical position-breaking moments.
Commanders looking to master the Object 265-II should consider:
Planning initial direction based on map terrain—favor flat areas and avoid hilly maps
Practicing salvo preparation timing to have devastating firepower ready when enemies peek
Mastering rear-turret side-scraping geometry to dominate corner fights
Accepting poor gun handling and operating at close range where accuracy limitations matter less
Trusting the excellent armor to advance confidently under fire
Managing independent gun fire versus coordinated salvos based on battlefield situations
Committing to positions knowing retreat is difficult with 12 km/h reverse speed
Understanding that the 5-degree depression prevents effective ridge-line fighting
Community Reception
Initial community reactions to the Object 265-II reveal polarized perspectives:
“Better Than Object 265T”: Community comments immediately noted the Object 265-II “is literally just better original – obj 265T, just by having 440dmg instead of 390,” suggesting the twin-gun system with higher alpha is viewed favorably compared to the reverse autoloader variant.
Gun Handling Concerns: Vortex Gaming’s assessment that “its aim time is very long and dispersion is very poor at 0.42” combined with “its slow mobility and poor gun performance” leading to it being “challenging to play” generated discussions about whether the devastating firepower compensates for severe handling limitations.
Twin-Gun Interest: The dual 122mm configuration generated significant enthusiasm, with players viewing the twin-barrel system as creating genuinely unique gameplay compared to standard heavy tanks.
Mobility Criticism: The 35 km/h forward and 12 km/h reverse speeds drew immediate criticism, with concerns that the limited mobility combined with poor gun handling creates frustrating experiences where the vehicle struggles to reach effective positions.
“Flood of Tanks” Fatigue: Community comments noted frustration with “a flood of tanks being spammed” while core game issues remain unaddressed, viewing the Object 265-II as part of a broader pattern rather than a welcome addition.
What Sets the Object 265-II Apart
The Object 265-II occupies a unique position in the Tier IX heavy tank landscape:
Twin-Gun System: The dual 122mm configuration with independent fire and coordinated salvo modes creates gameplay fundamentally different from conventional single-gun heavy tanks.
880 HP Salvo Devastation: The ability to deliver 880 HP of damage in a single coordinated strike is nearly unmatched at Tier IX and rivals Tier X super-heavy firepower.
Rear-Turret Side-Scraping: The rear-mounted turret configuration creates side-scraping geometry unavailable to center-turret or forward-turret vehicles, enabling unique corner-fighting advantages.
Excellent All-Around Armor: The combination of excellent hull and turret armor creates a vehicle that confidently holds positions through sheer durability rather than mobility or gun depression.
Extreme Specialization: The Object 265-II represents extreme specialization—devastating in close-quarters corner fights on flat terrain, but severely handicapped on open maps or hilly terrain where its limitations dominate.
What’s Next?
As a Supertest vehicle, the Object 265-II’s characteristics remain subject to adjustment. Key questions for testing include:
Will the 0.42 dispersion be improved to reduce frustration, or is this the intended trade-off for 880 HP salvos?
Can the aim time be shortened to enable more responsive gameplay?
Does the 35 km/h mobility enable the Object 265-II to reach effective positions before battles develop?
Will the 5-degree gun depression be increased to improve terrain versatility?
How do the reload timings work for independent fire versus salvo mode?
Will this be a premium vehicle, reward tank, or alternative branch to the Object 265T?
Can the Object 265-II perform adequately on open or hilly maps where its limitations are most pronounced?
Final Thoughts
The Object 265-II represents one of the most specialized vehicles to enter World of Tanks Supertest. By combining twin 122mm guns capable of devastating 880 HP salvos with excellent armor and rear-turret side-scraping geometry, Wargaming has created a vehicle that absolutely dominates in its preferred element—close-quarters urban combat on flat terrain—while struggling significantly outside these conditions.
For commanders who appreciate position-holding gameplay, enjoy devastating burst damage, and can work within severe mobility and gun handling limitations, the Object 265-II offers unique appeal. The twin-gun system creates tactical decisions unavailable to conventional heavy tanks, and the 880 HP salvo potential provides finishing power that can change battle outcomes in single moments.
However, the Object 265-II demands enormous compromises. The 0.42 dispersion is genuinely terrible and creates frustrating missed shots even at close range. The very long aim time forces extended exposure to achieve fully-aimed accuracy. The 35 km/h forward and 12 km/h reverse speeds create positioning commitment that punishes mistakes severely. The 5-degree gun depression prevents effective terrain exploitation and forces the vehicle into flat-ground engagements where its advantages matter most.
The initial direction commitment requirement—choosing where to fight at battle start and being locked into that decision—creates high-pressure strategic choices where poor reads of battlefield development lead to ineffective battles. Maps with abundant hills, long sight lines, or open terrain will likely generate frustrating experiences where the Object 265-II’s limitations overwhelm its strengths.
Whether you’re excited about twin 122mm guns delivering 880 HP salvos or skeptical about whether excellent armor compensates for terrible gun handling and limited mobility, the Object 265-II undeniably offers something extreme. If Wargaming successfully balances the gun performance, mobility, and specialization trade-offs, the Object 265-II could become a cult favorite for players who enjoy dominating specific map types and tactical situations absolutely.
For those who have wanted a Soviet heavy tank with devastating burst damage and impenetrable armor, accepting severe limitations as the price, the Object 265-II might be exactly what you’ve been waiting for.
Characteristics Are Not Final — all information sourced from World of Tanks Supertest announcements.