But here’s the twist that sets Marathon apart from Tarkov clones or even The Cycle: you don’t play as a “character.” You possess a Runner Shell — a biologically printed synthetic body with fixed abilities, playstyle, and role.
Choosing the right Shell (and mastering it) is the single biggest factor between extracting with legendary gear or becoming a cautionary tale on the leaderboards. This expert guide breaks down everything you need to know five days into launch: what Shells actually are, the full roster with abilities, the current meta tier list, and pro-level tips that separate casual runners from top 1% operators.
What Exactly Is a Runner Shell?
In Marathon lore, you’re a disembodied “Runner” consciousness jumping between cloned bodies called Shells. These aren’t customizable operators like in other hero shooters — each Shell is a complete, pre-built chassis with:
One Prime Ability (ultimate-style cooldown)
One Tactical Ability
Two fixed Traits (passive perks)
Base stats that cannot be changed
You can swap Shells freely between raids at the hub (no progression lock), but once you drop into the Zone, you’re locked into that body until extraction or death. Implants (found or crafted) add extra stats and random perks on top, but the core identity of the Shell never changes.
This system rewards mastery over one or two Shells rather than jack-of-all-trades flexibility. The meta is already settling fast.
Complete Runner Shell Roster (Launch 2026)
Here’s every Shell available at launch, with roles, key abilities, and ideal playstyle based on day-one data and Server Slam testing.
1. Destroyer (Combat Specialist / Tank)
Role: Frontline brawler
Prime: Heavy ordnance barrage
Tactical: Power Slide (supercharged slide that builds heat for bonus damage)
Traits: High armor, impact resistance
Best for: Squads that want to push objectives aggressively. Pairs insanely well with a healer. Weak solo because it’s loud and slow.
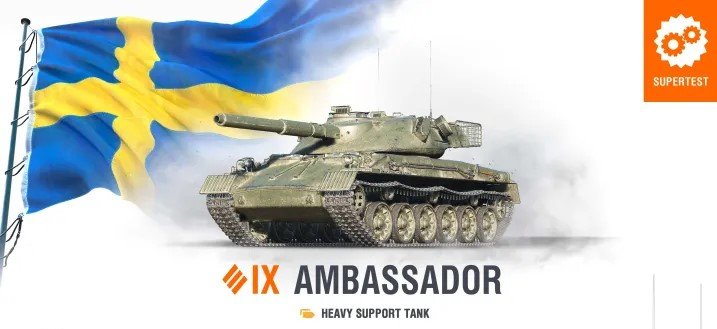
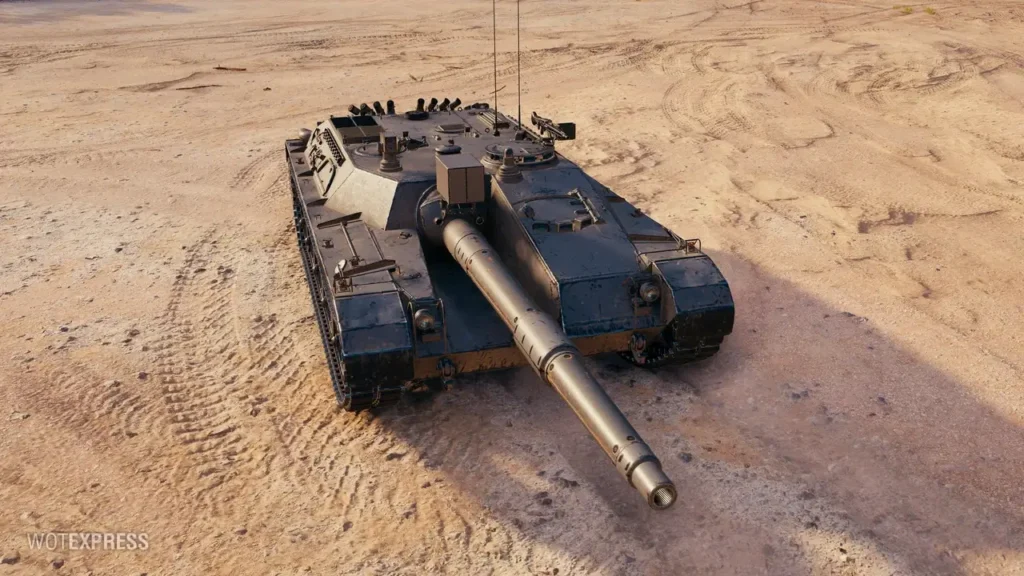
The World of Tanks Supertest has welcomed an intriguing addition to the Swedish heavy tank lineup: the Ambassador, a Tier IX support heavy tank whose defining characteristic is its balanced four-shell autoloader system paired with the legendary Swedish gun depression. For players who appreciate Swedish armor philosophy but want something fundamentally different from the siege mode mechanics of the UDES and Kranvagn lines, the Ambassador offers a compelling package built around rapid clip deployment, quick recovery, and relentless hull-down pressure.
Four-Shell Autoloader: Balanced Burst Damage
The Ambassador’s primary identity revolves around its autoloader system:
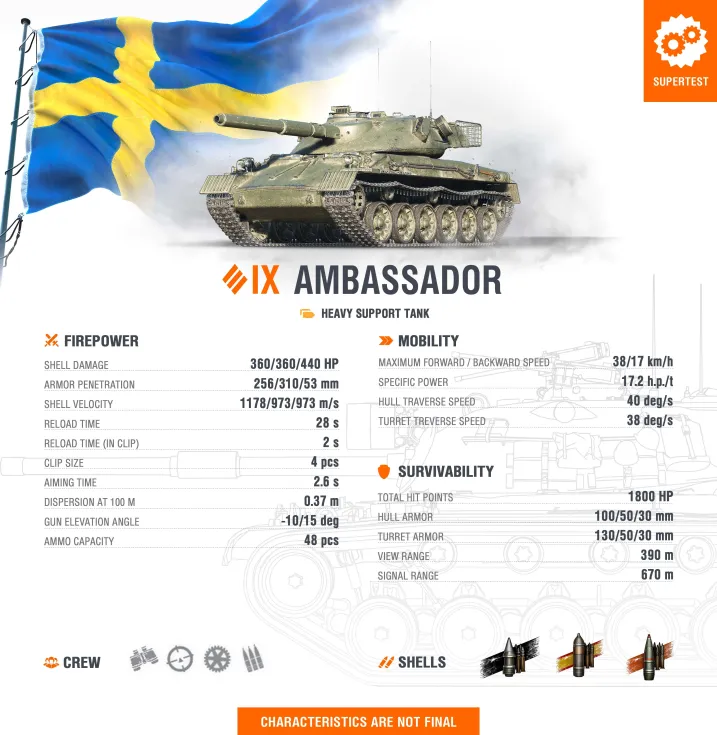
Four-Shell Clip Capacity: The 105mm gun is equipped with a four-round autoloader that enables rapid burst damage delivery. While not as devastating as larger-caliber autoloaders, the four-shell capacity provides meaningful alpha without excessive commitment.
360 HP Per Shot: Each shell delivers 360 HP of damage, creating a potential 1,440 HP burst when the full clip is deployed. This total clip damage is respectable for Tier IX and sufficient to eliminate many wounded opponents or severely punish exposed enemies.
2-Second Intra-Clip Reload: The rapid 2-second reload between shells within the clip enables fast damage delivery. The entire four-shell burst can be deployed in approximately 8 seconds, making the Ambassador deadly in short engagement windows.
28-Second Full Reload: Unlike autoloaders with punishing 40+ second reload times, the Ambassador’s 28-second full magazine reload is remarkably short. This characteristic enables the vehicle to maintain consistent pressure without extended periods of complete vulnerability.
Sustained Pressure Capability: The combination of rapid intra-clip reload and short full reload creates a heavy tank that can deliver burst damage, retreat briefly, and return to combat with a fresh clip faster than most autoloader contemporaries. This reload cycle supports the “support heavy” designation by enabling consistent contribution throughout engagements.
APCR Standard Ammunition: Premium Penetration by Default
The Ambassador brings exceptional standard shell performance:
256mm APCR Penetration: The standard ammunition is APCR with 256mm of penetration—values that would be premium rounds on many Tier IX vehicles. This penetration is sufficient to reliably engage the vast majority of targets without resorting to special ammunition.
310mm HEAT Premium Penetration: When facing heavily armored opponents or needing to penetrate specific weak spots, the 310mm HEAT premium round provides exceptional penetration capability. This value enables the Ambassador to challenge even super-heavy tanks in frontal engagements.
APCR Shell Velocity: APCR rounds travel at high velocities, reducing lead time on moving targets and making long-range engagements significantly easier. The shell velocity complements the support heavy role by enabling accurate fire at medium-to-long ranges where ridge-line positions excel.
Economic Standard Ammunition: The high penetration of the standard APCR round reduces reliance on expensive premium ammunition. Commanders can confidently use standard rounds in most situations, improving credit earnings and reducing per-battle operating costs.
Versatile Engagement Capability: The 256mm standard penetration opens viable frontline engagement options against targets that would force pure APCR-premium vehicles to load gold. The Ambassador can confidently participate in direct combat without constantly managing ammunition economics.
10-Degree Gun Depression: Ridge-Line Dominance
The Ambassador inherits Swedish heavy tank’s legendary terrain adaptation:
10-Degree Gun Depression: The exceptional -10° gun depression enables the Ambassador to leverage terrain features that are completely inaccessible to tanks with standard -5° to -6° depression. This capability is the cornerstone of the vehicle’s tactical identity.
Ridge-Line Fighting Excellence: The combination of 10° depression and a four-shell autoloader creates devastating ridge-line fighting capability. The Ambassador can crest hills, deploy its entire clip rapidly, and retreat to safety before opponents can respond effectively.
Minimal Exposure Requirement: Deep gun depression enables firing from positions where only the turret is visible, dramatically reducing the target profile and protecting the hull from return fire. This characteristic multiplies survivability in hull-down positions.
Versatile Terrain Exploitation: The Ambassador can fight effectively from slopes, hills, and uneven terrain that forces other heavy tanks into suboptimal flat-ground engagements. This versatility provides significant tactical advantages on maps with elevation changes.
Swedish Design Philosophy: The 10° gun depression continues the Swedish heavy tank tradition of compensating for armor limitations with superior positioning capabilities and terrain exploitation. The Ambassador thrives where geography creates firing opportunities.
Decent Mobility: Responsive Repositioning
The Ambassador offers solid mobility for a Tier IX heavy tank:
38 km/h Maximum Forward Speed: The top speed is competitive for a support heavy tank, enabling the Ambassador to keep pace with medium tank movements and respond to developing battlefield situations in a timely manner.
17.2 hp/t Specific Power: The power-to-weight ratio provides responsive acceleration and adequate cross-country mobility. The Ambassador won’t feel sluggish when moving between ridge-line positions or relocating to support different flanks.
Repositioning Flexibility: The decent mobility supports the support heavy role by enabling the Ambassador to respond to changing battlefield conditions. If one flank collapses or opportunities develop elsewhere, the vehicle can reposition to provide its four-shell burst damage where needed.
Tactical Mobility: While not matching the speed of mediums or light heavies, the Ambassador’s mobility is sufficient for opportunistic flanking maneuvers, reaching key ridge-line positions early in battles, and extracting from unfavorable situations when necessary.
Swedish Heavy Improvement: Compared to the siege-mode heavies like the Kranvagn that sacrifice mobility for armor transformation, the Ambassador maintains consistent mobility throughout the battle, supporting more dynamic and adaptive gameplay.
Support Heavy Tank Classification: Team-Oriented Design
The Ambassador’s design philosophy emphasizes team support over solo carrying:
Support Role Identity: The “support heavy tank” classification indicates the Ambassador is designed to complement teammates rather than anchor defensive positions alone. The four-shell autoloader excels at finishing damaged opponents and punishing enemies who expose themselves to engage teammates.
Burst Damage on Demand: The rapid clip deployment enables the Ambassador to deliver concentrated damage during brief windows when enemies are distracted or committed to engagements with teammates. This opportunistic damage contribution is the essence of support play.
Quick Reload Advantage: The 28-second full reload is short enough that the Ambassador rarely becomes a liability after expending its clip. Unlike autoloaders with 40+ second reloads that must hide for extended periods, the Ambassador can remain engaged and contribute within reasonable timeframes.
Ridge-Line Support: The exceptional gun depression enables the Ambassador to provide supporting fire from positions where traditional heavy tanks cannot operate effectively. This positional flexibility creates crossfire opportunities and denies terrain to opponents.
Sustained Contribution: The combination of short clip deployment time and relatively brief full reload creates a vehicle that maintains consistent damage output throughout battles rather than delivering one massive burst and disappearing for extended periods.
Penetration and Shell Performance
The Ambassador’s ammunition characteristics enable confident engagement:
256mm Standard APCR Performance: The standard penetration is sufficient to engage most Tier IX targets reliably and even penetrate many Tier X opponents in standard engagements. This capability reduces frustration and improves consistency.
310mm HEAT for Tough Targets: When facing super-heavy tanks or needing to penetrate specific heavily-armored positions, the 310mm HEAT premium ammunition provides reliable penetration without requiring perfect weak spot aiming.
APCR Shell Characteristics: APCR rounds maintain velocity better over distance compared to standard AP shells, improving accuracy at range and reducing the need for excessive lead on moving targets. This shell type complements the ridge-line fighting role.
Consistent Performance: The high standard penetration eliminates the frustrating experience of bouncing shots off targets that appear vulnerable, enabling commanders to focus on positioning and target selection rather than constant ammunition-type micromanagement.
Economic Efficiency: The ability to use standard ammunition against most targets improves credit earnings, making the Ambassador more sustainable for players without premium accounts or extensive credit reserves.
Methodical Frontline Pressure
The Ambassador’s design supports calculated, position-focused gameplay:
Ridge-Line Priority: Success with the Ambassador requires identifying and controlling key ridge-line positions where the 10° gun depression creates maximum advantage. These positions transform the vehicle from good to exceptional.
Clip Management Discipline: The four-shell clip requires intelligent deployment. Wasting the clip on low-value targets or firing at enemies about to take cover wastes the Ambassador’s burst potential and creates unnecessary vulnerability during reload.
Team Coordination: The support heavy classification performs best when coordinating with teammates. Communicating clip status, targeting wounded enemies teammates are engaging, and timing burst damage with team pushes maximizes impact.
Calculated Aggression: The 28-second reload is short enough to enable aggressive plays that would be suicide for traditional autoloaders. The Ambassador can commit clips more freely, knowing it will return to combat readiness relatively quickly.
Terrain-Dependent Performance: The Ambassador’s effectiveness varies dramatically based on terrain availability. On flat, open maps, the vehicle underperforms. On maps with abundant hills, ridges, and elevation changes, it becomes dominant.
Tactical Considerations
The Ambassador’s unique characteristics create specific tactical opportunities:
Early Ridge Control: Use the decent mobility to reach premium ridge-line positions early in battles. Controlling these positions before opponents arrive creates significant advantages that can last entire engagements.
Clip Timing: Deploy clips when opponents are committed to other engagements, crossing open ground, or repairing. These moments of vulnerability create opportunities for unpunished burst damage delivery.
Reload Position Safety: During the 28-second reload, retreat fully behind hard cover. Even with a relatively short reload, maintaining hull-down discipline during this window is essential to survivability.
Ammunition Selection: Use standard APCR against most targets to preserve credits and reserve HEAT for heavily armored opponents or critical situations where penetration must be guaranteed.
Position Rotation: Don’t become predictable. The decent mobility enables moving between multiple ridge-line positions, preventing enemies from pre-aiming your location or coordinating pushes against your position.
Playstyle Implications
The Ambassador rewards commanders who embrace hull-down discipline and team-oriented play:
Patience Over Impulse: The four-shell autoloader tempts impulsive clip deployment. Resist this temptation. Wait for high-value targets or moments when the full burst can be delivered safely before committing the clip.
Team Awareness: Monitor teammate positions and enemy focus constantly. The Ambassador excels when enemies are distracted—firing at teammates, crossing open ground, or committed to other engagements. Capitalize on these moments.
Terrain Reading: Develop map knowledge focused on ridge-line positions and hull-down opportunities. Understanding where the Ambassador excels versus where it struggles directly impacts battle performance.
Commanders looking to master the Ambassador should consider:
Learning premium ridge-line positions on each map where 10° depression creates overwhelming advantages
Timing clip deployment to coincide with enemy vulnerability windows
Maintaining strict hull-down discipline even during extended engagements
Using the 28-second reload window to safely retreat and assess battlefield developments
Coordinating with teammates to create crossfire opportunities from ridge positions
Reserving HEAT ammunition for heavily armored targets rather than using it routinely
Rotating between multiple ridge positions to remain unpredictable
Understanding when to conserve the clip versus when aggressive deployment is justified
Community Reception
Initial community reactions to the Ambassador reveal diverse perspectives:
“Finally, a Non-Siege Swedish Heavy”: Many players expressed enthusiasm about a Swedish heavy tank without siege mode mechanics, viewing the Ambassador as a more conventional and accessible alternative to the UDES/Kranvagn line.
“Four Shells Seems Underwhelming”: Community discussion immediately focused on whether four shells provides sufficient burst damage compared to autoloaders with larger clips. Some questioned whether 1,440 HP total damage justifies the autoloader reload mechanics.
Depression Appreciation: The 10° gun depression generated universal praise, with commanders recognizing this characteristic as potentially the Ambassador’s most valuable asset and the feature that could elevate it beyond simple “average autoloader” status.
“No Armor” Concerns: Comments noted the absence of any mention of armor protection, leading to speculation that the Ambassador relies entirely on gun depression and mobility for survivability, potentially creating frustration in bottom-tier matchmaking.
Premium/Reward Speculation: With no tech tree placement mentioned, community speculation immediately turned to whether the Ambassador would be a premium vehicle, battle pass reward, or potential addition to an alternative Swedish heavy branch.
What Sets the Ambassador Apart
The Ambassador occupies a unique position in the Tier IX heavy tank landscape:
Swedish Depression Without Siege Mode: The Ambassador is the first Swedish heavy tank since Tier VII to offer exceptional gun depression without requiring siege mode activation, creating more fluid and responsive gameplay compared to the Kranvagn line.
Balanced Autoloader Philosophy: The four-shell clip with 28-second reload represents a middle ground between devastating but slow autoloaders and rapid-fire but low-alpha conventional guns, creating consistent burst damage without excessive vulnerability.
APCR Standard Ammunition: The 256mm APCR standard penetration is exceptional for Tier IX and reduces the economic pressure that plagues vehicles dependent on premium ammunition for reliable performance.
Support Heavy with Mobility: Unlike static support platforms, the Ambassador combines its support heavy classification with decent mobility, enabling responsive repositioning and adaptive gameplay rather than position commitment.
Ridge-Line Autoloader: The combination of 10° gun depression and rapid four-shell burst creates a vehicle that can exploit terrain in ways that differentiate it from both traditional autoloaders and conventional hull-down heavies.
What’s Next?
As a Supertest vehicle, the Ambassador’s characteristics remain subject to adjustment. Key questions for testing include:
Is four shells sufficient burst damage, or should the clip be expanded to five or six shells?
Does the 28-second reload appropriately balance the 1,440 HP clip potential?
Will the Ambassador have meaningful armor, or does it rely entirely on gun depression for survivability?
Is 256mm standard APCR penetration balanced at Tier IX, or does it create economic imbalance compared to AP-standard vehicles?
Can the Ambassador perform adequately on flat maps where gun depression provides minimal advantage?
Will this be a tech tree vehicle, premium, or reward tank?
How will the Ambassador coexist with the Kranvagn and UDES 15/16 in the Swedish heavy lineup?
Final Thoughts
The Ambassador represents a thoughtful evolution of Swedish heavy tank design. By combining the nation’s legendary gun depression with a balanced autoloader system and exceptional standard ammunition penetration, Wargaming has created a vehicle that addresses many frustrations players experience with siege-mode mechanics while maintaining the hull-down excellence that defines Swedish armored warfare philosophy.
For commanders who appreciate ridge-line fighting, enjoy autoloader burst damage, and value consistent performance over extreme specialization, the Ambassador offers an appealing package. The 10° gun depression creates positioning opportunities unavailable to conventional heavy tanks, while the four-shell autoloader with 28-second reload enables sustained pressure without the extended vulnerability windows that plague traditional autoloaders.
However, the Ambassador will not suit every playstyle. Players who prefer heavily armored brawling, value massive single-clip alpha over consistent burst damage, or primarily play flat, open maps where gun depression provides minimal advantage will find the Ambassador’s design frustrating. The apparent lack of armor protection suggests the vehicle relies heavily on terrain exploitation and positioning discipline—traits that reward skilled play but punish mistakes severely.
The APCR standard ammunition is both a blessing and a potential controversy. The 256mm penetration enables confident engagements without constant premium ammunition expense, but may generate balance discussions about whether providing premium-level penetration as standard creates unfair advantages compared to vehicles with conventional AP standard rounds.
Whether you’re excited about a Swedish heavy tank without siege mode constraints or skeptical about whether four shells provides sufficient burst damage, the Ambassador undeniably offers something different at Tier IX. If Wargaming can successfully balance the clip size, reload time, and armor profile, the Ambassador could become a favorite for players who enjoy calculated, position-focused gameplay with responsive burst damage delivery.
For those who love Swedish gun depression but find siege mode mechanics restrictive or frustrating, the Ambassador might be exactly what you’ve been waiting for.
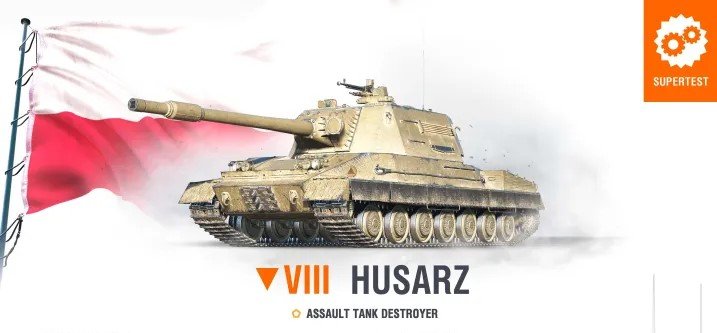
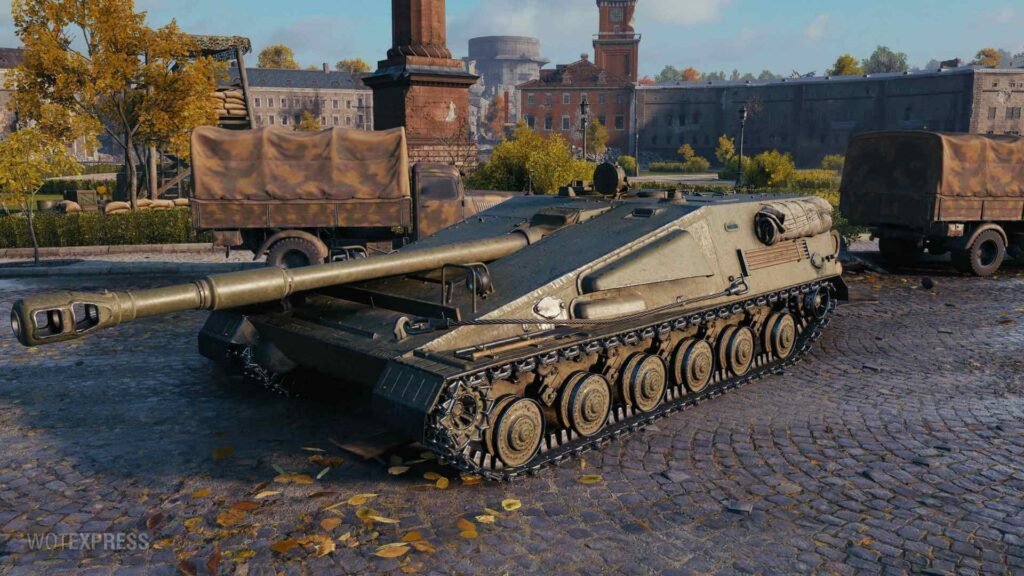
The World of Tanks Supertest has welcomed an intriguing addition to the Polish tank destroyer lineup: the Husarz, a Tier VIII assault tank destroyer whose defining feature is the combination of Poland’s signature deep-rifled gun technology with a fully rotating turret. For players who appreciate the unique damage-at-distance mechanics of Polish TDs but have been frustrated by the turretless limitations of the tech tree vehicles, the Husarz offers a compelling alternative that maintains the close-combat philosophy while adding tactical flexibility.
Deep-Rifled Gun: Distance-Based Devastation
The Husarz inherits the distinctive weapon system that defines high-tier Polish tank destroyers:
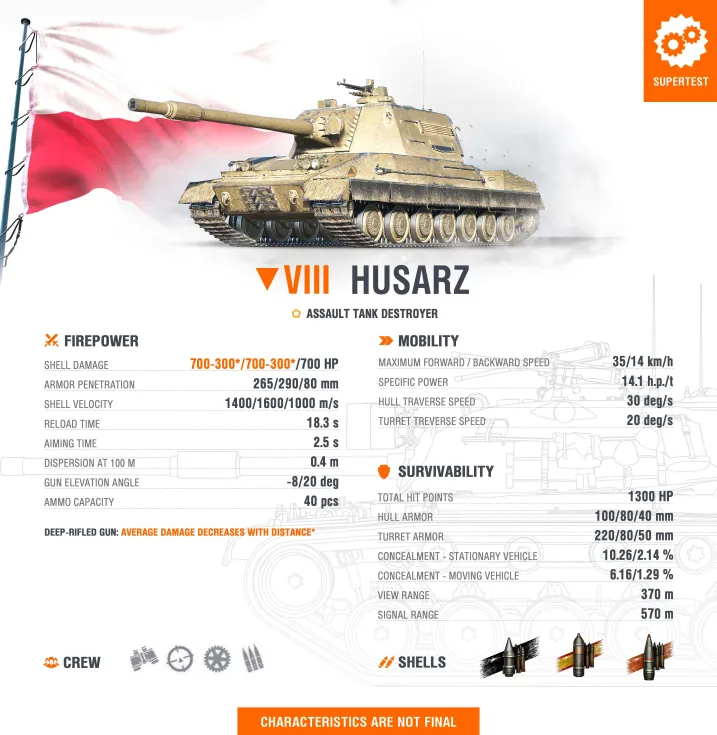
Deep-Rifled Gun Technology: The Husarz is equipped with a deep-rifled gun that fires star tray shells at exceptional velocities. These shells are specifically designed to deliver maximum damage at close range, creating a tank destroyer that rewards aggressive positioning rather than long-range sniping.
700 HP Alpha Damage at Optimal Range: At distances of 50 meters or less, the Husarz delivers a crushing 700 HP per shot. This alpha damage is exceptional for Tier VIII and creates devastating trading scenarios when the vehicle can close to its preferred engagement range.
Distance-Based Damage Degradation: The star tray shells lose kinetic energy as they travel, resulting in gradually decreasing damage with distance. While the exact damage curve is not yet finalized, the mechanic encourages commanders to seek close-range engagements where the Husarz’s firepower is most potent.
Exceptional Shell Velocity: Following the pattern of other Polish tank destroyers at Tier VIII and above, the deep-rifled gun fires shells at incredibly high velocities. This characteristic reduces lead time on moving targets and makes landing shots at medium range significantly easier despite the damage falloff.
Close-Combat Philosophy: The deep-rifled gun mechanics create a tank destroyer that fundamentally operates differently from traditional sniping platforms. The Husarz wants to be in the thick of the battle, using its 700 HP punches at ranges where other tank destroyers would feel vulnerable.
Fully Rotating Turret: The Game Changer
The Husarz’s most significant departure from the tech tree Polish TDs is its turret:
Full 360-Degree Rotation: Unlike the turretless SDP 58 Caliber and SDP 60 Gonkiewicz that preceded it in the Polish TD line, the Husarz features a fully rotating turret. This single characteristic transforms the vehicle’s tactical capabilities and playstyle possibilities.
Simplified Target Tracking: The fully rotating turret makes tracking moving targets dramatically easier. Commanders no longer need to constantly reposition the entire hull to keep enemies in the firing arc, enabling more responsive engagements and better sustained fire.
Reduced Exposure Time: With a turret, the Husarz can fire from positions where only the turret is exposed, protecting the hull and reducing the vehicle’s profile. This capability enables ridge-fighting and hull-down tactics that are impossible for turretless vehicles.
Flexible Positioning Options: The turret enables the Husarz to engage threats from multiple directions without extensive hull repositioning. This flexibility is invaluable in close-quarters urban combat and when defending positions against attacks from multiple angles.
Trading Efficiency: The ability to quickly aim and fire without hull alignment significantly improves trading efficiency. The Husarz can peek, fire its 700 HP shot, and retreat to cover faster than turretless counterparts, minimizing exposure to return fire.
Decent Armor Protection: Withstanding the Frontline
The Husarz brings meaningful armor to support its close-combat role:
Protection Against Tier VIII and Below: The armor is specifically designed to withstand standard shells from Tier VIII vehicles and lower tiers. This protection level enables the Husarz to confidently engage same-tier and lower opponents without immediately succumbing to return fire.
Assault Tank Destroyer Classification: The “assault” designation indicates the Husarz is expected to operate at the frontline rather than from second-line sniping positions. The armor supports this aggressive role by providing survivability in direct confrontations.
Frontal Protection Priority: While specific armor values have not been released, the protection is likely concentrated in the frontal arc to support head-on engagements. Commanders should avoid exposing side and rear armor unnecessarily.
Tier IX-X Vulnerability: Against top-tier opponents, the armor will be penetrable by most standard rounds. The Husarz must rely on tactical positioning, cover usage, and the fully rotating turret to maximize survivability in bottom-tier battles.
Balance Trade-Off: The decent armor protection is balanced against the vehicle’s limited mobility, creating a tank destroyer that can absorb some punishment but cannot rely on speed to escape unfavorable situations.
Limited Mobility: Methodical Advancement
The Husarz’s mobility characteristics support deliberate, calculated gameplay:
35 km/h Maximum Forward Speed: The top speed is notably limited for a Tier VIII vehicle, restricting the Husarz’s ability to rapidly relocate or respond to developing battlefield situations. This vehicle is committed to its chosen position more than most contemporaries.
14 km/h Reverse Speed: The reverse speed is functional but not exceptional, providing adequate capability to retreat from danger but not the rapid disengagement potential of faster vehicles. Commanders must plan escape routes in advance.
Methodical Positioning: The limited mobility reinforces the Husarz’s identity as an assault tank destroyer that advances deliberately rather than racing to forward positions. Each movement decision carries weight since repositioning is time-consuming.
Map Awareness Requirement: The mobility limitations demand superior map reading and positioning anticipation. The Husarz cannot afford to commit to positions that become untenable, as extracting from mistakes is difficult.
Close-Range Optimization: The limited speed paradoxically supports the deep-rifled gun’s close-range philosophy. The Husarz is designed to reach an advantageous position, establish itself, and dominate that space rather than constantly roaming.
18.3 Second Reload: Punishing Mistakes
The Husarz’s reload time creates distinct engagement rhythms:
18.3 Second Base Reload: The reload time is substantial but appropriate for the 700 HP alpha damage at optimal range. This reload creates clear windows of vulnerability that opponents can exploit if the Husarz misses or fires at a target that quickly retreats.
Lower DPM Than Tech Tree: The Husarz explicitly trades sustained damage output for the tactical flexibility of the rotating turret. The DPM will not match the turretless tech tree Polish tank destroyers, emphasizing quality of shots over quantity.
Shot Discipline Requirement: With an 18.3 second reload, every shot must count. Wasting shells on low-percentage shots or targets beyond the deep-rifled gun’s optimal range significantly reduces the Husarz’s effectiveness.
Trading Opportunities: The 700 HP alpha combined with decent armor creates favorable trading scenarios even with the lengthy reload. A single Husarz shot trades nearly equal HP with two shots from many Tier VIII mediums.
Vulnerability Windows: After firing, the Husarz enters a lengthy vulnerable period. Intelligent opponents will push aggressively during this reload window, requiring the Husarz to have strong positional support or escape routes prepared.
Methodical Frontline Pressure
The Husarz’s design philosophy emphasizes calculated aggression:
Assault Tank Destroyer Identity: The Husarz is designed to operate at the frontline, using its armor and devastating alpha to create space and punish opponents who challenge its position. This is not a second-line sniper but a direct combat vehicle.
Close-Range Dominance: At distances under 50 meters, the Husarz’s 700 HP alpha damage is nearly unmatched at Tier VIII. Enemies who enter this range face the prospect of losing massive HP chunks with each engagement.
Controlled Advances: The limited mobility encourages steady, deliberate advances rather than aggressive rushes. The Husarz excels when supporting team pushes, using its armor and alpha to break enemy resistance.
Turret Exploitation: The fully rotating turret enables the Husarz to control larger areas than turretless TDs. Positioning at corners or choke points allows the vehicle to threaten multiple approach angles without hull repositioning.
Zone Control: Once established in a strong position, the Husarz’s combination of armor, alpha damage, and turret creates an area of denial that opponents must respect or suffer catastrophic HP loss.
Tactical Considerations
The Husarz’s unique characteristics create specific tactical opportunities:
Optimal Range Awareness: Success requires constant awareness of engagement distances. The Husarz performs best under 50 meters where the deep-rifled gun delivers maximum damage, with effectiveness declining as range increases.
Turret Positioning: Leverage the fully rotating turret by taking positions where only the turret is exposed. Ridge lines and corners become premium locations for the Husarz to deliver damage while minimizing return fire.
Engagement Selection: Choose targets carefully. The 18.3 second reload means missed shots or poorly chosen targets represent significant lost damage potential. Prioritize immobilized, distracted, or guaranteed-hit targets.
Team Coordination: The Husarz thrives when operating with teammates who can draw enemy fire, create crossfire opportunities, or finish wounded opponents during the Husarz’s reload cycle.
Urban Combat Preference: City maps and close-quarters areas favor the Husarz’s strengths. The limited mobility is less punishing in tight spaces, and the close engagement ranges maximize the deep-rifled gun’s damage.
Playstyle Implications
The Husarz rewards commanders who embrace calculated, position-focused gameplay:
Patience Over Aggression: While classified as an assault TD, the Husarz requires patience. Rushing forward recklessly wastes the armor against superior firepower and places the vehicle beyond viable retreat range given the limited mobility.
Distance Management: Constantly evaluate engagement distances. If enemies are consistently beyond 50 meters, either advance closer or consider relocating to an area where close-range combat is more likely.
Cover Discipline: Use hard cover aggressively. The 18.3 second reload creates extended vulnerability windows that must be spent behind protection, not exposed to enemy fire.
Hull Angle Awareness: Despite having a turret, hull positioning still matters. The armor works best when properly angled, and exposing flat surfaces to enemy fire wastes the protection the vehicle provides.
Commanders looking to master the Husarz should consider:
Prioritizing positions that facilitate close-range engagements under 50 meters
Using the rotating turret to minimize hull exposure and maximize protection
Selecting targets who will remain exposed long enough to justify the 18.3 second reload investment
Advancing with team pushes rather than attempting solo carries
Learning maps to identify positions where the limited mobility is least punishing
Timing shots to maximize damage at optimal range rather than firing at any available target
Coordinating with teammates to exploit the Husarz’s reload vulnerability windows
Community Reception
Initial community reactions to the Husarz reveal polarized perspectives:
“Finally, a Polish TD with a Turret”: Many players expressed enthusiasm about the fully rotating turret, viewing it as a significant quality-of-life improvement over the turretless tech tree vehicles while maintaining the unique deep-rifled gun mechanics.
DPM Concerns: Community discussion immediately focused on the explicitly mentioned lower DPM compared to tech tree counterparts. Some players questioned whether the turret flexibility adequately compensates for reduced sustained damage output.
Mobility Skepticism: The limited 35 km/h top speed generated concerns about whether the Husarz can consistently reach favorable positions before battles develop, particularly on large open maps where mobility is crucial.
“No Armor, No Speed, Just Alpha”: A vocal segment dismissed the Husarz as having inadequate protection for bottom-tier matchmaking, insufficient mobility for tactical flexibility, and relying too heavily on the 700 HP alpha to carry its weight.
Premium Speculation: With no tech tree placement mentioned, community speculation immediately turned to whether the Husarz would be a premium vehicle, reward tank, or potential addition to an alternative Polish TD branch.
What Sets the Husarz Apart
The Husarz occupies a unique position in the Tier VIII tank destroyer landscape:
First Turreted Polish TD: The Husarz is the first Polish tank destroyer to feature a fully rotating turret, breaking the turretless tradition of the tech tree line while maintaining the signature deep-rifled gun mechanics.
Distance-Based Damage with Turret Flexibility: The combination of star tray shell damage degradation with a rotating turret creates gameplay that rewards close positioning while providing the tactical adaptability that turretless vehicles lack.
Assault Classification with Traditional Limitations: Unlike highly mobile assault TDs, the Husarz embraces limited mobility and relies on armor and positioning to fulfill its frontline role, creating a more methodical interpretation of the assault tank destroyer concept.
700 HP Close-Range Devastation: The maximum alpha damage at optimal range is exceptional for Tier VIII, creating a vehicle that absolutely punishes enemies who enter its preferred engagement envelope.
Unique Positioning Requirements: The deep-rifled gun’s range-dependent damage creates positioning considerations unlike any other tank destroyer, requiring constant evaluation of whether current engagement distance maximizes effectiveness.
What’s Next?
As a Supertest vehicle, the Husarz’s characteristics remain subject to adjustment. Key questions for testing include:
Is 700 HP alpha damage at close range balanced with the 18.3 second reload and limited DPM?
Does the damage degradation curve appropriately balance close-range devastation with long-range viability?
Is the armor sufficient to support the assault tank destroyer role, or will bottom-tier matchmaking be punishing?
Can the limited 35 km/h mobility enable the Husarz to reach favorable positions consistently across different map types?
Will this be a premium vehicle, reward tank, or tech tree addition?
How will the fully rotating turret impact balance compared to turretless tech tree Polish TDs?
Does the Husarz’s playstyle create a compelling alternative to existing Tier VIII tank destroyers?
Final Thoughts
The Husarz represents an ambitious attempt to evolve the Polish tank destroyer formula. By combining the distinctive deep-rifled gun mechanics with a fully rotating turret, Wargaming has created a vehicle that addresses one of the main frustrations of turretless tank destroyers while maintaining the unique close-combat identity that defines the Polish TD line.
For commanders who appreciate high-alpha gameplay, enjoy close-quarters combat, and value the tactical flexibility of a rotating turret, the Husarz offers an intriguing package. The 700 HP alpha damage at optimal range creates devastating engagement potential, and the turret eliminates the constant hull repositioning that makes turretless TDs frustrating in dynamic situations.
However, the Husarz demands significant compromises. The limited mobility restricts tactical options and makes poor positioning decisions difficult to correct. The explicitly lower DPM compared to tech tree vehicles means the Husarz cannot sustain fire in extended engagements. The armor, while decent against same-tier opponents, will struggle in bottom-tier matchmaking where Tier IX and X opponents can penetrate easily.
The distance-based damage mechanics create a unique skill ceiling. Commanders must constantly evaluate engagement ranges, understanding that a 700 HP shot at 50 meters degrades to significantly less damage at longer distances. This mechanic rewards positioning discipline and punishes passive, long-range gameplay in ways that traditional tank destroyers do not.
Whether you’re excited about Poland’s first turreted tank destroyer or concerned that the limited mobility and lower DPM will create a frustrating experience, the Husarz undeniably offers something different at Tier VIII. If Wargaming can successfully balance the damage curve, armor profile, and mobility constraints, the Husarz could become a favorite for players who enjoy methodical, position-focused gameplay with devastating close-range punch.
For those who have struggled with the turretless limitations of the Polish tech tree but love the deep-rifled gun philosophy, the Husarz might be exactly what you’ve been waiting for.
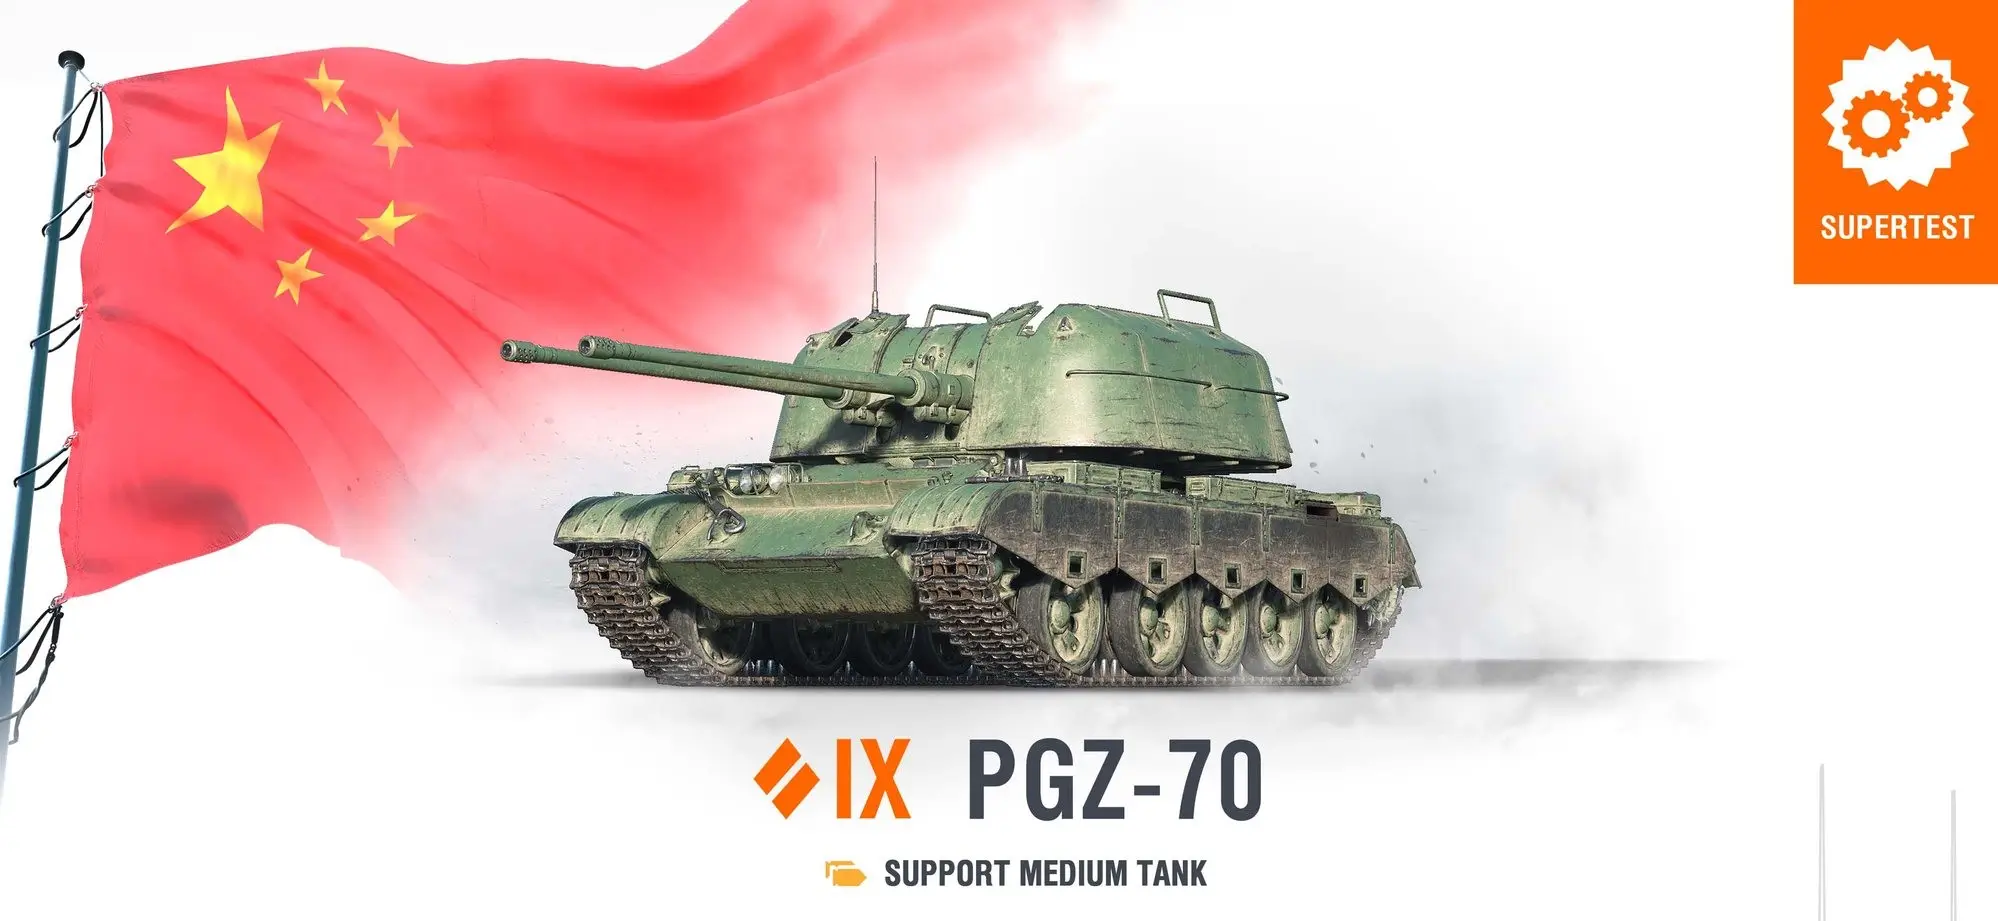
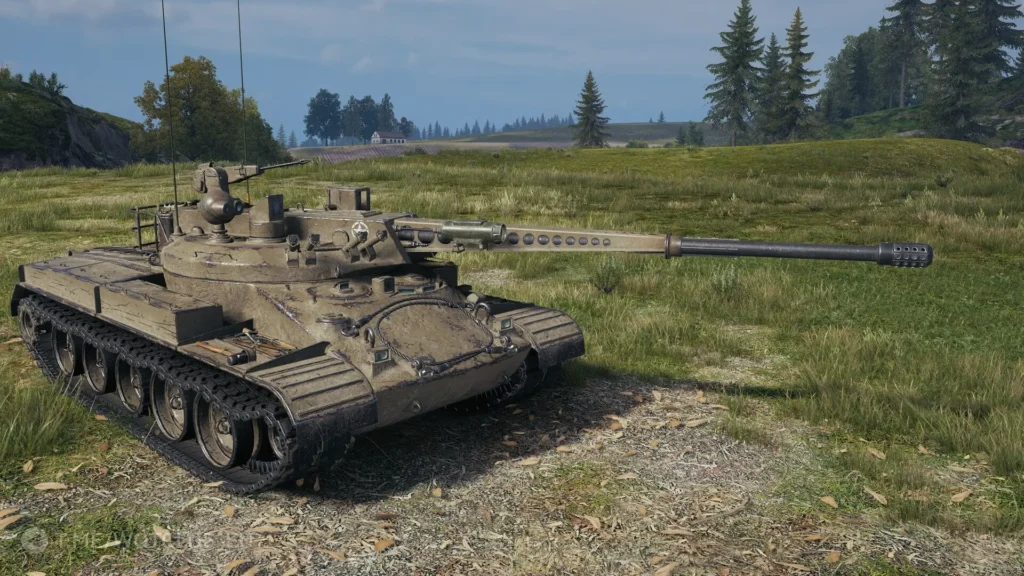
The World of Tanks Supertest has welcomed a highly unusual addition to the Chinese medium tank lineup: the PGZ-70, a Tier IX support medium tank whose defining feature is its extraordinary clip-based autocannon system. For players who appreciate the Chinese tech tree’s philosophy of borrowing the best ideas from Soviet design and pushing them to creative extremes, the PGZ-70 offers something genuinely unlike any other vehicle at its tier — a continuous-fire support weapon wrapped in the chassis of a medium tank.
40-Round Clip: The Heart of the PGZ-70
The PGZ-70’s entire identity is built around its enormous clip:
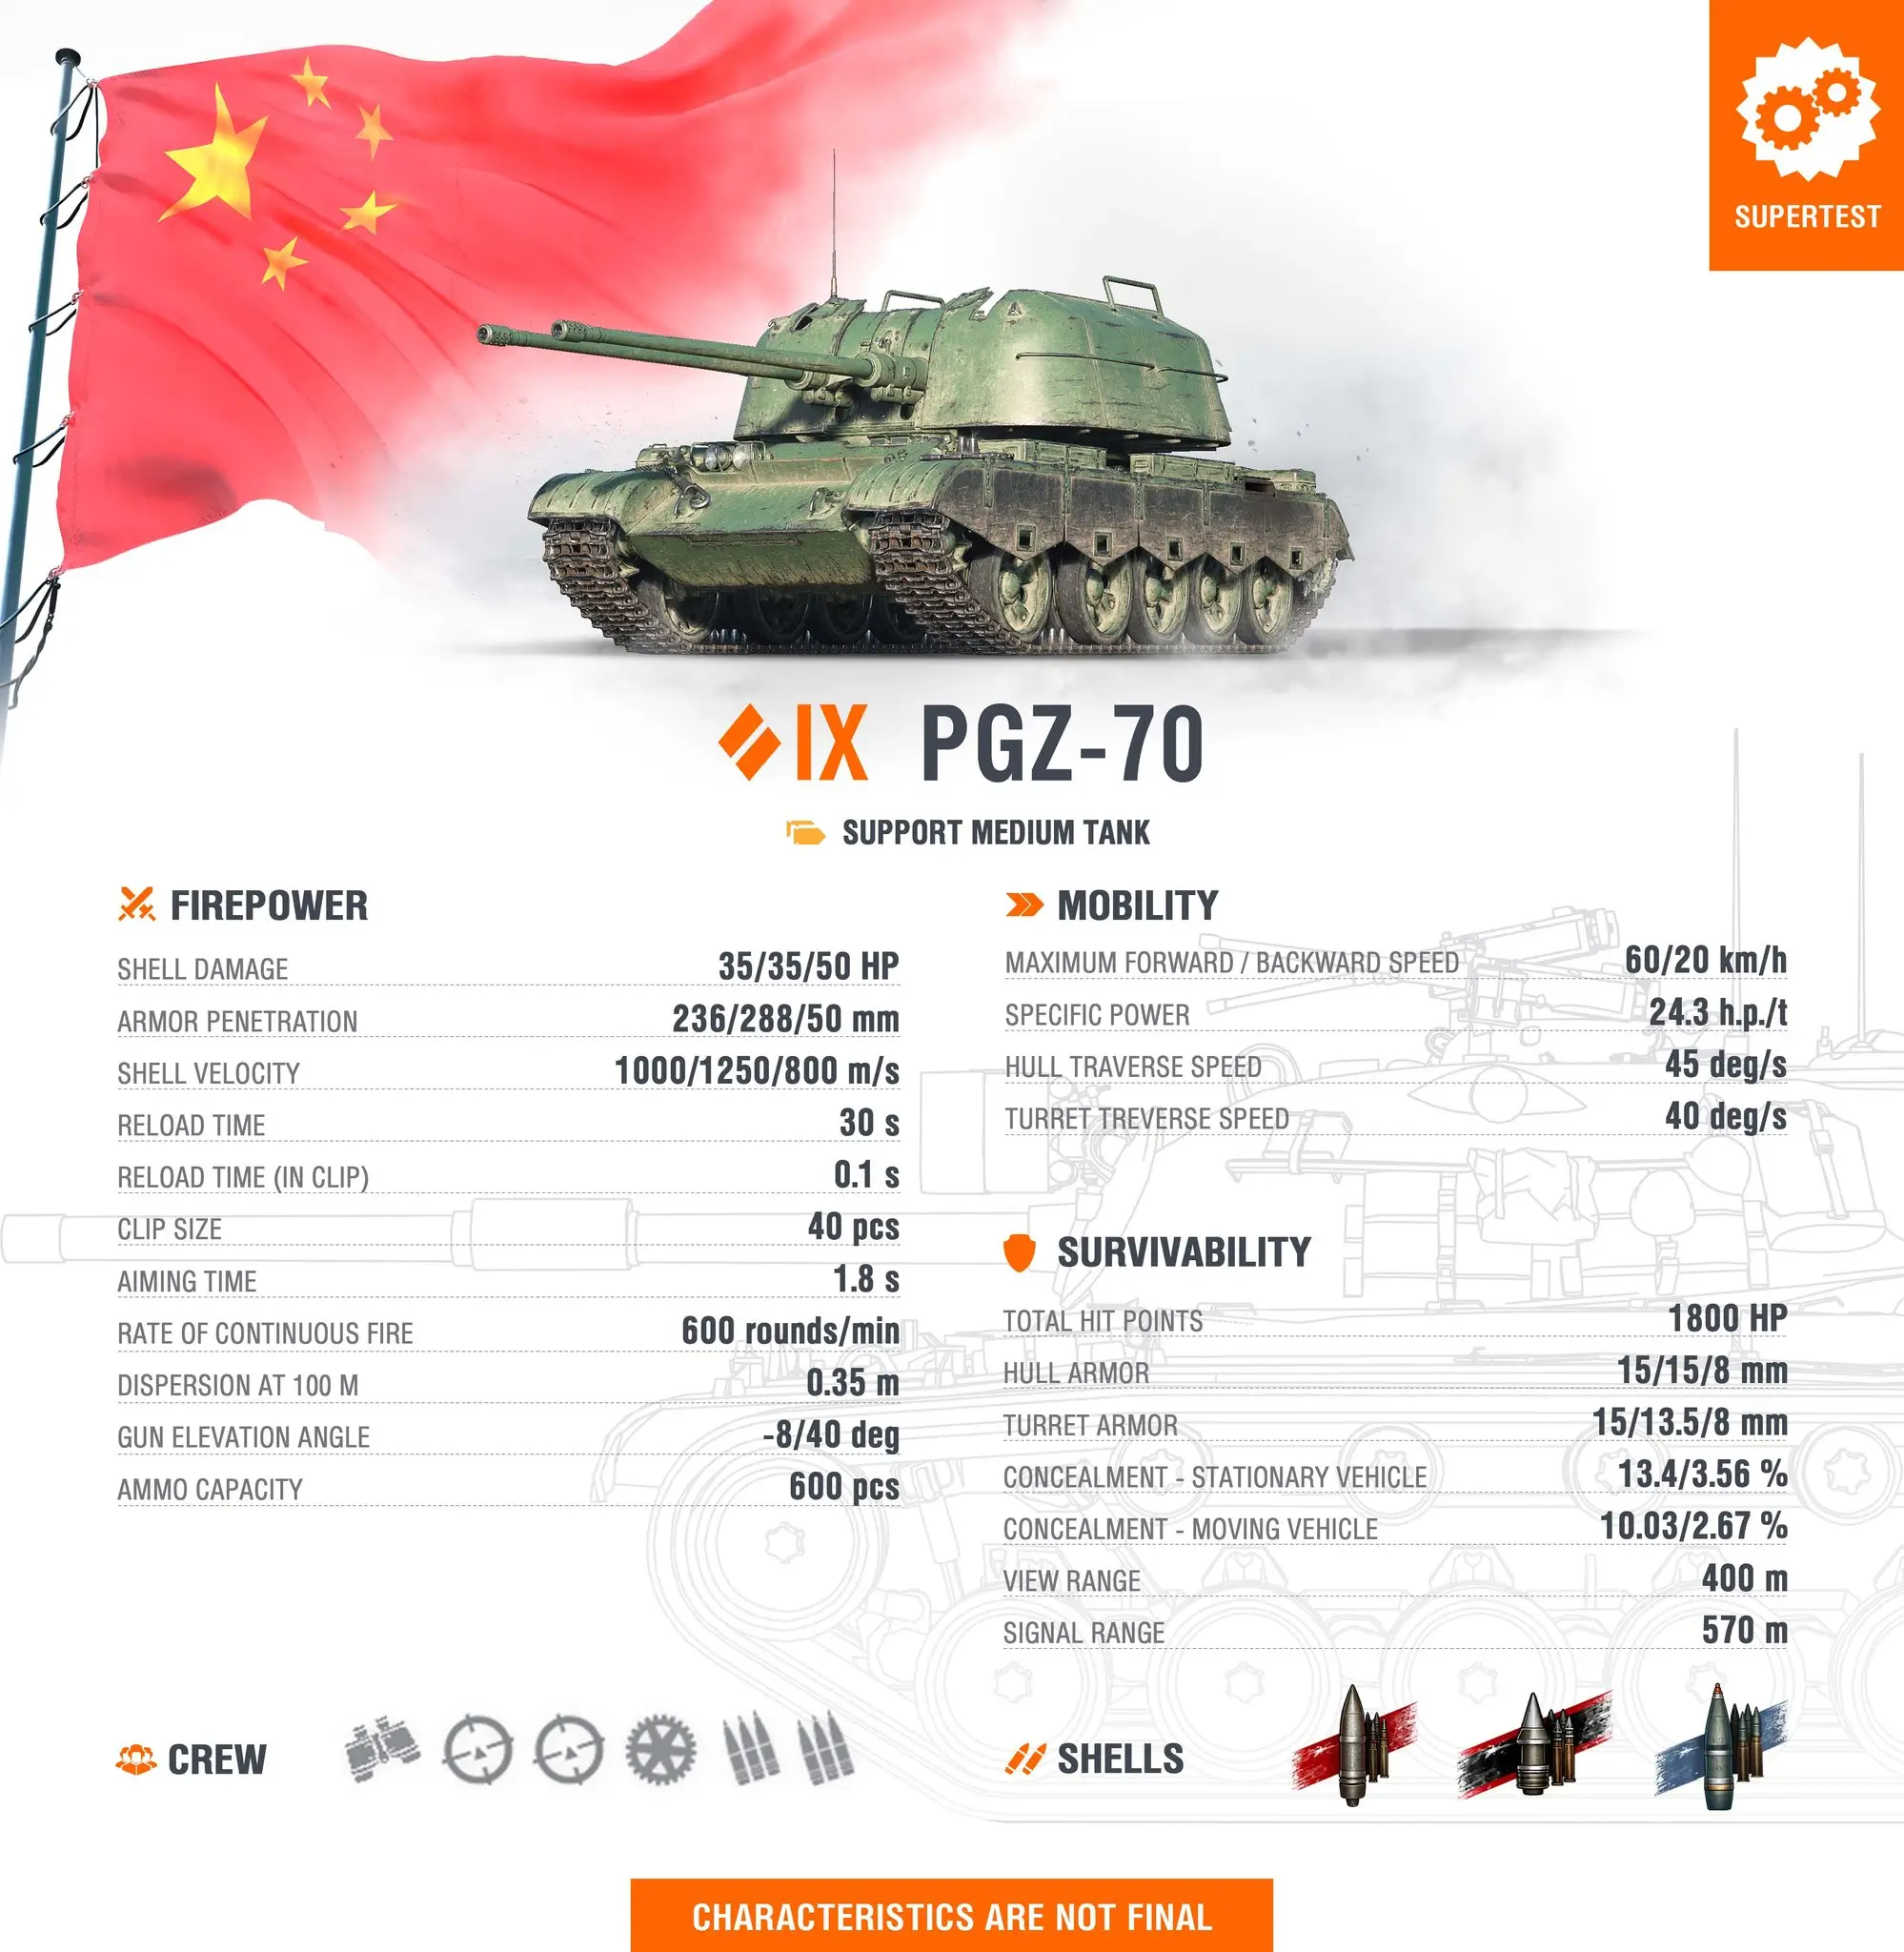
40-Round Clip Capacity: With 40 shells loaded at once and a within-clip reload of just 0.1 seconds, the PGZ-70 can empty its entire magazine in a matter of seconds. This is not burst damage in the traditional sense — it is a sustained wall of fire that overwhelms opponents who fail to break line of sight.
600 Rounds per Minute: The rate of continuous fire is staggering. At 600 rounds per minute, the PGZ-70 functions less like a tank and more like a self-propelled anti-aircraft gun turned against armored targets — which, fittingly, is exactly what its real-world inspiration was.
35/35/50 HP Per Shell: Individual shells deal modest damage, but accumulated fire adds up rapidly. A full uninterrupted clip can theoretically deliver up to 1,400 HP worth of damage to a single target — more than enough to destroy many opponents outright.
30-Second Reload Between Clips: The trade-off for this firepower is a 30-second reload once the clip is exhausted. Timing clip usage correctly and avoiding wasteful shots against angled armor or non-penetrable surfaces becomes a critical skill.
600 Rounds Ammo Capacity: With a generous 600-round ammo pool, commanders have more than enough ammunition to sustain aggressive play throughout an entire battle without anxiety about running dry.
Penetration and Shell Velocity: Surprisingly Capable
Despite its support designation, the PGZ-70’s penetration values are meaningful:
236/288/50 mm Armor Penetration: The standard shell’s 236 mm of penetration is more than respectable for a Tier IX medium tank and will reliably punch through the sides and rear of most opponents. The 288 mm premium penetration opens up viable engagements even against heavily armored targets when the situation demands it.
1000/1250/800 m/s Shell Velocities: High shell velocity, particularly on the premium round at 1,250 m/s, makes hitting moving targets at medium range far easier than the gun’s support-class framing might suggest. The PGZ-70 is not helpless against mobile opponents.
Armor Penetration Philosophy: The PGZ-70 is not designed to duel heavy tanks from the front. Its penetration values are tailored for opportunistic flanking strikes, tracking immobilized opponents, and stripping exposed side armor — all consistent with the support medium role.
Mobility: Fast Enough to Reposition
The PGZ-70 offers adequate mobility for a support platform:
60/20 km/h Maximum Forward/Backward Speed: The 60 km/h top speed ensures the PGZ-70 can keep pace with faster mediums and respond to developing flanks in a timely manner. The 20 km/h reverse speed is functional without being exceptional.
24.3 hp/t Specific Power: The power-to-weight ratio is solid for Tier IX, providing brisk acceleration out of cover and smooth cross-country movement. The PGZ-70 will not feel sluggish when repositioning between firing positions.
45 deg/s Hull Traverse Speed: Combined with the solid specific power, the 45 deg/s hull traverse allows the PGZ-70 to pivot quickly, an essential trait for a vehicle that needs to break contact after expending its clip and begin the 30-second reload safely.
40 deg/s Turret Traverse Speed: The turret traverse is adequate for tracking targets at close to medium ranges. The PGZ-70 is not optimized for reactive close-quarters brawling, but it won’t feel helpless when targets move.
Survivability: Fragile but Evasive
The PGZ-70’s survivability profile is defined more by evasion than endurance:
1,800 HP: At 1,800 hit points the PGZ-70 sits in a reasonable range for Tier IX mediums. It has enough buffer to absorb the occasional hit during repositioning, but should never be treated as a tank that can trade freely.
15/15/8 mm Hull Armor / 15/13.5/8 mm Turret Armor: The armor values are paper-thin and will not reliably bounce anything at Tier IX, including autocannon fire from lower tiers. The PGZ-70 survives through avoidance and concealment, not protection.
Concealment — Stationary: 13.4/3.56% / Moving: 10.03/2.67%: The concealment values are modest but workable for a medium tank of this tier. Choosing well-concealed firing positions and letting the clip do its work before breaking contact is the intended loop.
400 m View Range: The view range is competitive enough to support an active support role. Combined with a 570 m signal range, the PGZ-70 contributes meaningfully to team spotting networks while operating from second-line positions.
Methodical Frontline Pressure
The PGZ-70’s design philosophy centers on disciplined clip management and positional patience:
Opportunistic Engagement: The PGZ-70 is not designed to initiate duels. Instead, it excels when enemies are already committed — dealing with teammates, crossing open ground, or sitting broadside after a push — and the PGZ-70 can pour sustained fire into their flanks.
Support-First Mentality: The “Support Medium Tank” designation is not cosmetic. The PGZ-70 performs best when operating within a team context, finishing off damaged enemies, suppressing opponents pinning down allies, and punishing overextension.
Clip Commitment Discipline: The biggest mistake a PGZ-70 player can make is committing a clip against a target that disappears behind cover after 5 rounds. Identifying targets who will remain exposed for the clip duration is the single highest-skill expression of this vehicle.
Reload Vulnerability Management: The 30-second reload window is the PGZ-70’s most dangerous moment. After expending a clip, retreating fully behind hard cover and waiting safely for the reload to complete is non-negotiable.
Tactical Considerations
The PGZ-70’s unique characteristics create specific tactical opportunities:
Flanking Windows: Use the 60 km/h speed to reach advantageous flanking positions early in the match. A broadside shot on a distracted heavy with a full 40-round clip represents an extraordinary amount of damage potential.
Tracking and Finishing: The PGZ-70 excels at finishing off tracked or damaged opponents. If a teammate immobilizes an enemy, the PGZ-70 can pour an entire clip into their side and claim the kill before they can repair.
Anti-Scout Application: The 600 rounds-per-minute fire rate, combined with the 1,000 m/s standard shell velocity, makes the PGZ-70 reasonably effective at shredding lightly armored scouts and fast mediums who attempt to rush through your position.
Gun Depression: The -8 degree gun depression is workable for hull-down firing positions, giving the PGZ-70 access to ridge lines that complement the support medium role. Use terrain to expose only the gun while delivering clip damage.
Playstyle Implications
The PGZ-70 rewards commanders who embrace patience and capitalize on opponent mistakes:
Patience Over Aggression: The PGZ-70 does not create opportunities on its own — it exploits them. Waiting for the right moment to unleash a full clip is far more valuable than repeatedly firing partial clips and retreating to reload.
Target Prioritization: Always prioritize unarmored or side-facing targets. Wasting a clip against sloped heavy tank frontal armor is the fastest way to have an ineffective battle.
Team Integration: Communicate with teammates. A coordinated push where teammates draw fire opens premium flanking opportunities for the PGZ-70 to deliver game-changing clip damage.
Second Line by Default: Unless the battlefield situation clearly calls for it, position the PGZ-70 in the second line where it can observe and select the best target before committing. The first line is for tanks that can take hits — the PGZ-70 is not one of them.
Commanders looking to master the PGZ-70 should consider:
Learning which targets will remain stationary long enough to absorb a full clip
Never beginning a clip engagement without a clear escape route to cover
Using the 400 m view range actively to spot opponents before they spot you
Counting remaining rounds to know exactly when the next 30-second reload will begin
Working in proximity to teammates who can draw fire and create clip opportunities
Avoiding frontal engagements with anything carrying meaningful armor
Treating the reload window with the same caution as a fully exposed position
Community Reception
Initial community reactions to the PGZ-70 reveal a broad range of perspectives:
“Finally Something Different for China”: Many Chinese tech tree enthusiasts have reacted with cautious excitement, noting that the PGZ-70’s autocannon system gives the nation a genuinely unique Tier IX option compared to the Soviet-influenced heavies that dominate the tree.
Rate of Fire Balance Concerns: A segment of the community immediately raised concerns about whether 600 rounds per minute with 40-round clips could prove oppressive against lightly armored vehicles, particularly at Tier VII when bottom-tiered.
Support Role Skepticism: Some players expressed doubt about whether “support medium” tanks deliver enough carry potential for solo queue play, questioning if the PGZ-70 can perform without the team coordination it theoretically demands.
Historical Curiosity: The PGZ-70’s real-world origins as an anti-aircraft system have drawn significant interest from history-focused players, who appreciate the creative decision to adapt a SPAA platform into a World of Tanks support medium context.
What Sets the PGZ-70 Apart
The PGZ-70 occupies a unique niche in the Tier IX medium landscape:
Autocannon on a Medium Tank: No other Tier IX medium tank delivers fire at 600 rounds per minute. This fundamentally changes the engagement rhythm and forces both the PGZ-70 pilot and their opponents to adapt.
Clip Size Without Parallel: A 40-round clip at this tier is extraordinary. The sheer volume of fire possible in a single clip engagement creates damage outcomes unavailable to any conventional medium tank.
Anti-Aircraft Heritage: The PGZ-70’s real-world identity as an anti-aircraft system gives it an authentic design logic — a high-rate-of-fire weapon adapted for ground targets — that distinguishes it conceptually from other support medium tanks.
True Support Dependency: Unlike many tanks that describe themselves as “support” vehicles but still function effectively alone, the PGZ-70 genuinely flourishes when supported by teammates, creating a more cooperative gameplay dynamic than most Tier IX vehicles.
Evasion Over Armor: In a tier dominated by vehicles with meaningful armor schemes, the PGZ-70’s entirely evasion-based survivability philosophy is a refreshing outlier that rewards positional discipline over raw durability.
What’s Next?
As a Supertest vehicle, the PGZ-70’s characteristics remain subject to adjustment. Key questions for testing include:
Is a 40-round clip with 0.1 s intra-clip reload appropriately balanced, or does it create frustrating suppression loops?
Does 600 rounds per minute at 35 HP per shell create unacceptable damage-per-minute against lower-tier vehicles?
Is the 30-second reload long enough to compensate for the extraordinary clip potential?
Can the 1,800 HP pool sustain the PGZ-70 long enough to use its clip consistently in real battles?
Will this be a tech tree vehicle, premium, or reward tank?
How will the PGZ-70 interact with the existing Chinese medium tree structure?
Final Thoughts
The PGZ-70 represents one of the most creatively distinctive entries into the World of Tanks Supertest in recent memory. By adapting a real-world Chinese self-propelled anti-aircraft gun into a Tier IX support medium, Wargaming has produced a vehicle with a coherent identity and genuinely novel gameplay loop: identify the right moment, commit a devastating 40-round clip, and retreat safely to reload before repeating the process.
For commanders who enjoy strategic patience, team-oriented play, and the satisfaction of delivering enormous clip damage to a perfectly chosen target, the PGZ-70 has exceptional potential. The combination of 600 rounds per minute, a 40-round magazine, and adequate mobility creates a tank that punishes poor positioning by opponents more harshly than almost anything else at Tier IX.
However, the PGZ-70 will not suit every playstyle. Players who prefer direct dueling, aggressive solo carries, or heavily armored brawling will find the PGZ-70’s fragility and support-first philosophy frustrating. The paper-thin armor guarantees that misplays are punished severely, and the 30-second reload gap creates windows of total vulnerability that disciplined opponents will exploit.
Whether you’re excited by China finally receiving a truly unconventional Tier IX medium or skeptical about whether a 600 rounds-per-minute support platform can deliver reliable results, the PGZ-70 is unquestionably one of the most interesting vehicles to emerge from the Supertest in 2026. If Wargaming can land the balance correctly — and the “Characteristics Are Not Final” disclaimer leaves plenty of room for adjustment — the PGZ-70 could become a cult favorite for players who appreciate fire control, timing, and teamwork over raw armor and brute-force alpha strikes.
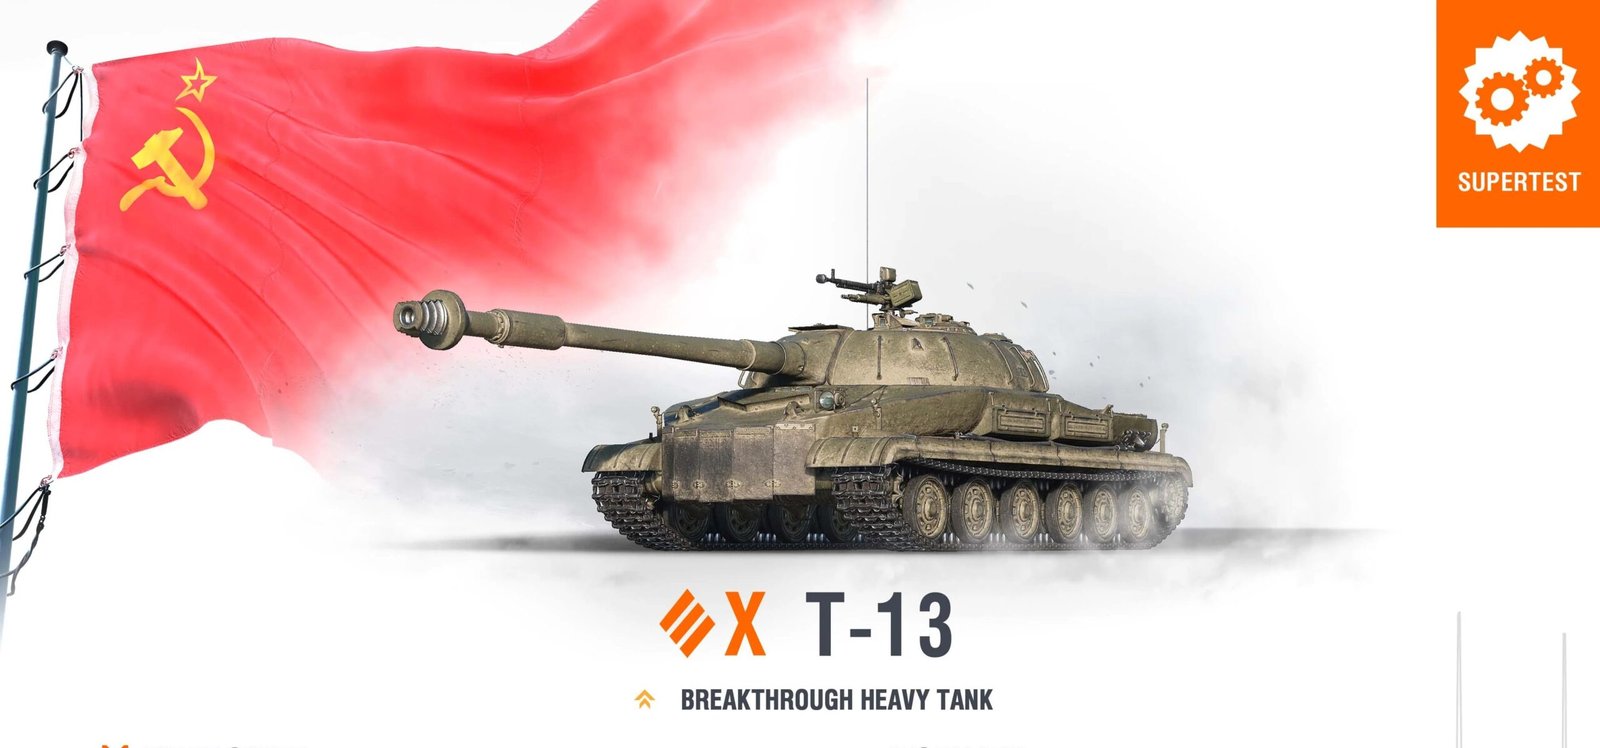
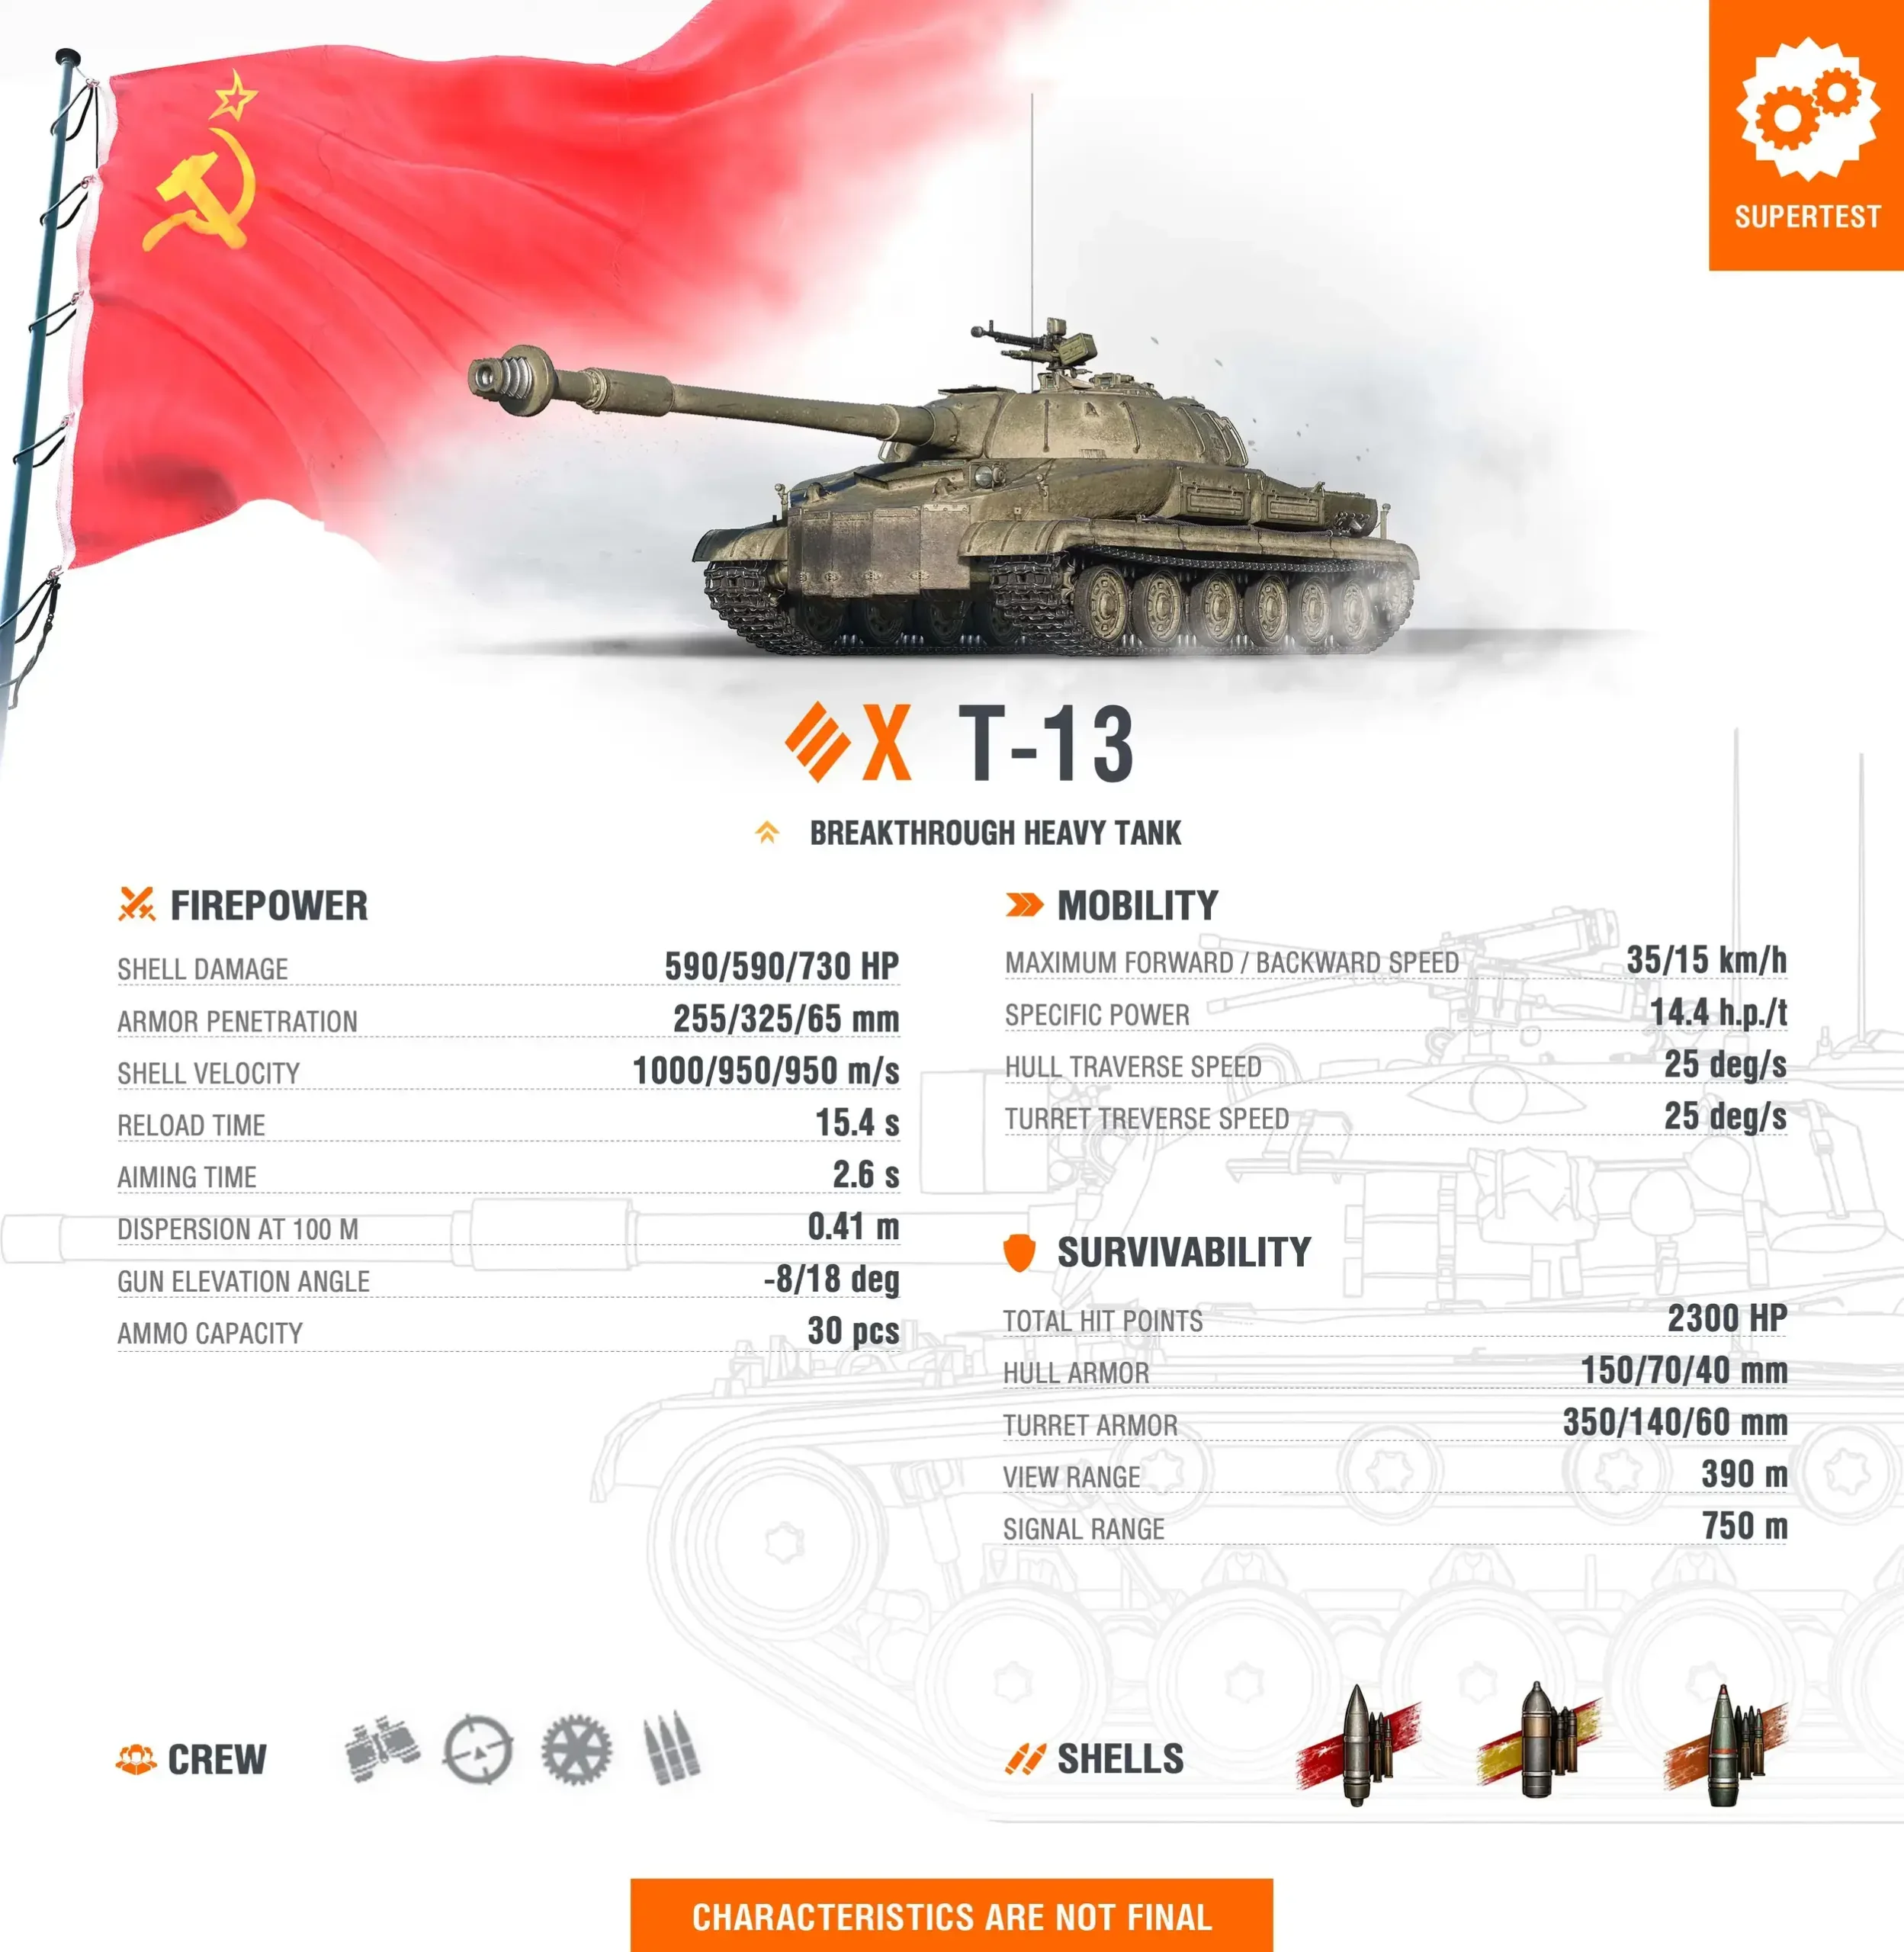
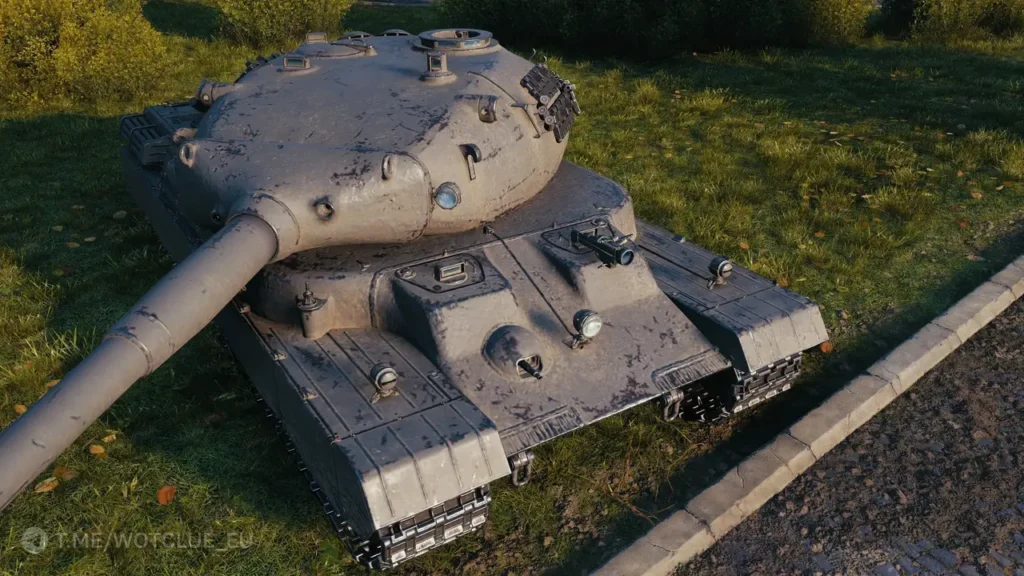
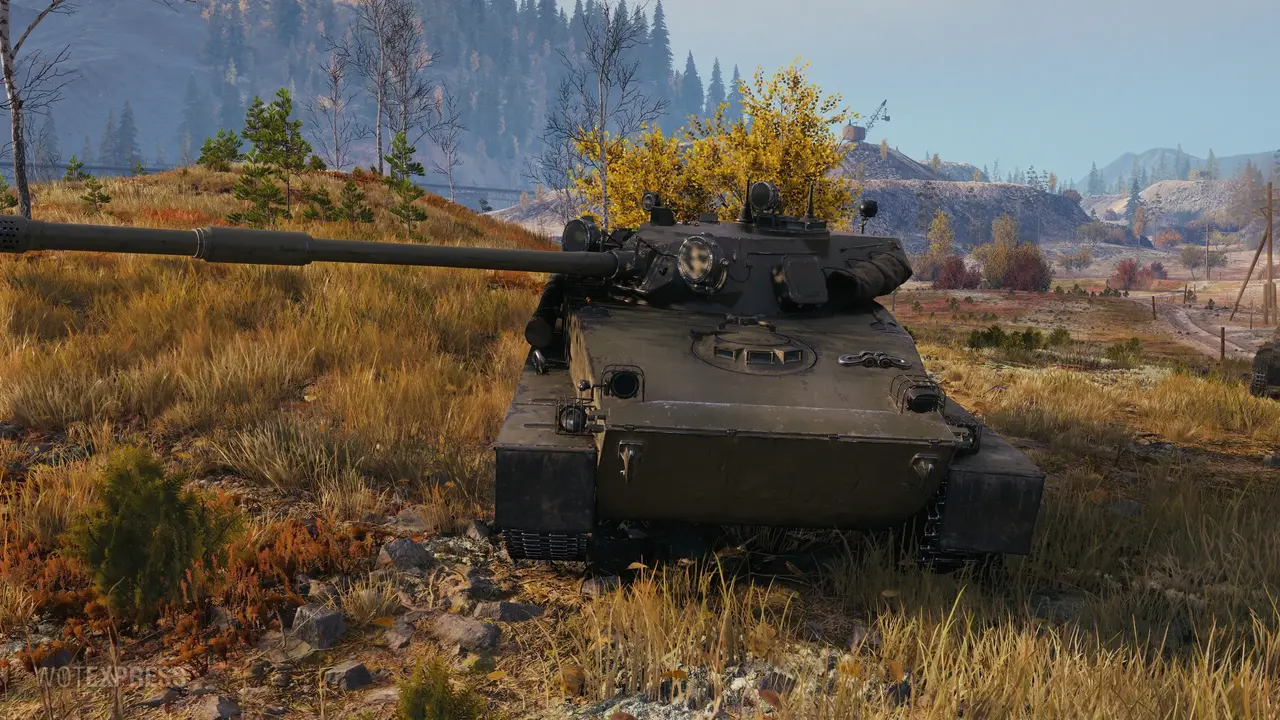
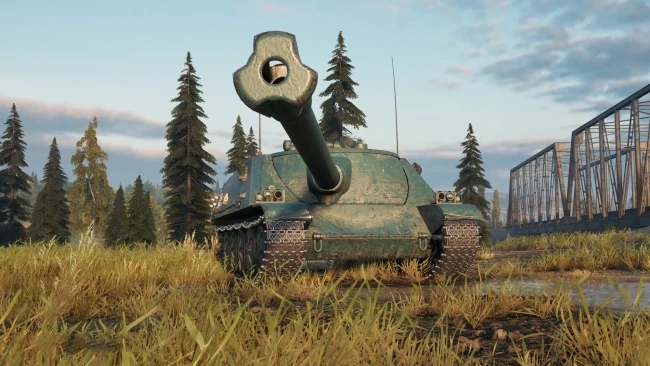
The World of Tanks Supertest has welcomed a distinctive addition to the Soviet heavy tank lineup: the T-13, a Tier X heavy tank whose key distinguishing feature is its unconventional hull design. For players who appreciate Soviet armor philosophy but want something genuinely different from the traditional IS-7 or Object 277, the T-13 offers an intriguing package built around unconventional geometry and steady, confident advances.
Unconventional Hull Design: Geometry Over Thickness
The T-13’s defining characteristic is its unconventional hull design that prioritizes angling over raw thickness:
Sharply Angled Plates: The side armor and upper frontal plate feature sharp angles that dramatically increase effective thickness. This geometric approach creates protection levels that far exceed what the nominal armor values would suggest.
Modest Nominal Thickness: Unlike traditional superheavies that rely on massive raw thickness, the T-13 achieves its protection through clever angling. The base armor values are described as “relatively modest,” but the extreme angles transform these into formidable effective protection.
Effective Armor Values: The sharp angling allows the T-13 to achieve “very high effective armor values” that make it difficult to penetrate when properly positioned. Understanding the armor angles becomes crucial to maximizing survivability.
Side Armor Integration: The sharply angled side armor is specifically mentioned, suggesting the T-13’s design incorporates the sides into the overall protection scheme rather than treating them as purely vulnerable surfaces.
Upper Frontal Plate: The angled upper frontal plate creates a strong defensive position when facing enemies directly. The geometry forces shells to travel through significantly more armor than the nominal thickness suggests.
This unconventional approach to armor creates a heavy tank that rewards understanding armor mechanics and positioning over simply relying on raw thickness to bounce shots.
Very Reliable Turret Armor
The T-13 brings exceptional turret protection to complement the hull design:
Very Reliable Turret Armor: The turret armor is described as “equally very reliable,” suggesting it matches or exceeds the hull’s protective capabilities. This reliability enables confident trading in head-on engagements.
Head-On Engagement Strength: The turret specifically offers “strong protection in head-on engagements,” indicating it excels when facing enemies directly rather than at angles.
Frontal Confrontation Focus: The combination of angled hull and reliable turret armor creates a heavy tank optimized for direct frontal confrontations. The T-13 wants enemies to shoot at its strongest armor.
Trading Confidence: The very reliable turret protection enables the T-13 to trade shots confidently, knowing that properly positioned, it can bounce return fire while delivering 590 HP punches.
The turret armor transforms the T-13 from merely survivable to genuinely threatening, creating a platform that can hold positions and push forward under fire.
Large-Caliber Gun: 590 HP Alpha Damage
The T-13 brings substantial firepower befitting a Tier X Soviet heavy:
590 HP Alpha Damage: The large-caliber gun delivers impressive 590 HP of damage per shot. This alpha damage is exceptional for Tier X, creating meaningful trades and the ability to punish mistakes severely.
Large-Caliber Classification: The gun is specifically described as “large-caliber,” suggesting it’s among the bigger guns available at Tier X. This classification implies potential trade-offs in gun handling.
High-Alpha Soviet Philosophy: The 590 HP alpha continues the Soviet heavy tank tradition of prioritizing per-shot impact over rapid fire or versatility. Each shell carries significant weight.
Trading Power: Combined with the very reliable armor, the 590 HP alpha creates devastating trading scenarios. The T-13 can absorb shots on its angled armor while delivering crushing counter-fire.
Psychological Impact: The 590 HP alpha creates constant psychological pressure on opponents. Every exposure risks massive HP loss, forcing defensive play from enemies.
The firepower package ensures the T-13 has the offensive punch to match its defensive capabilities, creating a complete assault heavy platform.
Decent Mobility: 14.4 hp/t
The T-13 offers surprising mobility for a heavily armored Tier X heavy:
14.4 hp/t Specific Power: The power-to-weight ratio is described as providing “decent mobility,” suggesting the T-13 isn’t locked into static gameplay despite its heavy armor.
Fast Acceleration: The specific power allows the T-13 to “accelerate fast,” enabling responsive movement that’s uncommon in heavily armored vehicles. This acceleration helps with micro-positioning and dodging.
Steady Speed Maintenance: Despite the heavy armor, the T-13 can “maintain a steady speed,” ensuring it doesn’t bog down when advancing or repositioning. The mobility supports active gameplay.
Heavy Armor Consideration: The description specifically notes the decent mobility is achieved “despite its heavy armor,” acknowledging this is better than expected given the protection level.
Tactical Flexibility: The mobility enables the T-13 to respond to battlefield developments rather than being committed to initial positions. You can relocate, advance, or retreat as situations demand.
The mobility ensures the T-13 can execute its methodical frontline pressure role effectively rather than being a static pillbox.
Methodical Frontline Pressure
The T-13’s design philosophy centers on steady, confident advances:
Methodical Pressure: The T-13 “excels at methodical frontline pressure,” suggesting gameplay focused on steady advances rather than aggressive rushes or static defense.
Confident Trading: The combination of very reliable armor and 590 HP alpha enables “confidently trading shots” without fear of unfavorable exchanges.
Steady Pushing Forward: The T-13 is designed for “steadily pushing forward under the cover of its solid armor,” creating pressure through consistent advancement rather than explosive plays.
Frontline Specialist: The tank excels specifically at frontline pressure—it’s designed to be at the forefront of advances, absorbing fire while delivering devastating counter-strikes.
Cover Through Armor: Unlike tanks that need terrain for cover, the T-13 uses its armor as cover, enabling aggressive positioning in areas where other heavies would be vulnerable.
This playstyle creates a heavy tank that rewards patience, positioning discipline, and understanding when to advance versus when to hold.
Tactical Considerations
The T-13’s unconventional characteristics create specific tactical opportunities:
Frontal Confrontation: The T-13 excels when facing enemies directly. Avoid exposing side armor unnecessarily—the design works best in head-on engagements.
Steady Advancement: Use the reliable armor to advance methodically. Don’t rush—the T-13’s strength is sustained pressure, not explosive flanking.
Trading Discipline: The 590 HP alpha rewards calculated trading. Expose yourself to deliver shots when confident your armor will bounce return fire.
Mobility Leverage: Use the decent mobility to maintain optimal positioning. The ability to accelerate fast enables micro-adjustments that maximize armor effectiveness.
Playstyle Implications
The T-13 rewards commanders who embrace methodical, pressure-focused gameplay:
Patience Over Aggression: The T-13 isn’t about explosive plays or rapid flanking. Success requires patient advancement, leveraging armor to gain ground steadily.
Armor Angle Awareness: Constantly monitor your hull angle relative to enemies. The unconventional armor works brilliantly when properly angled but creates vulnerabilities when mispositioned.
Frontline Leadership: Lead advances confidently, using your armor to absorb fire while teammates follow your push. The T-13 excels at creating openings through sustained pressure.
Trading Optimization: Maximize the value of each 590 HP shot by ensuring trades are favorable. Don’t waste alpha on poor targets.
Commanders looking to master the T-13 should consider:
Learning the specific armor angles that maximize protection
Facing enemies directly to leverage the frontal armor design
Advancing steadily rather than rushing into unfavorable positions
Trading shots confidently when properly positioned
Using decent mobility to maintain optimal hull angles
Leading team pushes through methodical pressure
Avoiding situations where side armor becomes exposed
Leveraging 590 HP alpha to punish positioning mistakes
Community Reception
Initial community reactions to the T-13 reveal predictable perspectives:
“Another Slow Iron Pig”: The immediate reaction from some players is dismissive: “Ah, another slow iron pig,” suggesting fatigue with heavily armored, methodical heavy tanks.
Armor Meta Concerns: The unconventional armor design likely generates concerns about whether it creates overpowered protection that’s frustrating to face.
Soviet Heavy Saturation: Some community members express fatigue with the number of Soviet heavy tanks, questioning whether another is necessary.
Design Interest: Despite cynicism, the unconventional hull design likely generates curiosity about how the sharply angled armor performs in practice.
What Sets the T-13 Apart
The T-13 occupies a unique niche in the Tier X Soviet heavy landscape:
Unconventional Hull Design: The sharply angled armor plates create a genuinely different protection scheme compared to traditional Soviet heavies.
Geometry Over Thickness: Unlike superheavies that rely on massive raw thickness, the T-13 achieves protection through clever angling of modest nominal values.
Methodical Pressure Philosophy: Specifically designed for steady frontline pressure rather than aggressive breakthroughs or static defense.
590 HP + Reliability: The combination of exceptional alpha damage and very reliable armor creates a trading platform few Tier X heavies can match.
Decent Mobility Despite Armor: The 14.4 hp/t specific power contradicts expectations for heavily armored vehicles, enabling more active gameplay.
What’s Next?
As a Supertest vehicle, the T-13’s characteristics remain subject to adjustment:
Key questions for testing include:
Do the sharply angled armor plates create overpowered effective values?
Is 590 HP alpha damage balanced with the very reliable armor?
Does the decent mobility contradict the methodical pressure philosophy?
Will the unconventional hull design create weak spots that skilled opponents exploit?
Can the T-13 coexist with the IS-7 and Object 277 without making them obsolete?
Will this be a tech tree vehicle, premium, or reward tank?
Final Thoughts
The T-13 represents thoughtful design—using unconventional geometry to create protection without relying on overwhelming raw thickness. The sharply angled armor plates transform modest nominal values into very high effective protection, while the 590 HP alpha damage ensures the T-13 has offensive punch to match its defensive capabilities.
For commanders who appreciate methodical, pressure-focused gameplay and enjoy heavy tanks that reward positioning discipline, the T-13 offers an intriguing package. The requirement to understand and leverage the unconventional armor angles creates a skill ceiling that rewards mastery.
However, the T-13 won’t appeal to everyone. Players who prefer mobile heavies, aggressive flanking gameplay, or dislike slow, methodical advances will find the T-13’s playstyle frustrating. The “another slow iron pig” sentiment suggests community fatigue with heavily armored, deliberate heavy tanks.
Whether you’re excited about Soviet Union’s unconventional heavy tank or concerned it’s just another armored behemoth, the T-13 represents an interesting experiment in achieving protection through geometry rather than raw thickness. If Wargaming successfully balanced the angled armor mechanics, the T-13 could become a favorite for players who enjoy steady, confident frontline pressure.
Following the great disappointment of the 2026 Black Market, where only SPHT was a tank worth buying and spending gold on it, we are again at the part of the year where the next lootboxes arrive, and these are for the Chinese New Year, also known as Serpetine boxes.
Since a lot of tanks were eliminated from the prediction pool by the Christmas lootboxes and black market event, we should have a pretty good estimate of which tanks will appear in lunar boxes.
This is a heavily armored French premium tier 9 heavy tank. This would be a perfect tank for the M4 51 lovers like me. Frontally, it seems really solid, around 260 mm of effective armor at the upper plate, the turret has only one weakspot that can be hidden while using full 10 degrees of gun depression. The issues I see with the tank are that the dispersion values are high, DPM is low, and the ammo capacity is very limited.
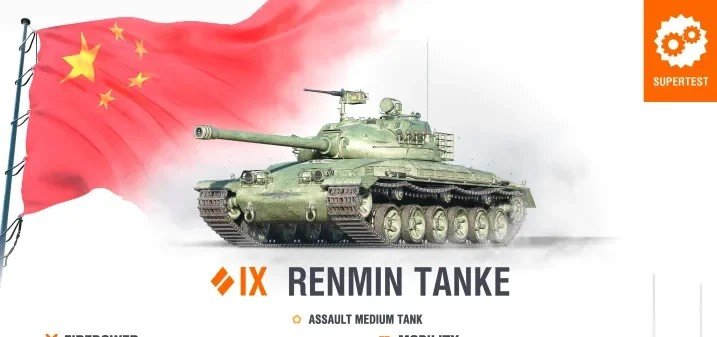
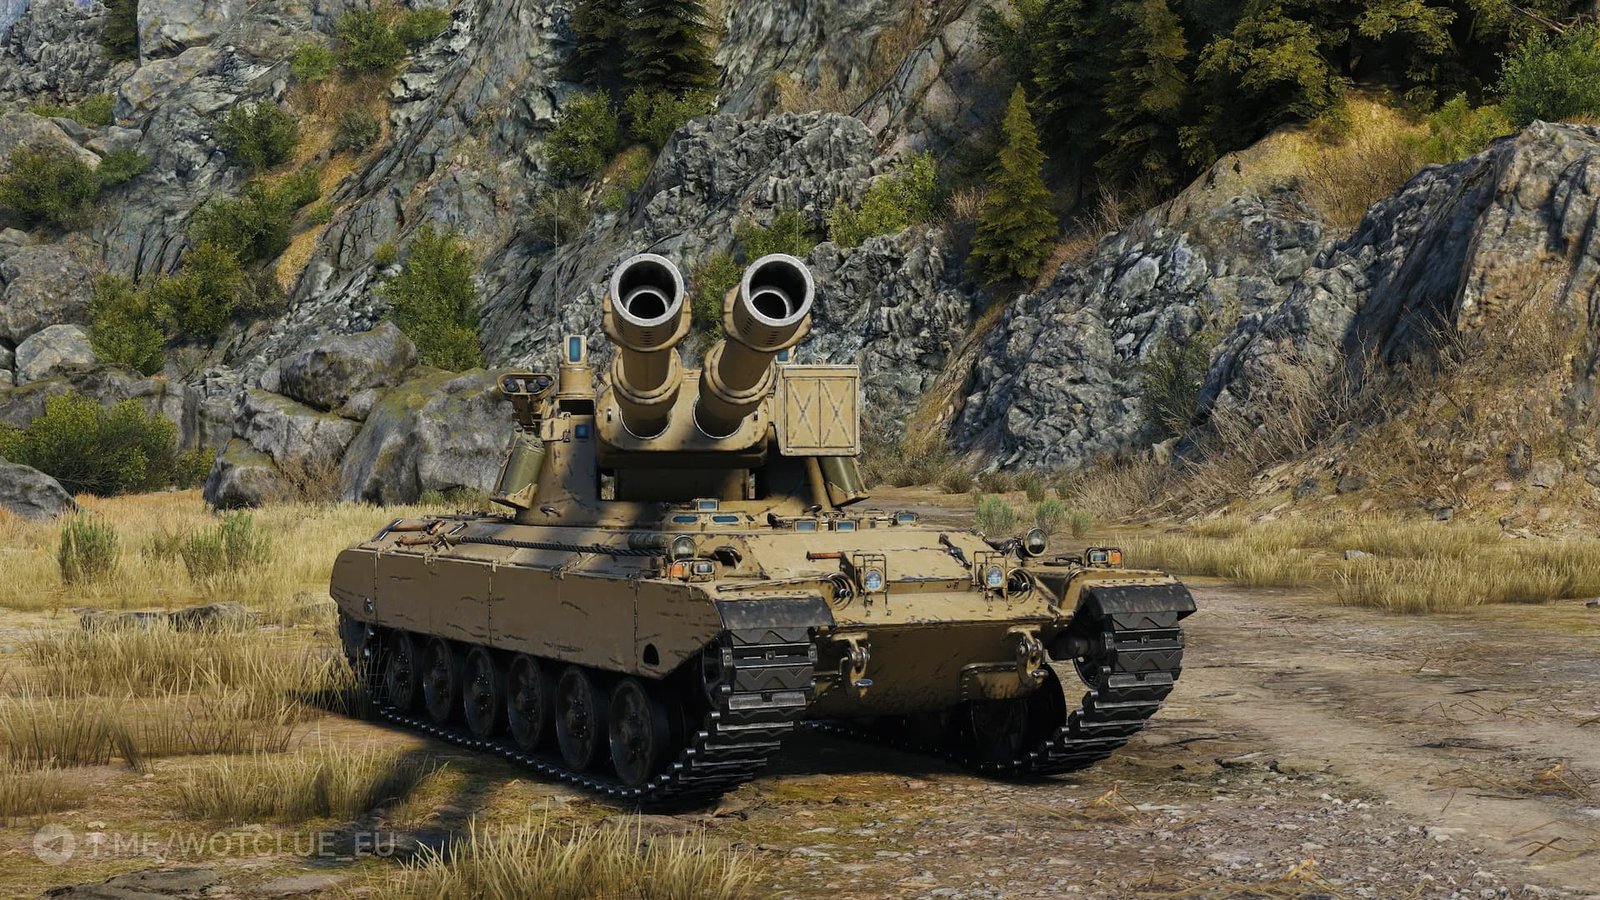
I’ve made a prediction that this tank will appear in the Black Market 2026, but I was wrong, it seems, but it makes sense. Such a novel Chinese tank is like perfect for a Chinese New Year event. During this time, the hype for this tank got bigger as well. Yong Bing is a tier 9 Chinese heavy tank with a double-barreled gun and solid fuel rocket boosters. It is capable of devastating double shots. If statistics stay the same, this will be one of the best tier 9 premium heavies in the game. This would probably be the main tank of the event, and the whole marketing strategy will revolve around it.
I’ve listed this tank as the Black Market 2026 offer, but unfortunately, it has not appeared in it. Considering how each year, there are more tier 9 premiums at such events, if it features 2 heavies, this is a good companion to the Yong Bing.
This German heavy at tier 10 features a 700 alpha damage gun and respectable armor. The biggest downside of the tanks seems to be the mobility, with a low top speed of only 30 km/h and bad gun handling. Schwertwal has 2 big weakspots on the upper front plate, while the upper deck can be overmatched by 121 mm guns and higher. The lower plate is quite large and quite weak at only 200 mm of effective armor. The turret doesn’t have any weakspots and it has around 400 mm of effective armor thickness.
Love them or hate them, the autocannon American mediums were a pretty big success in the game. While a lot of people hate facing them, most of the players that tried playing them, they agree that they are very fun vehicles to play eventhough very hard. If you could make a lot of credits while also having a lot of fun, it would be a perfect combination.
Even though the stats are not final, currently, it is a better tank in every aspect than the tier 9 tech tree counterpart. If stats don’t get changed, this could mark the start of the tier 9 premiums getting better than the tech tree variants, which hasn’t been the case for now. Put this tank together with the Yong Bing in the lootboxes, and you can expect a lot of people to gamble for them. It would be a perfect move from WG.
This seems like a great fit for a medium featured in Chinese lootboxes. While not a lot of people know about it since it’s only in the supertest phase, this is a very interesting take on the autoloading mechanic. It features a very low reload time for the entire clip at only around 6 seconds and incredibly low intraclip reload at only 0.75 seconds. The trade-off is that the alpha damage is low at only 200 damage. With 10 degrees of gun depression and decent armor, it could be quite powerful at tier 9.
This is a tier 9 premium Japanese medium tank featuring the gun cooling mechanic. Probably one of the more boring vehicles on the Supertest. In my opinion, the gun cooling mechanic is not very useful on the medium tanks, which rely on flanking anyway. The rest of the stats look lackluster with insanely poor standard penetration at only 230 mm and poor mobility. It could be a good option to put into these loot boxes as the mediocre tank.
A lot of people expected it in 2026 lootboxes or the 2026 Black Market, including myself, but it hasn’t appeared. There is a lot of hype surrounding it, and a lot of people would pay good money to get their hands on it. This is the first Italian tank with a double-barreled gun. Mechanics-wise, you share the same one as it is on the SFAC-105, it also has insane dispersion values whenever you are charging the double shot. The armor is nonexistent on the vehicle, but the mobility and gun depression are great. What is also horrible about the tank are gun handling stats, suggesting that if you are not charging the double shot, you will have a very hard time hitting anything.
LTS-85 has been in the supertest phase for 4 years now. Even though the chances of appearing in the Lunar New Year event are low, there is still a possibility. This tier 8 premium soviet light tank doesn’t seem too promising statistics-wise. This might be a stinker that WG put into the lootboxes. It looks like a pretty bad tank, horrible dpm, bad penetration, bad camo rating, and no armor. The only decent things about this tank are the mobility and good alpha damage at 300.
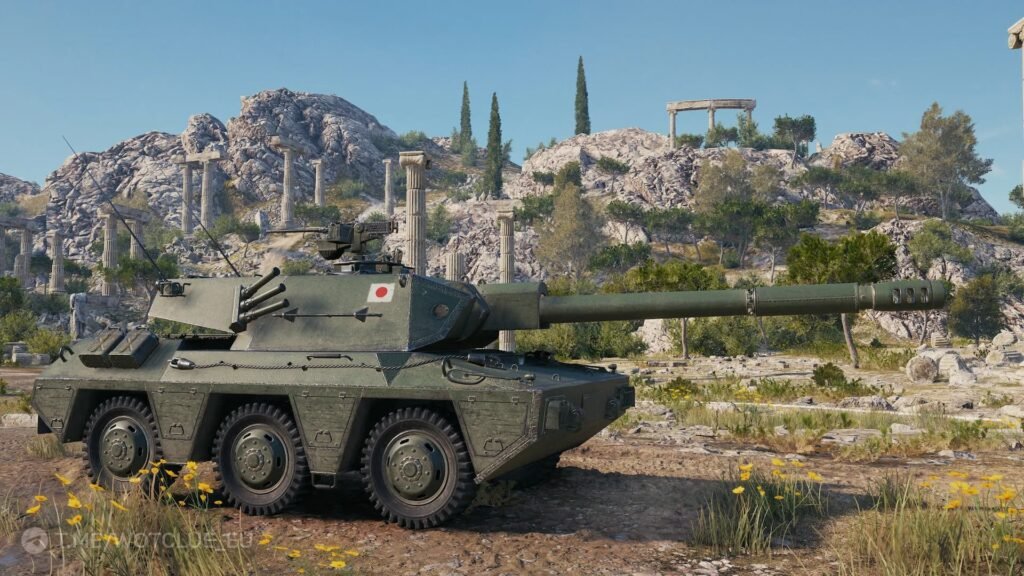
Since we saw that the 2026 Christmas boxes featured the tier 10 tanks, it only makes sense that the rule could be the same for the Lunar New Year lootboxes. One of the best candidates for the tier 10s is the only and only Ashigaru. This Japanese TD is the first wheeled TD with a gun cooling mechanic in the game. It was a decent choice for the Black Market 2026, but it hasn’t appeared in it. On paper, it looks like a great sniper with very nice DPM and mobility. Definitely one of the most interesting upcoming vehicles.
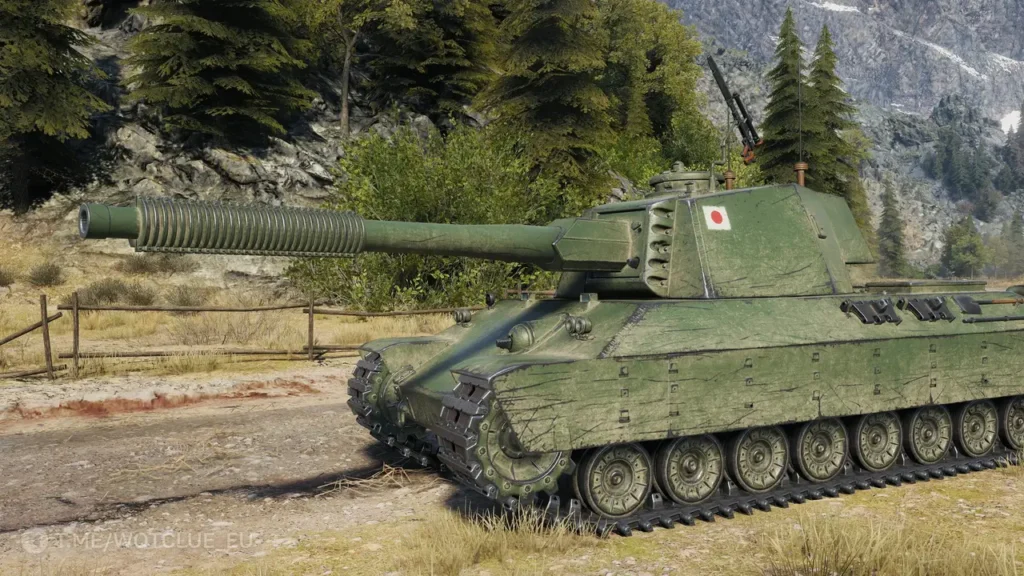
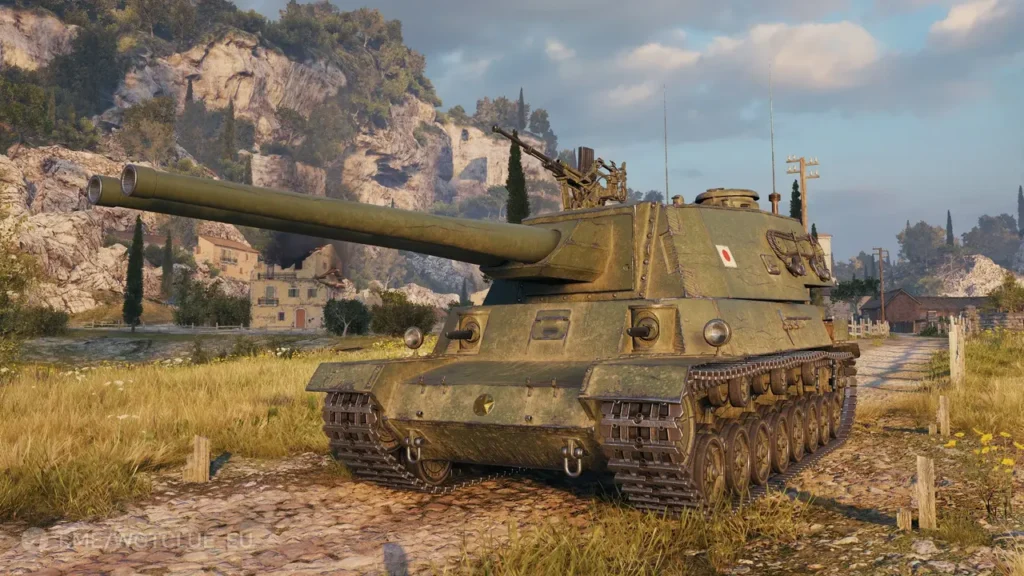
This is a Tier 9 premium Japanese tank destroyer featuring double-barreled guns. Stats-wise, currently, it is looking like a very strong tank at tier 9. Great alpha damage at 500, with double shots, it could be devastating to enemies with 1000 points of damage. While the mobility is limited, it seems very well armored at the front, including the front plate and the turret itself.
This Tier 8 German premium tank destroyer acts as the successor to the Kanonenjagdpanzer and features a specialized siege mechanic. This system transforms it into a premier long-range threat, achieving a pinpoint 0.29 dispersion while in siege mode. Beyond its accuracy, the vehicle offers a competitive 2,700 DPM and excellent mobility. However, its primary drawback is a complete lack of armor, leaving it extremely vulnerable to penetration from almost any HE shell.
The SU-122V is a Tier 9 premium Soviet tank destroyer distinguished by its hydropneumatic suspension. Although it has been undergoing supertest evaluations since February 2024, it has yet to make its debut in a live event. As the first Russian vehicle to utilize this suspension system, it features a formidable upper hull designed with auto-bounce angles reminiscent of the Swedish Strv 103B. Additionally, it boasts an impressive armament capable of delivering over 3,000 DPM. True to Wargaming’s typical balancing process, the tank remains subject to further statistical adjustments before its final release.
This French Tier 8 premium tank destroyer follows the traditional design philosophy of its nation’s TD line, featuring an autoloader equipped with a four-shell magazine. It boasts a quick 2.5-second intraclip delay, though it requires a lengthy 40 seconds for a complete drum reload. Its frontal protection is surprisingly robust, notably lacking the prominent weak points typically found on the roof of the Foch series. Furthermore, this vehicle offers significantly more flexibility than its Foch counterparts thanks to an additional 20 degrees of horizontal gun traverse, greatly improving the overall handling and comfort. In summary, it appears to be a solid performer and a potentially excellent tool for farming credits.
Conclusion
If there are again going to be 5 tanks in the lootboxes, this would be my prediction:
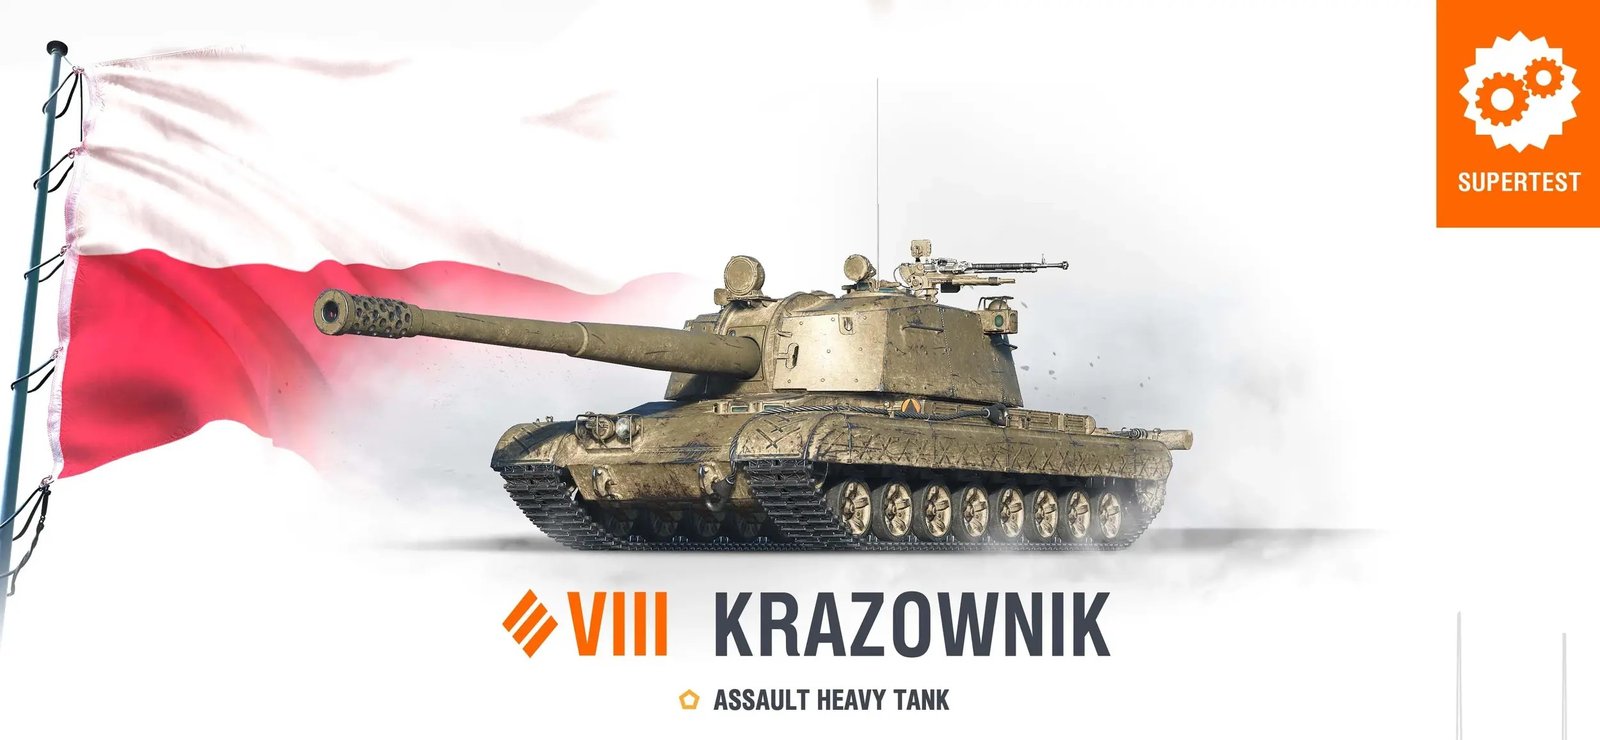
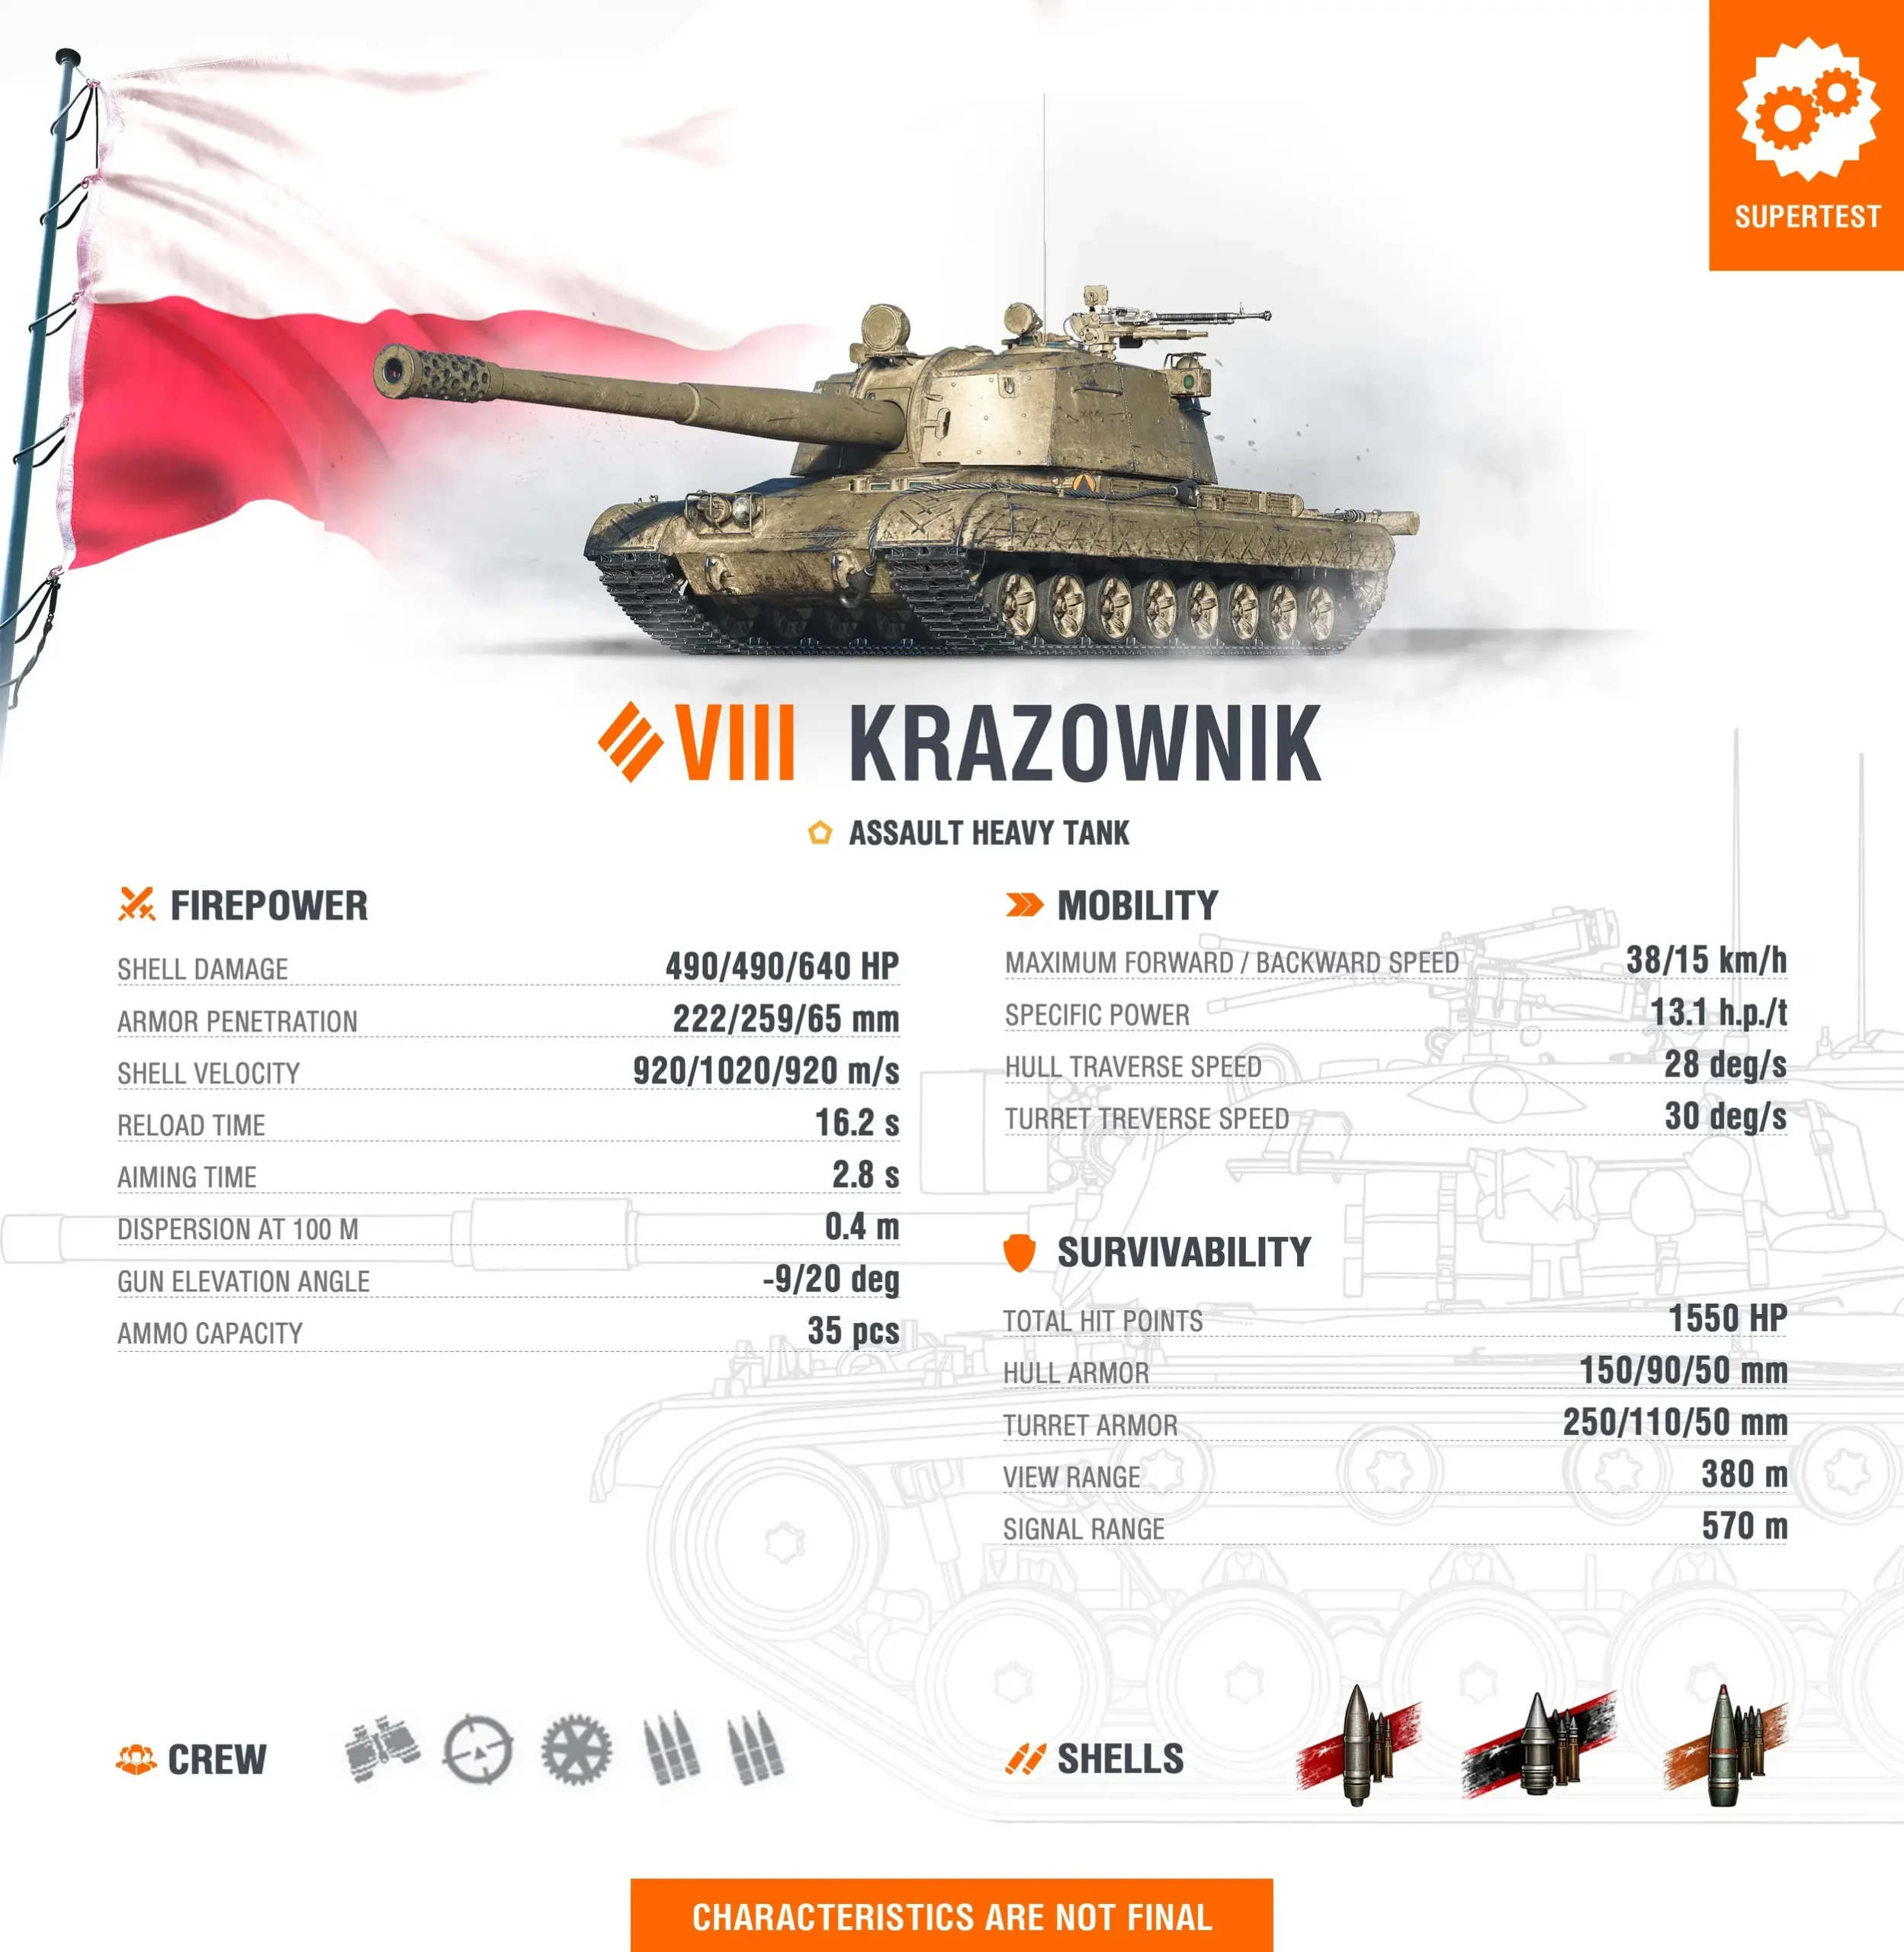
This vehicle combines high single-shot damage with reliable armor protection and surprisingly comfortable gun handling, creating what developers describe as “one of the most versatile assault heavy tanks available.” For players seeking a well-rounded Tier VIII heavy that can adapt to various tactical situations without glaring weaknesses, the Krazownik offers an intriguing package that emphasizes balance over specialized excellence.
High Alpha Damage: 490 HP Punch
The Krazownik brings substantial firepower to Tier VIII battles:
490 HP Alpha Damage: Each shot delivers 490 HP of damage, placing the Krazownik among the harder-hitting Tier VIII heavy tanks. This alpha damage enables meaningful trades and the ability to punish exposed enemies decisively.
High-Alpha Advantages: The 490 HP per shot creates several tactical benefits:
Winning HP trades against lower-alpha opponents
Finishing wounded enemies before they can escape
Creating psychological pressure on opponents
Maximizing damage during brief exposure windows
Tier VIII Power: At Tier VIII, 490 alpha damage is exceptional. Most same-tier heavies deal 390-440 HP, making the Krazownik’s firepower stand out significantly.
Trading Efficiency: In typical heavy tank confrontations, the Krazownik can deliver crushing blows that create favorable exchange ratios, particularly against opponents with standard 390-400 HP guns.
The high alpha damage forms the foundation of the Krazownik’s assault heavy identity, enabling aggressive positioning that would be less effective with lower per-shot damage.
Reliable Armor: Hull and Turret Protection
The Krazownik features dependable armor characteristics:
Reliable Hull Armor: The hull protection is described as “reliable,” suggesting meaningful frontal armor that can bounce shots from same-tier opponents when properly positioned and angled.
Reliable Turret Armor: The turret armor similarly offers “reliable” protection, enabling the Krazownik to trade shots with confidence when hull-down or in frontal confrontations.
Assault Heavy Design: The armor package supports the assault heavy classification—sufficient protection to push into contested positions and hold ground while delivering high-alpha punches.
No Weak Spot Vulnerabilities: The description doesn’t mention glaring weaknesses, suggesting the Krazownik avoids the obvious cupola or lower plate vulnerabilities that plague some heavy tanks.
Angling Benefits: With reliable frontal armor on both hull and turret, proper angling should enable the Krazownik to maximize its protection and bounce shots that would penetrate if faced directly.
The armor doesn’t make the Krazownik invulnerable, but provides the protection necessary to execute assault heavy tactics effectively.
Comfortable Gun Handling
The Krazownik offers surprisingly good gun characteristics for its alpha damage:
-9 Degrees Gun Depression: The gun depression is exceptional for a heavy tank, matching or exceeding most American heavies. This depression enables effective use of terrain features and hull-down positions that other nations’ heavies cannot access.
222mm Standard Penetration: The AP shell penetration is solid for Tier VIII, handling most same-tier opponents effectively without requiring excessive premium round usage. This penetration ensures the high alpha damage can be consistently applied.
Respectable Stabilization: The gun features “respectable stabilization,” suggesting good dispersion values during movement and turret traverse. This stability enables more reliable snapshot opportunities and reduces the need for lengthy aim times.
Comfortable for Damage: The description specifically notes the gun is “quite comfortable for its damage per shot,” indicating Wargaming has balanced the gun handling to prevent the Krazownik from suffering the typical accuracy and aim time penalties that often accompany high-alpha guns.
No Major Penalties: Unlike some high-alpha heavies that sacrifice gun handling for damage, the Krazownik maintains comfortable handling characteristics that make the firepower practically applicable rather than theoretical.
The gun handling package ensures the 490 HP alpha damage can be delivered reliably rather than being hampered by poor accuracy or excessive aim time.
Decent Mobility for an Assault Heavy
The Krazownik offers respectable mobility considering its armor protection:
38 km/h Top Speed: The maximum forward speed is decent for a heavily armored Tier VIII assault heavy. This speed enables tactical repositioning and keeps the Krazownik relevant as battle lines shift.
15 km/h Reverse Speed: The reverse speed is adequate for tactical retreats after delivering shots or when positions become untenable. While not exceptional, it’s sufficient for backing out of unfavorable situations.
Mobility-Armor Balance: The description specifically notes the mobility is “decent… considering the amount of armor it carries,” acknowledging the traditional trade-off between protection and speed while suggesting the Krazownik achieves a favorable balance.
Assault Capability: The mobility supports the assault heavy role—fast enough to advance with pushes and relocate between positions, but not so fast as to compromise the armor protection.
Consistent Battlefield Presence: The combination of 38 km/h forward and adequate reverse ensures the Krazownik can maintain relevant positioning throughout battles rather than being stuck in initial deployments.
The mobility package ensures the Krazownik remains flexible and adaptable rather than being locked into static defensive gameplay.
Tactical Considerations
The Krazownik’s balanced characteristics create clear tactical opportunities:
Versatile Positioning: Unlike specialized heavy tanks limited to specific positions, the Krazownik can function in hull-down situations (leveraging -9 degrees depression), frontal brawls (using reliable armor), or aggressive assaults (utilizing 490 HP alpha).
Hull-Down Exploitation: The -9 degrees gun depression opens up ridge-fighting positions that most heavy tanks cannot access. Combined with reliable turret armor, this creates nearly impenetrable positions on favorable terrain.
Alpha Trading: The 490 HP damage rewards calculated trading. Wait for opponents to expose themselves, deliver your shot, and retreat to cover while reloading. The high alpha ensures favorable exchange ratios.
Push Leadership: The combination of reliable armor and high alpha makes the Krazownik effective at leading team pushes. You can absorb damage while advancing and deliver punishing counter-fire.
Adaptability: The versatility means the Krazownik can adapt to evolving tactical situations rather than being effective only in predetermined circumstances.
Playstyle Implications
The Krazownik rewards commanders who leverage its balanced characteristics:
Terrain Awareness: The -9 degrees depression demands understanding which map positions offer ridge-fighting advantages. Route advances through terrain that maximizes this strength.
Trading Discipline: With 490 HP alpha, every shot matters significantly. Take the time to aim properly rather than rushing shots and wasting the high damage potential.
Armor Angling: The reliable armor works best when properly angled. Don’t rely on face-tanking—angle the hull and turret to maximize effective thickness.
Aggressive Confidence: The balanced package enables more aggressive positioning than typical Tier VIII heavies. Push when opportunities present themselves, knowing your armor and alpha damage create favorable conditions.
Commanders looking to master the Krazownik should consider:
Prioritizing hull-down positions on ridges and hills
Using the -9 degrees depression to engage from unexpected angles
Trading shots patiently to maximize 490 HP alpha damage value
Angling armor properly to bounce same-tier opponents
Leading team pushes with confidence in armor and firepower
Relocating between positions as battles evolve
Supporting teammates while maintaining aggressive positioning
Leveraging versatility to adapt to changing tactical situations
Community Reception
Initial community reactions to the Krazownik reveal interesting perspectives:
Polish Tank Criticism: One passionate commenter criticizes Polish tank balance: “those filthy russians wont leave a single dry thread on those polish tanks, 259 pen with gun this size? come on man every single other nation has atleast one op or super competetive tank and only poland has literally none”
Counter-Arguments: Others quickly counter this perspective, noting that the CS-63 is “literally the most competitive medium in the game” and the Błyskawica is “op in competitive modes too,” suggesting Polish tanks are more competitive than claimed.
Lower-Tier Success: Some mention the 25TP as “a super competitive Tank, that makes tons of fun (with the PomPom),” indicating Poland has successful vehicles at various tiers.
Tech Tree Quality: Players reference the 53TP and 50TP as quality heavy tanks, suggesting the Polish tech tree has strong options that the criticism overlooks.
Matchmaking Concerns: Comments note “then you got mm with ares 90 and….rest is history,” reflecting broader frustration with Tier VIII matchmaking facing Tier X opponents.
General Heavy Tank Viability: Some express that “Dogshit matchmaking makes heavy tanks completely pointless in WoT,” suggesting systemic issues beyond the Krazownik itself.
Comparison to Polish Heavy Tanks
The Krazownik must coexist with established Polish heavies:
vs 53TP: The tech tree Tier VIII offers different trade-offs. The Krazownik presumably emphasizes versatility while the 53TP may focus on other strengths.
vs 50TP: The Tier IX tech tree heavy represents the next step in Polish heavy tank evolution. The Krazownik’s Tier VIII positioning suggests it might be a premium or reward tank.
Polish Heavy Philosophy: Poland’s heavy tanks have generally emphasized good gun depression, respectable alpha damage, and reliable armor—characteristics the Krazownik clearly embodies.
Unique Niche: As described as “one of the most versatile assault heavy tanks available,” the Krazownik differentiates itself through well-rounded characteristics rather than specialized excellence.
What Sets the Krazownik Apart
The Krazownik occupies a specific niche in the Tier VIII heavy landscape:
Most Versatile Assault Heavy: The official description specifically highlights versatility as the Krazownik’s defining characteristic, suggesting it succeeds where specialized heavies struggle.
Balanced Excellence: Rather than excelling dramatically in one area while suffering elsewhere, the Krazownik offers good-to-excellent performance across all relevant categories.
Polish Identity: The combination of -9 degrees depression, reliable armor, and high alpha continues the Polish heavy tank design philosophy established by the 53TP and 50TP.
Comfortable High-Alpha: Unlike many high-alpha heavies that sacrifice gun handling for damage, the Krazownik maintains comfortable handling that makes the firepower practically applicable.
What’s Next?
As a Supertest vehicle, the Krazownik’s characteristics remain subject to adjustment:
Key questions for testing include:
Is 490 HP alpha damage with comfortable gun handling too strong at Tier VIII?
Does the reliable armor prove adequate in the current high-penetration meta?
Will the -9 degrees depression create positioning advantages that prove overwhelming?
Can the 222mm penetration handle heavily armored opponents without excessive premium round usage?
Will this be a tech tree vehicle, premium, or reward tank?
How does the Krazownik compare to other Tier VIII assault heavies in practice?
Final Thoughts
The Krazownik represents thoughtful design—creating versatility through balanced characteristics rather than trying to excel dramatically in narrow areas. The combination of 490 HP alpha damage, reliable armor, -9 degrees gun depression, and comfortable gun handling creates an assault heavy that can adapt to various tactical situations without glaring weaknesses.
For commanders who appreciate well-rounded vehicles that don’t force predetermined playstyles, the Krazownik offers an appealing package. The versatility enables responding to battlefield developments intelligently rather than being locked into rigid tactics.
However, the Krazownik’s success depends on whether “versatile” translates to “good at everything” or “mediocre at everything.” The testing phase will reveal whether the balanced characteristics create genuine adaptability or simply spread effectiveness too thinly to compete with specialized alternatives.
Whether you’re excited about Poland’s versatile assault heavy or concerned it’s another Tier VIII facing brutal matchmaking, the Krazownik represents an attempt to create a heavy tank that succeeds through balance and adaptability rather than overwhelming specialized strength. If Wargaming successfully tuned the characteristics, the Krazownik could become a favorite for players who value flexibility and well-rounded performance.
For players who appreciate British firepower but want something genuinely different from traditional fixed-gun designs, the Headshaker offers an intriguing combination of characteristics that creates unprecedented tactical versatility.
Gun Cooling System: Double Aiming Precision
The Headshaker features the gun cooling mechanic previously seen on vehicles like the Japanese Kame:
Cooling System: The gun cooling system allows for “double aiming”—the ability to improve accuracy significantly by taking additional time to fully aim. This mechanic transforms the Headshaker from a typical heavy-caliber derp gun into a precision instrument when needed.
Sniping Capability: The double aiming mechanic is specifically noted as helping “a lot” with sniping, but while the accuracy is important for sniping, the shell velocity is also really important, and Headshaker is lacking a lot of it, at only 900 meters per second for all types of shells.
Tactical Choice: Commanders face constant decisions: fire immediately with base accuracy, or take time to cool the gun for precision shots? The answer depends on target distance, exposure time, and tactical urgency.
Brawling vs Sniping: The cooling system enables true dual-role capability. In close brawls, base accuracy suffices. At range, invest the cooling time for surgical strikes.
This mechanic is crucial to understanding the “versatile” classification—it’s what enables the Headshaker to function effectively across engagement ranges that would cripple single-role tank destroyers.
HESH Shells: 720 HP Devastation
The Headshaker’s primary ammunition is HESH (High-Explosive Squash Head), bringing devastating single-shot damage:
720 HP Alpha Damage: Each HESH shell delivers a crushing 720 HP of damage. This alpha damage is exceptional for Tier IX, capable of crippling or outright destroying many opponents in just a few hits.
220mm Penetration: The HESH shells feature 220mm of penetration—sufficient for many targets but requiring careful shot placement against heavily armored opponents. This penetration value encourages targeting weak spots, side armor, or softer targets.
HESH Characteristics: HESH ammunition typically has:
Lower penetration than kinetic rounds
Inability to normalize against angled armor
Vulnerability to spaced armor and tracks
Exceptional damage when penetration succeeds
Useful splash damage even on non-penetrations
High-Risk, High-Reward: The 220mm penetration means every shot requires thought. Penetrations deliver crushing 720 HP blows, but bounces waste the lengthy reload time.
The HESH focus creates a playstyle centered around shot selection and target prioritization rather than spamming shots at heavily armored targets.
Limited-Rotation Turret: 60-Degree Arc
The Headshaker features a limited-rotation turret with specific tactical implications:
60-Degree Firing Arc: The turret can traverse 60 degrees total (presumably 30 degrees to each side), creating a 60-degree frontal arc of fire. This is significantly more flexible than fixed-gun TDs but far more restrictive than full-rotation turrets.
Vulnerability to Flanking: The 60-degree limitation creates significant blind spots. Aggressive light tanks and fast mediums can exploit these angles, forcing hull rotation that wastes time and exposes weaker side armor.
Brawling Advantage: In close-range brawls where enemies are directly ahead, the limited arc matters less. The turret provides enough flexibility to track targets without constant hull adjustments.
Compared to Fixed-Gun TDs: The Headshaker offers more flexibility than the Tortoise or AT-15, but less than turreted alternatives. It occupies a middle ground requiring different positioning skills.
This characteristic fundamentally shapes how the Headshaker must be played—you’re neither fixed-gun nor fully-turreted, creating unique positioning considerations.
Solid Frontal Armor: Brawling Capability
The Headshaker brings substantial frontal protection:
Solid Frontal Armor: The frontal armor is described as “solid,” suggesting meaningful protection that can bounce shots from same-tier opponents when properly positioned. This armor enables the aggressive close-range gameplay that British TDs are known for.
Brawling Enabler: Combined with 720 HP alpha damage and reasonable reload, the frontal armor allows the Headshaker to engage in close-range confrontations. You can trade shots with confidence, knowing your armor provides protection while you reload.
Gun Depression Concerns: Community discussion notes “soviet gun depression,” suggesting the Headshaker may have limited gun depression despite being British. One commenter sarcastically notes this “must mean it has no frontal weak spots. surely”—implying poor gun depression often correlates with stronger frontal armor profiles.
Armor-Dependent Tactics: The solid frontal armor encourages positioning where enemies must shoot your strongest armor while you aim HESH at their weak spots or side armor.
The armor doesn’t make the Headshaker invincible, but provides the protection necessary to execute close-range tactics that would be suicidal in paper-armored TDs.
High DPM: 12.9-Second Reload
The Headshaker brings impressive damage output:
12.9-Second Reload: The reload time is remarkably fast for a gun delivering capable of 720 HP per shot with HESH penetration. This reload enables sustained pressure that most high-alpha TDs cannot match.
Solid DPM: The combination of 600 HP alpha and 12.9-second reload creates a great DPM foundation for this tank. Maybe it doesn’t have the level of DPM of the Tortoise, but it makes trading a lot easier with almost 50% higher alpha damage.
This reload time is crucial to the “versatile” classification—it enables sustained combat effectiveness that pure alpha-focused TDs cannot maintain.
Mobility: Adequate Repositioning
The Headshaker offers moderate mobility:
37 km/h Top Speed: The maximum forward speed is described as “not stellar” but adequate for changing lines in battle. This isn’t racing speed, but it’s sufficient for tactical repositioning as the battle evolves.
Line-Changing Capability: The mobility specifically enables changing battle lines—relocating from one flank to another as tactical situations demand. You won’t arrive first to any position, but you can adapt to shifting battles.
Heavy TD Characteristics: The 37 km/h speed is typical for heavily armored tank destroyers at Tier IX, balancing armor and firepower against strategic mobility.
Deliberate Movement: The mobility suggests careful, planned repositioning rather than rapid flanking. Choose positions deliberately and relocate when necessary, not constantly.
The mobility ensures the Headshaker remains relevant throughout battles without enabling the rapid flanking gameplay that would contradict the brawling TD role.
Tactical Considerations
The Headshaker’s unusual combination of features creates specific tactical opportunities:
Dual-Role Flexibility: The gun cooling system genuinely enables dual-role capability. Brawl without cooling when enemies are close, or invest time in double aiming for long-range precision. This flexibility is the Headshaker’s defining characteristic.
HESH Target Selection: The 220mm penetration demands intelligent target selection. Prioritize lightly armored opponents, targets showing side armor, or specific weak spots on heavily armored tanks.
Arc Management: Constantly managing the 60-degree firing arc becomes essential. Position your hull to maximize coverage of likely engagement angles while maintaining escape routes.
Armor Utilization: The solid frontal armor enables aggressive positioning that would be suicidal in paper TDs. Face enemies directly, let them shoot your strongest armor, and deliver 720 HP responses.,
Playstyle Implications
The Headshaker rewards commanders who embrace versatility:
Adapt to Range: Adjust tactics based on engagement distance. Close range favors immediate brawling. Long range demands investing in gun cooling for accuracy. Mid-range requires judgment about which approach suits the situation.
Position with Purpose: Every position must consider both the 60-degree firing arc and frontal armor orientation. Place your hull to cover anticipated threats while maintaining offensive capability.
Shot Patience: The 220mm HESH penetration punishes hasty shots against heavy armor. Wait for weak spots, side shots, or favorable targets rather than wasting shells on impenetrable armor.
DPM Maximization: The 12.9-second reload rewards maintaining aggressive positioning that enables frequent shooting. Dead time where you can’t shoot wastes the high-DPM potential.
Commanders looking to master the Headshaker should consider:
Learning when to invest in double aiming versus firing immediately
Identifying which targets suit 220mm HESH penetration
Managing the 60-degree firing arc through hull positioning
Using solid frontal armor to enable aggressive close-range positioning
Leveraging high DPM through sustained engagement rather than hit-and-run
Relocating between battle lines as tactical situations evolve
Avoiding positions where poor gun depression becomes a liability
Targeting weak spots or lightly armored opponents to maximize HESH effectiveness
Community Reception
Initial community reactions to the Headshaker reveal diverse perspectives:
Fun Potential: Some players immediately recognize the potential: “This looks super fun.”
Tank Factory Criticism: Others criticize the pace of new tank releases: “What a fuck? Five tanks every month? This is game or tank factory???” suggesting frustration with constant new content.
XM-57 Comparison: Community members draw comparisons to the American XM-57, noting similarities in the limited-rotation turret and heavy-hitting gun combination.
ChatGPT Tanks: Cynical players comment on modern tank designs: “I’m also shaking my Head the whole Time when i see all these ChatGPT Tanks…” implying new designs feel algorithmically generated rather than historically grounded.
Gun Depression Concerns: Players note the apparently limited gun depression despite British origin: “soviet gun depression must mean it has no frontal weak spots. surely” sarcastically suggesting poor depression often accompanies strong frontal armor.
Collector Appeal: Some view it as feeding collector needs rather than filling gameplay gaps: “They must be feeding a need for collectors. No point otherwise.”
What Sets the Headshaker Apart
The Headshaker occupies unprecedented territory:
True Versatile TD: Unlike TDs optimized for either brawling or sniping, the Headshaker genuinely excels at both through the gun cooling mechanic.
HESH-Focused British TD: While Britain has HESH-capable vehicles, the Headshaker appears designed specifically around HESH as primary ammunition rather than an option.
60-Degree Limited Turret: The specific 60-degree arc creates a middle ground between fixed-gun and full-turret that requires distinct positioning skills.
High-Alpha, High-DPM Combination: Rarely do 720 HP guns reload in just 12.9 seconds. This combination creates both immediate impact and sustained pressure.
Gun Cooling on British TD: The cooling mechanic expands to a new nation and vehicle class, demonstrating Wargaming’s willingness to spread innovative mechanics beyond their original implementations.
What’s Next?
As a Supertest vehicle, the Headshaker’s characteristics remain subject to adjustment:
Key questions for testing include:
Is the 720 HP HESH with 220mm penetration properly balanced?
Does the gun cooling system adequately compensate for base accuracy?
Will the 60-degree firing arc prove too restrictive or adequately flexible?
How does the solid frontal armor perform against current high-penetration meta?
Is the 12.9-second reload too fast for 720 HP alpha damage?
Will this be a tech tree vehicle, premium, or reward tank?
How does the limited gun depression impact effective positioning options?
Final Thoughts
The Headshaker represents ambitious design—combining characteristics that normally don’t coexist to create genuine versatility rather than jack-of-all-trades mediocrity. The gun cooling system transforms a heavy-hitting HESH gun into a precision instrument when needed, while the combination of solid frontal armor and high DPM enables sustained close-range brawling.
For commanders who appreciate tactical flexibility and enjoy adapting to battlefield circumstances rather than executing predetermined strategies, the Headshaker offers an intriguing package. The requirement to manage gun cooling, HESH penetration limitations, limited firing arc, and armor positioning creates a high skill ceiling that rewards mastery.
However, the Headshaker won’t suit everyone. Players who prefer specialized excellence over versatility, or those frustrated by HESH penetration mechanics, will find the Headshaker’s compromises unpalatable. The limited gun depression may also frustrate players accustomed to British gun handling advantages.
Whether you’re excited about Britain’s versatile tank destroyer or skeptical about another unconventional design, the Headshaker represents Wargaming’s continued experimentation with combining mechanics in novel ways. If the gun cooling system proves as effective for enabling dual-role capability as intended, the Headshaker could become a beloved vehicle that rewards intelligent, adaptive play. If not, it risks being another curiosity that fails to find its competitive niche.to find its place in the competitive Tier X medium landscape.
Named after the legendary sword of Roland from French medieval epic poetry, this vehicle combines exceptional mobility with a unique firing system that allows it to deliver significant damage in extremely short timeframes, but with very bad penetration values. For players who appreciate French autoloader philosophy but crave something genuinely different, the Durendal offers an intriguing variation on the theme that emphasizes burst trading over sustained clip damage
The Durendal’s defining characteristic is its unusual autoloading system with two separate shell containers:
Poor penetration: this is quite unusual for a French tank; it has really bad penetration values. Only 242 mm on standard rounds and only 300 mm on premium rounds. Going through the front of the Tier 10 and 11 tanks is going to be very hard.
Two-Container Configuration: Unlike traditional autoloaders with a single drum or magazine, the Durendal features two independent containers that work in tandem to deliver shells. This configuration enables the unique firing pattern.
Rapid Two-Shell Bursts: The dual containers allow for extremely rapid two-shell bursts, presumably with minimal delay between the shots. This burst capability enables dealing significant damage in timeframes that give opponents almost no opportunity to respond.
4-Second Intra-Clip Reload: After firing the initial rapid burst from one container, there’s a 4-second reload before you can fire the next two-shell burst from the second container. This creates a distinctive rhythm: burst, brief pause, burst, long reload.
25-Second Full Reload: The complete reload cycle takes 25 seconds to replenish both containers. This lengthy reload creates extended vulnerability periods between full clip cycles, demanding careful planning and positioning.
Damage Per Shell: While specific alpha damage isn’t provided in the initial information, community discussion suggests 350 HP per shell. If accurate, this creates 700 HP bursts every 4 seconds, with a total clip potential of 1,400 HP.
The dual-container system creates a unique trading pattern unlike any existing French autoloader, emphasizing rapid successive bursts rather than traditional clip dumps.
Exceptional Mobility: Strike from Unexpected Angles
The Durendal brings impressive mobility characteristics:
60 km/h Top Speed: The maximum forward speed of 60 km/h places the Durendal among the faster Tier X mediums. This speed enables rapid position changes, aggressive flanking maneuvers, and quick escapes when situations deteriorate.
21 km/h Reverse Speed: The reverse speed is adequate for tactical retreats, though not exceptional by modern medium tank standards. It’s sufficient for backing out of engagements after delivering bursts but won’t save you from committed mistakes.
Agility Focus: The mobility is specifically noted as compensating for the vehicle’s relatively light armor. This design philosophy emphasizes positioning, map awareness, and exploitation of opportunities over direct confrontation.
Unexpected Angle Attacks: The combination of high speed and burst damage enables the Durendal to strike from angles opponents don’t anticipate. Appear suddenly, deliver devastating double-bursts, and relocate before effective response arrives.
The mobility package ensures the Durendal can consistently find favorable engagement conditions rather than being forced into unfavorable fights.
Armor Profile: Light Protection
The Durendal follows French medium tank tradition with minimal armor on the hull:
Relatively Light Armor: While the turret has around 200 mm of armor at the front, the hull is really poor at only 55 mm.
Mobility as Defense: The armor philosophy trades protection for speed and firepower. Survival depends on not being hit rather than bouncing shots when hit.
Support Medium Classification: The designation as a “support medium” reinforces the light armor profile. This isn’t a tank for frontline brawling or leading charges—it’s designed for second-line positioning and opportunistic strikes.
HP Pool Considerations: While specific HP values aren’t provided, expect a typical Tier X medium health pool—enough to survive some mistakes but not enough to sustain prolonged trading.
The armor demands perfect positioning awareness and careful engagement selection—every shot taken is potentially fatal damage.
Tactical Considerations
The Durendal’s characteristics create specific tactical guidelines:
Burst Trading Specialist: The rapid two-shell bursts enable exceptional trading in peek-a-boom situations. Expose yourself briefly, deliver 700 HP, retreat before opponents can respond effectively.
Container Management: Understanding the dual-container system is crucial. You have two rapid bursts before the lengthy 25-second reload. Plan which targets receive each burst before committing.
Mobility Exploitation: Use the 60 km/h speed to access unexpected positions. Flanks that seem safe from normal mediums suddenly face rapid double-bursts from angles they didn’t anticipate.
Support Positioning: The light armor and burst damage suggest second-line positioning where you can leverage teammates’ HP to create shooting opportunities while minimizing exposure.
Timing Windows: The 4-second gap between bursts creates specific timing windows. After the first burst, you have a brief moment to reassess before committing the second burst or repositioning.
Playstyle Implications
The Durendal rewards commanders who understand rhythm-based combat:
Burst Rhythm Mastery: Success requires internalizing the fire-pause-fire-reload rhythm. Deliver the first burst, evaluate the tactical situation during the 4-second pause, execute the second burst, then immediately seek cover during the 25-second reload.
Opportunistic Aggression: The 60 km/h speed enables rapid exploitation of battlefield opportunities. When enemies focus elsewhere or expose themselves, the Durendal can arrive quickly and punish with devastating bursts.
HP Conservation: With light armor and moderate HP, every point of damage taken reduces battlefield longevity. Play intelligently to maximize survival time and clip cycles.
Target Prioritization: Identify which enemies deserve the dual bursts before engaging. Wasting containers on low-value targets leaves you defenseless during the lengthy reload against priority threats.
Commanders looking to master the Durendal should consider:
Identifying opportunities for double-burst engagements before committing
Using the 60 km/h speed to reach unexpected positions
Timing bursts during enemy reload cycles or distractions
Immediately seeking cover after exhausting both containers
Supporting teammates who can protect you during the 25-second reload
Leveraging the rapid bursts for finishing wounded high-priority targets
Avoiding prolonged engagements where the light armor becomes a liability
Using mobility to choose every engagement on favorable terms
Comparison to Existing French Autoloaders
The Durendal must compete with established French autoloaders:
vs Bat-Châtillon 25t: The Bat-Châtillon offers a traditional 5-6 shell clip with longer sustained fire. The Durendal trades clip size for more rapid bursts in shorter timeframes.
vs AMX 50 B: The heavy tank AMX 50 B delivers higher alpha per shell and larger total clip damage. The Durendal counters with superior mobility and potentially faster burst delivery.
vs Progetto-style Autoreloaders: Italian autoreloaders offer flexibility between burst and sustained fire. The Durendal’s dual-container system creates a different rhythm focused specifically on rapid successive bursts.
Unique Niche: The two-container rapid-burst system creates a genuinely unique niche—no other tank delivers damage in this specific pattern.
What Sets the Durendal Apart
The Durendal occupies unprecedented territory in French tank design:
First Dual-Container Autoloader: Introduces the two-container mechanic to World of Tanks, creating an entirely new autoloader variant.
Rapid Burst Emphasis: Unlike traditional autoloaders that spread shots across longer timeframes, the Durendal optimizes for ultra-rapid successive bursts.
Legendary Naming: The connection to French medieval epic poetry gives the tank cultural significance beyond pure statistics.
Support Medium Identity: Clearly designed for second-line support rather than frontline brawling, with characteristics that reward intelligent positioning over armor reliance.
Balance Considerations
Several factors suggest potential adjustments during testing:
Burst Damage Power: If the rapid two-shell bursts with minimal delay prove too strong in peek-a-boom situations, expect increases to the inter-burst timing.
Mobility Balance: The combination of 60 km/h speed and rapid bursts might enable too much unpunished damage. Speed reductions could occur if testing reveals excessive power.
Container Timing: The 4-second interval between bursts and 25-second full reload will be carefully scrutinized to ensure the burst pattern isn’t overwhelming or underwhelming.
Alpha Damage: Community discussion suggests 350 HP per shell. This might be adjusted up or down based on testing data regarding overall performance.
Final thoughts
The Durendal represents bold innovation in French autoloader design—taking the nation’s autoloader philosophy and creating an entirely new variant focused on ultra-rapid successive bursts rather than traditional clip dumps. The dual-container system delivers damage in a rhythm unlike any existing tank, rewarding commanders who master the burst-pause-burst-reload pattern.
For commanders who appreciate French autoloader gameplay but want something genuinely different, the Durendal offers an intriguing package. The requirement to leverage 60 km/h mobility while managing dual containers and surviving with light armor creates a high skill ceiling that rewards mastery.
However, the Durendal’s success depends entirely on balance execution. The rapid-burst mechanic could prove either too powerful in skilled hands or too limited if the timing and damage values aren’t perfectly tuned. Community reception suggests skepticism about whether the current iteration offers compelling advantages over established alternatives.
Whether you’re excited about France’s dual-container innovation or concerned it’s just another French medium without sufficient differentiation, the Durendal represents Wargaming’s continued experimentation with autoloader variants. If the legendary sword’s name proves prophetic, the Durendal will cut through opponents with devastating efficiency. If not, it risks becoming another curiosity that fails to find its place in the competitive Tier X medium landscape.
This revolutionary vehicle combines exceptional mobility with high firepower and pinpoint accuracy, creating a medium tank that can deeply infiltrate enemy lines and deliver unexpected strikes from unconventional angles. For players who have enjoyed French wheeled light tanks but crave more firepower, or for those seeking a German vehicle with unprecedented mobility, the Radkampfwagen promises to redefine what German mediums can accomplish on the battlefield.
Historical Context: German Wheeled Vehicle Development
The Radkampfwagen, whose name translates to “Wheeled Combat Vehicle” in English, represents Germany’s exploration of wheeled armored fighting vehicles as alternatives or supplements to traditional tracked tanks.
Post-War Evolution: Following World War II, Germany recognized the value of wheeled armored vehicles for reconnaissance, rapid response, and maintaining territorial control. Wheeled vehicles offered strategic mobility on roads while consuming less fuel and requiring less maintenance than tracked counterparts.
Design Philosophy: German wheeled vehicle development emphasized combining the mobility advantages of wheels with sufficient firepower to engage threats independently. The Radkampfwagen embodies this philosophy—capable of rapid strategic repositioning while packing enough punch to eliminate priority targets.
Modern Inspiration: The concept draws inspiration from vehicles like the Radkampfwagen 90 (also known as the Spähpanzer 2), which served as a wheeled reconnaissance platform. The Tier X interpretation amplifies these characteristics to create a viable main battle platform rather than just a scout.
Community Speculation: Players have noted similarities to vehicles like War Thunder’s Radkampfwagen 90, suggesting cross-pollination of concepts between tank games’ implementations of similar historical design studies.
The Radkampfwagen represents Germany’s answer to “what if we combined wheeled mobility with medium tank firepower?”
Wheeled Chassis: Unmatched Strategic Mobility
The Radkampfwagen’s defining characteristic is its wheeled chassis, bringing French wheeled vehicle mechanics to the German tech tree:
Exceptional Forward Speed: With a maximum forward speed of 65 km/h, the Radkampfwagen can traverse the battlefield faster than virtually any tracked vehicle. This speed enables rapid flanking maneuvers, quick position changes, and unmatched map presence.
Outstanding Reverse Speed: The impressive 45 km/h reverse speed is exceptional even by wheeled vehicle standards. This allows the Radkampfwagen to engage, deal damage, and retreat at speeds that make pursuit nearly impossible.
Wheeled Vehicle Mechanics: Like French wheeled lights, the Radkampfwagen presumably features:
Cruise control mode for maximum speed on roads
Enhanced resistance to module damage while moving
Penalty to off-road mobility compared to tracked vehicles
Deep Infiltration Capability: The combination of 65 km/h forward and 45 km/h reverse creates unprecedented infiltration capability. No position on the battlefield is truly unreachable—the Radkampfwagen can exploit gaps in enemy lines, attack from unexpected angles, and escape before effective response.
Strategic Flexibility: The mobility enables choosing engagements rather than being forced into unfavorable fights. If a flank collapses, the Radkampfwagen can rapidly relocate. If opportunities emerge elsewhere, it arrives before opponents can react.
This mobility fundamentally changes how medium tanks can operate, enabling hit-and-run tactics that tracked mediums can only dream about.
Firepower: High Alpha Precision
The Radkampfwagen brings substantial firepower that distinguishes it from light tanks:
390 HP Alpha Damage: Each shot delivers 390 HP of damage, placing the Radkampfwagen firmly in medium tank territory. This alpha damage is significantly higher than light tanks and many medium tanks, enabling effective trading and target elimination.
8.4 Second Reload: The reload time balances the alpha damage, creating respectable DPM without being overwhelming. This reload allows for sustained fire while maintaining the per-shot impact that punishes exposed enemies.
Excellent Accuracy: With 0.3 dispersion, the Radkampfwagen offers exceptional accuracy rarely seen even on dedicated sniper mediums. This precision enables reliable damage at range and confident weak spot targeting.
Sniper Medium Classification: The combination of high alpha, excellent accuracy, and mobility positions the Radkampfwagen as a “sniper medium”—a vehicle designed for surgical strikes from safe positions rather than sustained brawling.
Penetration Considerations: While specific penetration values aren’t provided, the classification as a Tier X medium suggests competitive standard penetration with premium rounds for heavily armored targets.
The firepower package creates a vehicle capable of punishing mistakes immediately and consistently, leveraging mobility to ensure favorable engagement conditions.
Tactical Gameplay: Unconventional Angles
The Radkampfwagen’s characteristics enable unique tactical approaches:
Deep Infiltration Specialist: The combination of 65 km/h speed and 390 HP alpha makes the Radkampfwagen exceptional at penetrating behind enemy lines. Identify gaps, exploit them rapidly, and punish rear-positioned enemies before they can respond.
Unexpected Strike Capability: No position is safe from the Radkampfwagen. Flanks that seem secure suddenly face 390 HP hits from angles opponents didn’t anticipate. This psychological pressure forces enemies to maintain defensive awareness even in supposedly safe positions.
Vision Control: While classification emphasizes firepower over pure scouting, the mobility enables active vision play. Rapidly move to spotting positions, acquire targets for teammates, then relocate before counterfire arrives.
Opportunistic Gameplay: The Radkampfwagen excels at exploiting battlefield chaos. When enemies focus elsewhere, strike from unexpected angles. When attention turns your way, use 45 km/h reverse to escape.
No Place Unreachable: The tagline “no place on the battlefield is truly unreachable” defines the Radkampfwagen’s philosophy. Map features that protect against normal mediums become vulnerabilities when facing a vehicle that arrives from impossible directions.
Armor Profile: Speed Is Armor
The Radkampfwagen presumably follows wheeled vehicle tradition with minimal armor:
Paper Protection: Expect extremely thin armor that provides no meaningful protection against Tier X weaponry. The Radkampfwagen survives through mobility, not armor.
Vulnerability to Splash: Wheeled vehicles are notoriously vulnerable to HE splash damage. Artillery, derp guns, and explosive shells pose significant threats that can’t be mitigated through angling.
Vision-Based Defense: The primary defensive tool is avoiding detection and engagement. Use vision control, terrain, and speed to minimize exposure rather than relying on armor.
Hit Point Pool: The HP pool is likely typical for Tier X mediums—sufficient to survive some mistakes but not enough to sustain prolonged trading.
The lack of armor demands perfect positioning and awareness—every mistake that results in taking fire is potentially fatal.
Community Reception: Balance Concerns
Initial community reactions to the Radkampfwagen reveal significant concerns:
Puma Desires: Multiple players express desire for the historical Sd.Kfz.234/2 Puma in-game, suggesting the Radkampfwagen might be the top of a new German wheeled line. Community speculation suggests the real Puma could fit as Tier VII-VIII given its 5cm KwK 39 L/60 gun.
Concept 5 Competition: Players note the Radkampfwagen may turn faster than the Concept 5, making it potentially interesting but inevitably competing with the Leopard 1 for the German sniper medium slot.
Leopard 1 Comparison: Community consensus suggests that while interesting, the Radkampfwagen falls short when compared to the Leopard 1. Some view it as “something for collectors” rather than a competitive choice.
Balance Predictions: Experienced players predict Wargaming won’t release the Radkampfwagen with current stats, as it would make the Concept 5 obsolete and require buffs to both it and the Ashigaru. The expectation is significant nerfs before release.
Overpowered Concerns: Some believe that if released with current stats, nobody would play the Concept 5 anymore, indicating the Radkampfwagen might be too strong in its current iteration.
Design Origins: Community commentary notes this vehicle “sprang from the imagination of a WG employee,” suggesting it’s a paper design or significant extrapolation from historical concepts.
Comparison to Existing Sniper Mediums
The Radkampfwagen must compete with established Tier X sniper mediums:
vs Leopard 1: The Leopard 1 offers better gun handling, likely superior armor (though still paper), and established community trust. The Radkampfwagen counters with superior mobility and potentially better alpha damage.
vs Concept 5: If the Radkampfwagen turns faster and offers similar or better mobility, it could make the Concept 5 largely obsolete. Both emphasize mobility and firepower, but wheeled mechanics might provide decisive advantages.
vs Ashigaru: The Japanese sniper medium offers different trade-offs. The Radkampfwagen’s wheeled mobility is unique, but the Ashigaru may offer superior gun handling or accuracy.
Unique Niche: The wheeled chassis creates a genuinely unique niche—no other Tier X medium can match the strategic mobility and infiltration capability.
What Sets the Radkampfwagen Apart
The Radkampfwagen occupies unprecedented territory:
First German Wheeled Vehicle: Introduces wheeled vehicle mechanics to the German tech tree for the first time, expanding the nation’s tactical options dramatically.
Wheeled Medium Tank: Unlike French wheeled lights that sacrifice firepower for speed, the Radkampfwagen maintains medium tank alpha damage while offering wheeled mobility.
65/45 km/h Speed: The combination of exceptional forward and reverse speed creates mobility unmatched by any tracked vehicle, enabling tactical options unavailable to conventional mediums.
Sniper Mobility: Combines sniper-grade accuracy (0.3 dispersion) with mobility that ensures always shooting from favorable positions.
Infiltration Specialist: The only Tier X medium designed specifically for deep penetration behind enemy lines and strikes from unconventional angles.
Balance Considerations
Several factors suggest the Radkampfwagen may receive adjustments:
Mobility Power: The 65/45 km/h speed combined with 390 alpha and 0.3 accuracy might prove overwhelming. Expect potential speed reductions or gun handling nerfs.
Comparative Balance: If the Radkampfwagen makes the Concept 5 obsolete, Wargaming must either nerf the Radkampfwagen or buff competitors. History suggests nerfs are more likely.
Wheeled Medium Precedent: This would be the first wheeled medium tank in the game. Balancing mobility against firepower in this configuration is uncharted territory.
Deep Infiltration Impact: The ability to “deeply infiltrate enemy lines and deliver unexpected strikes from unconventional angles” could fundamentally disrupt battlefield flow if too strong.
What’s Next?
As a Supertest vehicle, the Radkampfwagen’s characteristics remain subject to potentially significant adjustment:
Key questions for testing include:
Is the 65/45 km/h speed balanced against the 390 alpha and 0.3 accuracy?
How does the wheeled chassis perform on various map types?
Can the Radkampfwagen coexist with the Leopard 1 without making it obsolete?
Will this be a tech tree vehicle, premium, or reward tank?
If tech tree, what vehicles lead up to it? (Community expects the Puma at Tier VII-VIII)
How vulnerable is it to artillery and HE splash damage?
Does the lack of armor create sufficient counterplay opportunities?
Final Thoughts
The Radkampfwagen represents bold innovation in German medium tank design—taking the nation’s sniper medium philosophy and turbocharged it with unprecedented wheeled mobility. The combination of 65 km/h speed, 45 km/h reverse, 390 HP alpha damage, and 0.3 accuracy creates a vehicle that can exploit battlefield opportunities faster and more decisively than any tracked medium.
For commanders who appreciate hit-and-run gameplay, surgical strikes from unexpected positions, and the freedom to choose every engagement on your terms, the Radkampfwagen offers an intriguing package. The requirement to survive through positioning and awareness rather than armor creates a high skill ceiling that rewards mastery.
However, the Radkampfwagen likely won’t reach live servers with current statistics. The combination of characteristics appears too powerful, potentially obsoleting existing sniper mediums. Expect nerfs to speed, gun handling, or alpha damage before release.
Whether you’re excited about Germany’s first wheeled vehicle or concerned about balance implications, the Radkampfwagen represents a genuinely new approach to Tier X medium tank gameplay. If Wargaming successfully balances the wheeled mobility against firepower, this could become a beloved addition. If not, it risks being either too dominant or nerfed into irrelevance.
For now, the Radkampfwagen remains a fascinating Supertest experiment—proof that even established tank games can still innovate and surprise their communities with entirely new vehicle concepts.