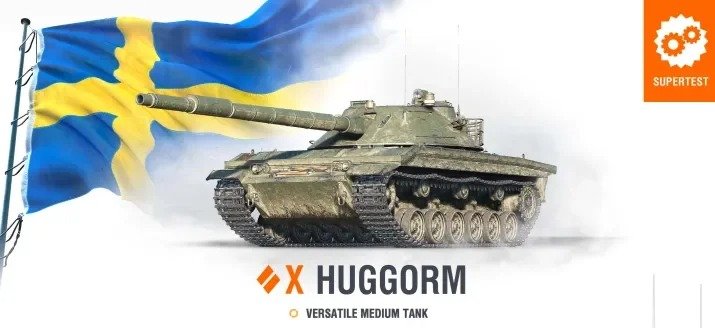
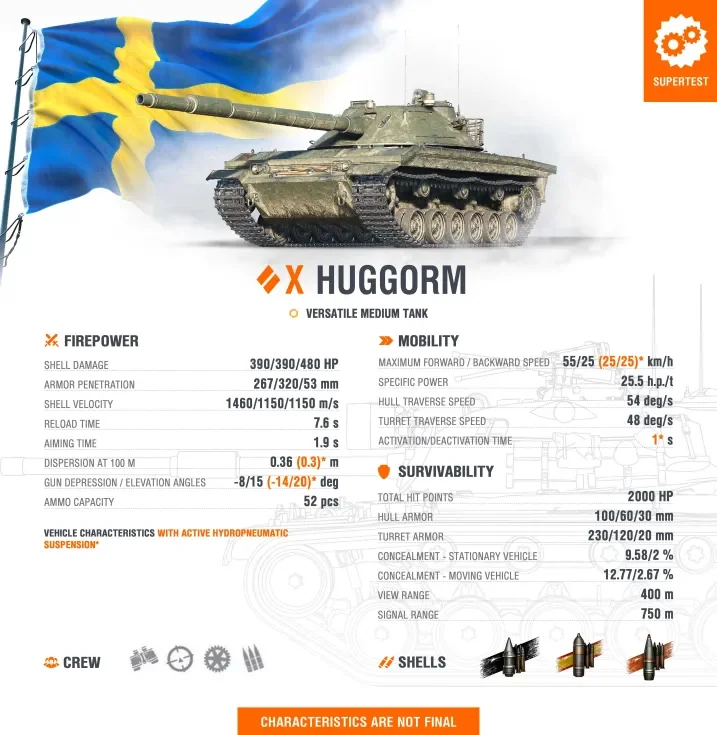
The Swedish tech tree is injecting an extraordinary level of flexibility into the Supertest environment with the arrival of the Huggorm. This new addition is being positioned as a true jack-of-all-trades, boasting a hydropneumatic suspension system that allows it to swap between two distinct operational modes on the fly.
The Duality of Modes
The Huggorm’s entire identity revolves around its dual-mode functionality, which allows it to adapt to almost any battlefield scenario.
In Travel mode, the tank prioritizes repositioning and skirmishing. It achieves a top forward speed of 55 km/h, making it highly capable of executing rapid maneuvers or securing early power positions. Crucially, its gun handling, accuracy, aiming time, and DPM remain solid while on the move, allowing it to function effectively as a traditional medium tank when the situation demands it.
When the fight slows down or a strong defensive posture is required, engaging Siege mode transforms the vehicle. The transition takes just one second and, remarkably, can be triggered without the tank needing to come to a complete halt.
Unprecedented Ridge Control
Once Siege mode is active, the Huggorm’s mobility drops to a maximum of 25 km/h (both forward and reverse), but its defensive and offensive capabilities spike dramatically.
The hydropneumatic suspension kicks in, allowing the hull to tilt and granting an exceptional maximum gun depression of 14°. When combined with what Wargaming describes as an “extremely well-protected turret,” this extreme gun depression turns the Huggorm into an absolute monster when fighting over ridgelines or uneven terrain. Furthermore, the gun’s base accuracy is improved even further while in this entrenched state.
Playstyle Implications
Expect the Huggorm to be one of the highest skill-ceiling vehicles in the game. It is not an exaggeration to say that almost every battlefield situation presents an opportunity for this tank—provided the commander knows which mode to be in.
Optimal play will likely involve using Travel mode’s 55 km/h top speed to aggressively secure advanced ridgelines early in the match. Once in position, snapping into Siege mode will allow you to leverage the 14° of gun depression and strong turret armor to lock down a corridor. If the flank collapses, a quick one-second toggle back to Travel mode allows for a rapid escape.
Community Reception
The World of Tanks community has shown significant interest in the Huggorm, primarily due to the fluidity of its mechanic. The ability to activate Siege mode without stopping is a massive quality-of-life improvement over older hydropneumatic vehicles, mitigating the awkward vulnerability windows that often plague stance-swapping tanks.
However, some players remain cautious, waiting to see the final soft stats regarding its terrain resistance and the precise thickness of that “well-protected” turret before declaring it a true meta contender.
What Sets the Huggorm Apart
Fluid Stance Swapping: The ability to enter Siege mode in just one second without stopping drastically reduces vulnerability during transitions.
Extreme Gun Depression: 14° of gun depression while in Siege mode allows the tank to abuse terrain that other vehicles cannot utilize.
True Hybrid Capability: It retains strong DPM and gun handling in Travel mode, ensuring it isn’t helpless when forced to fight on flat ground.
What’s Next
As a new addition to the Supertest environment, Wargaming will be monitoring the Huggorm’s performance metrics very closely. The balance between its two modes will be heavily scrutinized, so expect potential tweaks to its aiming times, dispersion values, or the exact speed limits of its Siege mode before it makes its official debut.
Final Thoughts
The Huggorm represents a fantastic evolution of the Swedish Siege mode mechanic. If you enjoy highly adaptable vehicles that reward sharp situational awareness and constant map reading, this is a tank you should definitely be watching.
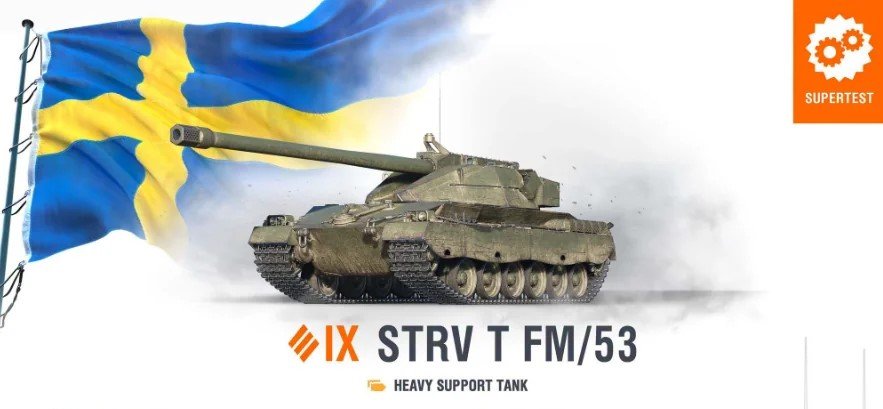
Billed as a “Heavy Support Tank,” this machine essentially marries the extreme hull-down capabilities of the Swedish line with the sudden, punishing burst potential of French autoloaders.
This vehicle aims to combine the ridge-line flexibility of Swedish design with the rapid-fire burst capabilities of French autoloading heavy tanks. While it doesn’t quite match the lightning top-end speed of a true French heavy, it looks ready to offer a comfortable alternative for players who love managing clip cycles without completely giving up hull-down security.
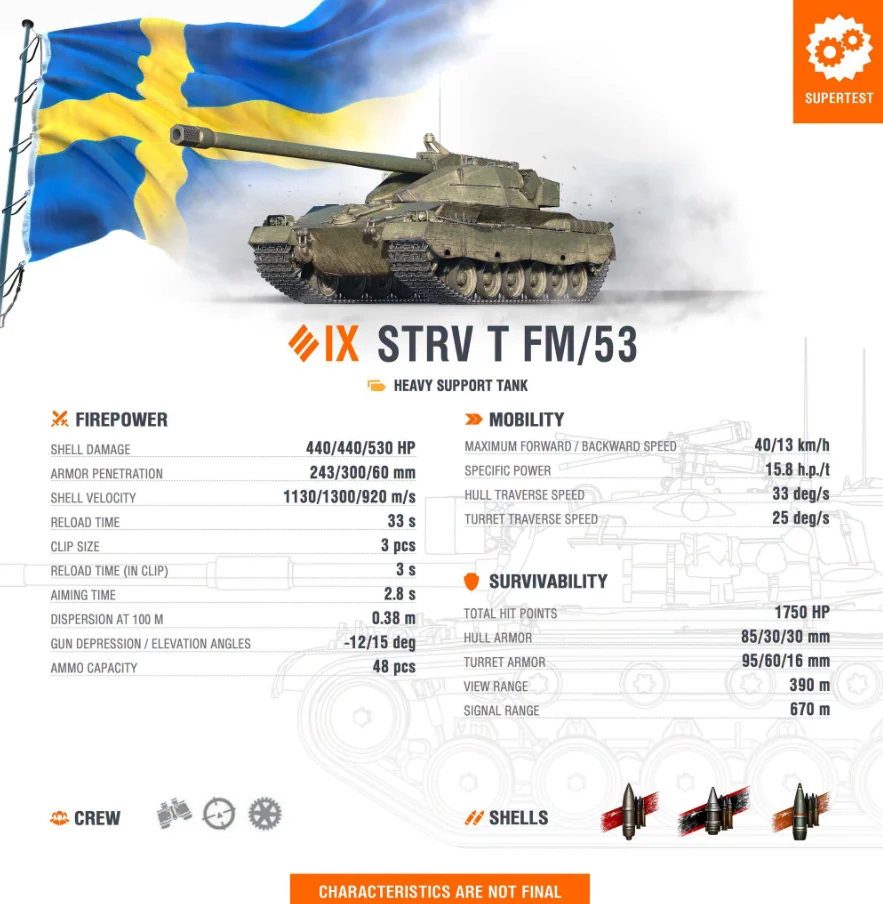
Take a close look at the official Wargaming Supertest stat card below. It maps out the core specifications of the vehicle, calling attention to its notable -12 degrees of gun depression and its 3-shell autoloader, balanced against a lengthy 33-second base clip reload and slower gun handling metrics.
The high-tier heavy meta is getting a fresh injection of flavor. The Strv T fm/53 has officially rolled into the World of Tanks Supertest environment as a Tier IX heavy support tank. By blending the mechanics of two iconic tank-building nations, Wargaming is trying to carve out a new niche—an autoloader that values terrain comfort over raw, breakneck speed.
Respectable Mobility and Armor Profile
Unlike traditional French heavy tanks that rely strictly on agility while carrying paper-thin armor, the Strv T fm/53 offers a more calculated approach to surviving the battlefield. It features a hull armor profile of 85/30/30 mm and a turret front of 95 mm. While 95 mm of frontal turret armor might sound dangerously low for a Tier IX heavy tank at first glance, the true defensive strength lies in its steep geometry. Wargaming describes it as “reliable—though not invulnerable—turret armor,” meaning you will need to actively use angles to deflect incoming rounds.
When it comes to getting around the map, the tank holds a respectable line. Powered by an engine yielding a specific power of 15.8 h.p./t, it achieves a maximum forward speed of 40 km/h and a reverse speed of 13 km/h. While it falls short of the physics-defying acceleration seen in pure French heavy tanks, it provides enough baseline mobility to secure power positions or retreat when a flank completely collapses.
Devastating Firepower (440 HP Alpha)
The centerpiece of the Strv T fm/53 is its formidable main armament. It packs a hard-hitting 440 HP alpha damage per shot on both its standard AP and premium APCR rounds, jumping up to a beefy 530 HP on High Explosive (HE) shells. Standard penetration comes in at an average 243 mm, scaling up to a highly competitive 300 mm when you tap into your premium ammunition.
However, this heavy hitting power comes with a clear mechanical trade-off. Gun handling stands out as the vehicle’s primary weakness. With a base dispersion of 0.38 m at 100 meters and a sluggish 2.8-second aiming time, this isn’t a platform meant for hitting pixel-perfect weak spots from across the map. Success will require getting up close and personal where the gun handling soft stats won’t betray you.
The Comfortable Autoloader Mechanic
What truly separates this vehicle from its direct Swedish tech-tree counterparts is how fluid its autoloader feels to operate. The tank features a 3-shell clip with a total reload time of 33 seconds. The intra-clip reload is a quick 3 seconds, meaning you can dump a massive 1,320 HP burst of damage into an unsuspecting opponent in just 6 seconds.
Compared to existing high-tier Swedish heavy autoloaders, the firing rhythm here feels noticeably more comfortable and forgiving, allowing commanders to capitalize on brief enemy exposures without feeling awkwardly crippled by permanent downtime.
Tactical Considerations
Despite the tempting offensive upside, playing the Strv T fm/53 effectively will require sharp analytical awareness. The tank boasts a spectacular -12 degrees of gun depression, making it an absolute monster on ridgelines and uneven terrain. However, because the turret armor is only “reliable” rather than impervious, you cannot sit out in the open and expect to bounce Tier X premium rounds. Hull-down tactics must be executed dynamically: poke over the ridge, dump your shell, and rock back immediately to use your steep angle to force ricochets.
Playstyle Implications
Expect the Strv T fm/53 to behave as a dedicated heavy support vehicle. Rather than anchoring a primary brawling corridor against heavily armored juggernauts, optimal playstyles will revolve around secondary lines and ridgeline ambushes. Use your -12 degrees of gun depression to work positions other heavy tanks can only dream of, let your heavily armored allies draw the initial fire, and then push over the ridge to unload your 3-shell clip before melting back into cover to reset your 33-second reload.
Community Reception
The World of Tanks community has reacted to the initial Supertest leaks with a blend of healthy skepticism and balance anxiety. Early forum and Reddit discussions have pointed out that 95 mm of turret armor feels incredibly thin for a modern Tier IX heavy, leading some players to worry it might turn out to be another “heavy with no armor.” Others are expressing frustration over the combination of a 2.8s aim time and 0.38 accuracy, labeling the gun handling as potentially too frustrating to enjoy. However, veteran autoloader players remain optimistic about the sheer utility of that 3-shell burst coupled with extreme gun depression.
What Sets the Strv T fm/53 Apart
Extreme Ridge Control: A spectacular -12 degrees of gun depression allows the vehicle to abuse terrain features that completely shut down other heavy tanks.
Punishing Burst Potential: The ability to drop 1,320 damage in 6 seconds lets you aggressively clip out low-health targets or punish overextended enemies.
Forgiving Fluidity: A more comfortable autoloading cycle compared to existing Swedish heavy options makes dealing damage feel less clunky.
What’s Next
As a fresh addition to the Supertest environment, the Strv T fm/53 is strictly subject to change. Wargaming will spend the coming weeks meticulously evaluating its real-world performance metrics. Given the community’s early outcries regarding the weak turret armor and sluggish gun handling, expect to see Wargaming tweak hidden soft stats—such as moving dispersion, terrain resistance, or even buffing the raw armor layout—before it makes its official live-server debut.
Final Thoughts
The Strv T fm/53 represents a fascinating mechanical bridge between Swedish terrain control and French autoloader burst power. If you enjoy opportunistic, ridgeline-heavy gameplay that rewards disciplined clip management and patient positioning, this hybrid support heavy is definitely a project to keep closely on your radar.
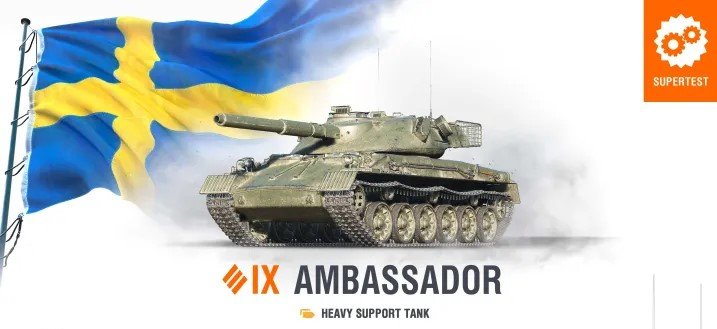
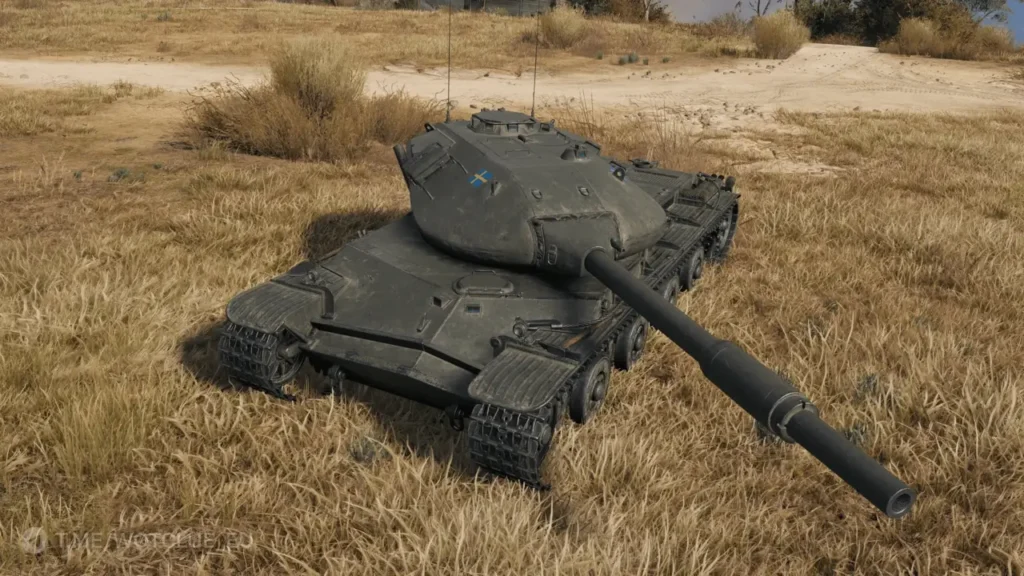
The World of Tanks Supertest has welcomed an intriguing addition to the Swedish heavy tank lineup: the Ambassador, a Tier IX support heavy tank whose defining characteristic is its balanced four-shell autoloader system paired with the legendary Swedish gun depression. For players who appreciate Swedish armor philosophy but want something fundamentally different from the siege mode mechanics of the UDES and Kranvagn lines, the Ambassador offers a compelling package built around rapid clip deployment, quick recovery, and relentless hull-down pressure.
Four-Shell Autoloader: Balanced Burst Damage
The Ambassador’s primary identity revolves around its autoloader system:
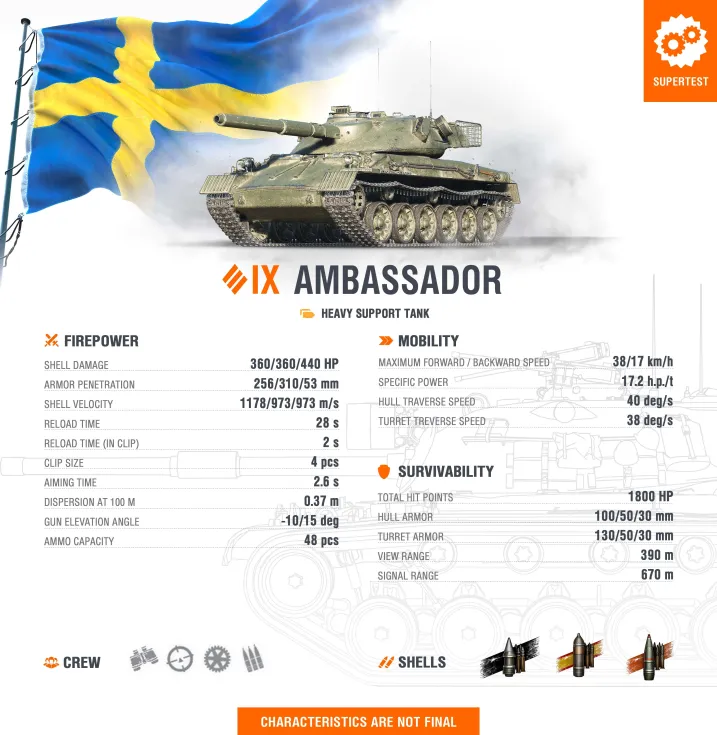
Four-Shell Clip Capacity: The 105mm gun is equipped with a four-round autoloader that enables rapid burst damage delivery. While not as devastating as larger-caliber autoloaders, the four-shell capacity provides meaningful alpha without excessive commitment.
360 HP Per Shot: Each shell delivers 360 HP of damage, creating a potential 1,440 HP burst when the full clip is deployed. This total clip damage is respectable for Tier IX and sufficient to eliminate many wounded opponents or severely punish exposed enemies.
2-Second Intra-Clip Reload: The rapid 2-second reload between shells within the clip enables fast damage delivery. The entire four-shell burst can be deployed in approximately 8 seconds, making the Ambassador deadly in short engagement windows.
28-Second Full Reload: Unlike autoloaders with punishing 40+ second reload times, the Ambassador’s 28-second full magazine reload is remarkably short. This characteristic enables the vehicle to maintain consistent pressure without extended periods of complete vulnerability.
Sustained Pressure Capability: The combination of rapid intra-clip reload and short full reload creates a heavy tank that can deliver burst damage, retreat briefly, and return to combat with a fresh clip faster than most autoloader contemporaries. This reload cycle supports the “support heavy” designation by enabling consistent contribution throughout engagements.
APCR Standard Ammunition: Premium Penetration by Default
The Ambassador brings exceptional standard shell performance:
256mm APCR Penetration: The standard ammunition is APCR with 256mm of penetration—values that would be premium rounds on many Tier IX vehicles. This penetration is sufficient to reliably engage the vast majority of targets without resorting to special ammunition.
310mm HEAT Premium Penetration: When facing heavily armored opponents or needing to penetrate specific weak spots, the 310mm HEAT premium round provides exceptional penetration capability. This value enables the Ambassador to challenge even super-heavy tanks in frontal engagements.
APCR Shell Velocity: APCR rounds travel at high velocities, reducing lead time on moving targets and making long-range engagements significantly easier. The shell velocity complements the support heavy role by enabling accurate fire at medium-to-long ranges where ridge-line positions excel.
Economic Standard Ammunition: The high penetration of the standard APCR round reduces reliance on expensive premium ammunition. Commanders can confidently use standard rounds in most situations, improving credit earnings and reducing per-battle operating costs.
Versatile Engagement Capability: The 256mm standard penetration opens viable frontline engagement options against targets that would force pure APCR-premium vehicles to load gold. The Ambassador can confidently participate in direct combat without constantly managing ammunition economics.
10-Degree Gun Depression: Ridge-Line Dominance
The Ambassador inherits Swedish heavy tank’s legendary terrain adaptation:
10-Degree Gun Depression: The exceptional -10° gun depression enables the Ambassador to leverage terrain features that are completely inaccessible to tanks with standard -5° to -6° depression. This capability is the cornerstone of the vehicle’s tactical identity.
Ridge-Line Fighting Excellence: The combination of 10° depression and a four-shell autoloader creates devastating ridge-line fighting capability. The Ambassador can crest hills, deploy its entire clip rapidly, and retreat to safety before opponents can respond effectively.
Minimal Exposure Requirement: Deep gun depression enables firing from positions where only the turret is visible, dramatically reducing the target profile and protecting the hull from return fire. This characteristic multiplies survivability in hull-down positions.
Versatile Terrain Exploitation: The Ambassador can fight effectively from slopes, hills, and uneven terrain that forces other heavy tanks into suboptimal flat-ground engagements. This versatility provides significant tactical advantages on maps with elevation changes.
Swedish Design Philosophy: The 10° gun depression continues the Swedish heavy tank tradition of compensating for armor limitations with superior positioning capabilities and terrain exploitation. The Ambassador thrives where geography creates firing opportunities.
Decent Mobility: Responsive Repositioning
The Ambassador offers solid mobility for a Tier IX heavy tank:
38 km/h Maximum Forward Speed: The top speed is competitive for a support heavy tank, enabling the Ambassador to keep pace with medium tank movements and respond to developing battlefield situations in a timely manner.
17.2 hp/t Specific Power: The power-to-weight ratio provides responsive acceleration and adequate cross-country mobility. The Ambassador won’t feel sluggish when moving between ridge-line positions or relocating to support different flanks.
Repositioning Flexibility: The decent mobility supports the support heavy role by enabling the Ambassador to respond to changing battlefield conditions. If one flank collapses or opportunities develop elsewhere, the vehicle can reposition to provide its four-shell burst damage where needed.
Tactical Mobility: While not matching the speed of mediums or light heavies, the Ambassador’s mobility is sufficient for opportunistic flanking maneuvers, reaching key ridge-line positions early in battles, and extracting from unfavorable situations when necessary.
Swedish Heavy Improvement: Compared to the siege-mode heavies like the Kranvagn that sacrifice mobility for armor transformation, the Ambassador maintains consistent mobility throughout the battle, supporting more dynamic and adaptive gameplay.
Support Heavy Tank Classification: Team-Oriented Design
The Ambassador’s design philosophy emphasizes team support over solo carrying:
Support Role Identity: The “support heavy tank” classification indicates the Ambassador is designed to complement teammates rather than anchor defensive positions alone. The four-shell autoloader excels at finishing damaged opponents and punishing enemies who expose themselves to engage teammates.
Burst Damage on Demand: The rapid clip deployment enables the Ambassador to deliver concentrated damage during brief windows when enemies are distracted or committed to engagements with teammates. This opportunistic damage contribution is the essence of support play.
Quick Reload Advantage: The 28-second full reload is short enough that the Ambassador rarely becomes a liability after expending its clip. Unlike autoloaders with 40+ second reloads that must hide for extended periods, the Ambassador can remain engaged and contribute within reasonable timeframes.
Ridge-Line Support: The exceptional gun depression enables the Ambassador to provide supporting fire from positions where traditional heavy tanks cannot operate effectively. This positional flexibility creates crossfire opportunities and denies terrain to opponents.
Sustained Contribution: The combination of short clip deployment time and relatively brief full reload creates a vehicle that maintains consistent damage output throughout battles rather than delivering one massive burst and disappearing for extended periods.
Penetration and Shell Performance
The Ambassador’s ammunition characteristics enable confident engagement:
256mm Standard APCR Performance: The standard penetration is sufficient to engage most Tier IX targets reliably and even penetrate many Tier X opponents in standard engagements. This capability reduces frustration and improves consistency.
310mm HEAT for Tough Targets: When facing super-heavy tanks or needing to penetrate specific heavily-armored positions, the 310mm HEAT premium ammunition provides reliable penetration without requiring perfect weak spot aiming.
APCR Shell Characteristics: APCR rounds maintain velocity better over distance compared to standard AP shells, improving accuracy at range and reducing the need for excessive lead on moving targets. This shell type complements the ridge-line fighting role.
Consistent Performance: The high standard penetration eliminates the frustrating experience of bouncing shots off targets that appear vulnerable, enabling commanders to focus on positioning and target selection rather than constant ammunition-type micromanagement.
Economic Efficiency: The ability to use standard ammunition against most targets improves credit earnings, making the Ambassador more sustainable for players without premium accounts or extensive credit reserves.
Methodical Frontline Pressure
The Ambassador’s design supports calculated, position-focused gameplay:
Ridge-Line Priority: Success with the Ambassador requires identifying and controlling key ridge-line positions where the 10° gun depression creates maximum advantage. These positions transform the vehicle from good to exceptional.
Clip Management Discipline: The four-shell clip requires intelligent deployment. Wasting the clip on low-value targets or firing at enemies about to take cover wastes the Ambassador’s burst potential and creates unnecessary vulnerability during reload.
Team Coordination: The support heavy classification performs best when coordinating with teammates. Communicating clip status, targeting wounded enemies teammates are engaging, and timing burst damage with team pushes maximizes impact.
Calculated Aggression: The 28-second reload is short enough to enable aggressive plays that would be suicide for traditional autoloaders. The Ambassador can commit clips more freely, knowing it will return to combat readiness relatively quickly.
Terrain-Dependent Performance: The Ambassador’s effectiveness varies dramatically based on terrain availability. On flat, open maps, the vehicle underperforms. On maps with abundant hills, ridges, and elevation changes, it becomes dominant.
Tactical Considerations
The Ambassador’s unique characteristics create specific tactical opportunities:
Early Ridge Control: Use the decent mobility to reach premium ridge-line positions early in battles. Controlling these positions before opponents arrive creates significant advantages that can last entire engagements.
Clip Timing: Deploy clips when opponents are committed to other engagements, crossing open ground, or repairing. These moments of vulnerability create opportunities for unpunished burst damage delivery.
Reload Position Safety: During the 28-second reload, retreat fully behind hard cover. Even with a relatively short reload, maintaining hull-down discipline during this window is essential to survivability.
Ammunition Selection: Use standard APCR against most targets to preserve credits and reserve HEAT for heavily armored opponents or critical situations where penetration must be guaranteed.
Position Rotation: Don’t become predictable. The decent mobility enables moving between multiple ridge-line positions, preventing enemies from pre-aiming your location or coordinating pushes against your position.
Playstyle Implications
The Ambassador rewards commanders who embrace hull-down discipline and team-oriented play:
Patience Over Impulse: The four-shell autoloader tempts impulsive clip deployment. Resist this temptation. Wait for high-value targets or moments when the full burst can be delivered safely before committing the clip.
Team Awareness: Monitor teammate positions and enemy focus constantly. The Ambassador excels when enemies are distracted—firing at teammates, crossing open ground, or committed to other engagements. Capitalize on these moments.
Terrain Reading: Develop map knowledge focused on ridge-line positions and hull-down opportunities. Understanding where the Ambassador excels versus where it struggles directly impacts battle performance.
Commanders looking to master the Ambassador should consider:
Learning premium ridge-line positions on each map where 10° depression creates overwhelming advantages
Timing clip deployment to coincide with enemy vulnerability windows
Maintaining strict hull-down discipline even during extended engagements
Using the 28-second reload window to safely retreat and assess battlefield developments
Coordinating with teammates to create crossfire opportunities from ridge positions
Reserving HEAT ammunition for heavily armored targets rather than using it routinely
Rotating between multiple ridge positions to remain unpredictable
Understanding when to conserve the clip versus when aggressive deployment is justified
Community Reception
Initial community reactions to the Ambassador reveal diverse perspectives:
“Finally, a Non-Siege Swedish Heavy”: Many players expressed enthusiasm about a Swedish heavy tank without siege mode mechanics, viewing the Ambassador as a more conventional and accessible alternative to the UDES/Kranvagn line.
“Four Shells Seems Underwhelming”: Community discussion immediately focused on whether four shells provides sufficient burst damage compared to autoloaders with larger clips. Some questioned whether 1,440 HP total damage justifies the autoloader reload mechanics.
Depression Appreciation: The 10° gun depression generated universal praise, with commanders recognizing this characteristic as potentially the Ambassador’s most valuable asset and the feature that could elevate it beyond simple “average autoloader” status.
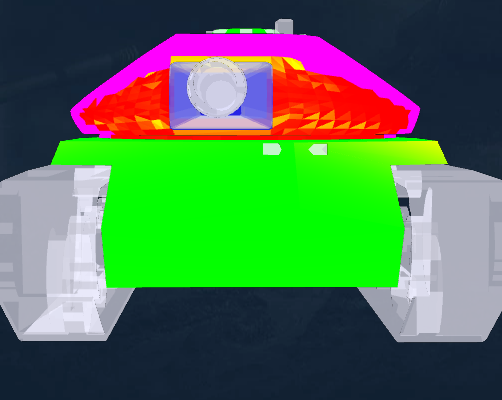
“No Armor” Concerns: Comments noted the absence of any mention of armor protection, leading to speculation that the Ambassador relies entirely on gun depression and mobility for survivability, potentially creating frustration in bottom-tier matchmaking.
Premium/Reward Speculation: With no tech tree placement mentioned, community speculation immediately turned to whether the Ambassador would be a premium vehicle, battle pass reward, or potential addition to an alternative Swedish heavy branch.
What Sets the Ambassador Apart
The Ambassador occupies a unique position in the Tier IX heavy tank landscape:
Swedish Depression Without Siege Mode: The Ambassador is the first Swedish heavy tank since Tier VII to offer exceptional gun depression without requiring siege mode activation, creating more fluid and responsive gameplay compared to the Kranvagn line.
Balanced Autoloader Philosophy: The four-shell clip with 28-second reload represents a middle ground between devastating but slow autoloaders and rapid-fire but low-alpha conventional guns, creating consistent burst damage without excessive vulnerability.
APCR Standard Ammunition: The 256mm APCR standard penetration is exceptional for Tier IX and reduces the economic pressure that plagues vehicles dependent on premium ammunition for reliable performance.
Support Heavy with Mobility: Unlike static support platforms, the Ambassador combines its support heavy classification with decent mobility, enabling responsive repositioning and adaptive gameplay rather than position commitment.
Ridge-Line Autoloader: The combination of 10° gun depression and rapid four-shell burst creates a vehicle that can exploit terrain in ways that differentiate it from both traditional autoloaders and conventional hull-down heavies.
What’s Next?
As a Supertest vehicle, the Ambassador’s characteristics remain subject to adjustment. Key questions for testing include:
Is four shells sufficient burst damage, or should the clip be expanded to five or six shells?
Does the 28-second reload appropriately balance the 1,440 HP clip potential?
Will the Ambassador have meaningful armor, or does it rely entirely on gun depression for survivability?
Is 256mm standard APCR penetration balanced at Tier IX, or does it create economic imbalance compared to AP-standard vehicles?
Can the Ambassador perform adequately on flat maps where gun depression provides minimal advantage?
Will this be a tech tree vehicle, premium, or reward tank?
How will the Ambassador coexist with the Kranvagn and UDES 15/16 in the Swedish heavy lineup?
Final Thoughts
The Ambassador represents a thoughtful evolution of Swedish heavy tank design. By combining the nation’s legendary gun depression with a balanced autoloader system and exceptional standard ammunition penetration, Wargaming has created a vehicle that addresses many frustrations players experience with siege-mode mechanics while maintaining the hull-down excellence that defines Swedish armored warfare philosophy.
For commanders who appreciate ridge-line fighting, enjoy autoloader burst damage, and value consistent performance over extreme specialization, the Ambassador offers an appealing package. The 10° gun depression creates positioning opportunities unavailable to conventional heavy tanks, while the four-shell autoloader with 28-second reload enables sustained pressure without the extended vulnerability windows that plague traditional autoloaders.
However, the Ambassador will not suit every playstyle. Players who prefer heavily armored brawling, value massive single-clip alpha over consistent burst damage, or primarily play flat, open maps where gun depression provides minimal advantage will find the Ambassador’s design frustrating. The apparent lack of armor protection suggests the vehicle relies heavily on terrain exploitation and positioning discipline—traits that reward skilled play but punish mistakes severely.
The APCR standard ammunition is both a blessing and a potential controversy. The 256mm penetration enables confident engagements without constant premium ammunition expense, but may generate balance discussions about whether providing premium-level penetration as standard creates unfair advantages compared to vehicles with conventional AP standard rounds.
Whether you’re excited about a Swedish heavy tank without siege mode constraints or skeptical about whether four shells provides sufficient burst damage, the Ambassador undeniably offers something different at Tier IX. If Wargaming can successfully balance the clip size, reload time, and armor profile, the Ambassador could become a favorite for players who enjoy calculated, position-focused gameplay with responsive burst damage delivery.
For those who love Swedish gun depression but find siege mode mechanics restrictive or frustrating, the Ambassador might be exactly what you’ve been waiting for.
Released as part of Holiday Ops 2026, the Stridsyxa has quickly established itself as a top-tier choice for players seeking a versatile and dependable medium tank that can adapt to any battlefield situation.
What sets the Stridsyxa apart is its exceptional balance across all combat characteristics. Unlike many premium tanks that excel in one area while sacrificing others, this Swedish medium maintains consistent performance whether you’re pushing aggressively, holding defensive positions, or providing long-range support. The tank’s 350 damage per shot with excellent penetration values allows it to engage effectively at all ranges, while its solid frontal armor provides the confidence to trade shots when necessary.
The Stridsyxa truly shines through its superior gun handling characteristics. With an aiming time of just 2.21 seconds and an accuracy of 0.355 at 100 meters, this tank can consistently land shots where they count. The 105mm gun delivers reliable performance against all tier opponents, making the Stridsyxa a tank you can take into any battle configuration with confidence.
Firepower
Let’s dive into the numbers that make the Stridsyxa such a formidable opponent. The tank is equipped with a 105mm gun that delivers 350 damage per shot with 219mm of base penetration (252mm with APCR). This puts it directly ahead of the Lansen C in most key firepower metrics.
Spec
Stridsyxa
Lansen C
Damage per Shot
350 HP
320 HP
Base Penetration
219 mm
208 mm
APCR Penetration
252 mm
242 mm
Rate of Fire
6.26 rpm
6.52 rpm
Damage per Minute
2,190 HP
2,087 HP
Aiming Time
2.21 sec
2.50 sec
Accuracy at 100m
0.355
0.380
Shell Velocity
980 m/s
930 m/s
Ammo Capacity
50 rounds
65 rounds
The damage per minute of 2,190 puts the Stridsyxa in an excellent spot. While it doesn’t have the burst damage of autoreloaders or the raw DPM of some single-shot guns, it provides consistent, reliable damage output that doesn’t require risky positioning or complex magazine management. The 10-second reload time is long enough to encourage thoughtful shot placement but short enough to maintain pressure on enemies.
Shell velocity of 980 m/s is genuinely excellent for a 105mm gun, giving the Stridsyxa superior ballistics compared to most medium tank competitors. This translates to easier shots at range and less lead compensation when engaging moving targets. The 50-round ammunition capacity provides plenty of sustain for extended engagements without frequent trips to the depot.
Gun Handling
The Stridsyxa’s gun handling characteristics are genuinely impressive and represent one of its strongest selling points. WG has blessed this Swedish warrior with some of the best gun handling parameters in the medium tank category, even outperforming the Lansen C in several key areas.
Spec
Stridsyxa
Lansen C
Aiming Time
2.21 seconds
2.50 seconds
Accuracy at 100m
0.355
0.380
Gun Depression
10 degrees
10 degrees
Gun Elevation
20 degrees
20 degrees
Turret Traverse
41.72°/sec
32°/sec
Turret Traverse Advantage
+9.72°/sec
–
The 2.21-second aiming time is outstanding and among the best in its class. Combined with 0.355 accuracy, this means the Stridsyxa can consistently hit targets at medium to long ranges without extensive settling time. The 10 degrees of gun depression is excellent for a medium tank and allows for aggressive ridge-line camping and effective hull-down positions.
41.72°/sec turret traverse speed is more than sufficient for tracking moving targets and making quick adjustments during engagements. The gun’s good elevation angles provide flexibility when engaging targets on elevated positions, though the 20-degree limit can sometimes restrict engagement angles on certain maps.
Mobility
Mobility-wise, the Stridsyxa strikes an excellent balance between speed and control. While the Lansen C has a significantly better power-to-weight ratio, the Stridsyxa provides reliable mobility that’s more than adequate for most tactical situations.
Spec
Stridsyxa
Lansen C
Top Speed
50 km/h
50 km/h
Reverse Speed
18 km/h
20 km/h
Power-to-Weight
16.67 hp/t
28.39 hp/t
Hull Traverse
46.94°/sec
40°/sec
Engine Power
500 hp
680 hp
Weight
30 t
23.95 t
The 50 km/h top speed is competitive for a medium tank, allowing for reasonable repositioning and effective flanking maneuvers. 18 km/h reverse speed is adequate for tactical retreats, though not exceptional. The 16.67 hp/t power-to-weight ratio provides good acceleration, especially considering the tank’s substantial armor protection.
46.94°/sec hull traverse is excellent and makes the Stridsyxa highly maneuverable in close quarters. Terrain resistance values are reasonable, meaning the tank maintains decent mobility across different surface types. The effective top speed of 31.73 km/h on soft terrain is the only real limitation, though this is typical for most medium tanks.
Armor
Here’s where the Stridsyxa really starts to shine compared to the Lansen C. This Swedish medium tank has genuinely respectable armor that completely eclipses the Lansen C’s paper-thin protection, allowing it to bounce shots from equal-tier opponents and even provide some surprises against higher tiers.
Spec
Stridsyxa
Lansen C
Hull Front Armor
100 mm
60 mm
Hull Side Armor
40 mm
40 mm
Hull Rear Armor
35 mm
40 mm
Turret Front Armor
250 mm
70 mm
Turret Side Armor
70 mm
70 mm
Turret Rear Armor
35 mm
40 mm
Health Points
1,300 HP
1,350 HP
Armor Advantage
Massive frontal advantage
–
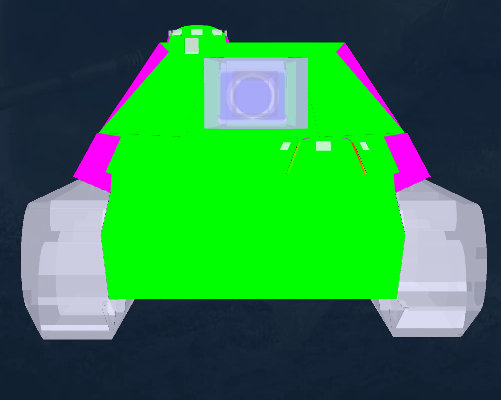
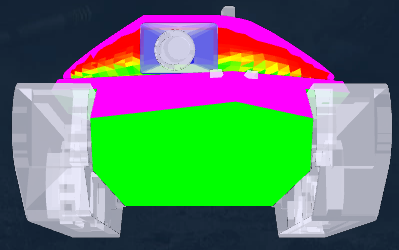
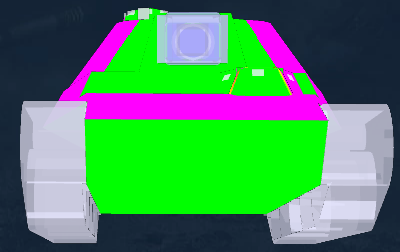
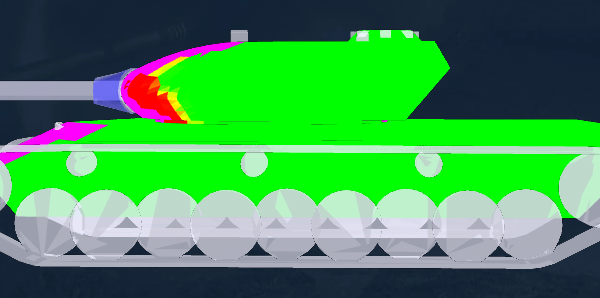
The 250mm frontal turret armor completely dwarfs the Lansen C’s 70mm turret armor and can reliably bounce Tier VIII gold rounds and even some Tier IX standard rounds when angled properly. The 100mm frontal hull armor is vastly superior to the Lansen C’s 60mm and, when combined with proper angling, can provide surprising survivability in brawling situations.
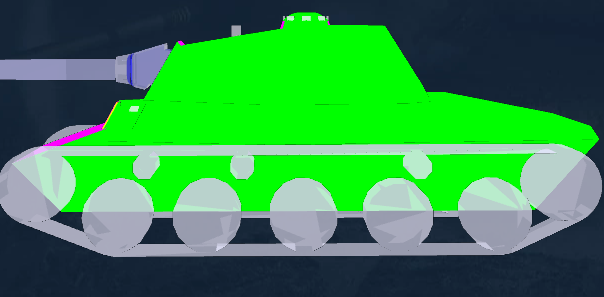
Stridsyxa
Lansen C
The biggest difference is amount of armor you have when using full 10 degrees of gun depression.
Stridsyxa
Lansen C
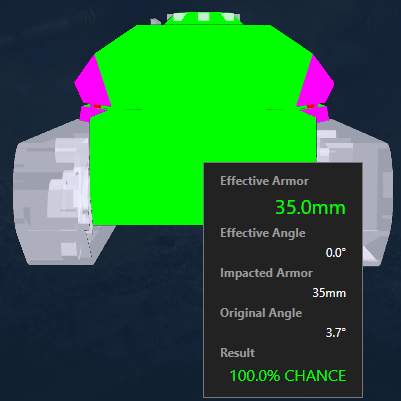
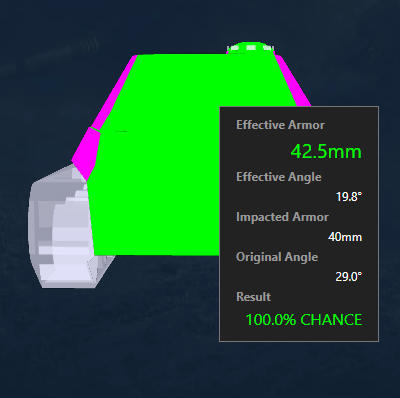
Side armor of 40mm is standard for medium tanks but can be vulnerable to overmatch. The 1,300 HP health pool is competitive, though the Lansen C has slightly more at 1,350 HP.
Stridsyxa
Lansen C
The rear armor of 35mm is typical and vulnerable to HE rounds, so caution is advised when reversing near enemy positions.
Stridsyxa
Lansen C
Conclusion: The tank’s unique frontal hull geometry (mentioned in historical references) likely contributes to its effective armor values. When properly positioned and angled, the Stridsyxa can trade shots effectively with many opponents, making it suitable for both aggressive and defensive playstyles.
Miscellaneous
The Stridsyxa’s auxiliary characteristics round out its profile as a genuinely well-balanced medium tank, with only minor advantages over the Lansen C in most areas.
Spec
Stridsyxa
Lansen C
View Range
390 m
380 m
Stationary Camo
17.04%
16.87%
Moving Camo
12.77%
~12%
Signal Range
570 m
710 m
Shell Cost
650 silver
Unknown
Suspension Repair
11.7 sec
8.02 sec
Tank Role
Versatile Medium
Sniper Medium
390m view range is solid and provides good spotting capability for a medium tank. The 17.04% stationary camouflage and 12.77% moving camouflage are both above average for the class, giving the Stridsyxa excellent passive scouting potential. This camouflage performance is genuinely impressive and allows the tank to contribute to vision control while remaining undetected.
Shell cost of 650 silver is reasonable and won’t break the bank during extended gaming sessions. The 50-round ammunition capacity ensures good sustain, and the overall credit economy of the Stridsyxa is favorable due to its solid performance and reasonable consumable costs.
Tips
Playing the Stridsyxa effectively requires understanding its strengths and playing to them consistently:
• Leverage the excellent gun handling – Take your time to aim and make every shot count. The 2.21-second aiming time means you can be more patient than with other medium tanks.
• Use the armor confidently – Don’t be afraid to trade shots when you have the advantage. The 250mm turret armor can bounce many shots, especially when hull-down.
• Maintain medium-range positioning – The Stridsyxa excels at mid-range combat where it can use its gun handling and armor effectively while remaining mobile.
• Don’t overextend despite good mobility – While the tank is mobile, it’s not a light tank. Stay with your team and avoid isolated positions.
• Use the good camouflage for vision control – The above-average camouflage values make the Stridsyxa excellent for passive spotting and vision denial.
• Aim for weak points – Despite good armor, you’ll still need to aim carefully against well-armored targets. Use the excellent accuracy to hit specific modules.
• Manage ammunition wisely – 50 rounds provide good sustain, but don’t waste shots. Each shell represents significant damage potential.
Conclusion
The Stridsyxa represents everything excellent about modern premium tank design in World of Tanks. It’s a genuinely well-balanced medium tank that doesn’t require the player to make significant compromises or master complex mechanics to be effective. While it may not have the extreme specialization of some competitors, it provides reliable performance across all aspects of medium tank gameplay.
The combination of excellent gun handling, solid armor, reasonable mobility, and above-average concealment makes the Stridsyxa a tank that consistently delivers results regardless of map, team composition, or enemy opposition. It’s the kind of tank you can take into any battle with confidence, knowing that your equipment and crew skills will be fully utilized.
For players seeking a reliable, versatile Tier VIII medium tank that can serve as both a workhorse and a showpiece, the Stridsyxa delivers exactly what it promises. It may not be the flashiest tank on the battlefield, but it’s undoubtedly one of the most consistent and dependable choices at its tier.