Since at the moment all we have is the statistics list, we can only speculate on how good of a vehicle this is going to be. In my opinion, it could be mediocre; the gun doesn’t feel like it is that good that you would be trading all of your armor for it. It lacks standard penetration, and the gold pen is also lackluster.
My prediciton is that this is going to be a hard tank to play, you will have to be in close range engagements more often then not, and you’ll have to rely on flanking, which in this meta of superheavies, it might not be the easiest thing.
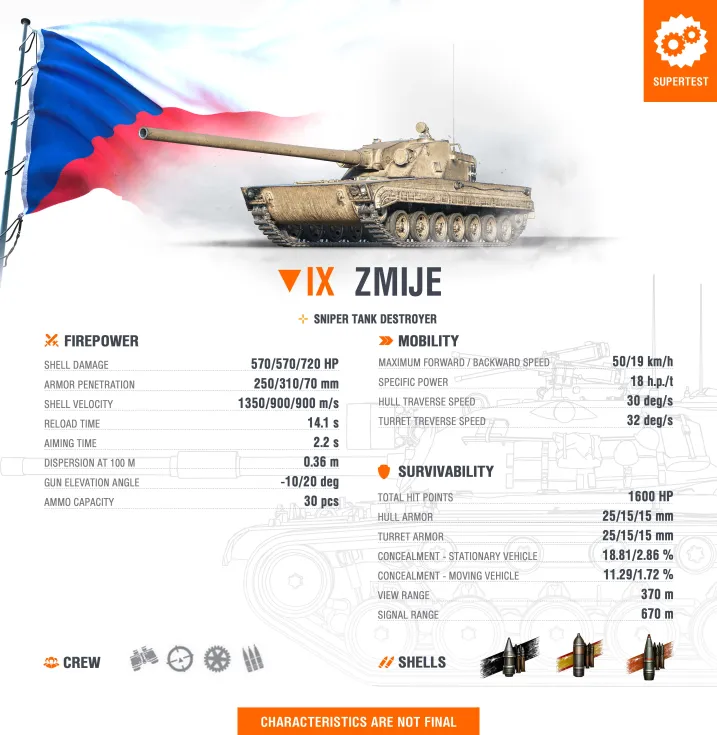
Characteristics
High Alpha Damage: 570 damage per shot is very competitive for tier 9
Poor Penetration: a very bad standard penetration for a tank destroyer
Rotating Turret: Unlike most of the tank destroyers, Zmije has a fully rotating turret which gives it a lot more flexibility
Mobility: 50 km/h top speed with 18 hp/ton specific power gives good mobility for flanking and repositioning
Gun Depression: 10° allows for effective hull-down gameplay
Paper armor: probably the least armored tank at tier 9, HE rounds will demolish this tank
Decent camo rating
Poor view range: It definitely will depend on others for spotting
Potential Playstyle
The Zmije appears to be designed as a sniper-flanker with assault capabilities:
Mid-to-short range engagements due to the bad penetration
Flanking maneuvers: Decent mobility for tactical repositioning
Hull-down positions: Good gun depression for ridge-line combat, but enemies will be able to penetrate you easily in the turret even when hull down
The Zmije represents an interesting hybrid between traditional tank destroyer sniping and more aggressive, mobile gameplay.
This is the first tank destroyer from the Czechs, meaning that the new nation’s TD Line might appear in the near future.
Note: Some promotional details may be subject to change as the vehicle progresses through testing phases.
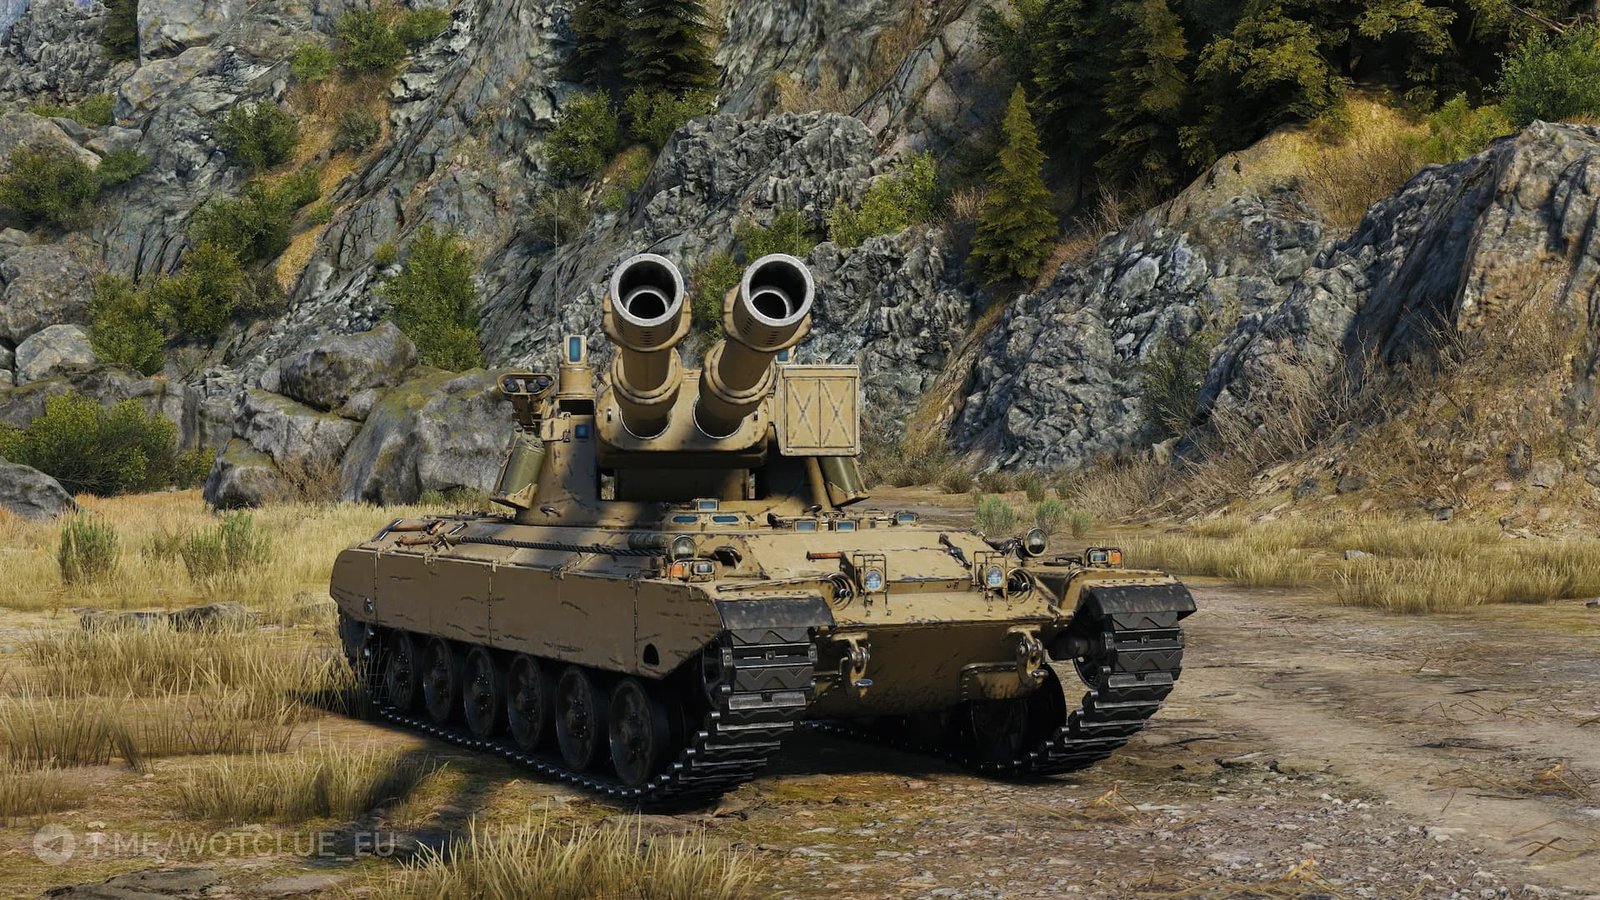
While most Italian medium tanks pride themselves on autoloader systems, the Serpente takes a completely different approach with its double-barreled gun system, making it one of the most distinctive vehicles to grace the battlefield. But what makes this tank truly special, and more importantly, how do you play it effectively? In this comprehensive guide, we’ll dive deep into the mechanics, strategies, and tactics that make the Serpente both a fascinating addition to any garage and a formidable opponent on the battlefield.
The Unconventional Italian
Breaking the Autoloader Tradition
Italian medium tanks have long been synonymous with autoloader systems, designed for rapid bursts of damage followed by critical reload periods. The Serpente, however, breaks this tradition entirely. Instead of following the familiar autoloader path, this Tier IX premium tank embraces a double-barreled gun system more commonly found on Soviet heavy tanks.
This isn’t just a cosmetic difference – it’s a fundamental shift in how the tank operates and, by extension, how you should play it. The Serpente represents a bold departure from Italian tank design philosophy, creating a unique hybrid vehicle that combines the mobility of a medium tank with the burst damage potential of a double-barrel system.
Statistics
Technical Specifications and Performance
Core Statistics
Tier: IX
Nation: Italy
Class: Premium Medium Tank
Top Speed: 55-60 km/h
Health Pool: 1,600 HP
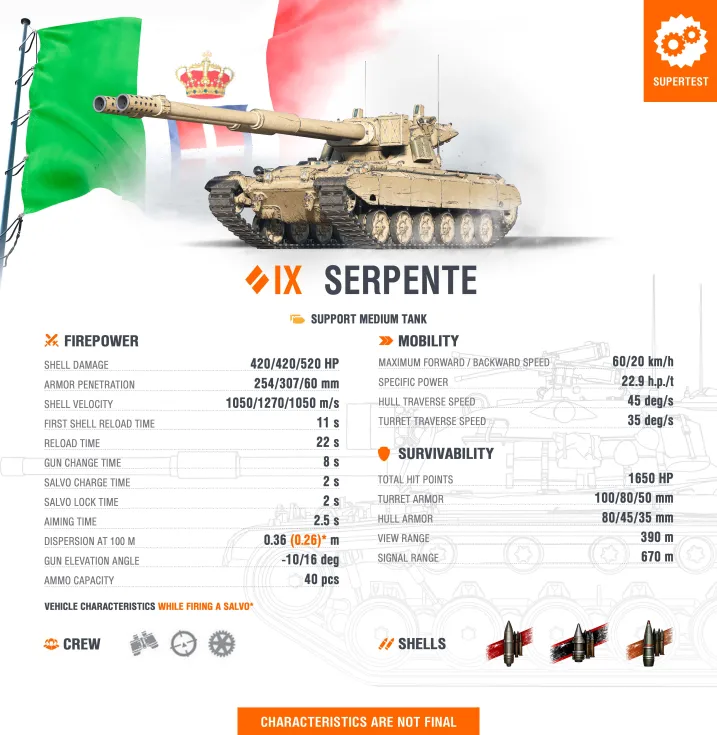
Damage per Shot: 420 HP
Average Salvo Damage: 840 HP
Ammo Capacity: 40 rounds
Firepower Analysis
The Serpente’s armament is centered around a 120mm gun with impressive specifications:
Penetration: 254mm (241mm at 500m)
Shell Velocity: 1,050 m/s
Damage per Minute (DPM): 2,021.82
Aim Time: 2.49 seconds
Reload Time: 12.46 seconds (8 seconds for alternate gun)
Mobility and Protection
With a top speed of 55-60 km/h and a power-to-weight ratio of 19.09 hp/ton, the Serpente is exceptionally mobile for its tier. However, this mobility comes at the cost of armor protection:
Hull Armor: 80mm / 45mm / 35mm
Turret Armor: 100mm / 80mm / 50mm
View Range: 390 meters
Camo Rating: 14.82% stationary / 11.12% moving
Statistic
Value
Commander’s Notes
Tier
IX (Premium Medium Tank)
A powerful premium option for earning credits and training crews.
Alpha Damage (Single Shot)
420 HP
Respectable single-shot damage for a medium tank.
Alpha Damage (Salvo)
840 HP
A massive burst of damage that is terrifying for enemy mediums and lights.
Salvo Preparation Time
2.0 seconds
The quick time needed to “charge” the double shot, allowing for fast reaction.
Post-Salvo Lock-out
2.0 seconds
The brief time where the guns are disabled after the double shot, limiting your follow-up.
Top Speed
60 km/h
Excellent top speed for rapid repositioning, flanking, and retreating.
Power-to-Weight Ratio
23 hp/t
Fantastic acceleration, cementing its role as a quick skirmisher.
Gun Depression
8 degrees
Essential for playing effectively over ridges and maximizing exposure control.
The Double-Barreled Mechanic: Understanding the System
How It Works
The Serpente’s defining characteristic is its unique firing system, which operates fundamentally differently from both traditional Italian autoloaders and conventional single-barrel guns:
Salvo Preparation: Unlike autoloaders, the Serpente requires time to prepare each salvo before firing
Double-Shot Fire: Once prepared, the tank fires both barrels in quick succession
Brief Lockout Period: After firing, there’s a short gun lockout period before the next salvo can be prepared
Enhanced Accuracy: The salvo mode provides improved aiming speed, stabilization, and accuracy for double shots
Optimal Firing Strategy
The key to mastering the Serpente lies in understanding when to use its salvo mechanics:
Salvo Mode (Recommended): Offers enhanced aiming, stability, and accuracy for double shots with relatively short preparation and lockout times
Preparation Time: Not lengthy compared to other double-barrel tanks, making it more forgiving
Post-Salvo Cooldown: Brief lockout period allows for repositioning and tactical planning
Strategic Gameplay Guide
The Mobility-First Philosophy
The Serpente’s basic armor means that mobility is your primary form of protection. This isn’t just a playstyle preference – it’s a survival necessity. The tank’s exceptional speed (60 km/h forward) should be leveraged for:
Flanking Maneuvers: Use your speed to create attack angles that catch enemies off-guard
Repositioning: Constant movement makes you a difficult target to hit and track
Surprise Attacks: Your mobility enables quick strikes followed by rapid retreats
Offensive Tactics
Burst Damage Opportunities: Look for situations where you can dump an 840 HP salvo into exposed enemies
Hit-and-Run Tactics: Engage with salvo fire, then relocate before enemies can return fire effectively
Multiple Attack Angles: Use your mobility to create confusion and force enemies into difficult positioning choices
Support Flanking: Work with team mates to create crossfires that enemies cannot easily escape
Defensive Considerations
Given your limited armor protection:
Avoid Head-On Engagements: You’re not a brawler – pick your battles carefully
Use Terrain for Cover: Your speed gets you to cover quickly, but you still need to reach it
Watch for Artillery: Your thin armor makes you vulnerable toarty shots – always be aware of your position relative to arty threats
Manage Vision Control: Use your mobility to maintain advantageous sight lines
Advantages and Disadvantages
Strengths
High Burst Damage: 840 HP average salvo provides significant damage spikes
Excellent Mobility: 60 km/h top speed enables aggressive positioning
Unique Mechanic: Double-barrel system offers tactical depth different from standard mediums
Enhanced Accuracy: Salvo mode provides superior stability and precision
Forgiving Mechanics: Shorter preparation/lockout times than other double-barrel tanks
Premium Perks: Credit earnings and tank experience bonuses typical of premium vehicles
Weaknesses
Limited Armor: Basic protection makes positioning critical for survival
Low DPM: 2,021.82 DPM is lower than many contemporary medium tanks
Ammo Limitations: 40-round capacity can limit sustained engagements
Skill Dependency: Requires good game sense and positioning to excel
Learning Curve: Double-barrel mechanics demand practice to master
Competitive Analysis: How It Stacks Up
vs. Traditional Italian Mediums
The Serpente fundamentally differs from its Italian medium tank brothers:
No Autoloader: Instead of Italian autoloader damage bursts, you have double-barrel salvos
Different Positioning: Less dependent on reload timing, more on momentum and positioning
Unique Role: More suited to flanking than the direct combat role of autoloader mediums
vs. Soviet Double-Barrel Tanks
Comparing to heavy tank double-barrel systems:
Better Mobility: Medium tank speeds in a double-barrel platform
Better Penetration: 254mm vs. typical heavy tank penetrations
Lower Health: 1,600 HP vs. heavy tank health pools makes mistakes more punishing
Different Role: More tactical flexibility than the heavy tank commitment
Equipment and Crew Recommendations
Equipment Selection
Stabilization Equipment: Essential for maintaining accuracy during movement
Enhanced Gun Laying Drive: Reduces aim time to capitalize on your burst damage potential
Improved Ventilation: Boosts all crew skills and module performance
Rammer: Increases DPM to offset your lower damage-per-minute baseline
Crew Skill Priorities
Commander: Sixth Sense, Situational Awareness
Gunner: Snapshot, Sniper
Driver: Smooth Ride, Clutch Braking
Loader: Safe Stowage, Intuition
Conclusion: A Tank That Rewards Mastery
The Serpente represents one of the most interesting additions to the Tier IX lineup in recent memory. Its unique combination of medium tank mobility and double-barrel burst damage creates a vehicle that’s both challenging to master and highly rewarding to play well.
Success with the Serpente demands a fundamental shift in thinking from traditional medium tank gameplay. Rather than sustained firefights, you’ll excel through opportunistic strikes, aggressive positioning, and tactical retreats. The tank rewards players who can think several moves ahead, using their mobility to create situations where their burst damage can make the most impact.
While its basic armor and moderate DPM might initially seem limiting, those who invest the time to master its unique mechanics will find the Serpente to be a genuinely distinctive and effective addition to their arsenal. In a game filled with variations of familiar tank archetypes, the Serpente stands out as a true innovation – a medium tank that plays like no other.
Whether you’re a seasoned veteran looking for a new challenge or a player interested in exploring unconventional tank mechanics, the Serpente offers an experience that’s both educational and entertaining. Just remember: in this tank, your greatest weapon isn’t your gun – it’s your speed.
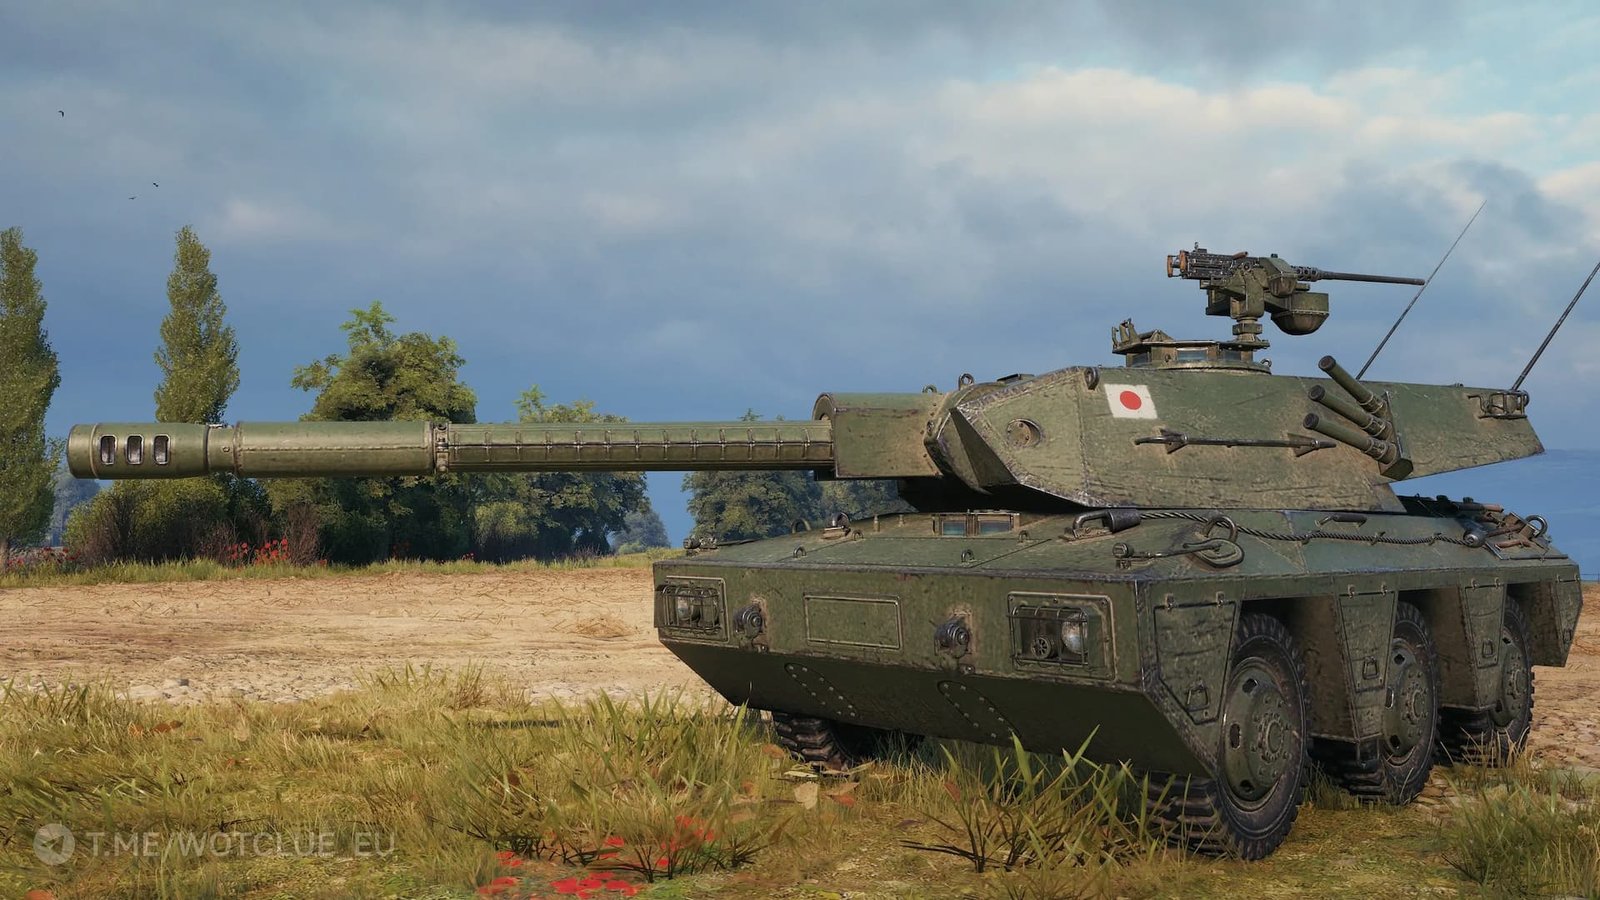
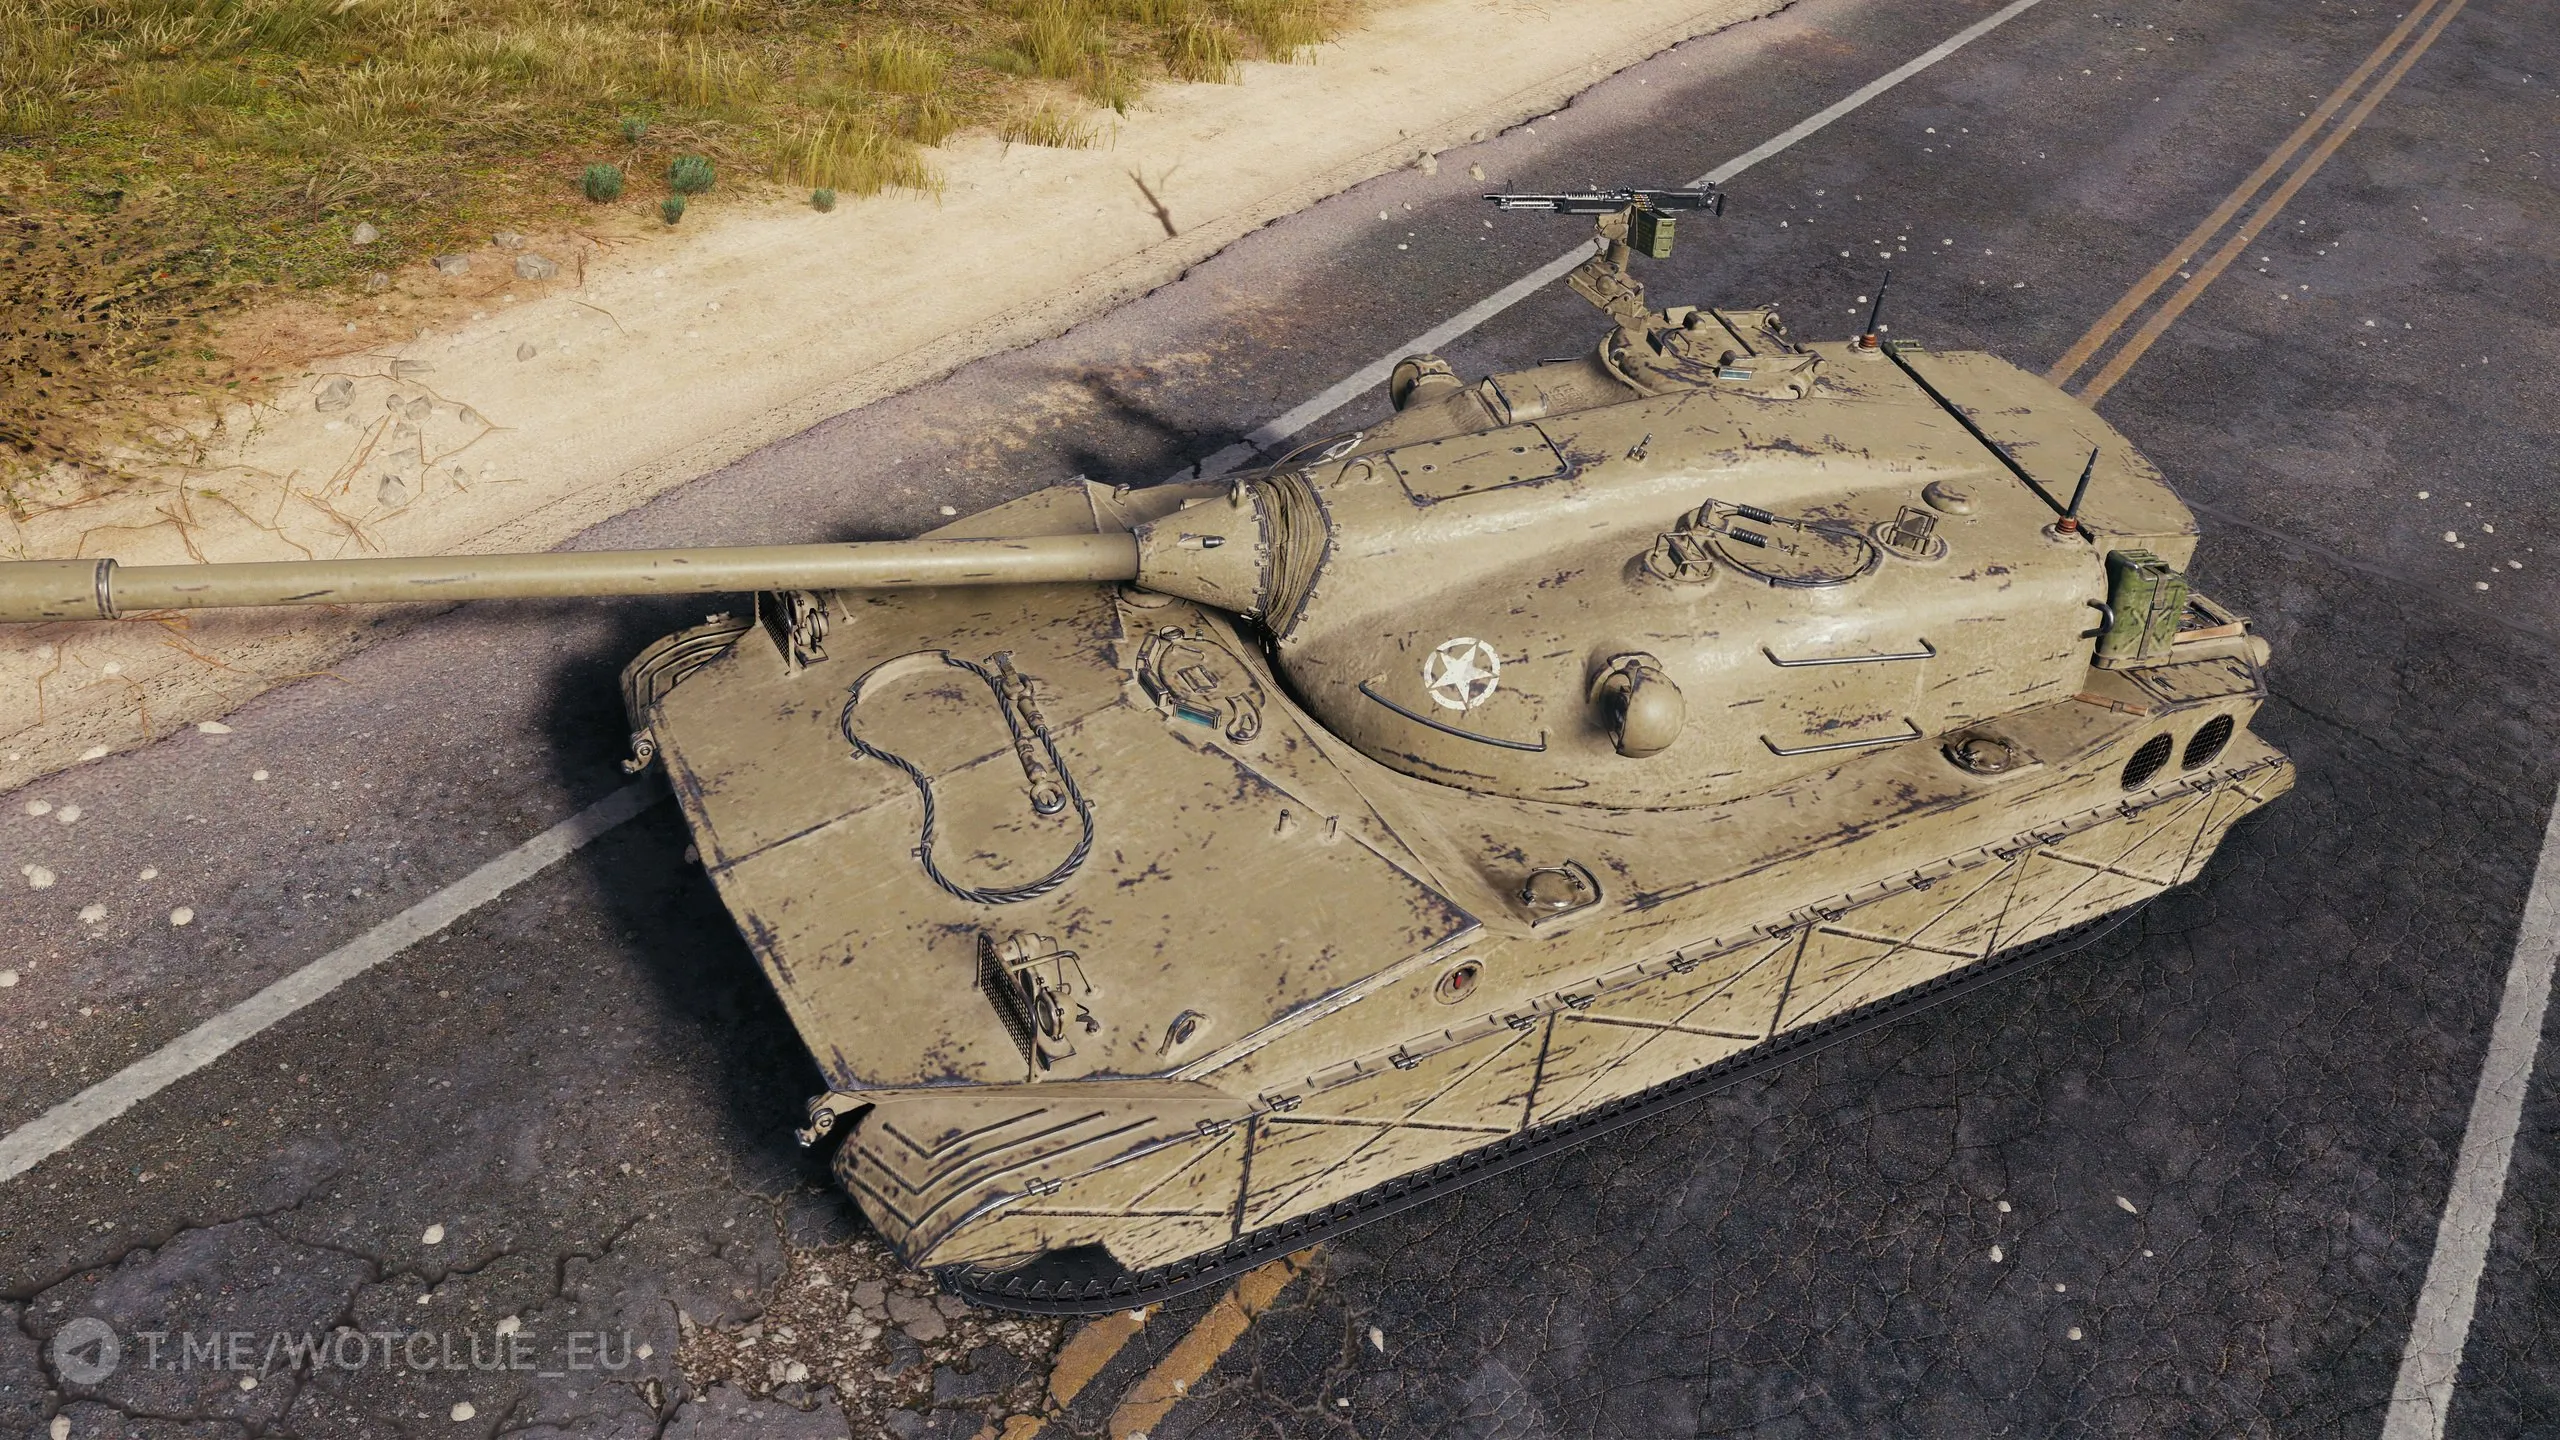
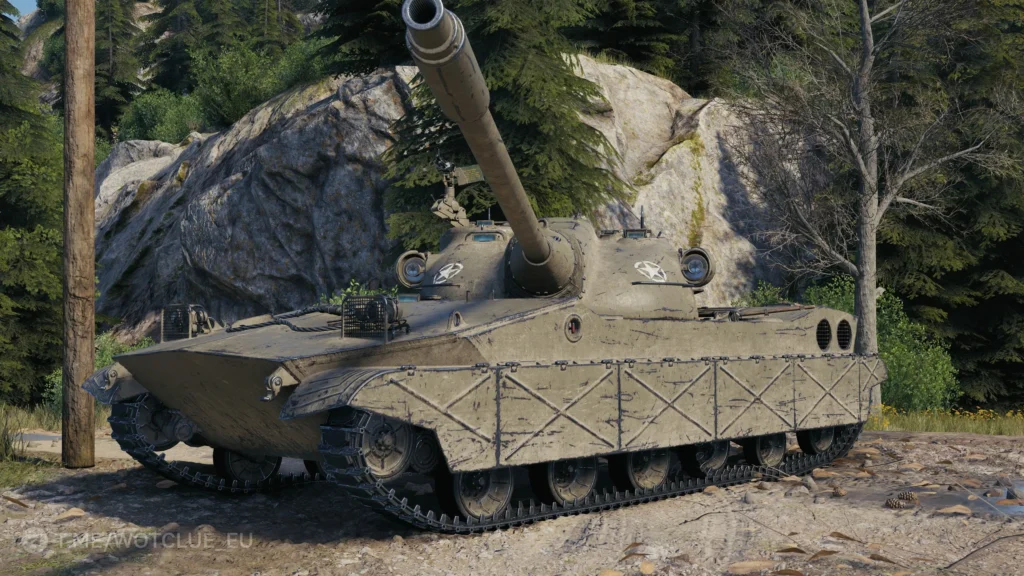
Despite being a light tank, its large size and lack of armor mean it is best played more like a medium tank, using its good mobility and view range to its advantage while avoiding direct combat. The LTC 2 is a non-premium vehicle, and there is a similar premium version called the ATAC 2 available on the Russian server.
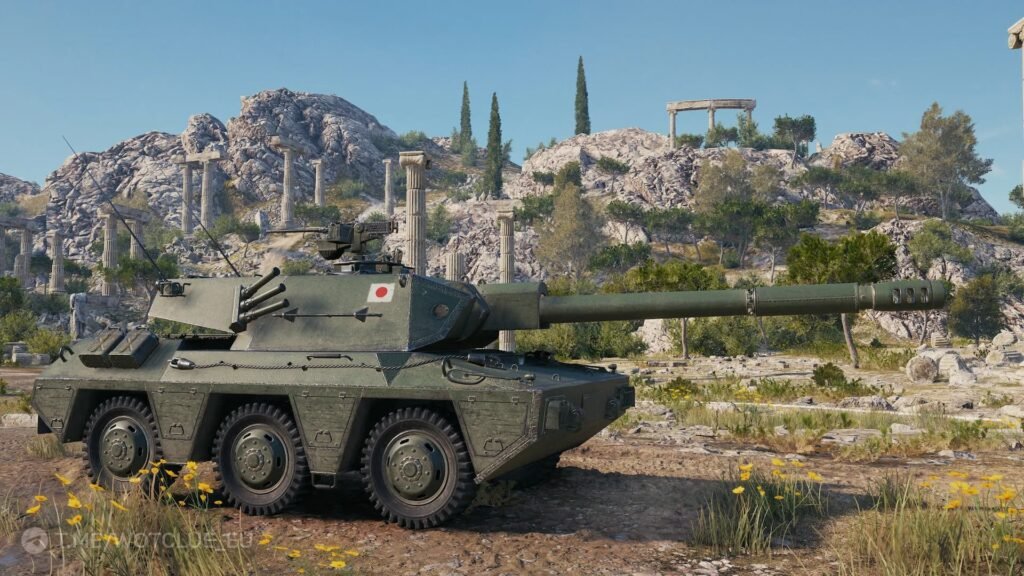
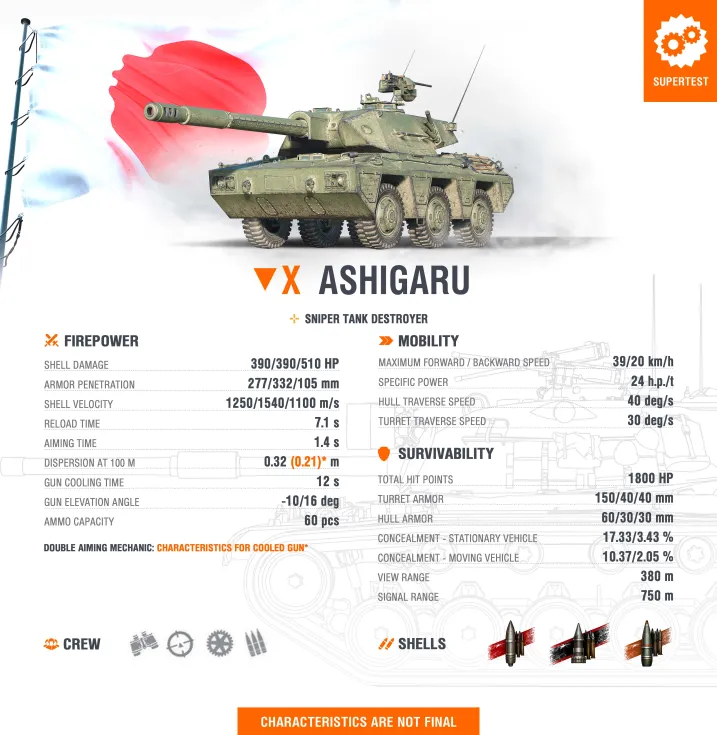
Tier and Class: It is a Tier X Japanese sniper tank destroyer.
Firepower: 105 mm gun with gun cooling.
Armor and Role: paper hull and poorly armored turret. Tank should stick to long-range engagements.
Category
Characteristic
Value / Detail (Approximate)
Notes
Class
Vehicle Type
Wheeled Tank Destroyer
First wheeled TD in the game.
Gun Mechanic
Double Aiming System
Allows for a 5-second “cooling” period to achieve maximum precision.
Rewards patient, fixed-position sniping.
Gun Caliber
Caliber
105 mm
Low caliber means overmatching is going to be hard.
Alpha Damage
Damage per Shot
~390 HP
Moderate for a Tier X TD.
Reload Time
Base Reload
~7.1 seconds
Time between shots if ignoring the cooling mechanic.
Cooled Accuracy
Dispersion
~0.21 m at 100m
Exceptionally high accuracy after gun cooling.
Base Accuracy
Standard Dispersion
~0.32 m at 100m
Good standard accuracy without cooling.
Gun Depression
Depression Angle
10 degrees
Excellent for hull-down positioning.
Top Speed
Max Forward Speed
~39 km/h
Slow for a wheeled vehicle; closer to a medium tank’s speed.
Specific Power
Horsepower-to-Weight
~24 hp/t
Provides good acceleration and maneuverability despite the low top speed.
Armor
Protection Level
Lousy / Paper
Relies on concealment and distance, not armor, to survive.
View Range
Base View Range
~380 m
Below average for a high-tier vehicle, often requiring allied spotting.
Playstyle Notes
The Ashigaru is poised to be a unique Tier X vehicle, blending the surgical accuracy of a Japanese TD with the quick-repositioning potential of a wheeled chassis. It functions best as a second-line sniper that uses its speed to quickly establish a powerful firing position and exploit the unique gun-cooling mechanic for devastating, highly-accurate strikes.
Designed for active or passive scouting and late-game damage bursts.
Main Armament
High-Capacity Autoloader
10-shell clip that deals 200 HP damage per shell.
Burst Potential
2,000 HP of damage per clip
One of the highest potential burst damages for a light tank at its tier, capable of quickly eliminating isolated enemies.
Reload Time
40 seconds (Full Clip)
A very long reload time means you must be completely safe after emptying your clip.
Intra-Shell Reload
2 seconds
A fast time between shots allows for rapid damage delivery once committed.
Unique Mechanic
Reserve Track
Features the “Reserve Track” mechanic (similar to the Yoh tanks), which prevents it from being fully immobilized when its tracks are damaged, allowing it to maintain mobility.
Mobility
Good
It is generally a fast and mobile vehicle, allowing it to take up critical scouting positions and escape after delivering its clip.
Armor/Camo
Low Armor, Below-Average Camo
It has weak armor and a relatively large silhouette for a light tank, making it vulnerable and better suited for flanking or passive scouting in the early game.
About
Despite being a light tank, its large size and lack of armor mean it is best played more like a medium tank, using its good mobility and view range to its advantage while avoiding direct combat. The LTC 2 is a non-premium vehicle, and there is a similar premium version called the ATAC 2 available on the Russian server.
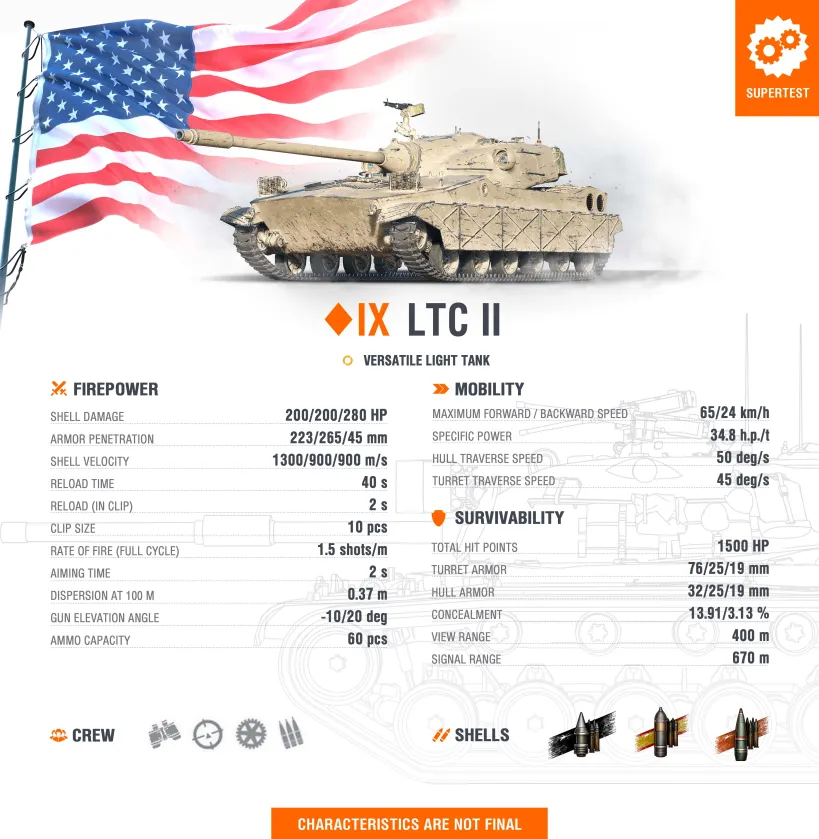
Tier and Class: It is a Tier IX American versatile light tank.
Firepower: 90 mm gun with 10-shell autoloader.
Armor and Role: can pull off some bounces from 90 mm caliber guns or lower on the upper plate. It is more of a sneaky damage dealer and flanker rather than a scout.
Playstyle Notes
The LTC II is not a brawling light tank. Its playstyle is one of high-risk, high-reward:
Early Game: Use its mobility for careful, passive scouting, as its camouflage is not top-tier.
Mid/Late Game: Leverage the massive 2,000 HP clip for aggressive assassinations. Wait until an enemy is isolated, unload the full clip in just a few seconds, and then immediately run to cover for the long 40-second reload.
Survivability: The Reserve Track mechanic is a unique tool that gives it an extra layer of protection against being immobilized while retreating.
This tank rewards patience and impeccable timing, as exposing yourself during the long reload is a death sentence.
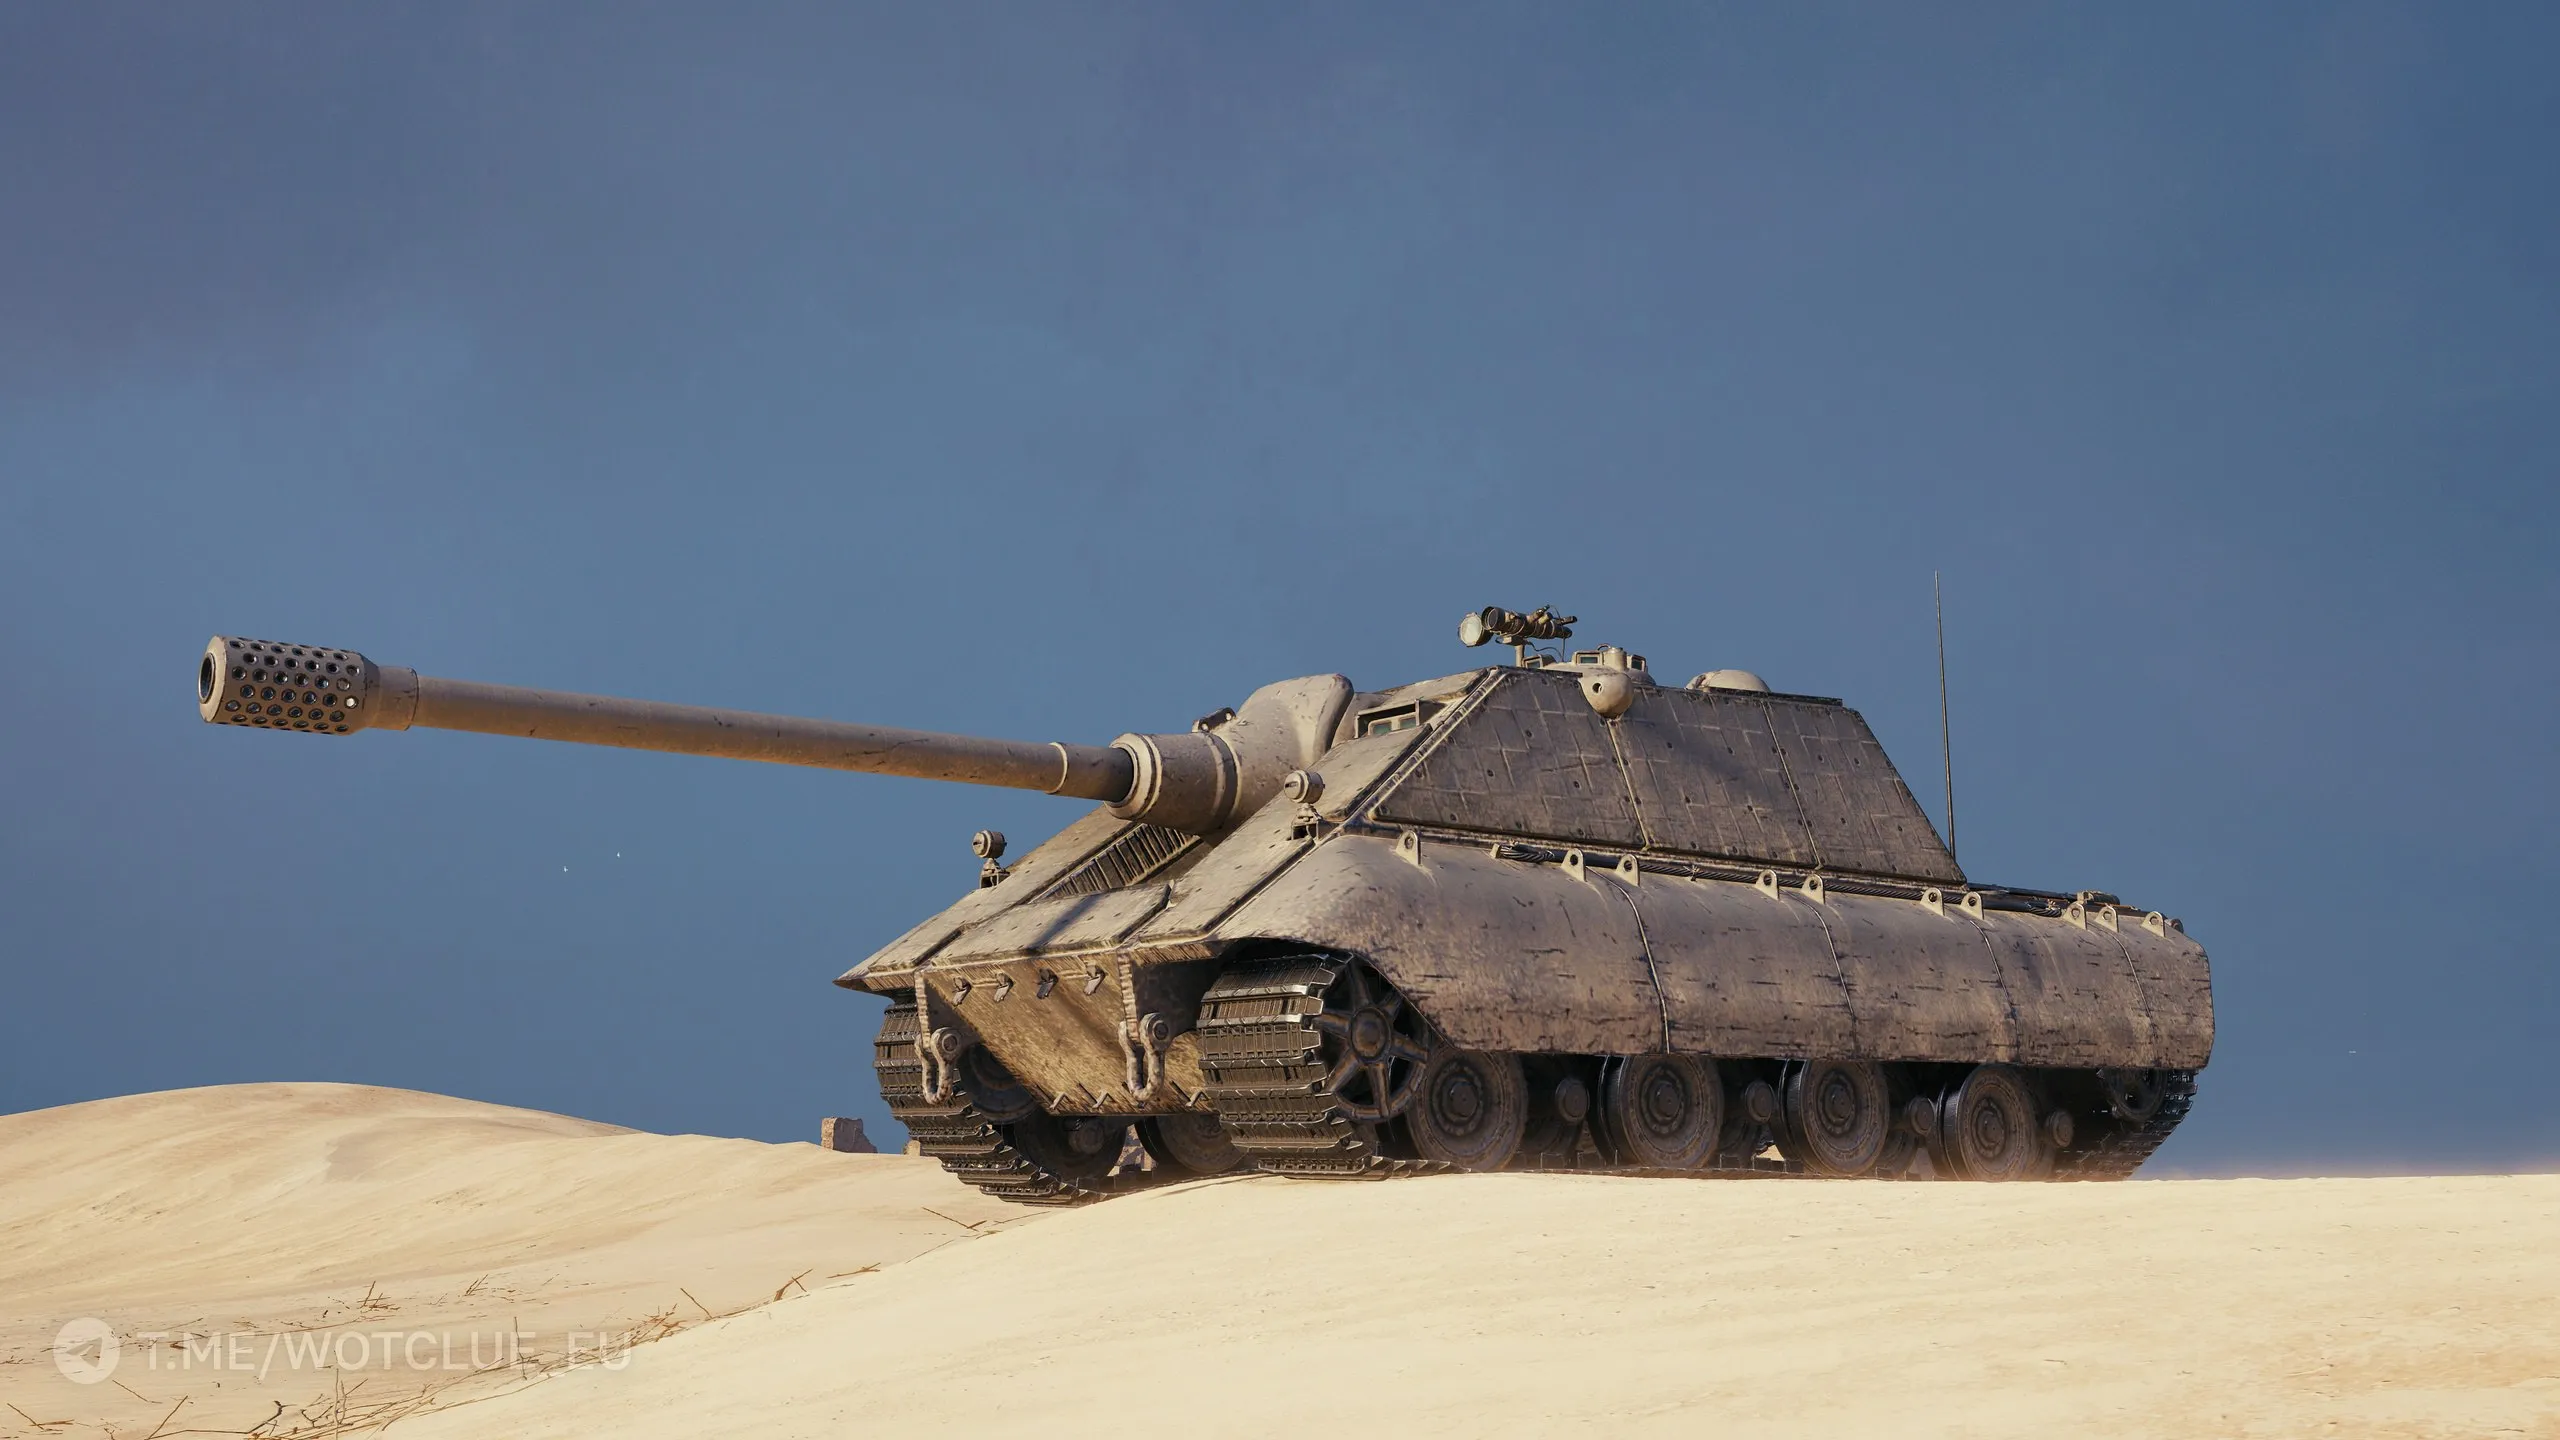
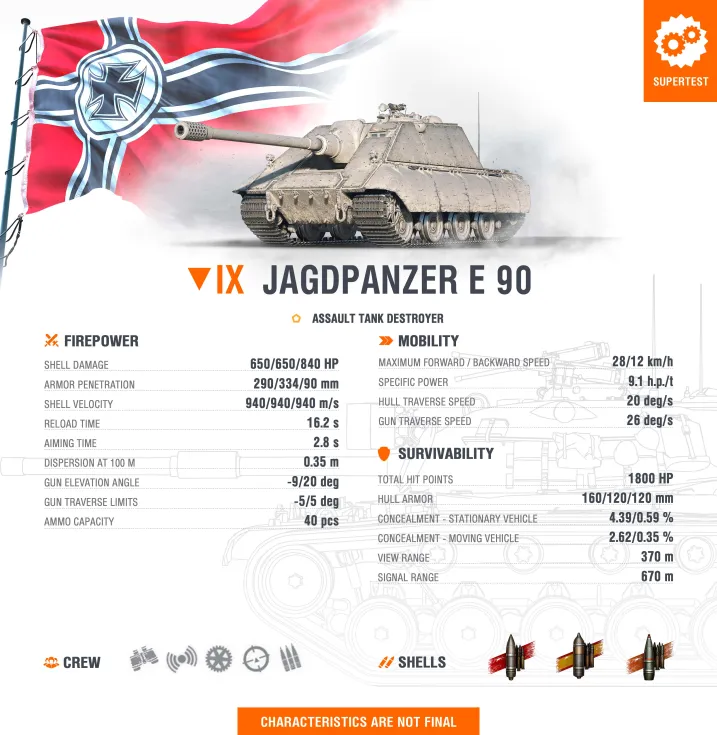
It is a fictional/concept vehicle, often jokingly referred to by the community as the “Mini Jagdpanzer E 100 Krokodil” or a “fat Jagdpanther,” as its design follows the lineage of the casemate-style tank destroyers.
Tier and Class: It is a Tier IX Germantank destroyer.
Firepower:150 mm barrel deals 650 damage on average.
Armor and Role: very similar playstyle to something like the Jagdtiger or Jagdpanzer E 100, but with better armor and a harder-hitting gun.
Feature
Detail
Notes
Class/Tier
Tank Destroyer, Tier IX
Designed for frontal combat and breaking through defensive lines.
Main Armament
High-Alpha Gun (likely 150mm)
Deals a punishing 650 HP of damage per shot.
Armor
Excellent Frontal Protection
Frontal armor is nominally up to 160 mm thick, allowing it to “shrug off” many rounds when played correctly.
Gun Depression
Good for a Casemate TD
-9° of gun depression, which is valuable for its role and helps it use terrain effectively while pushing.
Mobility
Limited/Slow
Top speed is restricted to 28 km/h. It is not a tank intended for rapid repositioning, but rather for holding ground.
Firepower Traits
High Penetration, Good Accuracy
The gun is designed to be highly reliable, ensuring that its large alpha damage is consistently applied.
Playstyle
Frontline Assault / Bunker
A classic, heavy casemate TD. It’s meant to roll forward slowly, absorb hits with its frontal armor, and deliver devastating alpha strikes in return.
Playstyle Notes
While the frontal armor is strong, the limited mobility and casemate design (no rotating turret) mean it must commit to its position. Its effective armor thickness will heavily rely on angling, and any exposed side or rear will be highly vulnerable. Like many German TDs, knowing where to go and sticking to the right position will be crucial for success.
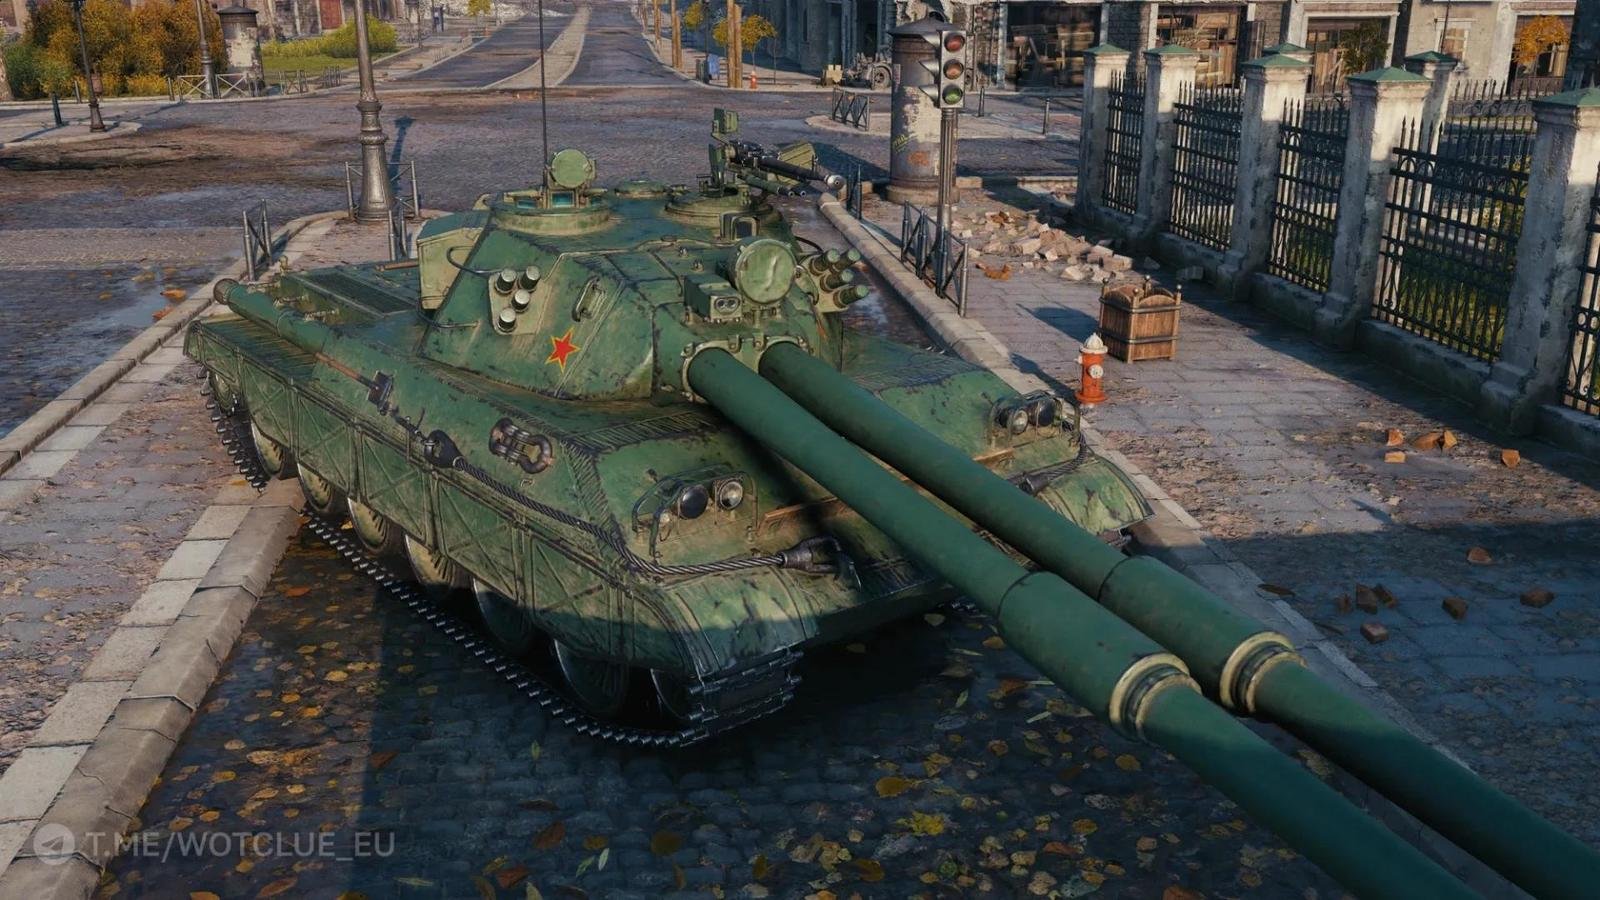
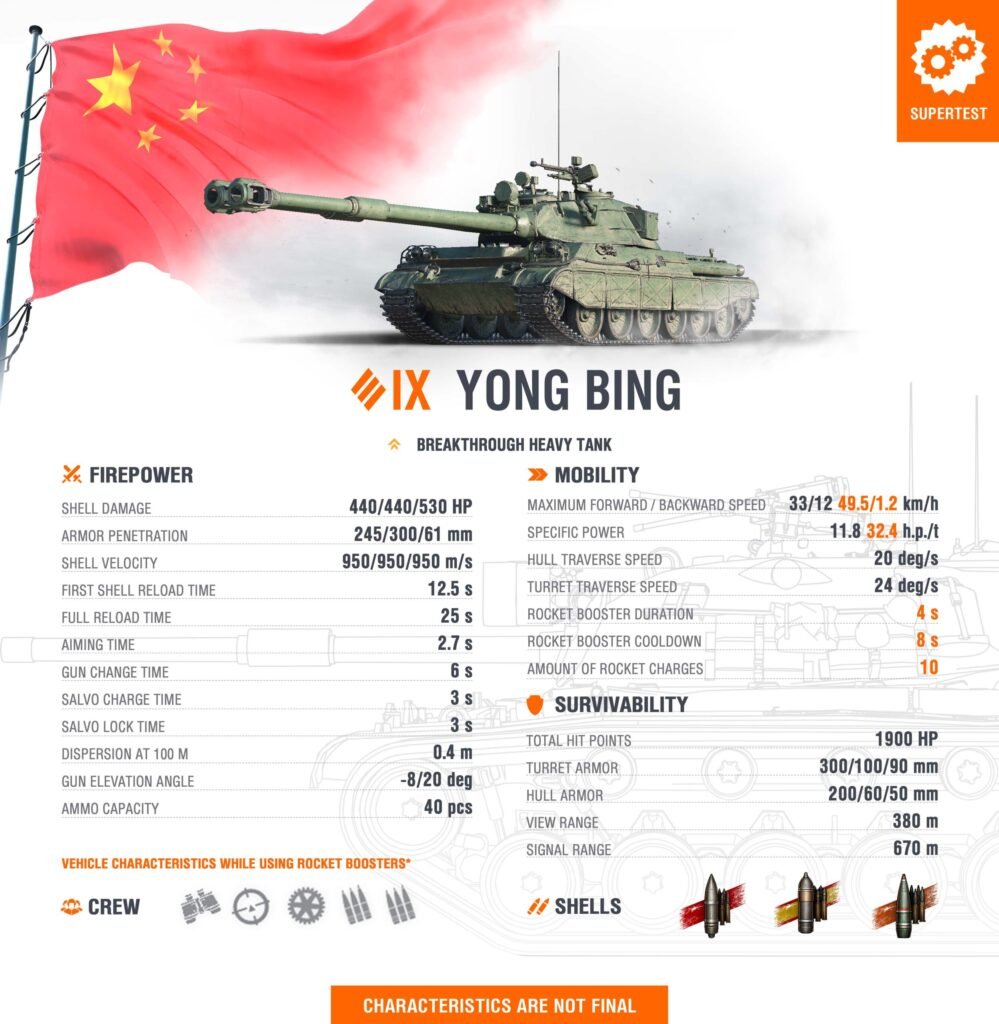
Tier and Class: It is a Tier IX Chinese heavy tank.
Dual Mechanics: It is notable for featuring two special mechanics:
Jet Boosters: It has 10 short but powerful jet boosters that can be used to increase its acceleration, allowing it to play as a “true breakthrough heavy tank.” Its base mobility is described as average (top speed of 33 km/h forward and 12 km/h in reverse).
Double-Barreled Gun System: It is equipped with twin 122 mm guns.
Firepower: Each of the 122 mm barrels deals 440 HP of damage per shot.
Armor and Role: Its design is built for shock assaults and close-quarters dominance, with a thick frontal plate but weaker side armor.
The tank is designed for players who want to apply pressure and surprise enemies in close combat using the combination of the double gun and the mobility boost from the jet boosters.
Feature
Detail
Notes
Class/Tier
Heavy Tank, Tier IX
Designed as a breakthrough heavy.
Main Armament
Double 122 mm guns
Each shell deals 440 HP of damage.
Mobility Gimmick
Jet Boosters
10 short, powerful charges, each lasting about 4 seconds. They are used to aid in acceleration, offering quick bursts of speed.
Base Mobility
Average/Sluggish
Top speed: 33 km/h forward, 12 km/h in reverse. The boosters compensate for the low base speed.
Armor Layout
Thick Frontal Plate and turret.
Strong frontal armor is its defining feature.
Weakspots
Multiple and Prominent
The most commonly cited weak points include: Prominent cupolas on the turret, a potential shot trap underneath the mantlet, an unsloped driver compartment, and reportedly only 60mm of side armor.
Design Basis
Enlarged T-34 Turret
Visually, it is described as having an enlarged T-34 hexagonal turret on an Obj. 703 II-like hull.
Playstyle Notes
The tank’s combination of the double gun and the jet boosters is intended for close-quarters brawling and aggressive pushes. The double-gun allows for a high alpha strike (880 damage if both shells penetrate), and the boosters give it the speed needed to relocate or quickly surprise an opponent in a peek-a-boo fight, despite its generally sluggish nature. You’ll need to be very aware of your frontal weak spots to minimize damage.
The Yong Bing is a newer vehicle from the testing phase. Its final in-game stats may have slight variations if it moves from Supertest to the live server. It’s still not known in which form of an event this tank will be available, but it could be a lootbox tank.
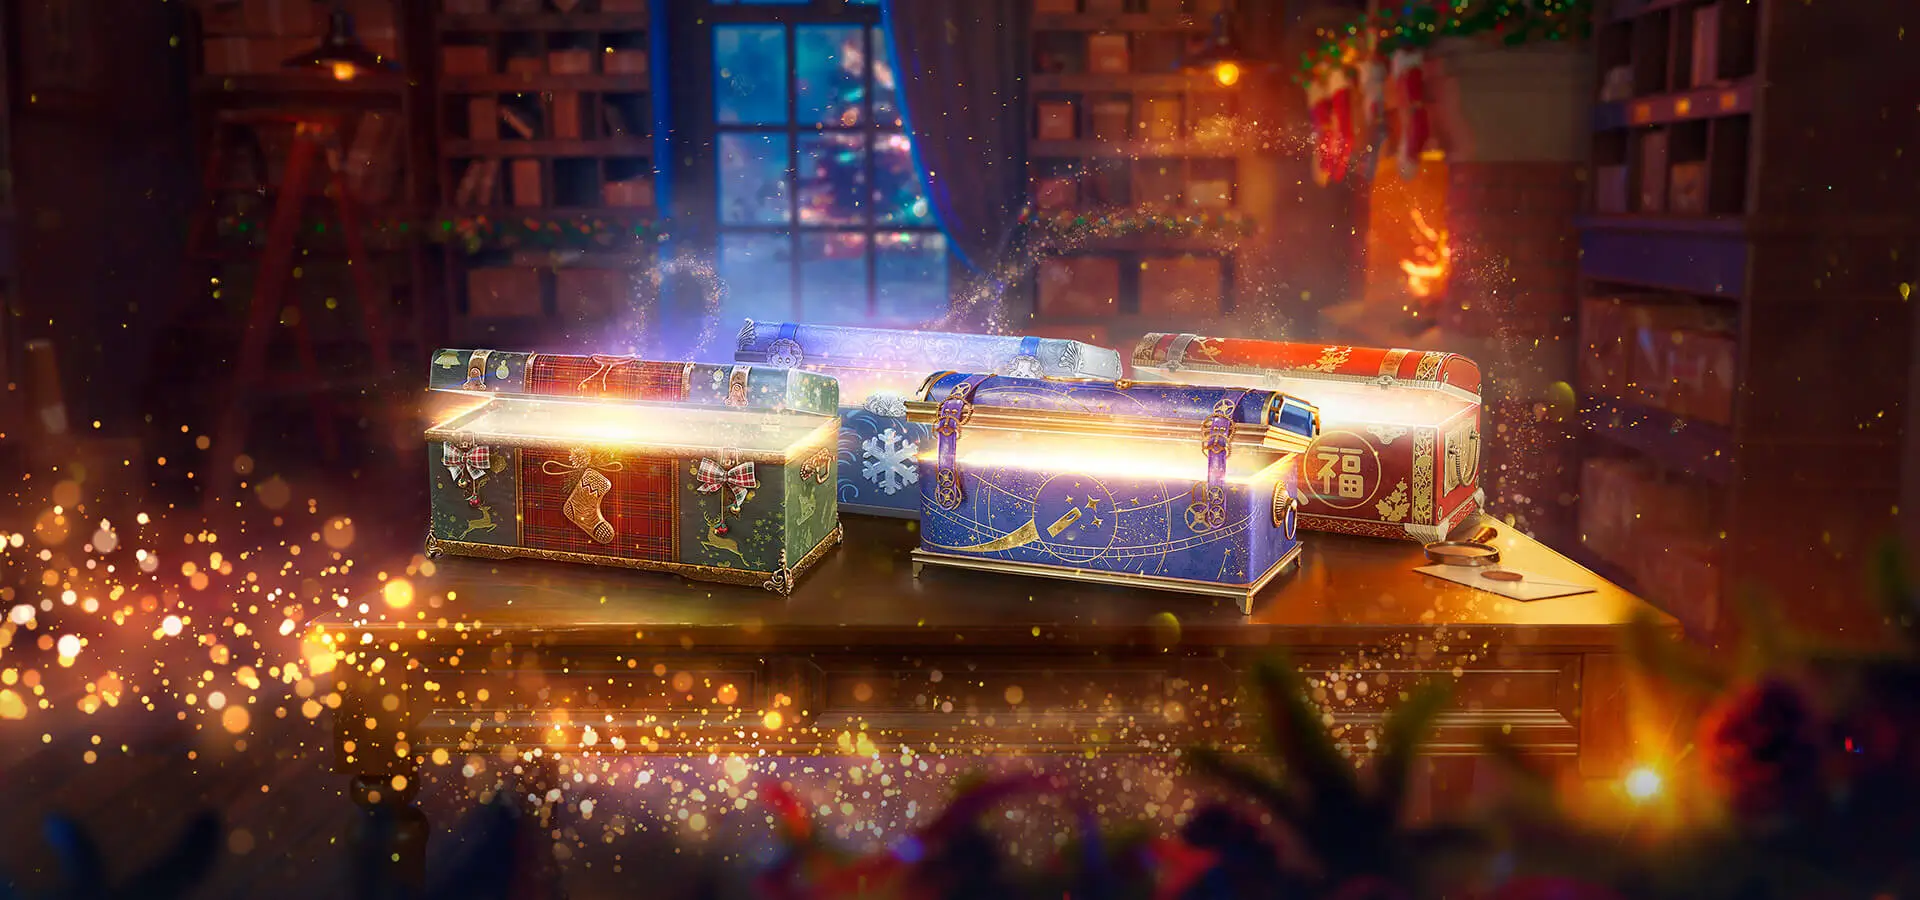
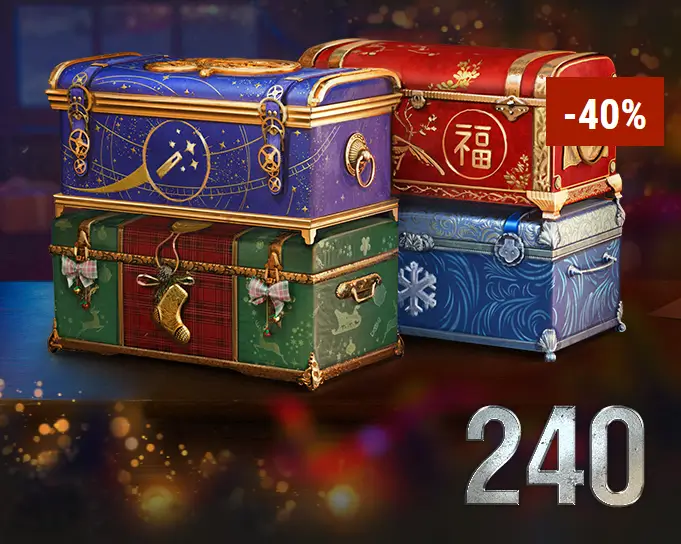
Reality is that the biggest bundle containing 240 boxes is the one to get if you want the maximum value for your money if you don’t mind throwing absurd amount of money at the game. While still very expensive, the 80 boxes bundle should be the sweetspot between price and value. Small bundles should be avoided.
If it’s your first time seeing these boxes, it might be important to say that there are 4 types of boxes, but all of them are priced the same. Think about what you want to achieve faster if you’re not going to buy a lot of boxes.
Buy Christmas or New Year types to quickly raise your Festive Atmosphere Level. To earn customization elements and economic bonuses, complete Jason’s Assignments by investing Warm Amber and Meteoric Iron from Lunar and Magic box types.
Loot box bundle sizes
240 Large Boxes
Price – 287.99 € EU Region
60 boxes of each type
This is the biggest bundle and the most expensive one. Largest bundle is made for people who would like to invest in the game once in a year or once in few years.
Without a doubt this is the best value bundle, advertised as 40% discounted price per box. That doesn’t tell the whole story tho, because not only the price per box is a lot lower then the less expensive bundles, the chance to get duplicate premium tanks and get compensation is very high. Meaning that you will get a ton of gold from this, probably enough gold for couple of years of premium account which is ridiculous.
Pros
Lowest price per box
You’ll get all the tier 8 and 9 premium tanks
Very high chance of getting all the lower tier premium tanks
Very high chance of getting all the 3D styes and attachments
Enough resources to level up to max festive atmosphere
Cons
Insanely high price for a bundle
Chances are you’re not going to be able to use the gold efficiently
160 Boxes
Price – 207.99 € EU Region
40 Boxes of each type
So this bundle is still very expensive and still presents a high value option, but not as complete as the largest bundle because you are not guaranteed to get all the high tier premium tanks, but only 3.
Dropping 200 euros at the game is still a quite a statement. This bundle is more oriented to players that would like a couple of high tier premiums, max out festive atmosphere and get all the 3D styles and attachments without pilling up a huge amount of gold that will be hard to make use of.
Pros
A bit more affordable the the largest bundle
3 guaranteed high tier premium tanks
Very high chance to get all the high and low tier premium tanks
Enough resources for maxing out festive atmosphere
Very high chance of geting all the 3D styles and attachments
Cons
Expensive
If you get unlucky, maybe you’ll only get 3 out of 5 high tier premium tanks
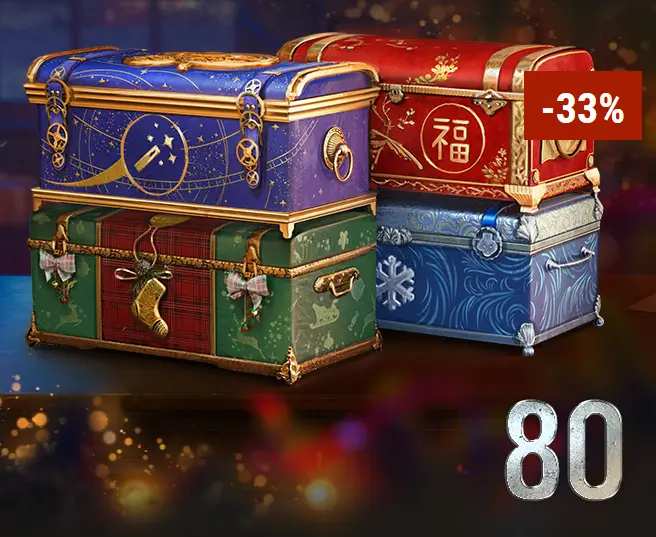
80 Large boxes
Price – 106.99 € EU Region
20 Large boxes of each type
Bundle that shouldn’t break the bank and still provide a lot of value for the money. Maybe the sweetspot between the value and price. Still a quite a pricey bundle and you’ll want to think well before buying.
With the price of around 100 euros and 80 boxes, a big chunk of players will lean towards this bundle because it will still give them plenty of gold and guarantee them that they will get at least one high tier premium tank if they get very unlucky.
The problem here could be if you get unlucky and you depend on safeguard at 50 boxes, when you’ll be finished with opening the bundle, you’ll realize you’ll need only 20 boxes more to get another high tier premium, a great strategy from WG’s perspective to lure you into buying more boxes.
Pros
Affordablefor a good amount of players
Sweetspot between the price and value
1 guaranteed high tier premium tank
High chance of getting all the 3D styles and attachments
Enough resources for maxing out festive atmosphere
Cons
If you get unlucky, you’ll get only 1 high tier premium
You can easily get baited into buying another 20 boxes for another high tier premium tank
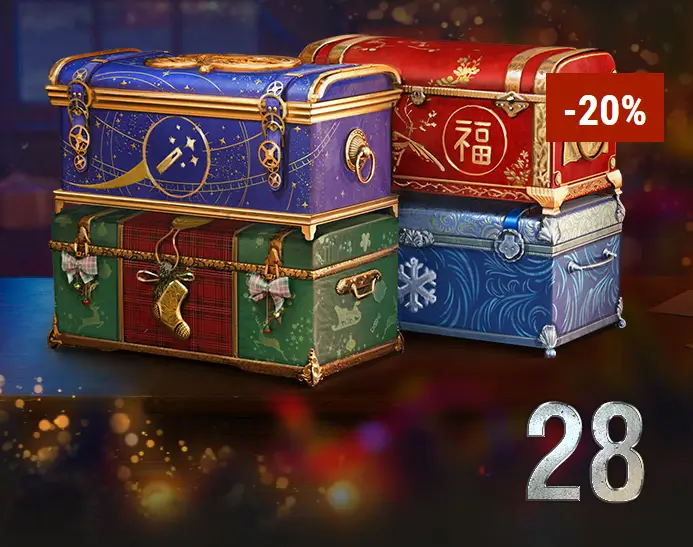
28 Large boxes
Price – 44.79 € EU Region
7 Large boxes of each type
This is a point where value really drops significantly, price per box is quite a bit higher then in the larger bundles and chances for getting duplicate premiums are very low.
While at the affordable price, it doesn’t provide a whole lot of value to be honest, you will not be guaranteed to get even 1 high tier premium tank and chances for collecting all the 3D styles and attachments are low.
You can buy this bundle if you want to take the risk and count on that you’ll get lucky and get a high tier premium, only that way you’ll get your money’s worth. You’ll still get a plenty of resources and 3D styles and attachments and a decent amount of gold and probably some premium time.
Pros
Affordable
Good amount of resources
Good amount of gold
Medium chance of getting a high tier premium
High chance of getting a low tier premium
Cons
Not a very good value bundle
If your aim is to get a high tier premium in this bundle, you maybe get dissapointed
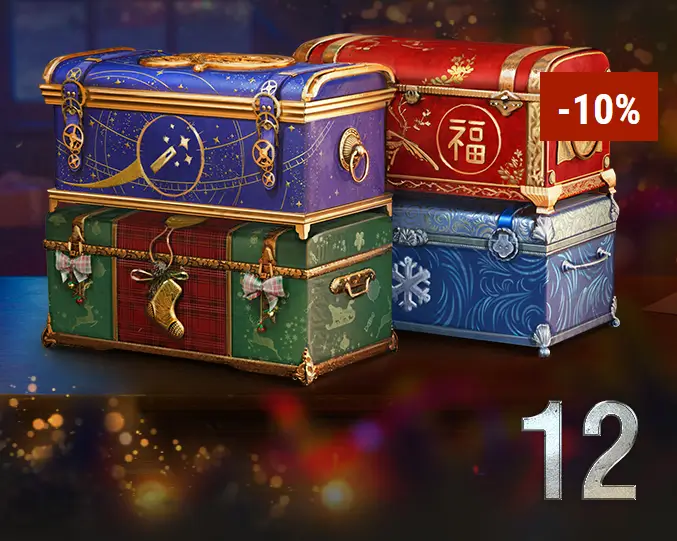
12 Large Boxes
Price – 21.59 € EU Region
3 boxes of each type
A very affordable bundle, but with a quite a bad value. Aimed at the players who don’t want to spend a lot of money on the boxes and would like to try their luck.
Price per box is really getting expensive in this bundle, almost 2 euros a pop which hurts quite a lot when all you get is for example 250 gold and 100k credits…
The only case I would recommend this bundle is really if you are missing around 12 boxes in order to get your high tier premium. Otherwise you most likely won’t get your money’s worth.
Pros
Very affordable
Some resources for leveling up festive atmosphere
Cons
Very bad value bundle
High price per box
Very low chance of getting a high tier premium
Low chance of getting a 3D style or attachment
3 Large boxes
Price – 5.99 € EU Region
You can pick what ever type
And at last we have the smallest bundle with only 3 boxes, but you can choose which type of boxes you want. That might be the only pro of this bundle along with the very cheap price tag.
This is most definitely the worst value bundle and it should be avoided if you want to get your money’s worth. With 2 euros a pop, it feels very expensive while opening these boxes are even more sad when you get only 250 gold and credits from it.
If you want to try your luck, maybe by some miracle you get something good from these 3 boxes, but the chances are very very low it must be said. You’ll also get a small amount of resources.
Case for buying these boxes would be maybe if you want to gift some boxes to your friend or you’re missing a couple for a guaranteed high tier premium.
Pros
Very affordable
Cons
Terrible value
Very high price per box
Very very low chance of getting a premium tank
Low amount of resources
Very low chance of getting a 3D style of attachment
Conclusion
As you saw, the more we went into the affordable territory, the worse bundles you were getting. You should be very careful when thinking about buying these boxes and don’t get baited by seeing people on reddit posting how lucky they got.
I would say if you’re buying any bundle below 80 boxes, you’re just counting on your luck and chances are you’ll get unlucky and get mad at the game and stop playing while you’ve already spent the money on it.
Go into opening with the mindset you won’t get anything and you’ll get out of the opening with a lot better mood. Good luck to everyone.