Blog

  • Renmin Tanke Tank Preview – World of Tanks Supertest

    Renmin Tanke Tank Preview – World of Tanks Supertest

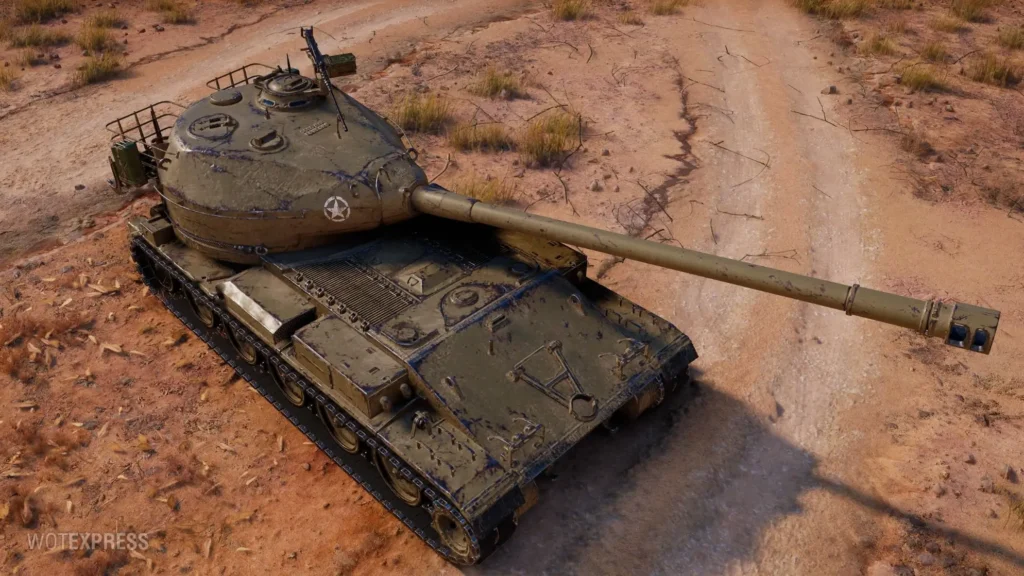
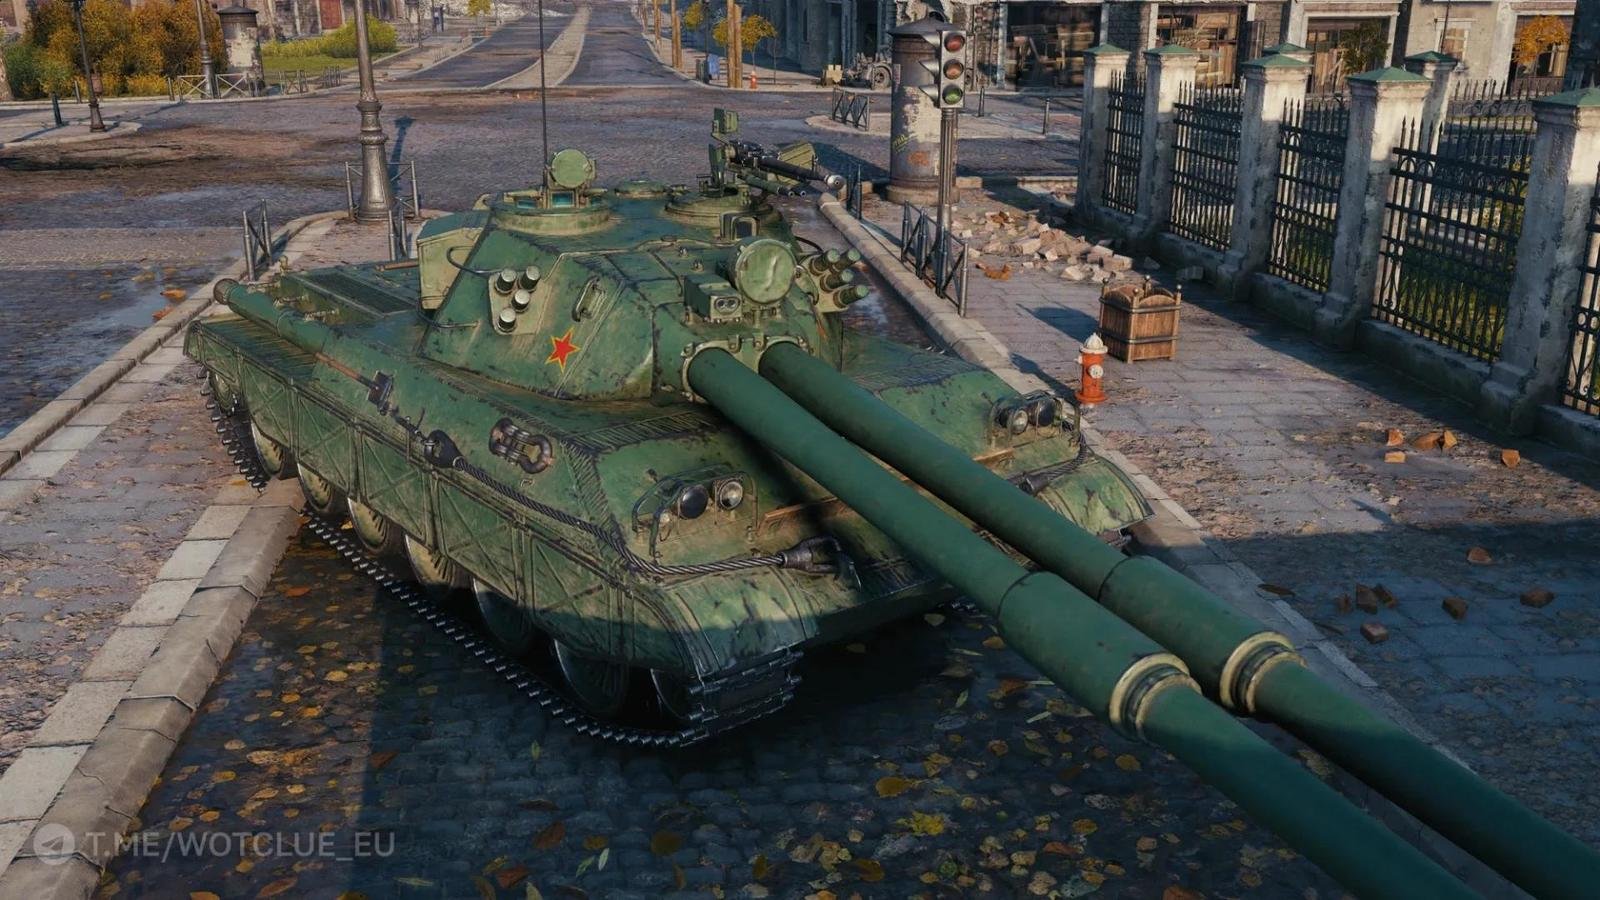
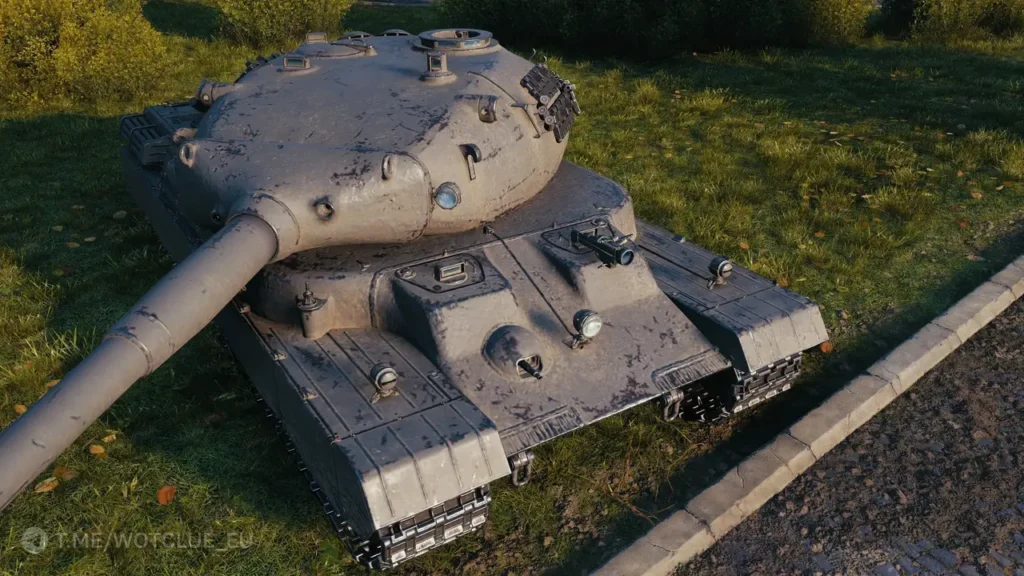
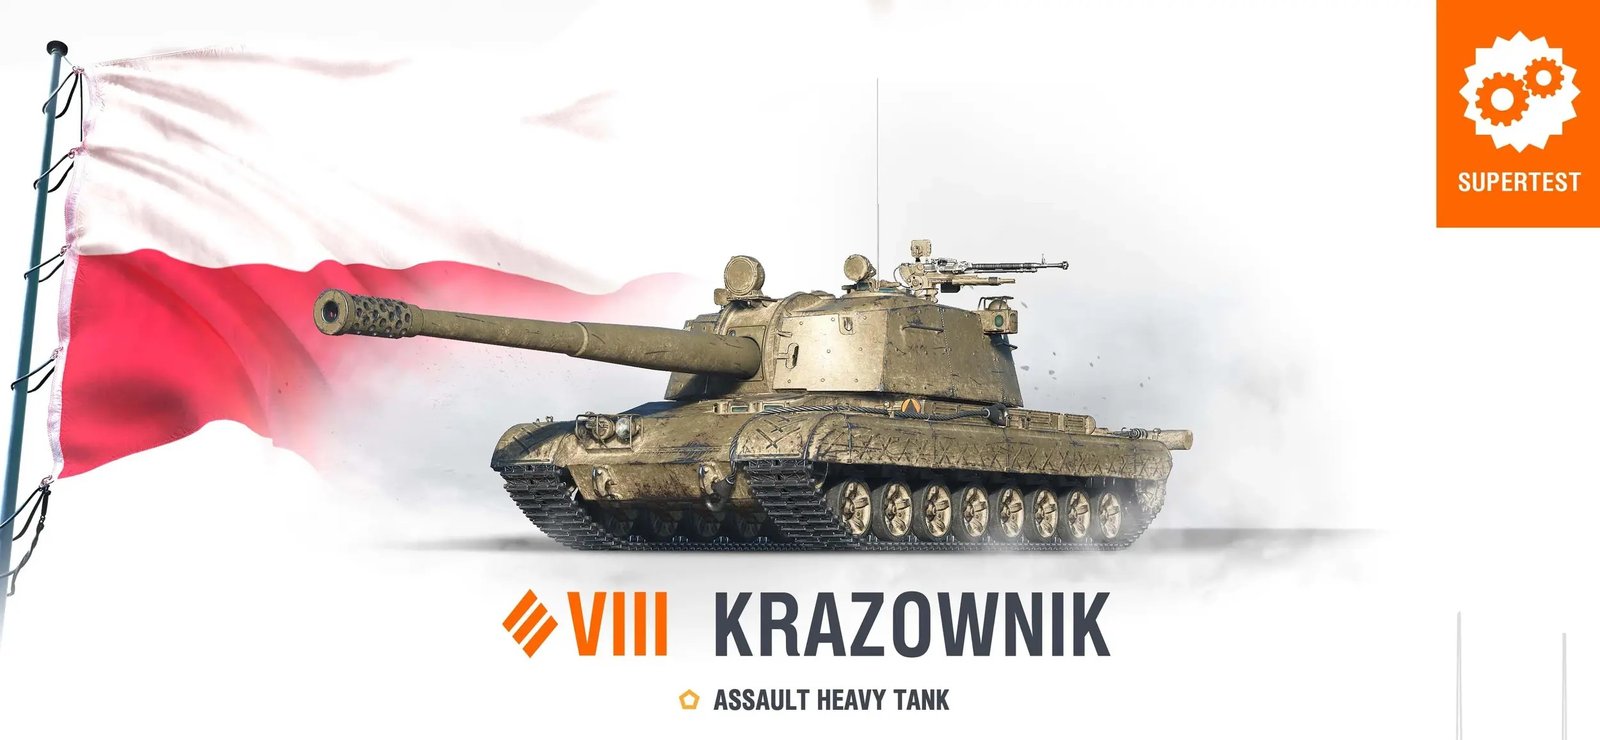
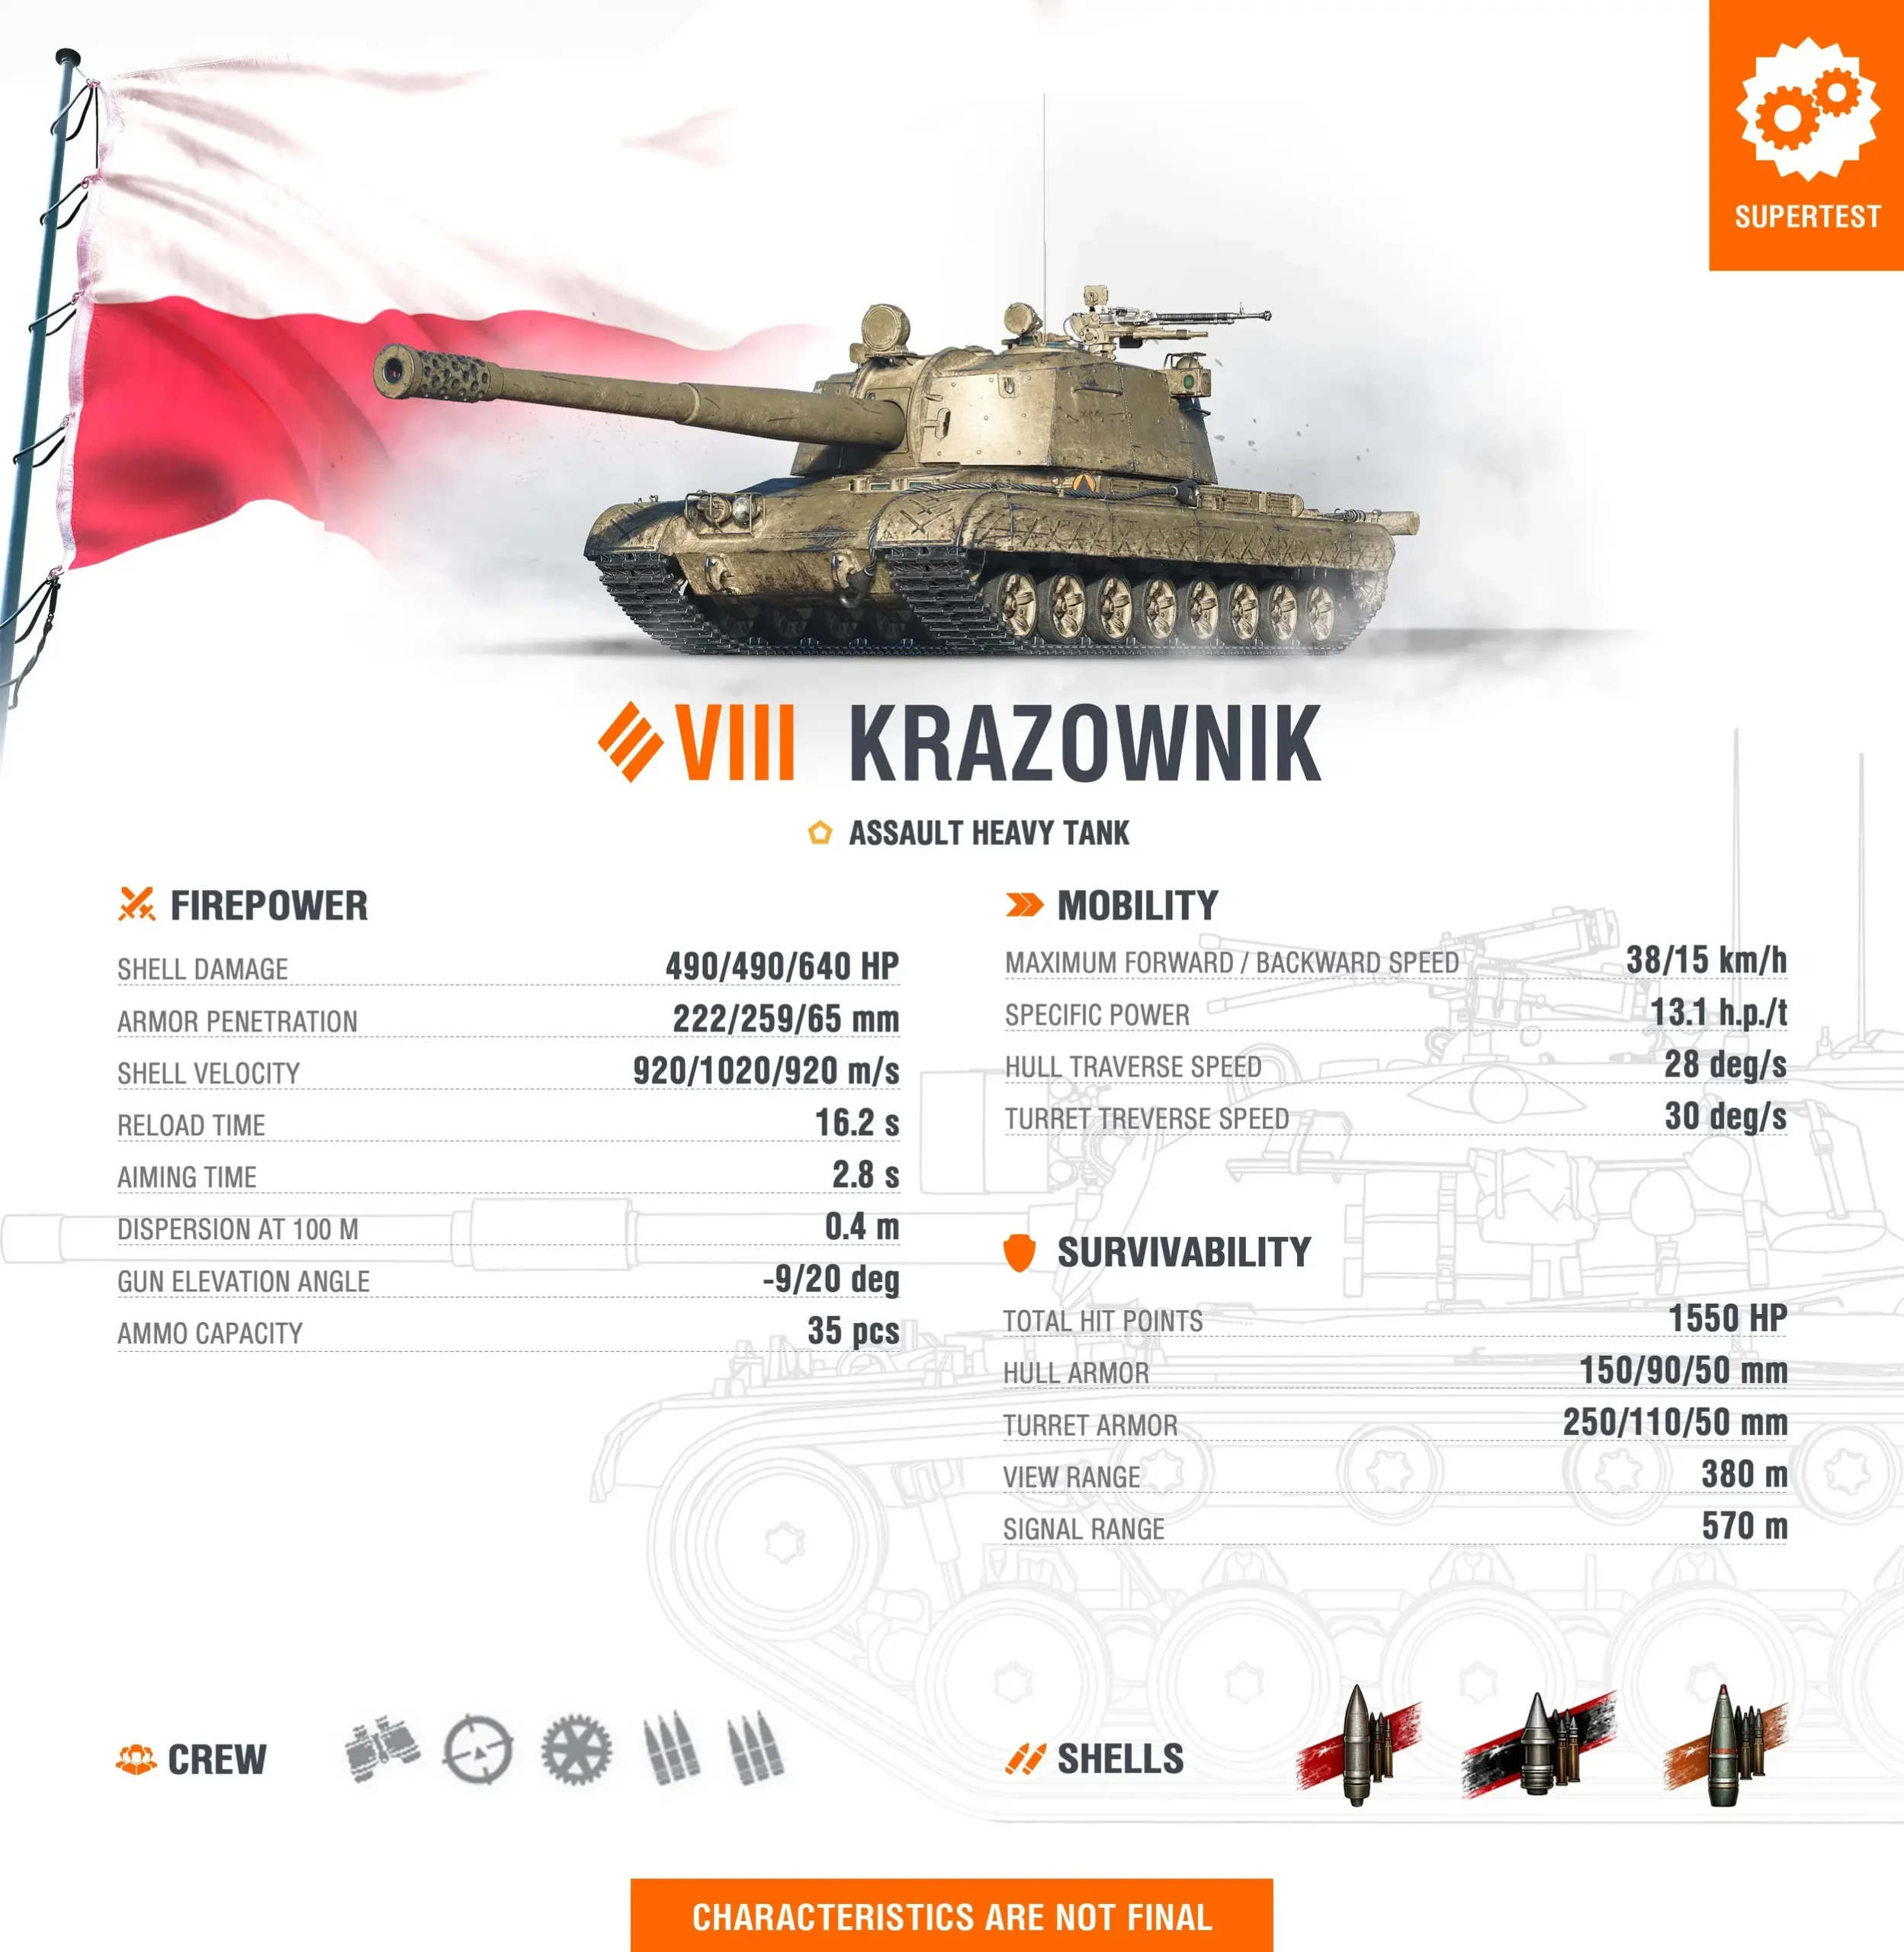
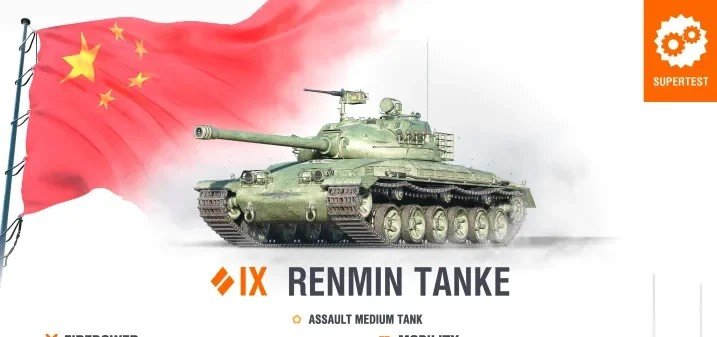
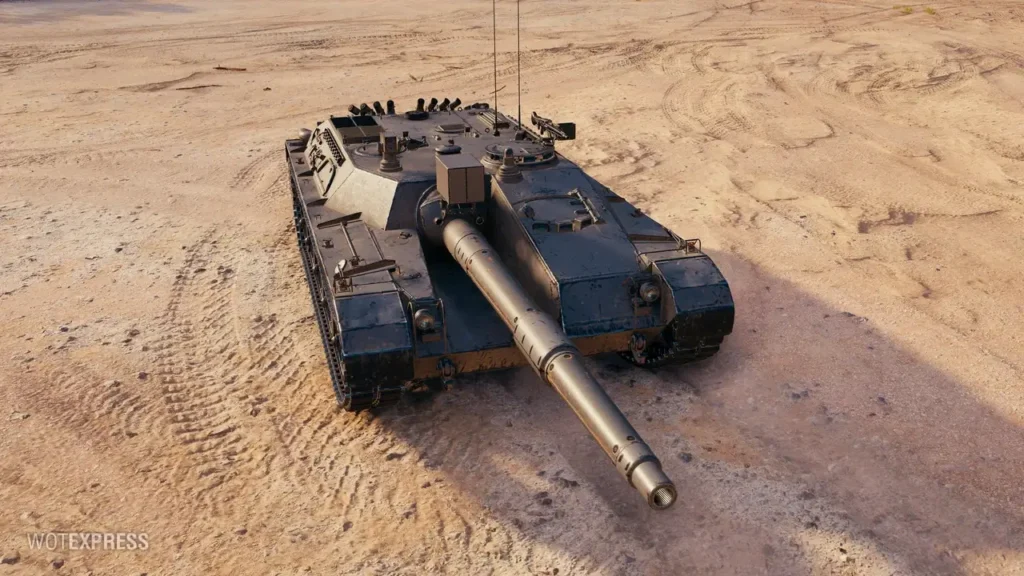
    The World of Tanks Supertest has just welcomed an intriguing addition to the Chinese tech tree: the Renmin Tanke, a Tier IX assault medium tank that introduces a completely unique firing mechanic to the game.

    renmin tanke statistics

    A Revolutionary Double-Shot System

    The Renmin Tanke’s most distinctive feature is its unprecedented two-round autoloader system with a twist that sets it apart from every other autoloader currently in the game. While many tanks feature multi-shell clips, the Renmin Tanke stores both shells in a single container, creating a fundamentally different firing experience.

    The Firing Mechanic: When you pull the trigger on the Renmin Tanke, you’re committed to firing both shells. The tank releases both rounds with a brief 0.75-second delay between them, creating a forced double-tap every single time. After both shells are discharged, the autoloader enters a 6.8-second reload cycle to prepare the next pair.

    Damage Output: Each shell deals 200 HP of damage, meaning every trigger pull delivers 400 HP in rapid succession. This creates an effective alpha damage of 400 HP delivered over approximately 0.75 seconds, followed by the reload period.

    DPM Advantages: The combination of 400 HP per firing cycle and a relatively short 6.8-second reload results in strong damage per minute for a Tier IX medium tank. This consistent damage output makes the Renmin Tanke a threatening presence in sustained engagements.
    This firing system differs fundamentally from traditional autoloaders. With conventional autoloaders, commanders can choose to fire one shell and save the rest for later. The Renmin Tanke removes that option entirely—you’re always firing both shells together. This creates unique tactical considerations around ammunition conservation and engagement timing.

    Gun Handling and Accuracy

    Beyond its unique loading system, the Renmin Tanke offers comfortable gun handling characteristics that make it pleasant to play:

    Reliable Accuracy: The gun handling is described as comfortable, suggesting good dispersion values and reasonable aim time. This allows commanders to deliver their double-shot with confidence, knowing both shells are likely to hit their mark.

    Consistent Performance: Unlike some experimental tanks that sacrifice gun handling for unique mechanics, the Renmin Tanke maintains competitive accuracy standards. This reliability is crucial given that every trigger pull commits 400 HP worth of ammunition—you want both shells to count.

    The combination of forced double-shots and comfortable gun handling creates an interesting dynamic. Commanders must be more deliberate with their shooting, but once committed, they can trust the gun to deliver both shells accurately.

    Armor Profile and Survivability

    The Renmin Tanke brings impressive defensive capabilities for its class, positioning it as an “assault” medium tank:

    Excellent Armor for Class: The vehicle features outstanding armor protection compared to typical medium tanks at Tier IX. This allows the Renmin Tanke to take more aggressive positions and trade shots with confidence that other mediums couldn’t match.

    Frontline Presence: The combination of good armor and strong burst damage (400 HP in 0.75 seconds) makes the Renmin Tanke effective in aggressive pushes and frontline engagements. It can absorb incoming fire while delivering punishing counter-attacks.
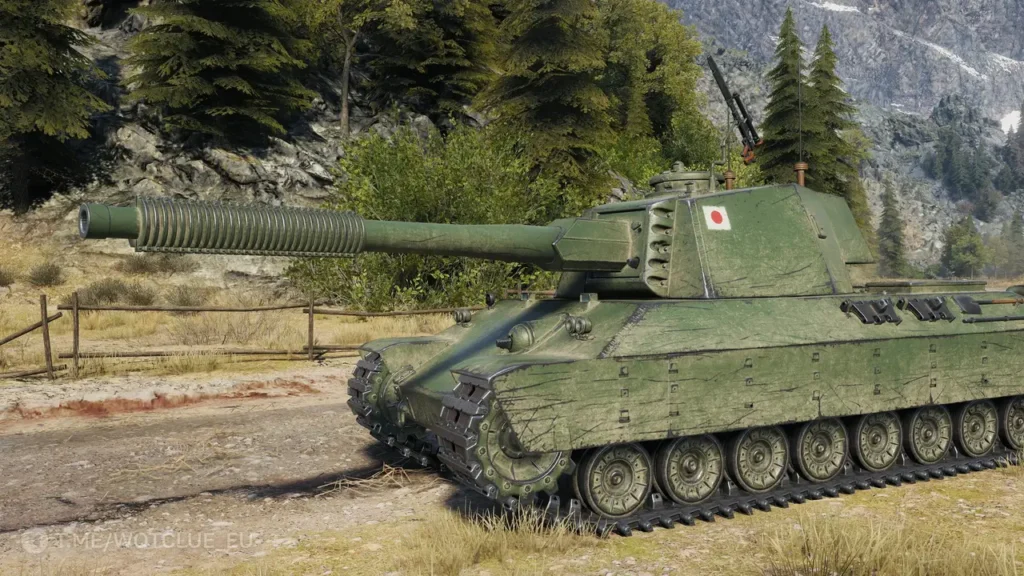
    Assault Medium Role: Unlike traditional support mediums that rely on mobility and concealment, the Renmin Tanke is built to lead pushes and hold positions. The armor enables this playstyle while the double-shot mechanic punishes opponents who expose themselves.

    This armor profile fundamentally changes how the tank operates compared to typical Chinese mediums, which often rely on gun depression and hull-down positions rather than direct armor protection.

    Mobility Characteristics

    The Renmin Tanke offers decent mobility, though it’s not built for high-speed flanking maneuvers:

    Forward Speed: With a maximum forward speed of 45 km/h, the Renmin Tanke maintains reasonable pace for a heavily armored medium tank. While not exceptional, this speed is sufficient for relocating between positions and keeping up with team movements.
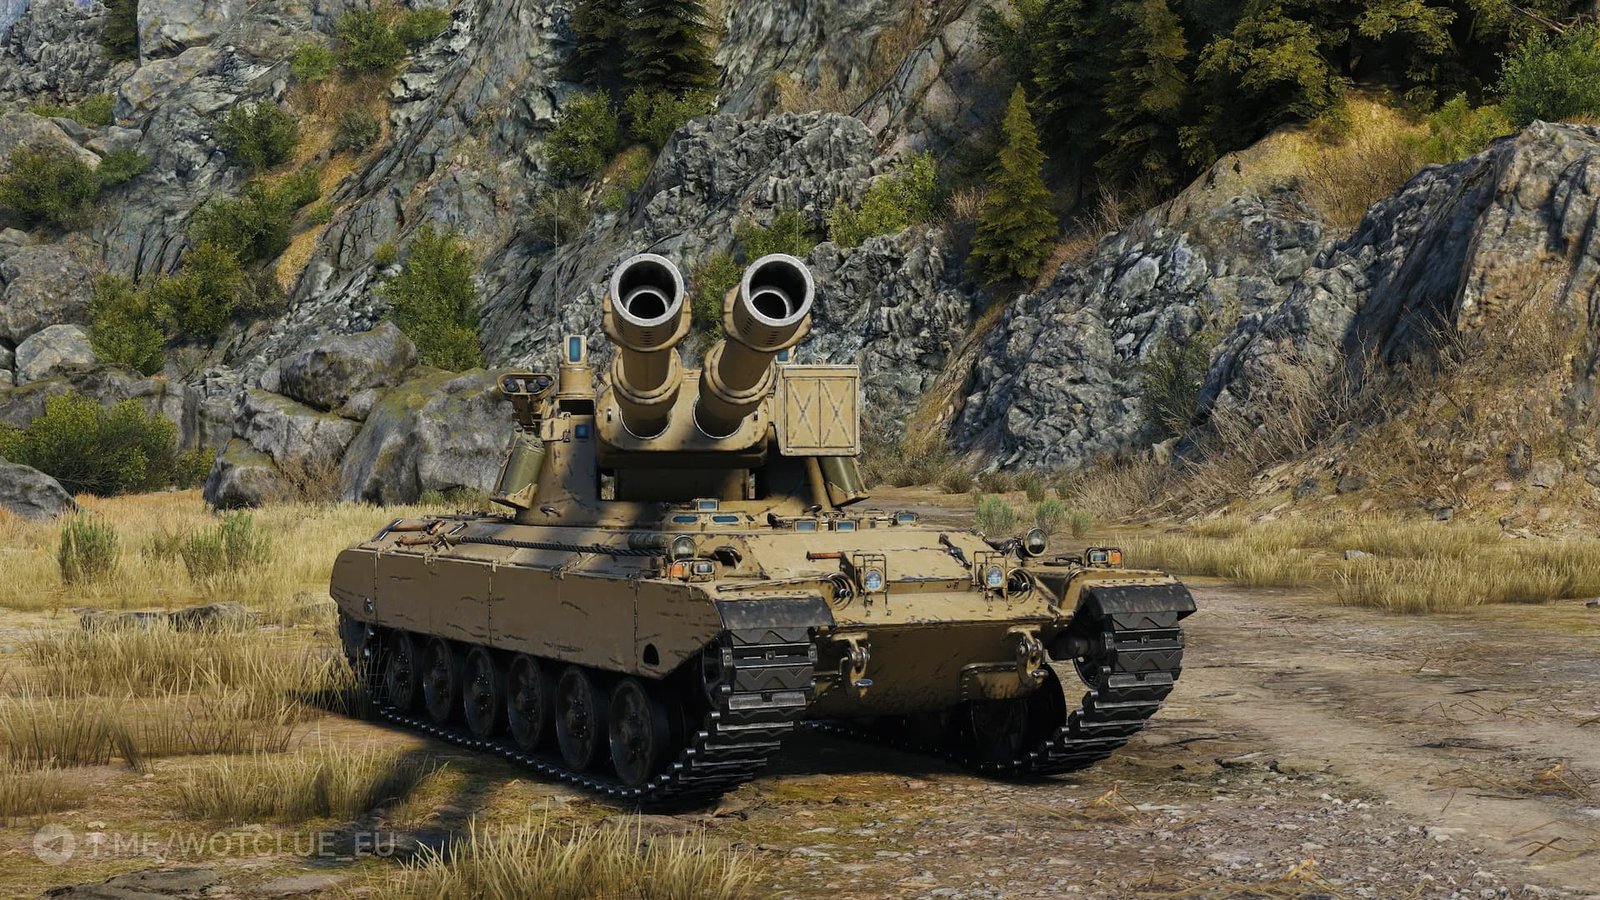
    Reverse Speed: The 20 km/h reverse speed provides adequate retreat capability, allowing commanders to back out of unfavorable situations or retreat behind cover after delivering their double-shot.

    Balanced Mobility: The mobility profile suggests a tank designed for measured, deliberate gameplay rather than aggressive flanking. The Renmin Tanke excels at advancing with the team and holding captured positions, not racing around the map looking for flanking opportunities.

    This mobility package complements the assault medium role perfectly. You don’t need exceptional speed when your armor allows you to advance directly rather than seeking circuitous flanking routes.

    Tactical Considerations

    The Renmin Tanke’s unique mechanics create several important tactical considerations:

    Ammunition Conservation: Every trigger pull expends two shells. Commanders must be more thoughtful about when to fire, as casual shooting will deplete ammunition quickly. Each engagement decision carries more weight when you’re always committing 400 HP worth of shells.

    Burst Damage Trading: The double-shot mechanic excels in peek-a-boom situations. Commanders can expose themselves briefly, deliver 400 HP in less than a second, and retreat before opponents can respond effectively. This makes the Renmin Tanke devastating in hull-down positions or around corners.

    No Shot Conservation: Unlike traditional autoloaders where you might fire one shell and save the rest, the Renmin Tanke removes that strategic layer. You can’t “save” ammunition for emergencies—every shot is an all-or-nothing commitment. This eliminates some complexity but adds pressure to make each shot count.

    Frontline Leadership: The excellent armor for its class means the Renmin Tanke can lead aggressive pushes. The double-shot mechanic allows it to quickly eliminate exposed enemies, creating openings for teammates to exploit.

    Playstyle Implications

    The Renmin Tanke rewards commanders who embrace its assault medium role and unique firing mechanics:

    Measured Aggression: The combination of armor and burst damage encourages bold positioning, but the forced double-shots demand discipline. You can’t waste ammunition on low-health targets when every trigger pull uses two shells.

    Trading Efficiency: The double-shot system maximizes efficiency in trading situations. When both shells connect, you deliver 400 HP faster than most opponents can respond, creating favorable trade ratios.

    Target Selection: With limited control over ammunition expenditure, target selection becomes crucial. Shooting a nearly dead tank wastes one shell, while targeting healthy opponents maximizes the value of each double-shot.

    Cover Utilization: The ability to deliver 400 HP in 0.75 seconds makes cover-based gameplay extremely effective. Peek out, double-tap, retreat—the Renmin Tanke excels at this rhythm.

    Commanders looking to master the Renmin Tanke should consider:

    • Planning shots carefully since every trigger pull commits two shells
    • Using the excellent armor to push aggressively into advantageous positions
    • Maximizing burst damage in peek-a-boom situations around hard cover
    • Avoiding wasteful shots on nearly dead enemies
    • Leveraging the strong DPM in sustained engagements
    • Leading team pushes where the armor and burst damage can create breakthroughs

    Community Reception

    Initial community reactions to the Renmin Tanke have been mixed, with discussion focusing on how the forced double-shot mechanic will feel in practice:

    Mechanic Innovation: Many players appreciate Wargaming’s continued experimentation with unique mechanics, seeing the Renmin Tanke as another interesting addition to the “World of Mechanics” era of tank design.

    Practical Concerns: Some community members wonder about the inability to cancel the second shot. If the first shell kills the target, the second automatically fires—potentially wasting ammunition or giving away your position unnecessarily.

    Blueprint Speculation: Several players suspect the Renmin Tanke might be destined for a Battle Pass or special event rather than traditional premium sales, given its Tier IX designation and unique mechanic.

    Playstyle Questions: The community is curious whether the forced double-shots will feel restrictive or liberating. Does removing the choice of firing single shells simplify gameplay beneficially, or does it remove too much tactical depth?

    What Sets the Renmin Tanke Apart

    The Renmin Tanke represents a bold new direction in autoloader design:

    Unique Container System: No other tank stores multiple shells in a single container that must be fired together. This mechanic is entirely new to World of Tanks.

    Assault Medium Archetype: The combination of excellent armor, burst damage, and moderate mobility creates a distinct playstyle focused on frontline leadership rather than flanking or support roles.

    Simplified Yet Demanding: By removing the choice of firing individual shells, the Renmin Tanke simplifies some aspects of autoloader gameplay while adding pressure to make every trigger pull count.

    Strong Fundamentals: Beyond its unique mechanic, the tank offers solid armor, good gun handling, and strong DPM. It’s not just a gimmick—it’s a well-rounded assault medium that happens to have an innovative firing system.

    What’s Next?

    As a Supertest vehicle, the Renmin Tanke’s final statistics and mechanical implementation remain subject to change. Wargaming will need to carefully evaluate how the forced double-shot system feels in practice and whether it needs adjustments.
    Key questions for the testing phase include:

    • Can commanders cancel the second shot if the first kills the target?
    • Is the 6.8-second reload balanced for the 400 HP burst potential?
    • Does the ammunition capacity support the forced double-shots adequately?
    • Will the excellent armor be sufficient to enable the aggressive playstyle the mechanics suggest?
    • How does the tank perform in various map types and engagement scenarios?

    The Supertest phase will be crucial in determining whether the Renmin Tanke’s unique mechanic feels rewarding to play or becomes frustrating due to wasted ammunition.

    Final Thoughts

    The Renmin Tanke represents exactly the kind of bold innovation that keeps World of Tanks fresh and interesting. By completely reimagining how autoloaders function and removing the traditional shell-by-shell firing control, Wargaming has created a medium tank that demands a different mindset and rewards different skills than conventional autoloaders.

    Whether you’re excited about the streamlined double-shot system or concerned about the loss of firing control, the Renmin Tanke offers something genuinely new to the medium tank experience. For commanders who appreciate aggressive, frontline-focused gameplay and can adapt to the all-or-nothing nature of the double-shot mechanic, this “People’s Tank” could become a favorite assault medium.

    The combination of excellent armor, strong burst damage, comfortable gun handling, and consistent DPM creates a well-rounded package that happens to feature an innovative firing system. If Wargaming successfully balances the forced double-shots and provides adequate ammunition capacity, the Renmin Tanke could set a new standard for assault medium tank design—proving that removing player choice can sometimes create more interesting tactical decisions, not fewer.

  • Buryan Tank Preview – World of Tanks Supertest

    Buryan Tank Preview – World of Tanks Supertest

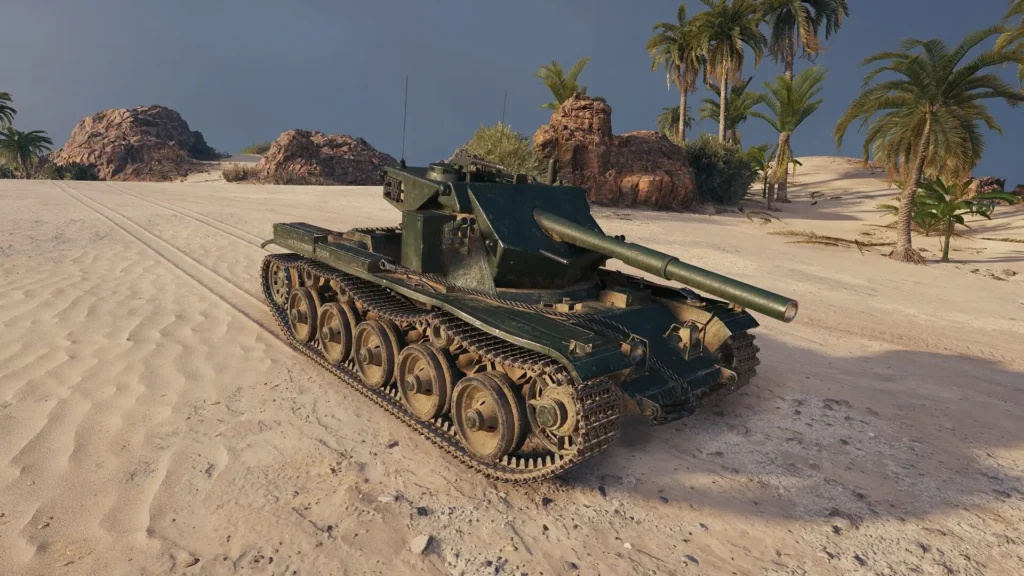
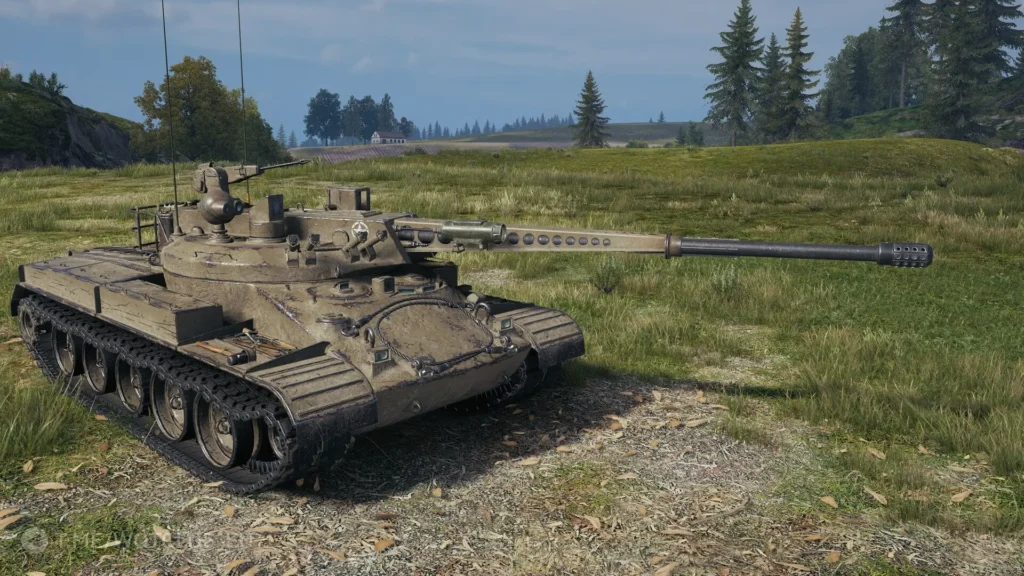
    The World of Tanks Supertest has welcomed an impressive addition to the French heavy tank lineup: the Terrifiant, a Tier IX premium heavy tank that continues the design philosophy of France’s “alternative” heavy branch.

    buryan statistics

    A Rare Firepower Combination

    The Buryan’s defining characteristic is its exceptional firepower package that combines two attributes rarely seen together in Soviet heavy tanks at Tier IX:

    Impressive Alpha Damage: The Buryan wields a gun capable of delivering 490 HP of damage per shot. This alpha damage is notably higher than most Tier IX heavy tanks, placing it in an elite category of vehicles that can trade shots with devastating efficiency.

    High Damage Per Minute: What makes the Buryan truly special isn’t just the impressive single-shot damage—it’s the combination of that alpha with high DPM. Most tanks that hit for 490 HP sacrifice rate of fire, but the Buryan maintains strong sustained damage output alongside its powerful punch.

    Exceptional in Duels: This rare combination of high alpha and high DPM makes the Buryan exceptionally strong in one-on-one confrontations. In a duel scenario, the tank can deliver crushing blows while maintaining pressure through consistent damage output, forcing opponents into losing trades regardless of their approach.

    The firepower package creates a fascinating dynamic: commanders get the satisfaction of massive single-shot damage while maintaining the ability to continuously pressure opponents without long reload times diminishing their battlefield presence.

    Gun Handling Characteristics

    The Buryan’s impressive firepower comes with notable trade-offs in gun handling:

    Mediocre Gun Handling: The gun handling characteristics are described as mediocre, suggesting less-than-stellar accuracy, longer aim times, or increased dispersion values compared to more refined weapons systems. This is the price for the devastating firepower.

    Limited Gun Depression: With only -6 degrees of gun depression, the Buryan falls short of the comfortable -7 to -8 degrees that enable effective hull-down gameplay. This limitation significantly restricts positioning options and makes the tank unsuitable for ridge-fighting tactics.

    Close-Range Focus: These gun handling limitations naturally push the Buryan toward close-range engagements where the poor gun depression matters less and where mediocre accuracy becomes less punishing. This design philosophy reinforces the tank’s role as a brawler rather than a support heavy.

    The gun handling trade-offs are deliberate design choices that focus the Buryan’s effectiveness into specific tactical situations rather than trying to create a jack-of-all-trades vehicle.

    Armor Profile and Survivability

    The Buryan brings solid defensive capabilities focused around its turret:

    Sturdy Turret: The turret features 250mm of frontal armor, providing robust protection that can reliably block shots from same-tier opponents when properly positioned. This solid turret armor is crucial for the Buryan’s close-range brawling role.

    Face-Hugging Capability: The combination of strong turret armor and limited gun depression actually works together in close-range situations. When fighting at point-blank range, the poor gun depression becomes less relevant while the sturdy turret becomes increasingly difficult for opponents to penetrate.

    HP Trading Advantage: The armor profile supports the Buryan’s role as an HP trading specialist. You can afford to take return fire because your turret can bounce shots, and when penetrations do occur, you’re dealing 490 HP while potentially receiving less.

    The armor focuses defensive strength where it matters most for the Buryan’s intended playstyle—enabling aggressive close-range positioning where the turret becomes the primary defense.

    Mobility Characteristics

    The Buryan’s mobility profile matches its close-range brawling role:

    Limited Top Speed: With a maximum speed of 36 km/h, the Buryan is not winning any races. This relatively modest top speed for a Tier IX heavy tank limits its strategic mobility and map presence.

    Adequate for Repositioning: While not fast, the mobility is described as adequate for short repositioning. The Buryan can move between nearby positions and adjust to local tactical situations without feeling completely immobile.

    No Flanking Potential: The 36 km/h top speed definitively limits flanking potential. This isn’t a tank for racing around the map seeking opportunities—it’s a vehicle for holding key positions and dominating local engagements.
    Frontline Fighter: The mobility package reinforces the Buryan’s identity as a frontline fighter that advances with the team, holds captured territory, and dominates close-range confrontations rather than seeking elaborate maneuvers.
    This mobility profile is honest about what the Buryan is and isn’t. You won’t be executing dynamic flanking maneuvers, but you will have sufficient mobility to stay relevant in evolving battle situations.
    Tactical Considerations

    The Buryan’s characteristics create clear tactical guidelines for effective play:

    Close-Range Dominance: The combination of high alpha, high DPM, and sturdy turret armor makes the Buryan exceptional in close-quarters combat. Getting within brawling range transforms the tank’s weaknesses into strengths.

    HP Trading Specialist: Few tanks can match the Buryan in sustained HP trading situations. The 490 alpha damage combined with good DPM and reliable turret armor creates consistently favorable trade ratios.

    Avoid Hilly Terrain: The -6 degrees of gun depression makes hilly positions a significant disadvantage. Commanders must consciously avoid terrain that would expose the tank’s inability to depress the gun adequately.

    Urban Warfare Excellence: City maps and urban environments play to the Buryan’s strengths perfectly. Close corners, limited sightlines, and flat terrain eliminate the tank’s weaknesses while maximizing its brawling advantages.

    Positioning Patience: The limited mobility means poor positioning decisions have lasting consequences. Commanders must think carefully about where to commit the Buryan since relocating takes time.

    Playstyle Implications

    The Buryan rewards commanders who embrace its role as a close-range brawling specialist:

    Aggressive Positioning: The tank excels when commanders push into close-range positions where the high alpha and good DPM can be fully leveraged. Passive play wastes the Buryan’s strengths.

    Map Awareness: Understanding which areas of each map feature flat terrain versus hilly sections becomes crucial. Route your advances through favorable terrain and avoid ridgelines.

    Calculated Trading: With 490 alpha damage, every shot matters significantly. The high DPM means you can afford to trade more frequently than typical high-alpha tanks, but shot placement still requires attention.

    Team Support: The limited mobility and poor gun depression mean the Buryan benefits greatly from teammate support. Fight alongside other heavies rather than trying to carry flanks independently.

    Commanders looking to master the Buryan should consider:

    • Prioritizing flat urban areas and close-range fighting positions
    • Aggressively pushing into brawling distance where firepower advantages dominate
    • Using the sturdy turret to absorb damage while dealing devastating return fire
    • Avoiding hilly maps or hill-dependent positions entirely
    • Maximizing the high DPM through sustained engagement rather than hit-and-run tactics
    • Planning advances carefully since limited mobility makes repositioning costly
    • Supporting teammates in taking and holding key positions rather than attempting solo plays

    Community Reception

    Initial community reactions to the Buryan have been generally positive, with players appreciating the focused design:

    Clear Identity: Players appreciate that the Buryan has a clear, focused identity as a close-range brawler. The strengths and weaknesses align logically with this role rather than trying to do everything moderately well.

    Comparison to Obj 590: Some community members have compared the Buryan to a “fattened up Object 590,” suggesting similarities in playstyle but with more bulk and possibly more armor.

    High-Alpha Appeal: The 490 alpha damage at Tier IX generates excitement among players who enjoy the psychological impact and trading advantages of high per-shot damage.

    Concerns About Meta: Some players worry about adding another high-alpha vehicle to the game, particularly one with good DPM alongside that alpha damage. Questions remain about whether the gun handling limitations adequately balance the firepower.

    What Sets the Buryan Apart

    The Buryan occupies a unique niche in the Tier IX heavy tank landscape:

    Rare Stat Combination: The pairing of 490 alpha damage with high DPM is genuinely uncommon at Tier IX. Most tanks sacrifice one for the other, making the Buryan’s combination special.

    Honest Design: The tank doesn’t try to hide its weaknesses or pretend to be versatile. It’s a close-range brawler through and through, with every characteristic supporting or necessitating that playstyle.

    Soviet Brawler Philosophy: The Buryan exemplifies classic Soviet heavy tank design—massive firepower and solid armor focused on direct confrontation, with mobility and gun handling as secondary concerns.

    Duel Specialist: In one-on-one situations on flat terrain, few Tier IX heavies can match the Buryan’s combination of alpha damage, DPM, and turret armor. It’s built specifically to win individual confrontations.

    What’s Next?

    As a Supertest vehicle, the Buryan’s final statistics and characteristics remain subject to change. Wargaming will need to carefully evaluate whether the combination of 490 alpha and high DPM is properly balanced by the gun handling and depression limitations.

    Key questions for the testing phase include:

    • Is the high alpha + high DPM combination too strong for close-range situations?
    • Do the gun handling limitations adequately balance the firepower advantages?
    • Can the -6 degrees of gun depression be worked around effectively on most maps?
    • Does the 36 km/h speed limit strategic impact sufficiently?
    • Will the turret armor prove reliable enough to enable the aggressive playstyle?
    • How does the tank perform in various matchmaking scenarios?

    The Supertest phase will reveal whether the Buryan’s focused design creates interesting tactical gameplay or results in a vehicle that’s either too dominant in its niche or too limited in application.

    Final Thoughts

    The Buryan represents focused tank design at its finest. Rather than trying to be adequate in all situations, it excels dramatically in close-range brawling while accepting significant limitations elsewhere. This design philosophy creates a vehicle with clear strengths and weaknesses that require intelligent positioning and tactical awareness to maximize.

    For commanders who enjoy aggressive heavy tank gameplay, direct confrontations, and the satisfaction of devastating alpha damage combined with sustained DPM, the Buryan offers an compelling package. The requirement to avoid hilly positions and the limited mobility create meaningful constraints that prevent the tank from being overpowering while ensuring that skilled positioning decisions are rewarded.

    The combination of 490 alpha damage, high DPM, and sturdy turret armor creates a dueling specialist that dominates close-range HP trading. If you embrace the limitations and position yourself in favorable terrain, the Buryan becomes an absolute monster in its preferred engagement range. The key is understanding that this isn’t a tank for every situation—it’s a specialized tool for close-range confrontations where its rare firepower combination can shine.

    Whether you’re excited about the high-alpha brawling potential or concerned about the poor gun depression and limited mobility, the Buryan offers a distinctive take on Soviet heavy tank design that prioritizes overwhelming firepower in close quarters above all else.

  • Terrifiant Tank Preview – World of Tanks Supertest

    Terrifiant Tank Preview – World of Tanks Supertest

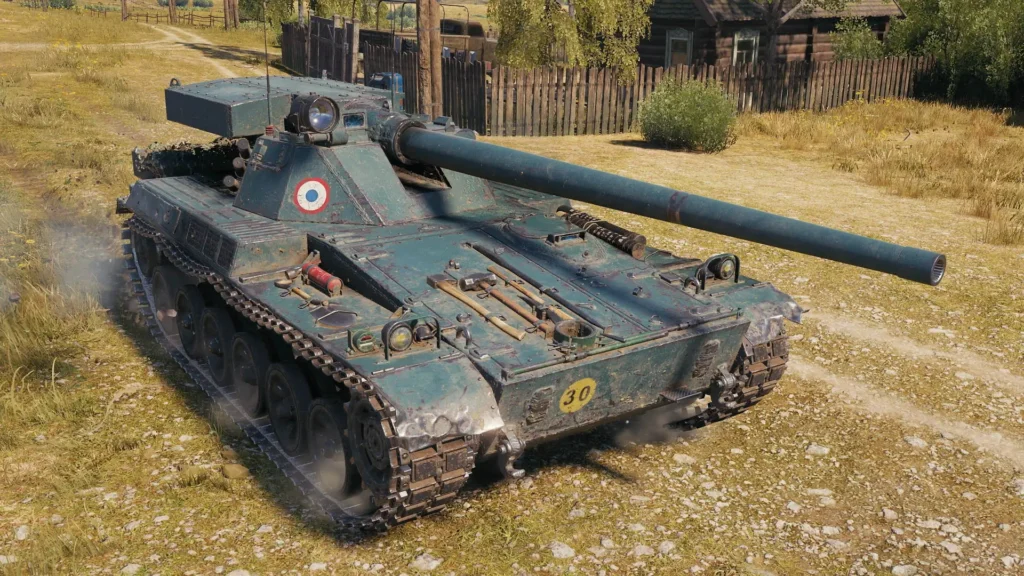
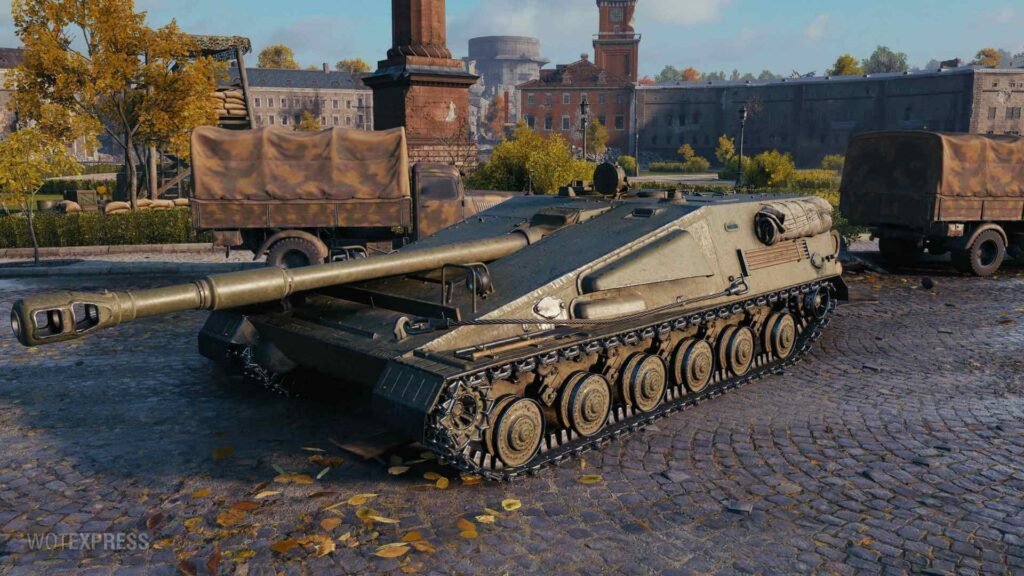
    The World of Tanks Supertest has welcomed an impressive addition to the French heavy tank lineup: the Terrifiant, a Tier IX premium heavy tank that continues the design philosophy of France’s “alternative” heavy branch.

    terrifiant statistics

    Firepower: Punchy and Precise

    The Terrifiant brings a potent firepower package that balances alpha damage with accuracy:

    High Alpha Damage: The gun delivers 490 HP of damage per shot, placing the Terrifiant among the harder-hitting Tier IX heavy tanks. This alpha damage creates meaningful trades and allows the tank to punish exposed opponents decisively.

    Decent Accuracy: With 0.36 dispersion, the Terrifiant offers respectable accuracy for a heavy tank. This isn’t sniper-level precision, but it’s sufficient for reliable shot placement at medium ranges and enables more confidence in longer-distance engagements than many heavies can manage.

    Balanced Reload: With a 13.33-second reload time and a rate of fire of 4.5 rounds per minute, the Terrifiant maintains steady pressure on opponents while delivering significant per-shot impact. The balance between alpha damage and reload creates a comfortable rhythm for sustained engagements.

    Penetration Values: The gun features 246mm standard penetration and 276mm with premium ammunition, providing adequate penetration for most same-tier confrontations, though heavily armored targets may require premium rounds or careful aim at weak points.

    The firepower package creates a versatile weapon system capable of adapting to various engagement scenarios rather than being specialized for a single role.

    Armor Profile: Alternative Heavy Branch DNA

    The Terrifiant carries forward the armor characteristics that define the alternative French heavy line:

    Strong Frontal Hull Armor: With a nominal value of 150mm on the hull front, the Terrifiant features respectable frontal protection. While not impenetrable, the armor provides meaningful protection when properly angled and positioned, especially against lower-tier opponents.

    Robust Turret Armor: The turret boasts 250mm of frontal armor, creating a strong defensive position for hull-down gameplay. This substantial turret protection allows the Terrifiant to trade shots confidently when only the turret is exposed.

    Alternative Branch Philosophy: Like the AMX M4 54 and other vehicles from this line, the Terrifiant emphasizes frontal armor protection over mobility, creating a more traditional heavy tank experience than the autoloading oscillating-turret branch.

    Visual Connection: Community members have noted that the Terrifiant has visuals reminiscent of a Tier XI progression after the AMX M4 54, though the statistics remain firmly at the Tier IX level. This design continuity reinforces its position within the alternative heavy line.

    The armor profile supports aggressive positioning while maintaining the flexibility to adapt to defensive situations when necessary.

    Gun Depression: The French Advantage

    One of the Terrifiant’s most significant advantages is its exceptional gun depression:

    Outstanding -10° Depression: The maximum gun depression of -10 degrees is exceptional for any heavy tank, let alone a vehicle with this much armor. This depression capability opens up numerous positioning options that most heavy tanks simply cannot access.

    Terrain Mastery: The combination of -10 degrees depression, strong turret armor, and decent accuracy creates a vehicle that excels at ridge-fighting and utilizing terrain features. Hills and undulating terrain become significant tactical advantages rather than obstacles.

    Flexibility in Positioning: The exceptional gun depression means commanders can take aggressive positions on hills and ridges that would be impossible for tanks with standard -5 to -7 degrees of depression, expanding the Terrifiant’s tactical toolbox considerably.

    This gun depression is a defining characteristic that separates the Terrifiant from most heavy tanks and enables a more dynamic, terrain-focused playstyle.

    Mobility Characteristics

    The Terrifiant offers respectable mobility for a heavily armored Tier IX heavy tank:

    Top Speed: With a maximum forward speed of 33 km/h, the Terrifiant won’t be racing around the battlefield, but maintains adequate pace for a heavy tank. This speed allows for tactical repositioning without feeling completely immobile.

    Specific Power: The 17.5 hp/t power-to-weight ratio provides decent acceleration and ability to maintain speed over varied terrain. While not exceptional, this specific power ensures the Terrifiant remains relevant as battle lines shift.

    Balanced Mobility Package: The mobility characteristics suggest a tank designed for measured advances and tactical repositioning rather than aggressive flanking maneuvers. You can relocate when needed, but you won’t be executing rapid flanking movements.

    The mobility profile complements the Terrifiant’s role as a versatile heavy tank that can adapt to battlefield developments without being locked into static positions.

    Tactical Considerations

    The Terrifiant’s characteristics create clear tactical opportunities:

    Ridge-Fighting Excellence: The combination of -10 degrees gun depression, 250mm turret armor, and decent accuracy makes the Terrifiant exceptional at ridge-fighting. Seek out hills and terrain variation where this advantage can dominate.

    Versatile Positioning: Unlike specialized tanks limited to specific positions, the Terrifiant can function in hull-down positions, sidescraping situations, or frontal confrontations. This versatility allows adaptation to evolving battle situations.

    Measured Aggression: The strong frontal armor and punchy gun enable aggressive plays when opportunities present themselves, while the excellent gun depression provides escape routes and defensive options when pushes stall.

    Support or Lead: The Terrifiant can function as either a frontline leader using its armor to push positions, or as a second-line support tank leveraging its gun depression and accuracy to provide covering fire.

    Playstyle Implications

    The Terrifiant rewards commanders who can read terrain and leverage positioning advantages:

    Terrain-Focused Gameplay: Understanding map topography becomes crucial. Seek positions where the -10 degrees depression creates unfair advantages over opponents with limited gun depression.

    Hull-Down Priority: While the frontal armor is respectable, the turret armor is stronger. Prioritize hull-down positions where only the turret is exposed, maximizing survivability while maintaining offensive capability.

    Adaptable Approach: Don’t lock yourself into a single playstyle. The Terrifiant’s versatility means you should adapt to what each situation demands rather than forcing a predetermined approach.

    Shot Patience: The decent accuracy and meaningful alpha damage reward patient, aimed shots rather than snap-shooting. Take the extra second to ensure hits, especially at longer ranges.

    Commanders looking to master the Terrifiant should consider:

    • Prioritizing positions with terrain variation where gun depression advantages matter
    • Using the strong turret armor aggressively in hull-down situations
    • Leveraging the -10 degrees depression to engage from unexpected angles
    • Balancing aggressive pushes with the tactical retreats the gun depression enables
    • Taking advantage of the decent accuracy for longer-range engagements when needed
    • Supporting teammates by holding key terrain features that control map flow

    Community Reception

    Initial community reactions to the Terrifiant have been generally positive:

    Design Continuity: Players appreciate that the Terrifiant clearly belongs to the alternative French heavy branch, with design elements and capabilities that echo the line’s established identity.

    Visual Appeal: Community members have praised the visual design, with some noting it looks like it could be a Tier XI vehicle in terms of aesthetics, though the statistics remain appropriately balanced for Tier IX.

    Gun Depression Enthusiasm: The -10 degrees of gun depression generates particular excitement among players who understand how powerful this capability can be in skilled hands.

    Versatility Appreciation: The Terrifiant’s ability to function in multiple roles appeals to players who prefer flexible vehicles over one-trick specialists.

    What Sets the Terrifiant Apart

    The Terrifiant occupies a compelling niche in the Tier IX heavy tank landscape:

    Alternative Branch Identity: Clear lineage to the alternative French heavy line creates instant understanding of the tank’s philosophy and playstyle for experienced players.

    Gun Depression Elite: The -10 degrees of gun depression places the Terrifiant among the absolute elite for heavy tanks in this regard, creating tactical possibilities most heavies can’t access.

    Historical Significance: As a Franco-American hybrid design, the Terrifiant represents an interesting “what if” moment in tank development history, bringing a canceled project to virtual life.

    Versatile Heavy: Unlike specialized tanks that excel narrowly, the Terrifiant offers genuine versatility—functioning effectively in hull-down, frontal engagement, and support roles depending on situation demands.

    What’s Next?

    As a Supertest vehicle, the Terrifiant’s final statistics and characteristics remain subject to change. Wargaming will evaluate whether the combination of gun depression, armor, and firepower creates balanced gameplay or requires adjustment.

    Key questions for the testing phase include:

    • Is the -10 degrees gun depression too powerful when combined with the armor profile?
    • Does the 490 alpha damage with decent accuracy create too favorable trading scenarios?
    • Is the mobility sufficient to allow repositioning without making the tank too flexible?
    • How does the tank perform across various map types and terrain profiles?
    • Will the frontal armor prove adequate in the current high-penetration meta?
    • Does the reload time properly balance the alpha damage and gun handling?

    The Supertest phase will reveal whether the Terrifiant becomes a beloved addition to the alternative French heavy line or requires tuning to find its proper balance.

    Final Thoughts

    The Terrifiant represents the alternative French heavy philosophy executed at Tier IX with thoughtful design choices that create tactical depth. The exceptional -10 degrees of gun depression combined with strong turret armor and punchy firepower creates a vehicle that rewards terrain awareness and positioning intelligence.

    For commanders who appreciate versatile heavy tanks that can adapt to circumstances rather than being locked into rigid playstyles, the Terrifiant offers a compelling package. The requirement to understand terrain and leverage gun depression advantages creates a skill ceiling that rewards mastery while remaining accessible to competent players.

    The combination of French and American design elements creates something greater than the sum of its parts—a heavy tank that can fight from ridges, brawl in cities, or provide supporting fire depending on what each battle demands. If you embrace the terrain-focused gameplay that the exceptional gun depression enables, the Terrifiant becomes a powerful tool for controlling key positions and dictating engagement terms.

    Whether you’re excited about continuing the alternative French heavy line or intrigued by the historical Franco-American collaboration, the Terrifiant offers a distinctive take on Tier IX heavy tank design that prioritizes tactical flexibility and positioning advantages over specialized dominance in narrow circumstances.r in close quarters above all else.

  • Saryuda Tank Preview – World of Tanks Supertest

    Saryuda Tank Preview – World of Tanks Supertest

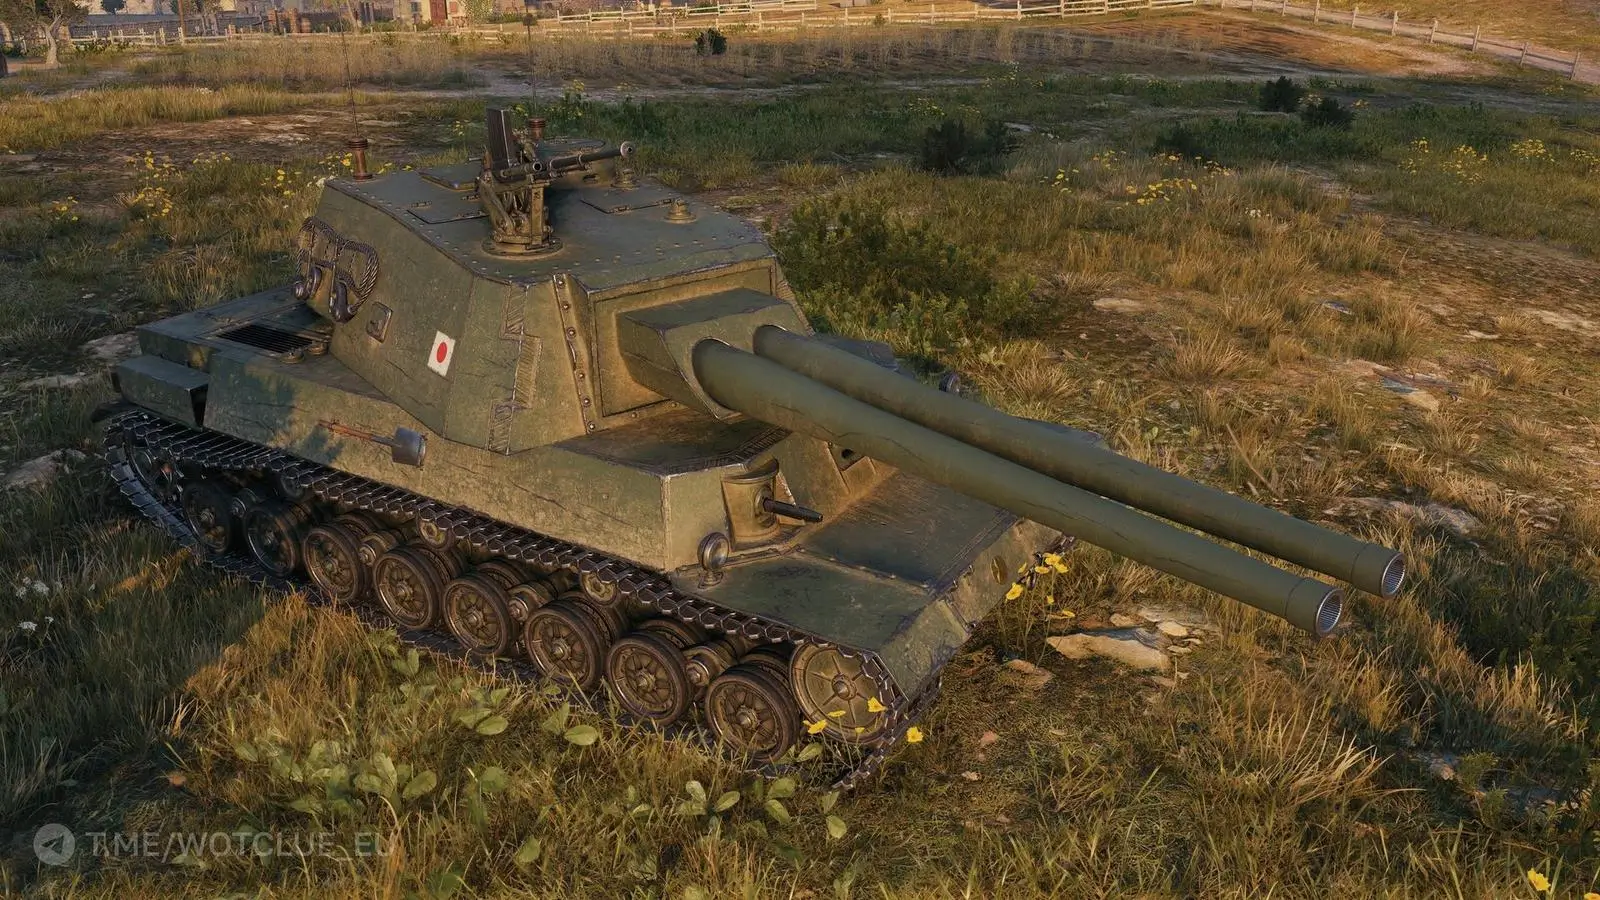
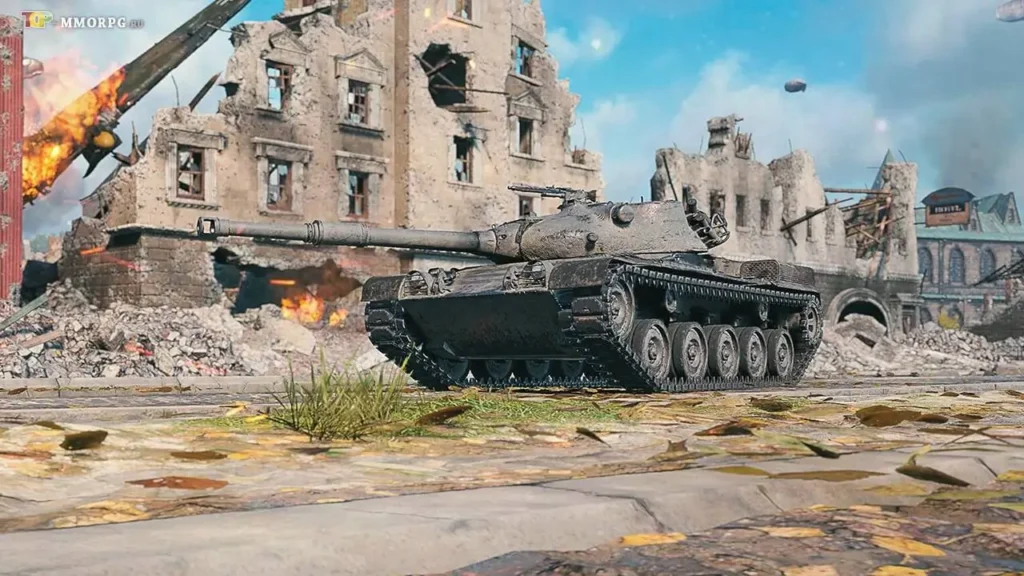
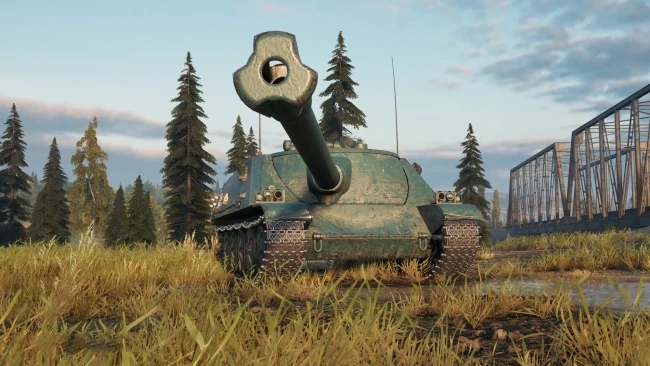
    This turreted tank destroyer combines twin 12.7cm naval guns with decent armor and mobility, creating a unique platform that brings the popular double-barreled mechanic to a nation that has never experienced it before. With its distinctive limited-traverse turret and coastal defense heritage, the Saryuda represents an intriguing fusion of Japanese engineering and the dual-gun system perfected on vehicles like the Object 703 Version II.

    saryuda tank statistics

    Historical Background: Coastal Defense Doctrine

    The Saryuda has a fascinating historical context rooted in Japan’s desperate defensive preparations during World War II:

    Coastal Defense Mission: Expecting Allied forces to eventually invade the Japanese Home Islands, military planners began preparing comprehensive coastal defense strategies for Honshu and the other islands of the archipelago. This defensive doctrine required specialized vehicles capable of both anti-landing operations and engagement with Allied armored vehicles.

    Naval Gun Repurposing: Various naval gun options were considered for the main armament—specifically guns that had already been built but were no longer needed by the Imperial Navy. This practical approach to resource allocation was typical of Japan’s late-war industrial strategy, where existing military hardware was repurposed for new roles.

    Twin-Gun Innovation: To increase the rate of fire and maximize firepower, designers planned to mount a double-barreled gun system on a spacious welded turret. This twin-mount configuration would allow the vehicle to deliver devastating salvos against landing craft or armored targets.

    Secondary Armament: The design included comprehensive secondary weaponry: three machine guns (two forward-facing and one rear-mounted) plus a 20mm rapid-fire cannon on the turret. This extensive secondary armament reflected the coastal defense role, where protection against infantry and light vehicles was crucial.

    The project never progressed beyond design stages, as Japan’s surrender ended development before any prototype could be constructed. However, the Saryuda represents an interesting “what if” scenario—what would Japanese engineers have created if given the time and resources to pursue twin-gun tank destroyer technology?

    Dual-Gun Mechanics: Double the Trouble

    The Saryuda introduces the dual-gun mechanic to Japanese vehicles, functioning similarly to the Object 703 Version II and TS-54:

    Twin 12.7cm Guns: Each gun delivers 500 HP of damage per shot, creating a combined salvo potential of 1,000 HP. This devastating burst damage capability makes the Saryuda a serious threat in any engagement.

    Salvo Preparation: The guns require 3 seconds of preparation time before firing the salvo. This pre-fire delay adds tactical complexity—you must commit to the shot and wait for the salvo to be ready.

    Reload Lock: After firing the salvo, the guns are locked down for 4 seconds before you can begin individual gun reloads or prepare another salvo. This post-salvo vulnerability period is a critical weakness that opponents can exploit.

    Individual Gun Reload: Each gun has a 12.46-second reload time, meaning full dual-gun readiness takes 24.93 seconds from empty. This lengthy reload creates extended periods of vulnerability between full salvos.

    Gun Switching: You can switch between individual guns with a 5-second switching time, allowing for sustained fire at the cost of never having both guns ready simultaneously unless you wait for the full reload cycle.

    The mechanic creates fascinating tactical decisions around when to use the devastating 1,000 HP salvo versus maintaining sustained fire with individual guns.

    Firepower Characteristics

    Beyond the dual-gun mechanic, the Saryuda offers solid firepower fundamentals:

    Penetration Values: Standard AP rounds feature 265mm of penetration, while special APCR rounds offer 305mm. These values are competitive for Tier IX, handling most same-tier opponents effectively while requiring premium rounds for heavily armored targets.

    Accuracy: With 0.35 dispersion at 100m, the Saryuda offers decent accuracy for a tank destroyer. While not surgical precision, this accuracy is sufficient for reliable shot placement at medium to long ranges.

    Aim Time: The 2.21-second aim time is quite good for a vehicle with this much alpha damage potential. Combined with the decent accuracy, the Saryuda can deliver aimed shots relatively quickly.

    Gun Depression/Elevation: The Saryuda features -7 degrees of gun depression and +15 degrees of elevation. While -7 degrees is acceptable, it’s not exceptional—limiting hull-down effectiveness compared to vehicles with superior depression.

    The firepower package balances the devastating salvo potential with handling characteristics that prevent the tank from being overpowering at range.

    Limited Turret Traverse: Tactical Considerations

    One of the Saryuda’s most defining characteristics is its limited turret rotation:

    90-Degree Traverse Arc: The turret can rotate 90 degrees to each side, creating a 180-degree arc of fire. This is significantly more flexible than fixed-gun tank destroyers but far more restrictive than full-rotation turrets.

    Turret Traverse Speed: At 18.77 degrees per second, the turret traverse is respectable within its limited arc. You can track targets adequately when they’re within your firing arc.

    Positioning Importance: The limited traverse makes hull positioning absolutely critical. You must constantly consider your hull angle to ensure targets fall within your firing arc, adding a layer of tactical complexity absent from full-turret TDs.

    Vulnerability to Flanking: The 90-degree limitation to each side creates significant blind spots behind you. Aggressive light tanks and fast mediums can exploit this weakness, forcing you to rotate your hull—a time-consuming process that leaves you vulnerable.

    This limitation fundamentally changes how the Saryuda must be played compared to traditional turreted tank destroyers.

    Armor Profile and Survivability

    The Saryuda brings respectable armor values for a turreted tank destroyer:

    Turret Armor: The turret features 250mm of nominal frontal armor, providing solid protection against most same-tier opponents. This robust turret can bounce shots when properly angled, enabling more aggressive positioning.

    Hull Armor: With 230mm of nominal frontal armor, the hull offers decent protection that can work against lower-penetration guns. While not impenetrable, this armor allows the Saryuda to absorb some damage rather than requiring complete concealment.

    Hit Points: The Saryuda has 1,800 HP, a respectable pool for a Tier IX tank destroyer that enables it to survive a few mistakes or absorb return fire during trades.

    Armor Effectiveness: The combination of turret and hull armor means the Saryuda can engage in direct confrontations more confidently than lightly armored TDs, though it shouldn’t be mistaken for a heavy tank.

    The armor profile supports a more aggressive playstyle than typical paper-armored tank destroyers while maintaining the glass-cannon nature of the class.

    Mobility Characteristics

    The Saryuda offers decent mobility for a heavily armed tank destroyer:

    Top Speed: With a maximum forward speed of 38 km/h, the Saryuda maintains reasonable pace for repositioning and reaching key positions. This isn’t light tank speed, but it’s adequate for a TD with this much firepower.

    Specific Power: The 16.1 hp/t power-to-weight ratio provides decent acceleration and ability to maintain speed over varied terrain. You won’t struggle to reach positions, though you won’t beat faster vehicles to key spots.

    Tactical Positioning: The mobility allows the Saryuda to take key positions in time and relocate between firing positions as battle lines shift. This flexibility prevents the tank from being locked into static gameplay.

    The mobility package ensures the Saryuda remains relevant throughout battles rather than being stuck in its initial deployment position.

    Tactical Considerations

    The Saryuda’s unique characteristics create specific tactical considerations:

    Salvo Timing: The 1,000 HP salvo potential is devastating, but the 3-second preparation time and 4-second reload lock create vulnerability windows. You must carefully time salvos to maximize damage while minimizing exposure to return fire.

    Arc Management: Constantly managing your firing arc becomes essential. Position your hull to maximize coverage of likely enemy approaches while minimizing the need for time-consuming hull rotation.

    Sustained vs Burst: Choosing between individual gun fire for sustained DPM and waiting for both guns to deliver a salvo creates interesting tactical decisions. Sometimes the 1,000 HP burst is worth the wait; other times, continuous fire is more valuable.

    Armor Utilization: The decent armor allows for more aggressive positioning than paper TDs, but you shouldn’t face-tank enemies. Use the armor to buy time for reloads or create favorable trades, not as primary defense.

    Flanking Vulnerability: The limited turret traverse creates significant vulnerability to flanking attacks. Always position with awareness of potential flanking routes and maintain escape paths.

    Playstyle Implications

    The Saryuda rewards commanders who can manage its unique blend of strengths and limitations:

    Position with Purpose: Every position must consider firing arc coverage. Place your hull to cover likely engagement angles while maintaining escape routes for when you need to relocate.

    Patience with Salvos: The 3-second salvo preparation means you can’t panic-fire. Commit to targets deliberately, ensure they’ll remain exposed during preparation, and maximize the value of each 1,000 HP salvo.

    Aggression Management: The decent armor and HP pool allow for calculated aggression, but the limited turret traverse punishes overextension. Push when supported, retreat before you’re surrounded.

    Armor Angling: Unlike fixed-gun TDs that present their strongest armor directly forward, the Saryuda’s limited turret traverse adds complexity to armor angling. Finding the sweet spot between optimal armor angle and firing arc coverage requires practice.

    Commanders looking to master the Saryuda should consider:

    • Pre-positioning your hull angle to cover anticipated enemy movements
    • Using the 1,000 HP salvo to punish isolated targets or finish wounded enemies
    • Leveraging the decent armor to trade more aggressively than paper TDs
    • Maintaining awareness of your limited rear arc and flanking vulnerabilities
    • Switching to individual gun fire when sustained pressure is more valuable than burst damage
    • Using the decent mobility to reposition between firing positions as battle lines shift
    • Supporting teammates who can protect your flanks from fast, aggressive enemies

    Community Reception

    Initial community reactions to the Saryuda have been mixed:

    Japanese Dual-Gun Excitement: Players appreciate seeing the dual-gun mechanic finally come to Japan, adding variety to the nation’s gameplay options.

    “1,000 Damage Double Shot”: The community immediately focused on the devastating salvo potential, with concern that getting hit by this double-tap will ruin anyone’s day, similar to FV215b (183) encounters.

    Historical Skepticism: Some players questioned the historical authenticity, noting that the design appears to be a recent creation rather than a genuine wartime project.

    Limited Traverse Concerns: The 90-degree limitation to each side has generated discussion about whether this restriction adequately balances the salvo potential or simply creates frustration.

    Accuracy and DPM Discussion: Some players note that the accuracy isn’t amazing and the DPM is limited, but acknowledge that people will still hate receiving the 1,000 HP double-tap.

    What Sets the Saryuda Apart

    The Saryuda occupies a unique niche in the World of Tanks ecosystem:

    First Japanese Dual-Gun: This marks Japan’s entry into the dual-gun club, expanding the nation’s tactical options and playstyle variety.

    Turreted TD with Limited Arc: The combination of turret flexibility and 90-degree limitation creates a middle ground between fixed-gun and full-turret tank destroyers.

    Naval Gun Heritage: The repurposed naval gun concept adds interesting historical flavor and explains the twin-mount configuration.

    1,000 HP Salvo Potential: Few Tier IX tank destroyers can deliver this much damage in a single burst, making the Saryuda a serious threat in any engagement.

    What’s Next?

    As a vehicle currently in developer testing following Supertest, the Saryuda’s characteristics may still be subject to refinement. The transition from Supertest to Common Test and eventual release will reveal any final balance adjustments.

    Key questions for the remaining testing phases include:

    • Is the 1,000 HP salvo properly balanced by the preparation time and reload lock?
    • Does the limited 90-degree traverse to each side adequately restrict the turret’s flexibility?
    • Are the armor values appropriate for a tank destroyer with this much burst damage?
    • Will the vehicle’s classification as “Promotional” affect its availability and acquisition method?
    • How will the Saryuda perform in various map types and tactical situations?

    Final Thoughts

    The Saryuda represents an exciting addition to the Japanese tech tree, bringing the popular dual-gun mechanic to a nation that has never experienced it. The combination of devastating 1,000 HP salvos, limited-traverse turret, decent armor, and respectable mobility creates a tank destroyer that rewards intelligent positioning and careful salvo timing.

    For commanders who appreciate the dual-gun playstyle but want to experience it in a tank destroyer format, the Saryuda offers a unique package. The requirement to manage firing arcs while timing devastating salvos creates engaging gameplay that rewards tactical thinking and situational awareness.

    The Saryuda won’t be the tank for everyone—the limited turret traverse and lengthy reload cycles create genuine vulnerabilities that skilled opponents will exploit. However, for players who can master the firing arc management and salvo timing, this coastal defense monster offers the satisfaction of delivering crushing 1,000 HP blows that can swing battles.

    Whether you’re excited about Japan’s first dual-gun vehicle or intrigued by the naval gun heritage and limited-traverse turret mechanics, the Saryuda promises to be a distinctive addition to the game—one that brings new tactical considerations to the tank destroyer class.

  • M-VII-Y Tank Preview – World of Tanks Supertest

    M-VII-Y Tank Preview – World of Tanks Supertest

    This brand-new vehicle promises to bring versatile gameplay and unique survivability features to high-tier battles, building upon the foundation established by its predecessors in the Yoh line.

    M-VII-Y tank statistics

    The Yoh Legacy: Reserve Track Mechanic

    The M-VII-Y’s most distinctive feature is its reserve track system, a mechanic that has defined the Yoh family since Tier VII. The concept is elegantly simple yet tactically significant: an additional track is attached to the main tracks, allowing the tank to continue moving even when both main tracks are destroyed.

    What makes the M-VII-Y particularly special is its shortened hull design. This optimized configuration allows the reserve tracks to work very effectively, with speed losses being far less noticeable when the main tracks are destroyed. This improvement over earlier Yoh vehicles means commanders can maintain battlefield mobility even after taking track damage that would completely immobilize conventional heavy tanks.

    Firepower That Balances Alpha and Reliability

    The M-VII-Y is equipped with a capable gun system delivering 400 HP of damage per shot. While this may not match the devastating alpha of super-heavy tanks or premium heavies, it strikes an excellent balance between punch and practical application. The gun offers sufficient damage to make each shot count while maintaining the consistency needed for sustained engagements.

    The firepower package delivers several advantages:

    • Respectable alpha damage: 400 HP per shot provides meaningful impact in trades
    • Comfortable gun handling: The weapon system is designed for reliable shot placement
    • Versatile ammunition selection: Options for different tactical situations and armor profiles

    This damage output positions the M-VII-Y as a tank that rewards good positioning and target selection rather than relying solely on overwhelming single-shot damage.

    Defensive Capabilities and Armor Profile

    The M-VII-Y brings solid defensive characteristics that complement its role as a frontline heavy tank:

    Strong Turret Armor: The vehicle features robust turret protection, allowing it to leverage hull-down positions effectively and trade shots with confidence when properly positioned.

    Hull-Down Potential: With an impressive 10 degrees of gun depression, the M-VII-Y excels at utilizing terrain features and ridgelines. This exceptional gun depression is among the best available to heavy tanks and opens up numerous tactical positioning options that other nations’ heavies can only dream of.

    Survivability Through Mobility: Beyond traditional armor, the reserve track mechanic adds a unique layer of survivability. The ability to remain mobile after track damage allows for tactical retreats, repositioning under fire, and maintaining presence in crucial moments when other heavies would be sitting ducks.

    Tactical Considerations

    The M-VII-Y appears designed as a versatile heavy tank that can adapt to multiple battlefield roles:

    Hull-Down Specialist: The combination of strong turret armor and excellent gun depression makes the M-VII-Y particularly effective on maps with terrain variation. Ridge fighting, hill control, and defensive positions become natural strengths.

    Reliable Support Vehicle: With solid firepower and good survivability, the M-VII-Y can serve as a dependable second-line tank, supporting aggressive pushes or providing covering fire for teammates.

    Mobility-Focused Heavy: The tank features solid specific power, meaning it can relocate between positions more readily than sluggish super-heavies. Combined with the reserve track mechanic, this creates a heavy tank that’s surprisingly difficult to pin down.

    Playstyle Implications

    The M-VII-Y rewards commanders who think tactically about positioning and understand how to maximize their advantages. This isn’t a tank for mindless brawling or static gameplay—it excels when played with intelligence and map awareness.

    Commanders looking to master the M-VII-Y should consider:

    • Seeking out hull-down positions to maximize the 10-degree gun depression
    • Using the strong turret armor to trade effectively while minimizing hull exposure
    • Leveraging the reserve tracks for aggressive repositioning without fear of being tracked
    • Supporting team advances with consistent firepower rather than relying on single massive strikes
    • Taking advantage of the good specific power to respond to battlefield developments

    Versatility as a Core Strength

    The vehicle is fairly versatile in all other aspects with solid specific power, strong turret armor, and comfortable gun handling. This versatility is perhaps the M-VII-Y’s greatest asset. Unlike highly specialized tanks that excel in narrow circumstances, the M-VII-Y can adapt to various situations and contribute meaningfully across different map types and battle scenarios.

    The tank doesn’t have crippling weaknesses that force overly cautious play, nor does it possess overwhelming strengths that encourage reckless aggression. Instead, it offers a balanced package that rewards skilled play and tactical thinking.

    Community Reception

    Initial community reactions to the M-VII-Y have been mixed, with some players expressing skepticism about adding another Yoh family member. Critics point to the existing Yoh tanks’ relatively modest popularity compared to other tech tree lines. However, enthusiasts appreciate the unique reserve track mechanic and the versatility that the line offers.

    Some players have suggested the M-VII-Y might have worked better as a Tier XI vehicle, continuing the Yoh line upward rather than filling in the Tier IX slot. Others see it as a potential premium vehicle candidate given the existing Yoh line structure.

    What’s Next?

    As a Supertest vehicle, the M-VII-Y’s final statistics and characteristics remain subject to change. Wargaming will gather data from Supertesters to ensure the vehicle fits properly into the Tier IX heavy tank ecosystem without overshadowing existing options or proving underwhelming.

    Key questions for the testing phase include:

    • Does the reserve track mechanic provide sufficient tactical advantage?
    • Is the gun handling and alpha damage combination competitive at Tier IX?
    • How does the turret armor hold up against current high-penetration meta?
    • Can the vehicle find its niche alongside established favorites?

  • AHT-7 Tank Preview – World of Tanks Supertest

    AHT-7 Tank Preview – World of Tanks Supertest

    Whether you’re excited or concerned about the AHT-7, one thing is certain: this tank destroyer will demand respect from both those who play it and those who face it on the battlefield.

    AHT-7 tank destroyer

    Firepower That Commands Respect

    The AHT-7’s defining feature is its colossal 165.1 mm gun, placing it among the most destructive weapons in its class. This monster cannon offers two devastating ammunition options:

    • Standard HEAT rounds: 1,000 HP damage per shot with 320 mm penetration
    • Special HESH shells: 1,200 HP damage per shot with 265 mm penetration

    These damage numbers are extraordinary, capable of crippling or outright destroying enemy vehicles in just a few well-placed shots. The ability to inflict 1,200 HP of damage with a single HESH shell gives the AHT-7 incredible late-game potential, where every shot can be game-changing.

    The Trade-Off: Gun Handling Challenges

    Of course, such devastating power comes with significant drawbacks. The AHT-7 features some challenging gun handling characteristics:

    • Aiming time: 3.3 seconds
    • Accuracy: 0.44 dispersion

    These statistics place the AHT-7 firmly in the category of tanks that require patience and careful positioning. This isn’t a vehicle for snap shots or reactive gameplay. Instead, commanders will need to pre-aim, choose their moments carefully, and make every shot count.

    Survivability and Positioning

    The AHT-7 isn’t just about raw firepower. It brings several defensive capabilities that complement its role:

    Turret Armor: The full-rotation turret features up to 241 mm of nominal armor at the front, providing solid protection when properly angled and positioned.

    Gun Depression: With 8 degrees of gun depression, the AHT-7 can effectively utilize hull-down positions and terrain features, a crucial advantage given its lengthy aim time.

    Camouflage Values: The vehicle boasts excellent camouflage ratings, allowing it to leverage its devastating firepower from concealed positions and strike from unexpected angles.

    Tactical Considerations

    The AHT-7 appears designed for a specific tactical niche:

    Ambush Predator: With its exceptional camouflage and one-shot potential, the AHT-7 excels at setting up ambushes and catching enemies off-guard. The combination of stealth and firepower means skilled players can dictate engagements on their terms.

    Terrain-Based Warfare: The solid turret armor and respectable gun depression enable hull-down play, compensating somewhat for the challenging gun handling. Finding good positions with solid cover will be essential.

    Late-Game Specialist: As battles thin out and opponents become more cautious, the AHT-7’s ability to delete nearly any target in 1-2 shots becomes increasingly valuable. Patient players who survive to the endgame could find this tank particularly rewarding.

    Playstyle Implications

    Early community feedback suggests the AHT-7 will reward careful, methodical gameplay. The poor accuracy and lengthy aim time mean aggressive pushes are risky, but the combination of high alpha damage, good camouflage, and a rotating turret provides versatility that fixed-gun tank destroyers lack.

    Commanders looking to master the AHT-7 should consider:

    • Maximizing camouflage with crew skills, equipment, and positioning
    • Pre-aiming common routes and chokepoints
    • Using the full-rotation turret to cover multiple angles without repositioning
    • Taking advantage of the gun depression to minimize exposure
    • Saving premium HESH shells for crucial moments or soft-skinned targets

    Community Reception

    Initial reactions from the World of Tanks community have been mixed, with some players expressing concerns about another high-alpha vehicle entering the game, while others are excited about the tactical possibilities. Comparisons to vehicles like the FV215b (183) and Object 268 Version 4 are inevitable, though the AHT-7’s combination of turret, camouflage, and specific gun characteristics gives it a distinct identity.

    What’s Next?

    As a Supertest vehicle, the AHT-7’s statistics and characteristics are subject to change before any potential release. Wargaming will be gathering data and feedback from Supertesters to refine the vehicle’s balance and ensure it fits properly into the game’s ecosystem.

    Its combination of devastating alpha damage, solid defensive capabilities, and stealth potential creates a unique package that could become either a beloved favorite or a frustrating opponent, depending on which side of its gun you find yourself.

  • TBT Tank Review – Long Reloads – World of Tanks

    TBT Tank Review – Long Reloads – World of Tanks

    TBT tank

    What sets the TBT apart is its exceptional burst potential relative to its protection. Unlike many premium tanks that trade armor for firepower, this Czech heavy maintains consistent survivability whether you’re pushing aggressively, holding defensive positions, or trading fire on the frontline.
    The tank’s 490 damage per shot with solid turret armor allows it to engage effectively at close range, while its two-shell autoloader provides the confidence to finish off opponents when necessary.

    The TBT truly shines through its raw hitting power characteristics. With an aiming time of just 2.68 seconds and an accuracy of 0.39 at 100 meters, this tank can reliably deliver its payload where it hurts. The 130mm gun delivers reliable performance against all tier opponents, making the TBT a tank you can take into any heavy brawl with confidence.

    Firepower

    Let’s dive into the numbers that make the TBT such a formidable opponent. The tank is equipped with a 130mm gun that delivers 490 damage per shot with 247mm of base penetration (290mm with APCR). This puts it directly ahead of the TNH T Vz. 51 in terms of raw alpha damage.

    Spec TBT TNH T Vz. 51
    Damage per Shot 490 HP 440 HP
    Base Penetration 247 mm 252 mm
    APCR Penetration 290 mm 294 mm
    Rate of Fire 3.37 rpm 3.81 rpm
    Damage per Minute 1,685 HP 1,676 HP
    Shell Velocity 980 m/s 930 m/s
    Magazine Size 2 rounds 2 rounds

    The damage per minute of 1,685 puts the TBT in a specialized spot. While it doesn’t have the sustained pressure of single-shot heavies or the raw DPM of the Vz. 51, it provides massive, front-loaded damage output that forces enemies into cover. The 32.6-second reload time is long enough to encourage thoughtful positioning, but the 1,000-damage clip is devastating enough to maintain pressure on enemies.

    Shell velocity of 980 m/s is alright for a large-caliber 130mm gun, giving the TBT suboptimal ballistics compared to many heavy tank competitors. This translates to hard shots at moving targets and more lead compensation when engaging at mid-range. The limited ammunition capacity requires discipline, as every miss hurts your potential impact on the battle.

    Gun Handling

    The TBT’s gun handling characteristics are balanced by its high alpha and represent a classic heavy tank trade-off. WG has given this Czech warrior workable gun handling parameters that, while not sniper-like, are sufficient for its brawling role, though slightly behind the Vz. 51.

    Spec TBT TNH T Vz. 51
    Aiming Time 2.68 seconds 2.88 seconds
    Accuracy at 100m 0.39 0.38
    Moving/turret dispersion 0.20 0.18
    Gun Depression 7 degrees 7 degrees
    Gun Elevation 20 degrees 20 degrees
    Turret Traverse 26.07°/sec 26.07°/sec
    Alpha Advantage +50 HP

    The 2.68-second aiming time is standard for 130mm guns and requires stabilization equipment. Combined with 0.39 accuracy, this means the TBT is best used at close-to-medium ranges where you can ensure your shells connect. The 7 degrees of gun depression is standard for the nation and allows for
    solid hull-down play and effective use of gentle terrain.

    Dispersion values are even worse than on the Vz. 51, the vertical stabilizer is a must-have on this tank, but even with that, your reticle will bloom out a lot. The gun’s good elevation angles provide flexibility when engaging targets on elevated positions, though the 7-degree limit means you cannot work extreme ridgelines like Western heavies.

    Mobility

    Mobility-wise, the TBT strikes a balance closer to a true heavy tank compared to the faster Vz. 51. While the Vz. 51 is a “heavium” capable of 50 km/h, the TBT provides steady, reliable mobility that keeps it in the heavy fight.

    Spec TBT TNH T Vz. 51
    Top Speed 36 km/h 50 km/h
    Reverse Speed 15 km/h 15 km/h
    Power-to-Weight 14 hp/t 14.37 hp/t
    Hull Traverse 29.20°/sec 33.38°/sec
    Engine Power 700 hp 750 hp
    Weight 50 t 52.21 t

    The 36 km/h top speed is the main limiting factor, preventing quick cross-map rotations, but it allows for controlled advances.15 km/h reverse speed is standard for the class.

    29°/sec hull traverse is respectable and makes the TBT capable of angling decently in close quarters. Terrain resistance values are standard, but quite a bit better on hard and a lot better on soft terrain than the tech tree counterpart. The lower top speed is the price you pay for the increased stability and armor layout.

    Armor

    Here’s where the TBT really starts to shine compared to the Vz. 51. This heavy tank has genuinely formidable turret armor that improves upon the Vz. 51 by removing the prominent cupola weakspot, allowing it to bounce shots from higher-tier opponents reliably.

    Spec TBT TNH T Vz. 51
    Hull Front Armor 120 mm 130 mm
    Hull Side Armor 80 mm 80 mm
    Hull Rear Armor 70 mm 80 mm
    Turret Front Armor 240 mm 300 mm
    Turret Side Armor 100 mm 150 mm
    Turret Rear Armor 70 mm 80 mm
    Health Points 1,850 HP 1,900 HP
    Armor Advantage No Cupola Weakspot

    The 280mm frontal turret armor is a significant upgrade over the Vz. 51’s layout and can reliably bounce Tier X gold rounds. The
    130mm frontal hull armor features a V-shape nose (pike nose style), which, when combined with proper positioning, can provide surprising survivability.

    TBT tank armor
    TBT
    TNH T Vz. 51 tank armor
    TNH T Vz. 51

    The biggest difference is the amount of protection you have when using the full 7 degrees of gun depression. The TBT’s lack of a cupola makes it nearly invulnerable in this state.

    TBT tank armor
    TBT
    TNH T Vz. 51 tank armor
    TNH T Vz. 51

    Side armor of 80mm is standard for heavy tanks and allows for sidescraping, though the V-hull requires you to be careful not to over-angle. The 1,800 HP health pool is competitive, almost matching the tech tree equivalent.

    TBT tank armor
    TBT
    TNH T Vz. 51 tank armor
    TNH T Vz. 51

    The rear armor of 80mm is surprisingly thick, offering decent protection against HE rounds from smaller calibers, so you are less vulnerable to light tanks than expected.

    TBT tank armor
    TBT
    TNH T Vz. 51 tank armor
    TNH T Vz. 51

    Conclusion: The tank’s strong turret geometry and lack of weakspots contributes to its high effective armor values. When properly positioned and angled, the TBT can trade shots effectively with higher-tier opponents, making it suitable for both aggressive and defensive playstyles.

    Miscellaneous

    The TBT’s auxiliary characteristics round out its profile as a focused brawler, with premium benefits that give it an edge in economy.

    Spec TBT TNH T Vz. 51
    View Range 380 m 380 m
    Stationary Camo 6.78% 6.84%
    Moving Camo 3.42% 3.45%
    Signal Range 670 m 850 m
    Shell Cost 1,116 silver 1,020 silver

    380m view range is average and provides basic spotting capability for a heavy tank. The camouflage values are poor as expected for a heavy, giving the TBT little to no stealth capability. This performance means the tank must rely on hard cover rather than concealment.

    Shell cost is standard for the alpha damage, and won’t break the bank. The premium status ensures good credit income, and the overall economy of the TBT is favorable due to its high alpha, allowing for efficient trading.

    Tips

    Playing the TBT effectively requires understanding its strengths and playing to them consistently:

    Leverage the 490 alpha damage – Force trades where you fire one shot for one shot. You will win the trade against almost any Tier IX heavy.

    Use the clean turret confidently – Don’t be afraid to sit hull-down. The lack of cupolas means you don’t need to wiggle frantically to survive.

    Maintain close-range positioning – The TBT excels at brawling range, where its 0.39 accuracy is less of a liability, and its armor works best.

    Don’t overextend during reload – 32 seconds is a long time. Always have an escape plan or a rock to hide behind before you empty your clip.

    Use the burst for finishers – Save your second shell for low HP enemies to remove their gun from the game instantly.

    Aim fully – With low DPM, every miss is painful. Use the good shell velocity, but let the reticle settle.

    Manage ammunition wisely – With limited rounds and a long reload, ensure you are firing at targets you can penetrate.

    Conclusion

    The TBT represents a powerful evolution in the Czech heavy tank style in World of Tanks. It’s a genuinely dangerous brawler that doesn’t require the player to master complex mechanics to be effective, provided they respect the reload timer. While it may not have the speed of the Vz. 51, it provides superior survivability.

    The combination of high alpha, excellent turret armor, and burst potential makes the TBT a tank that
    consistently influences the battle regardless of map, provided you can reach the frontline. It’s the kind of tank you can take into any city map with confidence, knowing that your armor will hold up.

    For players seeking a reliable, high-alpha Tier IX heavy tank that can serve as both a credit maker and a carry vehicle, the
    TBT delivers exactly what it promises.

  • Stridsyxa Tank Review – The Swedish Precision Tool – World of Tanks

    Stridsyxa Tank Review – The Swedish Precision Tool – World of Tanks

    stridsyxa tank

    Released as part of Holiday Ops 2026, the Stridsyxa has quickly established itself as a top-tier choice for players seeking a versatile and dependable medium tank that can adapt to any battlefield situation.

    What sets the Stridsyxa apart is its exceptional balance across all combat characteristics. Unlike many premium tanks that excel in one area while sacrificing others, this Swedish medium maintains consistent performance whether you’re pushing aggressively, holding defensive positions, or providing long-range support. The tank’s 350 damage per shot with excellent penetration values allows it to engage effectively at all ranges, while its solid frontal armor provides the confidence to trade shots when necessary.

    The Stridsyxa truly shines through its superior gun handling characteristics. With an aiming time of just 2.21 seconds and an accuracy of 0.355 at 100 meters, this tank can consistently land shots where they count. The 105mm gun delivers reliable performance against all tier opponents, making the Stridsyxa a tank you can take into any battle configuration with confidence.

    Firepower

    Let’s dive into the numbers that make the Stridsyxa such a formidable opponent. The tank is equipped with a 105mm gun that delivers 350 damage per shot with 219mm of base penetration (252mm with APCR). This puts it directly ahead of the Lansen C in most key firepower metrics.

    SpecStridsyxaLansen C
    Damage per Shot350 HP320 HP
    Base Penetration219 mm208 mm
    APCR Penetration252 mm242 mm
    Rate of Fire6.26 rpm6.52 rpm
    Damage per Minute2,190 HP2,087 HP
    Aiming Time2.21 sec2.50 sec
    Accuracy at 100m0.3550.380
    Shell Velocity980 m/s930 m/s
    Ammo Capacity50 rounds65 rounds

    The damage per minute of 2,190 puts the Stridsyxa in an excellent spot. While it doesn’t have the burst damage of autoreloaders or the raw DPM of some single-shot guns, it provides consistent, reliable damage output that doesn’t require risky positioning or complex magazine management. The 10-second reload time is long enough to encourage thoughtful shot placement but short enough to maintain pressure on enemies.

    Shell velocity of 980 m/s is genuinely excellent for a 105mm gun, giving the Stridsyxa superior ballistics compared to most medium tank competitors. This translates to easier shots at range and less lead compensation when engaging moving targets. The 50-round ammunition capacity provides plenty of sustain for extended engagements without frequent trips to the depot.

    Gun Handling

    The Stridsyxa’s gun handling characteristics are genuinely impressive and represent one of its strongest selling points. WG has blessed this Swedish warrior with some of the best gun handling parameters in the medium tank category, even outperforming the Lansen C in several key areas.

    SpecStridsyxaLansen C
    Aiming Time2.21 seconds2.50 seconds
    Accuracy at 100m0.3550.380
    Gun Depression10 degrees10 degrees
    Gun Elevation20 degrees20 degrees
    Turret Traverse41.72°/sec32°/sec
    Turret Traverse Advantage+9.72°/sec

    The 2.21-second aiming time is outstanding and among the best in its class. Combined with 0.355 accuracy, this means the Stridsyxa can consistently hit targets at medium to long ranges without extensive settling time. The 10 degrees of gun depression is excellent for a medium tank and allows for aggressive ridge-line camping and effective hull-down positions.

    41.72°/sec turret traverse speed is more than sufficient for tracking moving targets and making quick adjustments during engagements. The gun’s good elevation angles provide flexibility when engaging targets on elevated positions, though the 20-degree limit can sometimes restrict engagement angles on certain maps.

    Mobility

    Mobility-wise, the Stridsyxa strikes an excellent balance between speed and control. While the Lansen C has a significantly better power-to-weight ratio, the Stridsyxa provides reliable mobility that’s more than adequate for most tactical situations.

    SpecStridsyxaLansen C
    Top Speed50 km/h50 km/h
    Reverse Speed18 km/h20 km/h
    Power-to-Weight16.67 hp/t28.39 hp/t
    Hull Traverse46.94°/sec40°/sec
    Engine Power500 hp680 hp
    Weight30 t23.95 t

    The 50 km/h top speed is competitive for a medium tank, allowing for reasonable repositioning and effective flanking maneuvers. 18 km/h reverse speed is adequate for tactical retreats, though not exceptional. The 16.67 hp/t power-to-weight ratio provides good acceleration, especially considering the tank’s substantial armor protection.

    46.94°/sec hull traverse is excellent and makes the Stridsyxa highly maneuverable in close quarters. Terrain resistance values are reasonable, meaning the tank maintains decent mobility across different surface types. The effective top speed of 31.73 km/h on soft terrain is the only real limitation, though this is typical for most medium tanks.

    Armor

    Here’s where the Stridsyxa really starts to shine compared to the Lansen C. This Swedish medium tank has genuinely respectable armor that completely eclipses the Lansen C’s paper-thin protection, allowing it to bounce shots from equal-tier opponents and even provide some surprises against higher tiers.

    SpecStridsyxaLansen C
    Hull Front Armor100 mm60 mm
    Hull Side Armor40 mm40 mm
    Hull Rear Armor35 mm40 mm
    Turret Front Armor250 mm70 mm
    Turret Side Armor70 mm70 mm
    Turret Rear Armor35 mm40 mm
    Health Points1,300 HP1,350 HP
    Armor AdvantageMassive frontal advantage

    The 250mm frontal turret armor completely dwarfs the Lansen C’s 70mm turret armor and can reliably bounce Tier VIII gold rounds and even some Tier IX standard rounds when angled properly. The 100mm frontal hull armor is vastly superior to the Lansen C’s 60mm and, when combined with proper angling, can provide surprising survivability in brawling situations.

    Stridsyxa armor
    Stridsyxa
    Lansen C armor
    Lansen C

    The biggest difference is amount of armor you have when using full 10 degrees of gun depression.

    Stridsyxa
    Lansen C

    Side armor of 40mm is standard for medium tanks but can be vulnerable to overmatch. The 1,300 HP health pool is competitive, though the Lansen C has slightly more at 1,350 HP.

    Stridsyxa
    Lansen C side armor
    Lansen C

    The rear armor of 35mm is typical and vulnerable to HE rounds, so caution is advised when reversing near enemy positions.

    Stridsyxa
    Lansen C

    Conclusion: The tank’s unique frontal hull geometry (mentioned in historical references) likely contributes to its effective armor values. When properly positioned and angled, the Stridsyxa can trade shots effectively with many opponents, making it suitable for both aggressive and defensive playstyles.

    Miscellaneous

    The Stridsyxa’s auxiliary characteristics round out its profile as a genuinely well-balanced medium tank, with only minor advantages over the Lansen C in most areas.

    SpecStridsyxaLansen C
    View Range390 m380 m
    Stationary Camo17.04%16.87%
    Moving Camo12.77%~12%
    Signal Range570 m710 m
    Shell Cost650 silverUnknown
    Suspension Repair11.7 sec8.02 sec
    Tank RoleVersatile MediumSniper Medium

    390m view range is solid and provides good spotting capability for a medium tank. The 17.04% stationary camouflage and 12.77% moving camouflage are both above average for the class, giving the Stridsyxa excellent passive scouting potential. This camouflage performance is genuinely impressive and allows the tank to contribute to vision control while remaining undetected.

    Shell cost of 650 silver is reasonable and won’t break the bank during extended gaming sessions. The 50-round ammunition capacity ensures good sustain, and the overall credit economy of the Stridsyxa is favorable due to its solid performance and reasonable consumable costs.

    Tips

    Playing the Stridsyxa effectively requires understanding its strengths and playing to them consistently:

    Leverage the excellent gun handling – Take your time to aim and make every shot count. The 2.21-second aiming time means you can be more patient than with other medium tanks.

    Use the armor confidently – Don’t be afraid to trade shots when you have the advantage. The 250mm turret armor can bounce many shots, especially when hull-down.

    Maintain medium-range positioning – The Stridsyxa excels at mid-range combat where it can use its gun handling and armor effectively while remaining mobile.

    Don’t overextend despite good mobility – While the tank is mobile, it’s not a light tank. Stay with your team and avoid isolated positions.

    Use the good camouflage for vision control – The above-average camouflage values make the Stridsyxa excellent for passive spotting and vision denial.

    Aim for weak points – Despite good armor, you’ll still need to aim carefully against well-armored targets. Use the excellent accuracy to hit specific modules.

    Manage ammunition wisely – 50 rounds provide good sustain, but don’t waste shots. Each shell represents significant damage potential.

    Conclusion

    The Stridsyxa represents everything excellent about modern premium tank design in World of Tanks. It’s a genuinely well-balanced medium tank that doesn’t require the player to make significant compromises or master complex mechanics to be effective. While it may not have the extreme specialization of some competitors, it provides reliable performance across all aspects of medium tank gameplay.

    The combination of excellent gun handling, solid armor, reasonable mobility, and above-average concealment makes the Stridsyxa a tank that consistently delivers results regardless of map, team composition, or enemy opposition. It’s the kind of tank you can take into any battle with confidence, knowing that your equipment and crew skills will be fully utilized.

    For players seeking a reliable, versatile Tier VIII medium tank that can serve as both a workhorse and a showpiece, the Stridsyxa delivers exactly what it promises. It may not be the flashiest tank on the battlefield, but it’s undoubtedly one of the most consistent and dependable choices at its tier.

    CategoryStridsyxa AdvantagesLansen C Advantages
    Firepower+30 damage, +11mm pen, +103 DPM+0.26 rpm, +15 shells
    Gun Handling0.29s faster aim, better accuracy, +9.72°/sec turret
    MobilityBetter hull traverse, heavier armorMuch better power-to-weight, faster reverse
    ArmorMassive advantage – 250mm vs 70mm turret+50 HP, slightly better rear armor
    OtherBetter camo, +10m view rangeBetter radio range, faster repairs

    Check reviews of other vehicles:

    Here is also a post about the best premium tanks in the game:
    Best premium tanks in 2025 – Easy credit makers

  • Best champions in 25.24 – League of Legends

    Best champions in 25.24 – League of Legends

    Riot’s given fresh buffs to Bram, Nasa, Sichuani, Swain and Viktor, while shaving power from Dr. Mundo, Kass, Kai’Xa, Master Yi, Mel and Zed. Translation: the kings of yesterday are sharing the throne, and a new roster of S-tier bullies is ready to carry your climb.

    Whether you’re a top-lane tank, a jungle assassin, a mid-game mage, a bot-lane cannon or a vision-packing support, three champions per role now sit in the statistical penthouse—win-rate, pick-rate and ban-rate all flashing neon. Below you’ll meet the nine names that dominate Emerald-plus queues, complete with why they’re busted and how to pilot them so you can queue up with confidence instead of guess-work.

    Top Lane

    Zaahen
    Picture a Darkin juggernaut who gets a built-in Guardian Angel every time he stacks four auto-attacks. His Q is a spammable, life-stealing slash that keeps him healthy through the worst poke, while his R is a five-man fear that also turns him into a 6 k HP raid boss. Conqueror plus Trinity Force spikes him at one item; after that he can dive back-line, revive, and walk out laughing.
    Survivability: 5 (built-in revive + drain)
    CC: 3 (single-target fear on R)
    Mobility: 2 (only a short dash on W)

    Malphite
    The classic “press R, win fight” champion is back at 52 % win-rate because every AD carry and assassin is meta again. Iceborn Gauntlet first item means he wins lane off one Sheen proc, and at two items he’s a 300-armor wall that still one-shots squishies. Save the ultimate for flanks—if you open with it on cooldown, the enemy team forgets you exist for the next two minutes.
    Survivability: 4 (300-armoUr mountain)
    CC: 5 (800-range AoE knock-up)
    Mobility: 2 (ult is his only gap-closer)

    Aatrox
    Durability patch buffs quietly pushed his healing into “unkillable” territory. Goredrinker plus Serylda gives him both sustain and armor shred, so even behind in CS he can turn a skirmish with a three-man Q3. Cast R early in fights for the reset pressure; the extra move-speed turns every trade into a chase-down.
    Survivability: 4 (Goredrinker + massive healing)
    CC: 2 (single knock-up on Q3)
    Mobility: 3 (E dash every 3 s while ulting)

    Jungle

    Briar
    She clears the entire map by 3:05 without using a single potion. Her self-heal is tied to missing HP, so the lower she gets, the more she drains. Point-click suppress on R guarantees a kill whenever you show your face. Build Lethal Tempo into Profane Hydra and you become a late-game hyper-carry who still started the game with a perfect leash.
    Survivability: 4 (drain tank, but squishy if stunned)
    CC: 3 (point-click suppress)
    Mobility: 3 (Q dash + MS on W)

    Bel’Veth
    Infinite scaling on takedowns means every kill makes her next clear faster. At six stacks she spawns Voidlings that solo baron while she grabs a coffee. Conqueror plus Kraken Slayer melts tanks and squishies alike; save E to dodge the one CC spell that can stop your rampage.
    Survivability: 3 (needs to stack, no hard defensive)
    CC: 1 (zero hard CC)
    Mobility: 5 (infinite dashes on takedown)

    Master Yi
    Crit is back on Alpha Strike. One Q can now wipe an entire backline through shields, and Meditate still tanks a full rotation while you laugh. Rush Kraken into Collector, turn on R, and right-click your way to a highlight reel—just ban Malphite so you actually get to press Q.
    Survivability: 2 (Mediate tank, otherwise paper)
    CC: 0 (literally none)
    Mobility: 2 (Alpha + R MS, reset on kill)

    Mid lane

    Rumble
    Fifty-four percent win-rate because Equalizer covers the entire river entrance. Comet plus Scorch turns Flame-Spitter into a true-damage tick, and overheat autos chunk melees under tower. Never overheat pre-six—once you have R, shove and roam; dragon fights are yours to script.
    Survivability: 2 (shield on W, but squishy)
    CC: 3 (equalizer slow + heat stun)
    Mobility: 2 (short W burst only)

    LeBlanc
    Mana buffs let her cast W on cooldown without running dry. W-Q-E still pops carries, but now you get the dash back for free if you hit a champion. Electrocute plus Luden gives one-shot range at two items; clone-control with Alt-click to body-block hooks and skillshots.
    Survivability: 3 (clone + snap-back)
    CC: 2 (single snare)
    Mobility: 5 (two dashes, snap-back)

    Katarina
    Kraken Slayer procs on every dagger, so “assassin” now deletes tanks faster than your top-laner. Conqueror plus Blade of the Ruined King keeps you alive long enough to chain resets. Ban Briar—her suppress is the only thing that cancels Death Lotus through the whole channel.
    Survivability: 2 (relies on resets)
    CC: 0 (none)
    Mobility: 5 (blink on every dagger)

    ADC

    Miss Fortune
    One of the few marksmen who can win a fight with a single button. Make It Rain slows an entire team; Bullet Time crits for 1 200 damage per wave. Eclipse into Collector gives you armor pen, shield, and burst on the first auto. Flash-R only from fog—if you’re visible, you’re rooted and dead.
    Survivability: 1 (no dash, no shield)
    CC: 2 (E slow)
    Mobility: 1 (passive MS falls off in combat)

    Draven
    New lethality item pays 300 gold per kill, so his passive snowballs twice as fast. Conqueror plus Prowler’s Claw turns Spinning Axe into a true-damage nuke. Catch axes, cash in, and buy your third item before the enemy bot has finished their second—just don’t get hooked by Blitz.
    Survivability: 2 (W MS + lifesteal)
    CC: 1 (E knock-aside)
    Mobility: 3 (W reset on catch)

    Jinx
    Rocket range scales with level, so she out-ranges every other marksman at three items. Switch to minigun for baron melts, then back to rockets for 1 100-range crits on the back-line. Lethal Tempo plus Kraken Slayer is still the cleanest DPS package in the game.
    Survivability: 2 (passive MS only after takedown)
    CC: 2 (E chompers root)
    Mobility: 3 (passive MS + zap slow)

    Support

    Milio
    Guardian plus Shurelya turns your carry into a race car. Ultra-R gives 550 bonus attack range and an AoE cleanse that deletes Malphite R, Briar suppress, and Rumble equalizer all at once. Sit on your ADC’s shoulder, press E for 600 move-speed, and watch enemy assassins cry into /all chat.
    Survivability: 3 (heal + shield, but squishy)
    CC: 2 (Q knock-back)
    Mobility: 2 (E speed boost)

    Nami
    Electrocute synergizes with any aggressive lane partner; one W bounce plus E auto procs the rune for free. Bubble is still ten frames of airborne set-up, and Tidal Wave can counter-engage from two screens away. Imperial Mandate turns every trade into a kill threat.
    Survivability: 2 (bubble self-peel)
    CC: 4 (bubble + wave)
    Mobility: 1 (no dash)

    Blitzcrank
    Seventy percent hook accuracy equals flash-kill on cooldown. Aftershock plus Locket gives you 200 armor for two seconds after you land a grab, so you can facetower for your team. Ban Milio—he cleanses your entire combo and turns the pick you just landed into a four-man disengage.
    Survivability: 4 (Aftershock + 100 armor passive)
    CC: 4 (hook + knock-up + silence)
    Mobility: 2 (W burst, self-slow after)

    Lock any of these paths and you’re queueing into Patch 25.24 on easy mode. See you on the climb, and may your bans hit harder than your hooks.

  • World of tanks Black Market 2026 – Tank predictions

    World of tanks Black Market 2026 – Tank predictions

    Last year, the Black Market was quite underwhelming for the majority of the playerbase. It was dominated by the gold offer,s and there was only 1 credits offer for a trash tank K-91-2.

    Pretty much, there wasn’t any new content that was offered to the players apart from that K-91-2. Last offer featured just a mystery box with premium tanks with fancy 3D styles that many players already had. Let’s try to guess which tanks could be featured in this event. We guessed 2 tanks for the Christmas lootboxes, let’s see if we can do it better this time.

    Heavy Tanks

    Yong bing tank

    Yong Bing

    Yong Bing is a tier 9 Chinese heavy tank with rocket boosters and a double-barreled gun capable of devastating double shots. I was already very surprised this tank wasn’t in 2026 lootboxes, but it is a perfect candidate for the black market since a lot of people are ready to bid big in order to get their hands on this beast. Based on the statistics alone, this seems like the best tier 9 premium at the moment.
    Probably the most fun unreleased tier 9 premium heavy would give up to 25 million credits for it.

    SPHT tank

    SPHT

    SPHT is an American premium tier 9 heavy tank. It has very weak frontal armor with around 200 mm of effective armor thickness. Apart from the armor, it actually seems like a decent support heavy, with great gun and decent enough mobility to relocate on the battlefield if necessary. It seems on point with other tier 9 premiums in terms of power and balance.
    This tank is pretty decent, would give up to 18 million credits for it.

    schwertwal tank

    Schwertwal

    This is a pretty interesting German heavy at tier 10. Main characteristics of this vehicle are a high alpha damage gun at 700 damage per shot and a low top speed at only 30 km/h. In terms of armor, it’s nothing special; it has 2 big weakspots on the upper front plate, the upper deck can be overmatched by 121 mm guns and higher, while the lower plate is very big and tragically weak at only 200 mm of effective armor. The turret is tho very solid, around 400 mm on the front without any weak spots. While the gun is hard-hitting, it has horrible dispersion values.
    I wouldn’t give more than 10 million credits; it doesn’t bring anything new to the game, and it doesn’t have a characteristic that would make it great at one thing.

    Medium tanks

    Leox world of tanks

    Leox 

    A very recent addition to the Supertest is a tier 9 premium French medium tank, the Leox. Playstyle-wise, it reminds me a lot of the AMX 30 and 30B. It features great penetration, decent alpha damage, good gun handling, bad hull armor, and a somewhat reliable turret. But the main interesting feature is the top speed of 70 km/h, which is really fast for a medium without any special modes. It could be a pretty fun tank, would give up to 20 million for it.

    serpente tank

    Serpente

    A lot of people expected it in 2026 lootboxes, but it hasn’t appeared. There is a lot of hype surrounding it, so if it will be for bids, you can expect bids to be really high, around 30-40 million. The reason for the hype is the fact that this is the First Italian tank with a double-barreled gun. SFAC-105, which was in the last year, Black Market was also the first French TD with double barrels, so it does make sense if they put Serpente into the bids. Mechanics-wise, you also have insane dispersion values whenever you are charging the double shot, which proved very effective on the SFAC-105.

    Light tanks

    LTS-85 tank

    LTS-85

    This is a tier 8 premium soviet light tank. It has been in a supertest phase for a couple of years now, while the chances are low for it appearing, this might be a stinker that WG can sell to you for credits or free XP. Stats-wise, it looks like a pretty bad tank, horrible dpm, bad penetration, bad camo rating, and no armor. The only decent things about this tank are the mobility and good alpha damage at 300.

    Since I’m not such a fan of lights in the current meta, I wouldn’t give more than 5 million for it.

    Tank Destroyers

    Kanonenjagdpanzer 2 tank

    Kanonenjagdpanzer 2

    This is a Tier 8 premium German tank destroyer. A successor to the Kanonenjagdpanzer is equipped with a siege mechanic, which makes it one of the best snipers at tier 8 with only 0.29 dispersion in siege mode. DPM is solid at 2,7k and mobility is great. The ugly thing about the tank is the fact that it has absolutely no armor to the point where almost any HE rounds can penetrate it. Probably worth around 12 million.

    SU-122V tank

    SU-122V

    SU-122V is a tier 9 premium Russian tank destroyer with hydropneumatic suspension. It has been on the supertest since February of 2024, but the tank hasn’t been featured in any event yet. The first Russian tank with such suspension, it also has a really good upper hull, where the majority is an autorichochet very similar to the Swedish tier 10 STRV103B. Did I forget to add that it also has a great gun with over 3k DPM? Tank might also receive some additional changes to the usual procedure, which is for WG. Probably worth around 20 million.

    alby

    Lorraine 120 Alby

    This is a French tier 8 premium TD. It seems like the standard stuff from the French TD, an autoloader, in this case with 4 shells in the clip, 2.5 s intraclip reload, and 40 seconds for the full clip reload. Frontal armor is really decent, actually, with not weakspots at the top of the vehicle, as is usually the case with Foch TDs. But this tank is a lot more flexible than the Foch tanks due to the fact that it has an extra 20 degrees of horizontal gun traverse, which makes playing the tank a lot more comfortable. It seems like a pretty good tank overall, could be a good credit maker.
    I would bid up to 15 million for it.

    Conclusion

    If there are again going to be 5 tanks in the lootboxes, this would be my prediction:

    • Serpente – Tier 9 Italian Medium
    • Leox – Tier 9 French Medium
    • Schwertwal – Tier 10 German Heavy
    • SPHT – Tier 9 American Heavy
    • Yong Bing – Tier 9 Chinese Heavy
    • LTS-85 – Tier 8 Soviet light tank
    • Kanonenjagdpanzer 2 – Tier 8 German TD
    • SU-122V – Tier 9 Soviet TD
    • Lorraine 120 Alby – Tier 9 French TD

    Check out also these similar posts:
    Best premium tanks in 2025 – Easy credit makers
    Best premium tanks for bonds in 2025
    Best tier 11 tanks in 2025

    Good luck on the battlefield.