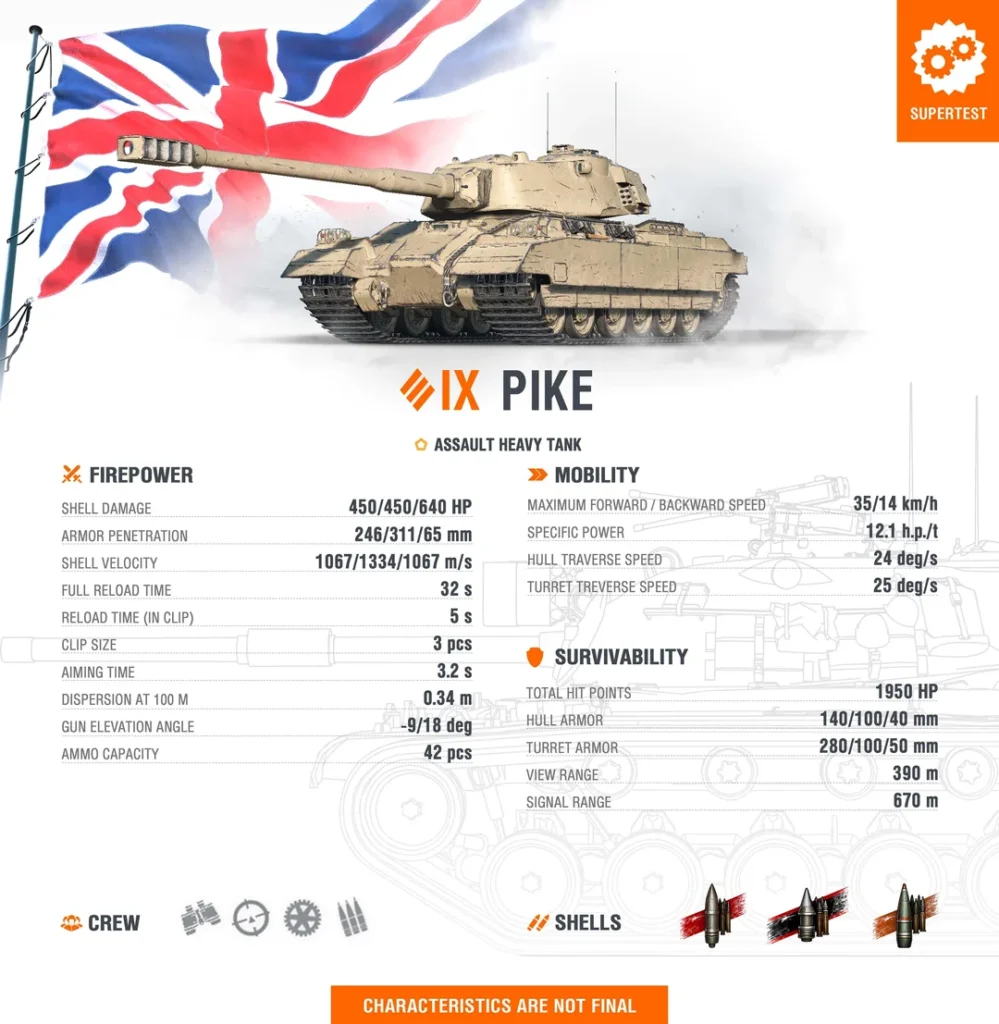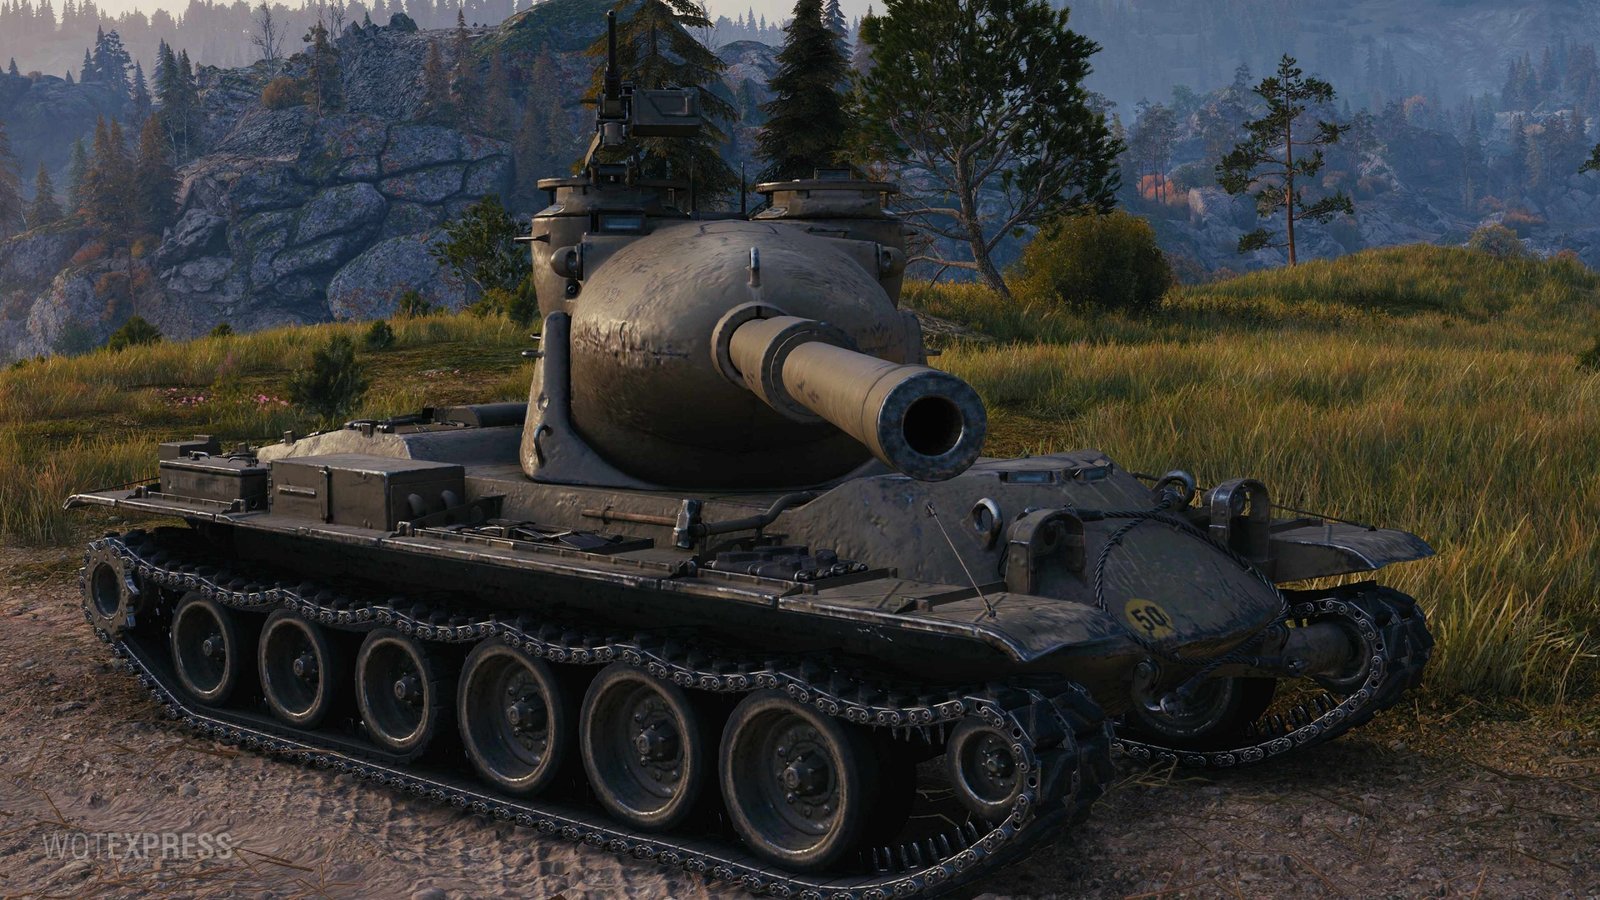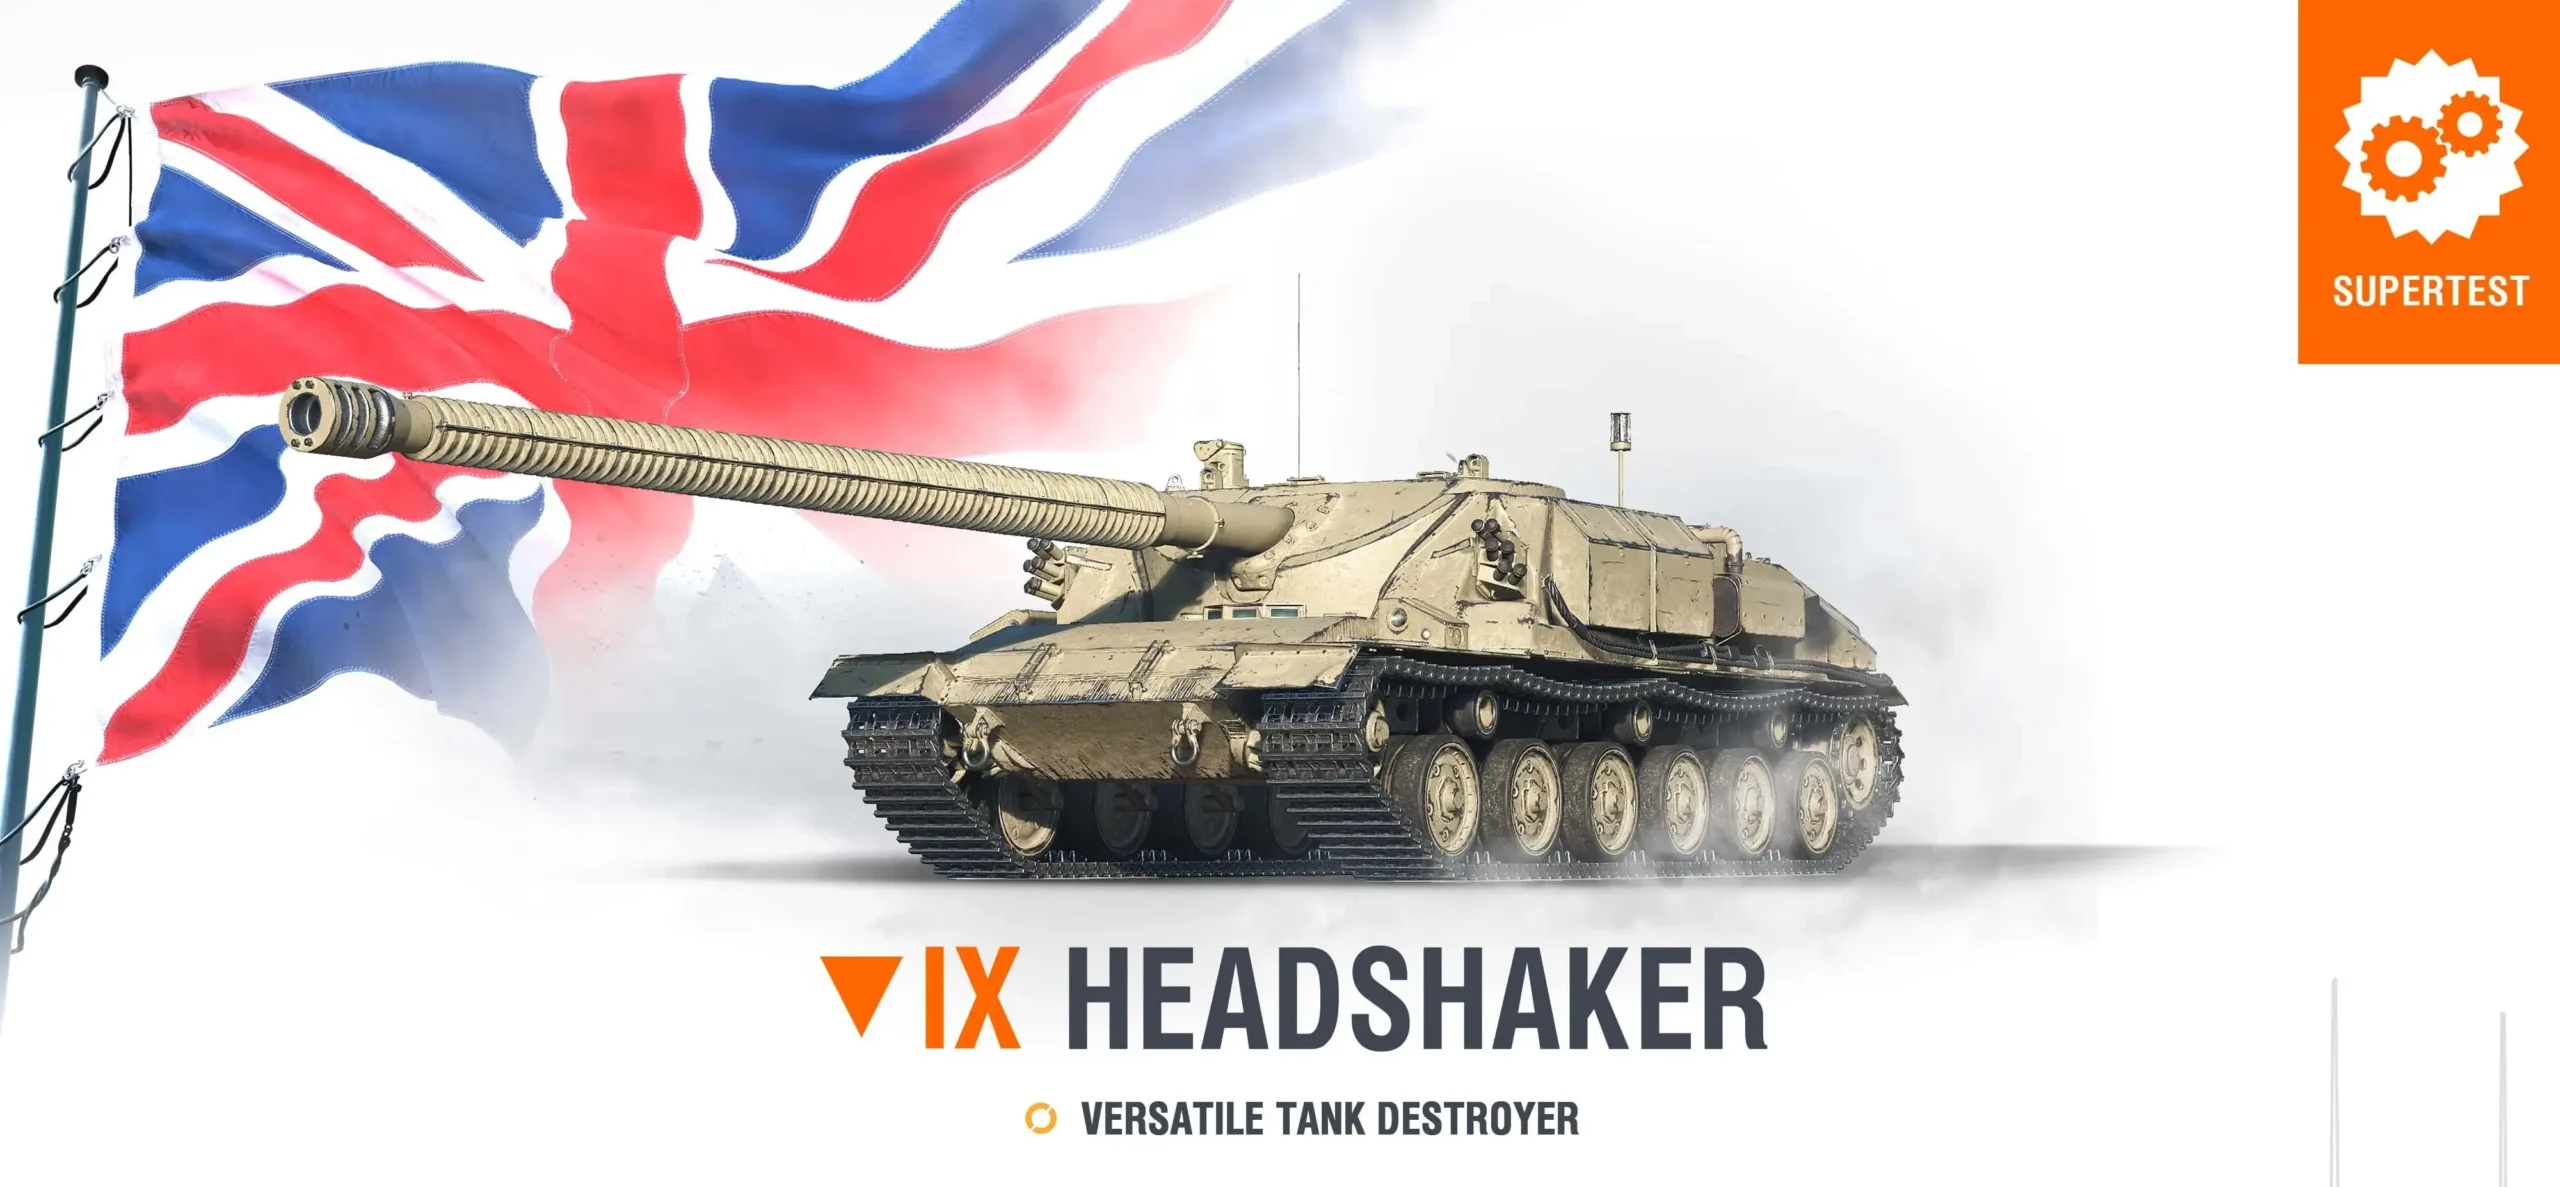
For players who appreciate British firepower but want something genuinely different from traditional fixed-gun designs, the Headshaker offers an intriguing combination of characteristics that creates unprecedented tactical versatility.
Gun Cooling System: Double Aiming Precision
The Headshaker features the gun cooling mechanic previously seen on vehicles like the Japanese Kame:
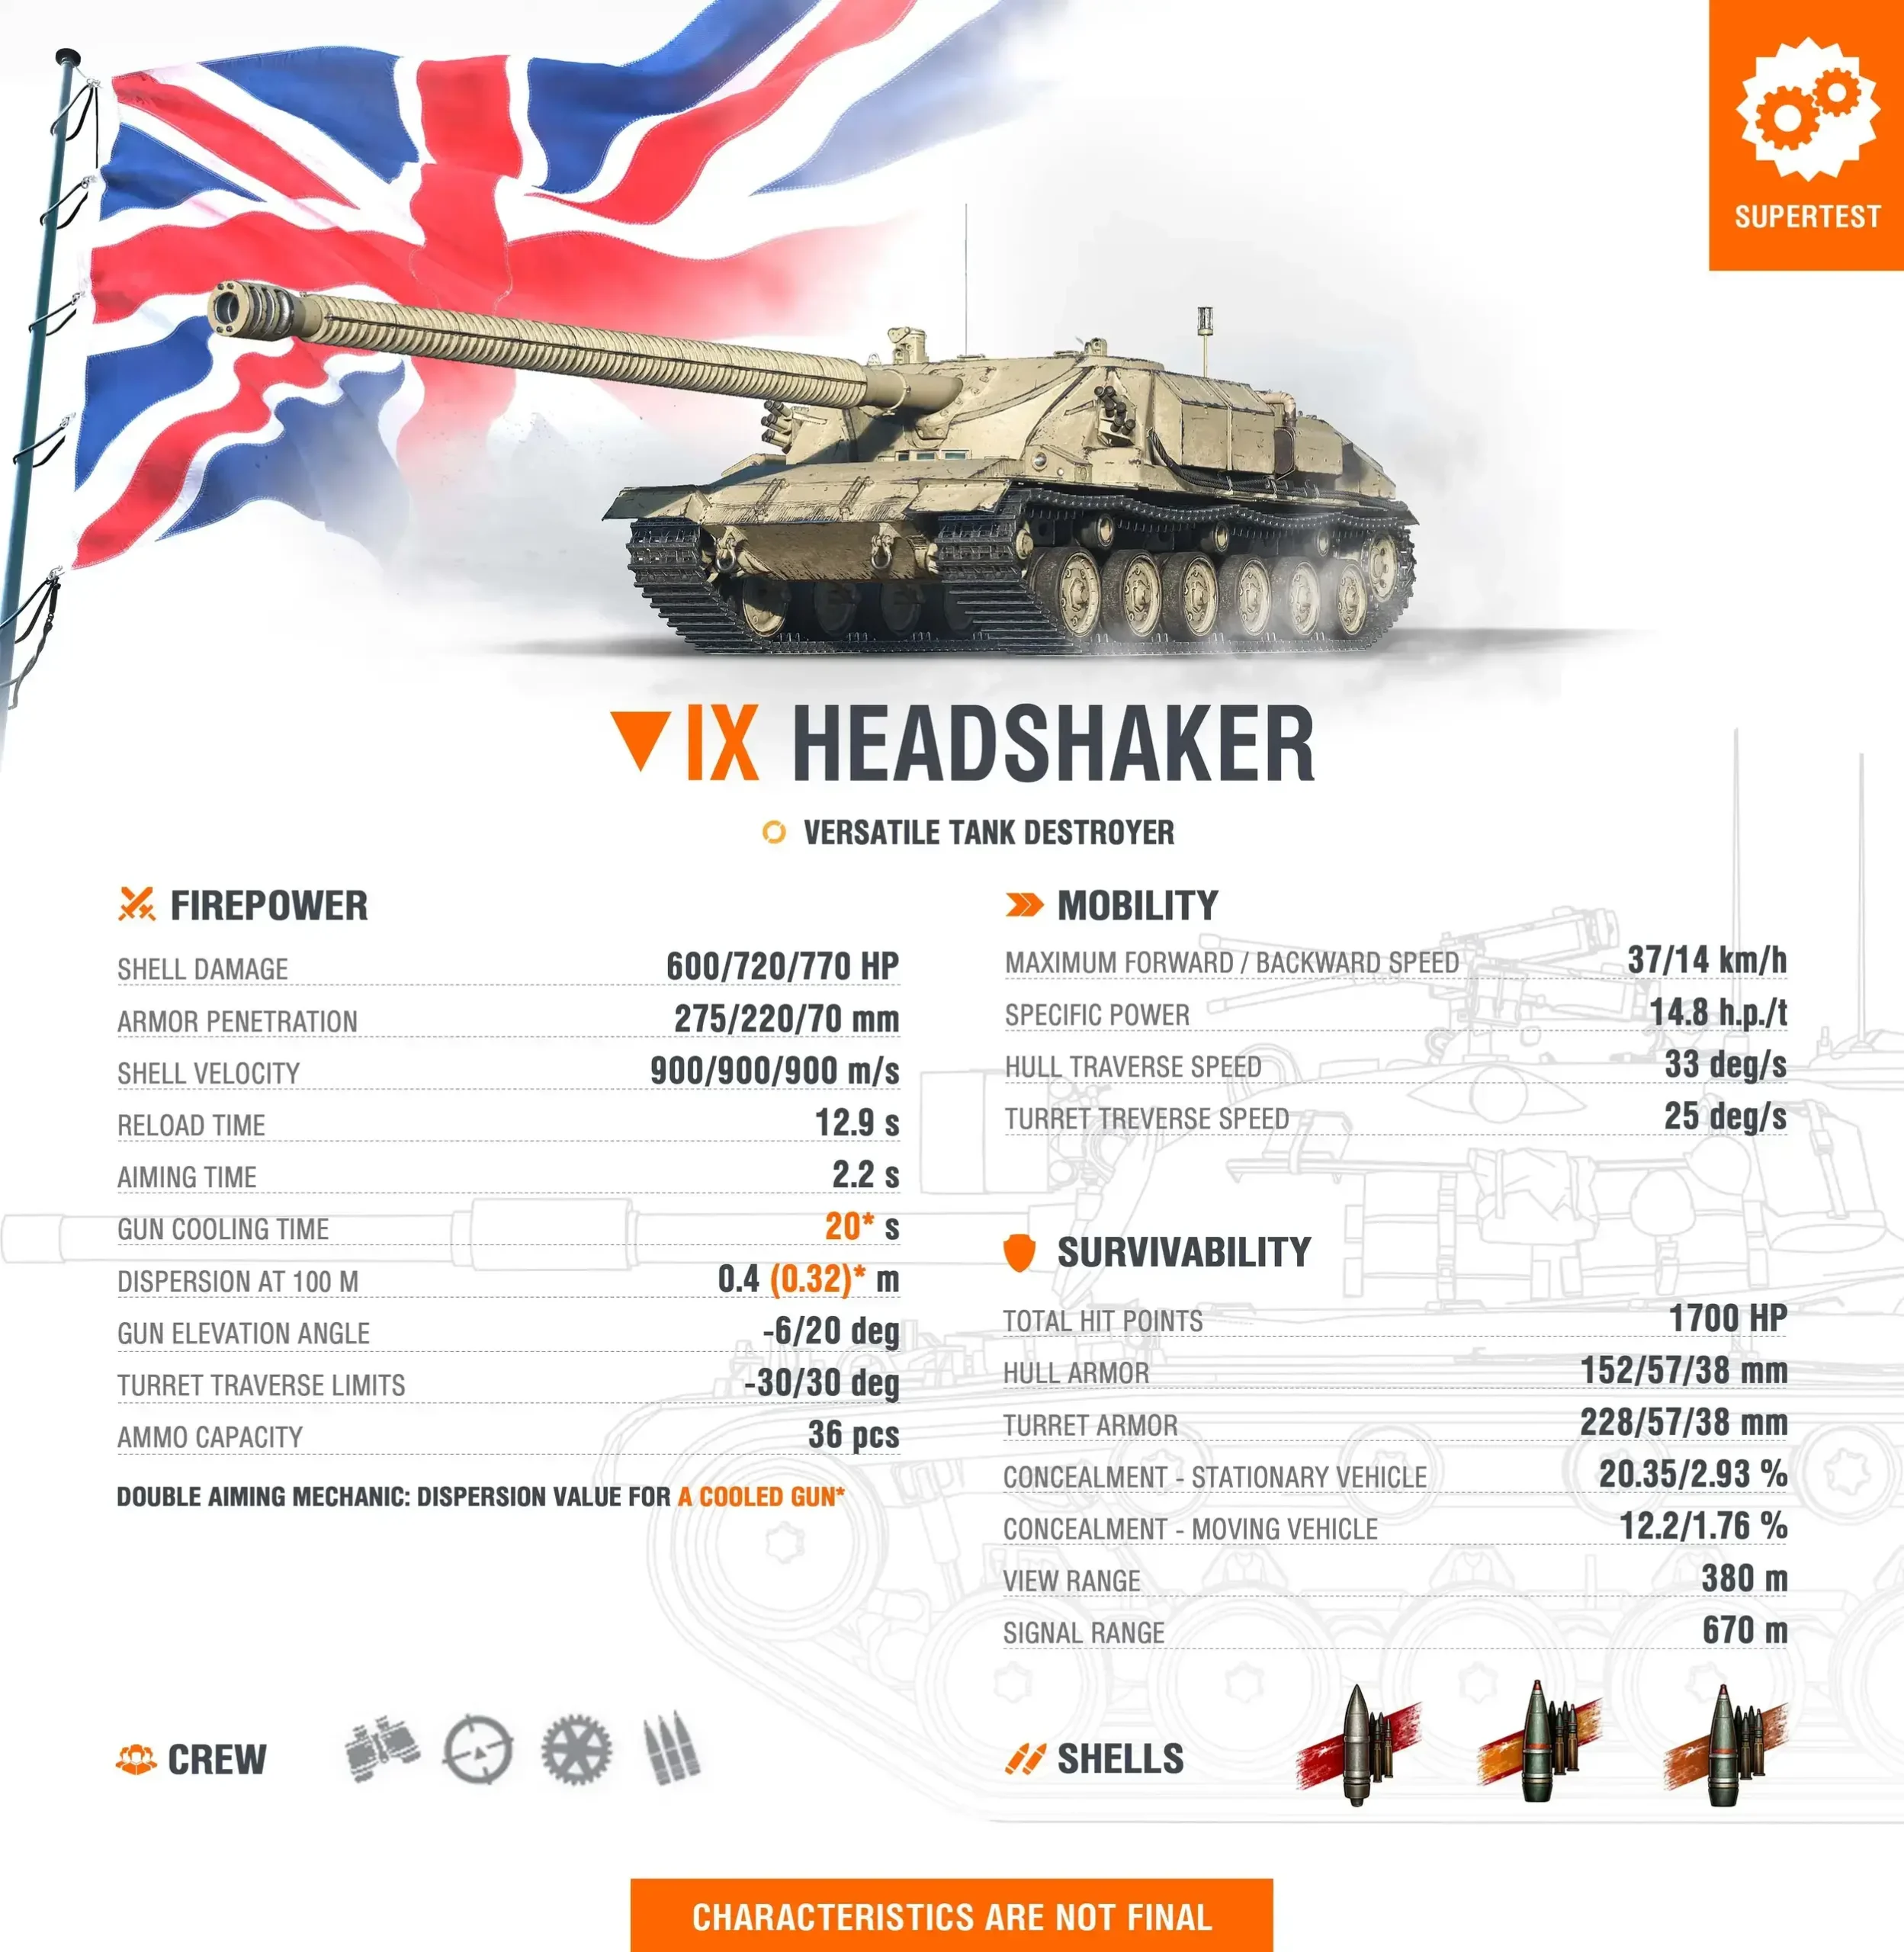
Cooling System: The gun cooling system allows for “double aiming”—the ability to improve accuracy significantly by taking additional time to fully aim. This mechanic transforms the Headshaker from a typical heavy-caliber derp gun into a precision instrument when needed.
Sniping Capability: The double aiming mechanic is specifically noted as helping “a lot” with sniping, but while the accuracy is important for sniping, the shell velocity is also really important, and Headshaker is lacking a lot of it, at only 900 meters per second for all types of shells.
Tactical Choice: Commanders face constant decisions: fire immediately with base accuracy, or take time to cool the gun for precision shots? The answer depends on target distance, exposure time, and tactical urgency.
Brawling vs Sniping: The cooling system enables true dual-role capability. In close brawls, base accuracy suffices. At range, invest the cooling time for surgical strikes.
This mechanic is crucial to understanding the “versatile” classification—it’s what enables the Headshaker to function effectively across engagement ranges that would cripple single-role tank destroyers.
HESH Shells: 720 HP Devastation
The Headshaker’s primary ammunition is HESH (High-Explosive Squash Head), bringing devastating single-shot damage:
720 HP Alpha Damage: Each HESH shell delivers a crushing 720 HP of damage. This alpha damage is exceptional for Tier IX, capable of crippling or outright destroying many opponents in just a few hits.
220mm Penetration: The HESH shells feature 220mm of penetration—sufficient for many targets but requiring careful shot placement against heavily armored opponents. This penetration value encourages targeting weak spots, side armor, or softer targets.
HESH Characteristics: HESH ammunition typically has:
- Lower penetration than kinetic rounds
- Inability to normalize against angled armor
- Vulnerability to spaced armor and tracks
- Exceptional damage when penetration succeeds
- Useful splash damage even on non-penetrations
High-Risk, High-Reward: The 220mm penetration means every shot requires thought. Penetrations deliver crushing 720 HP blows, but bounces waste the lengthy reload time.
The HESH focus creates a playstyle centered around shot selection and target prioritization rather than spamming shots at heavily armored targets.
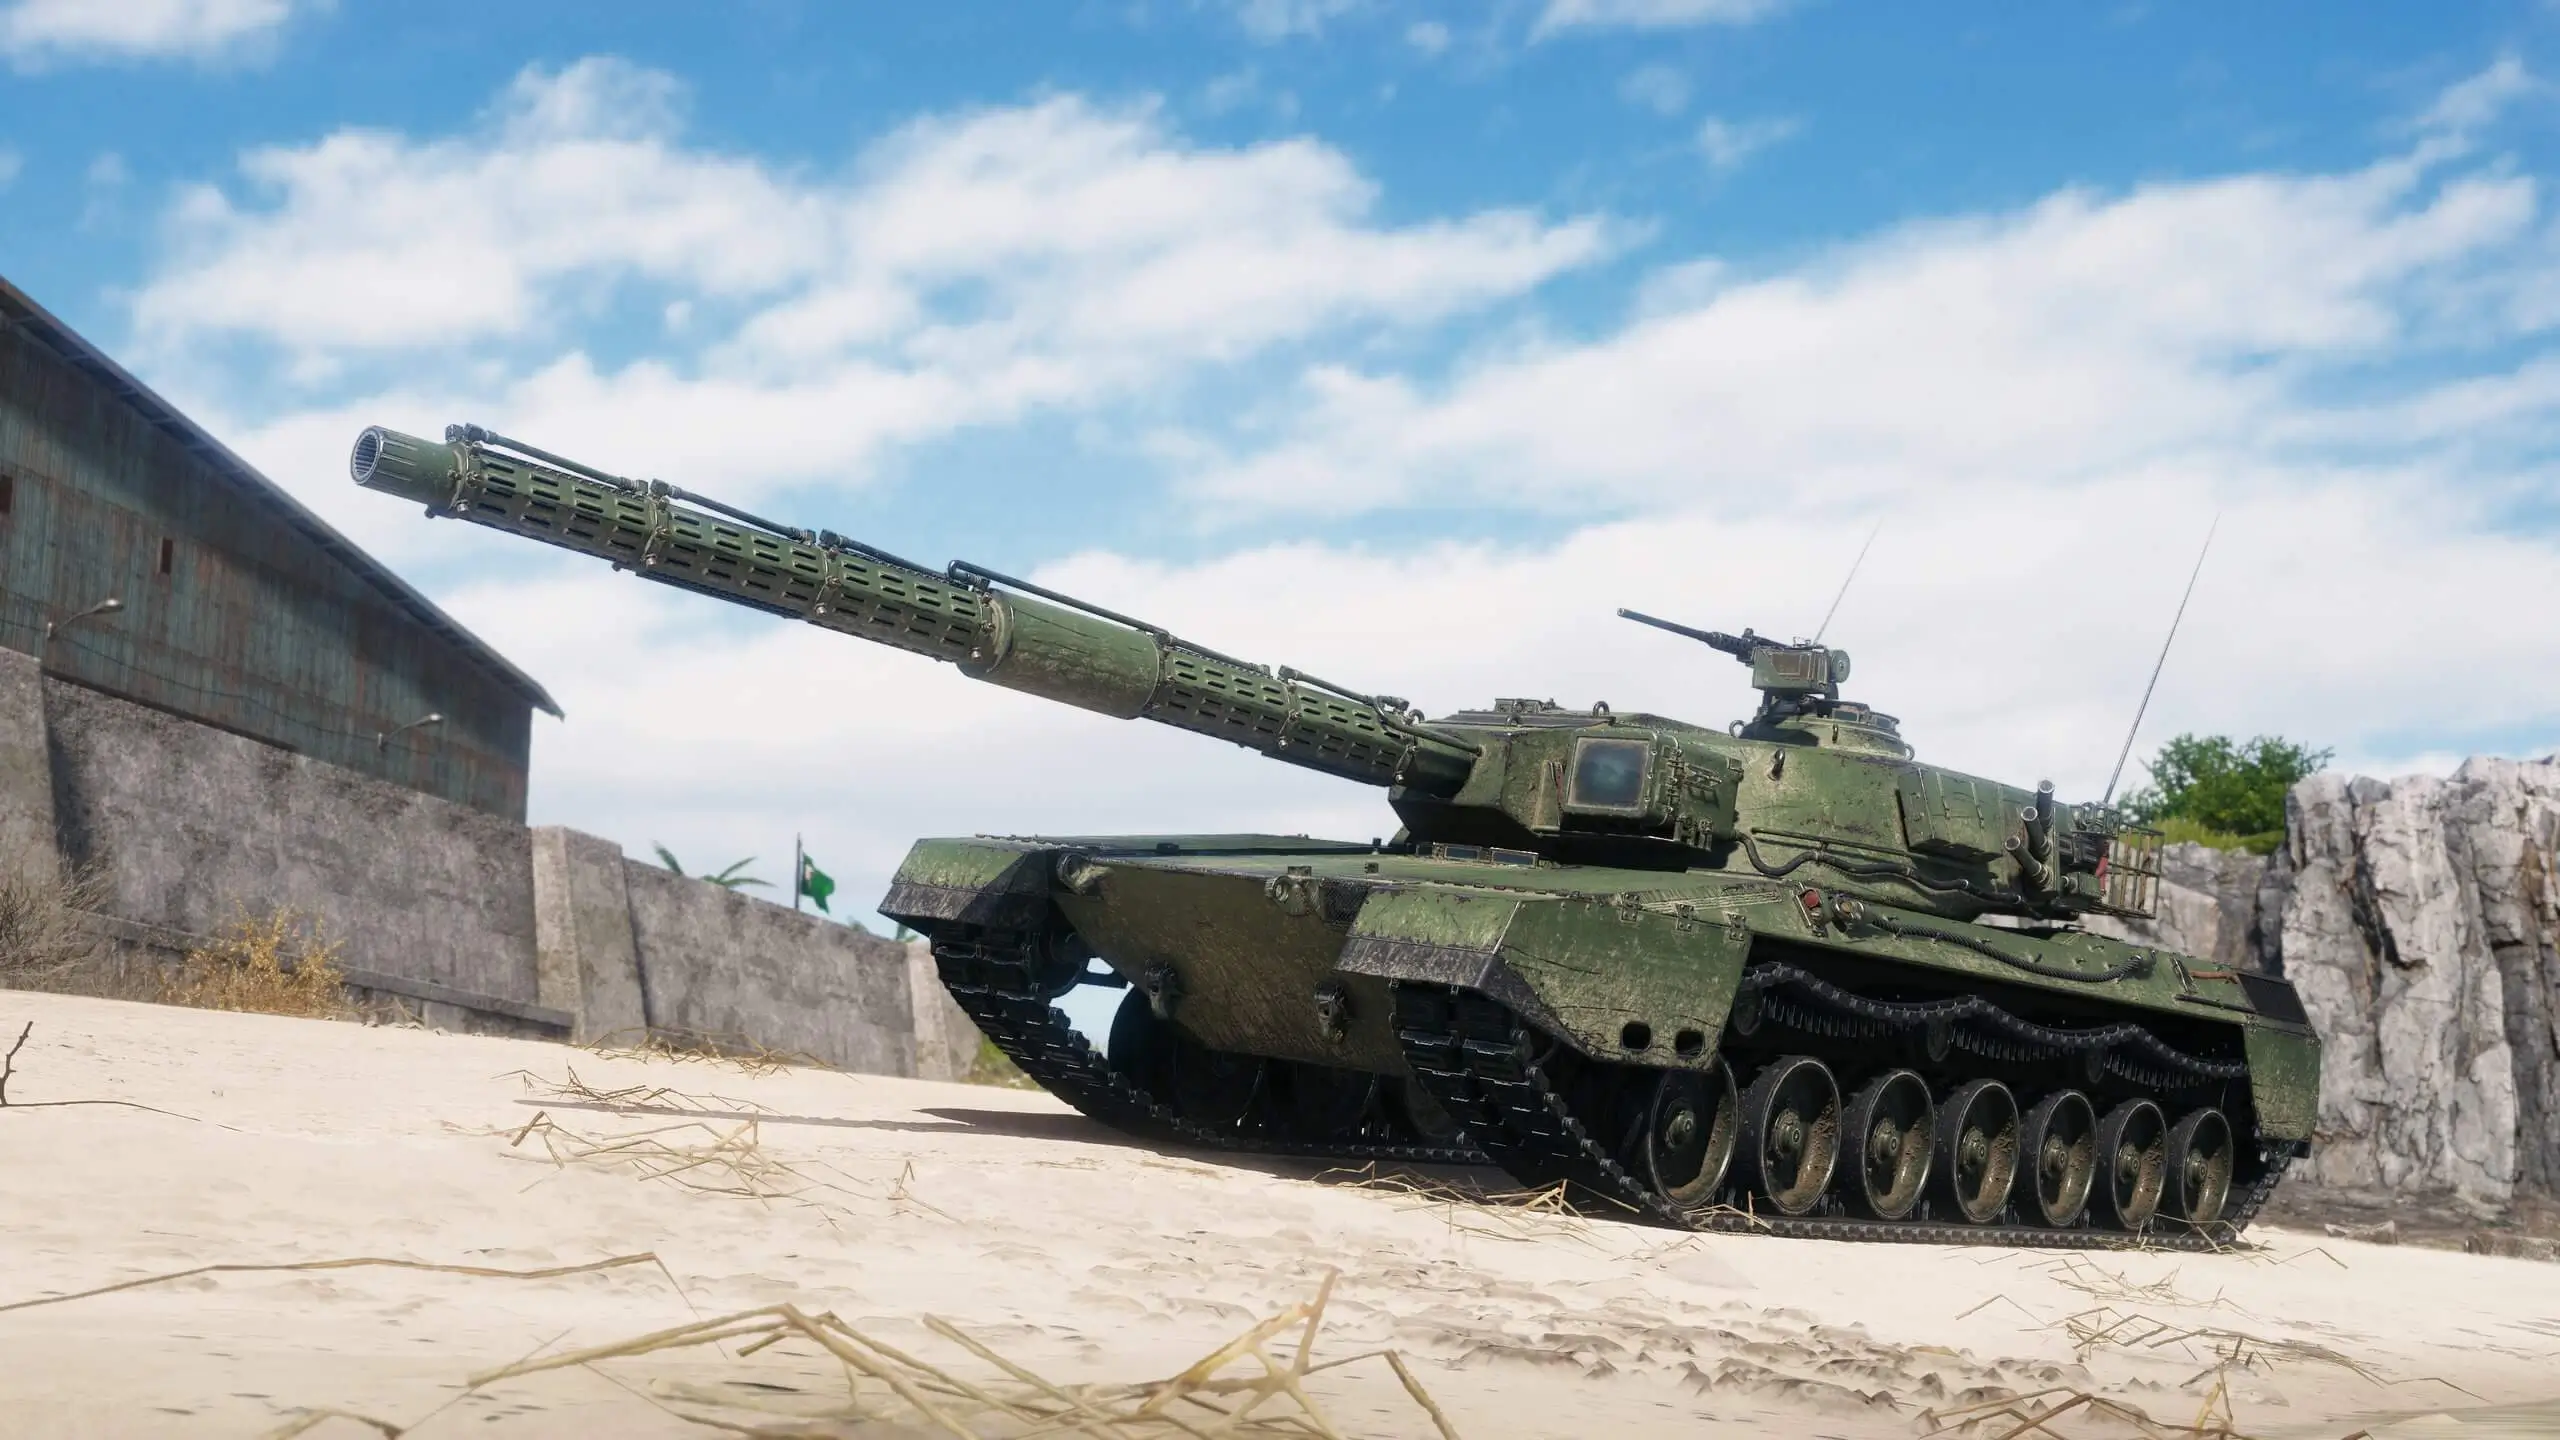
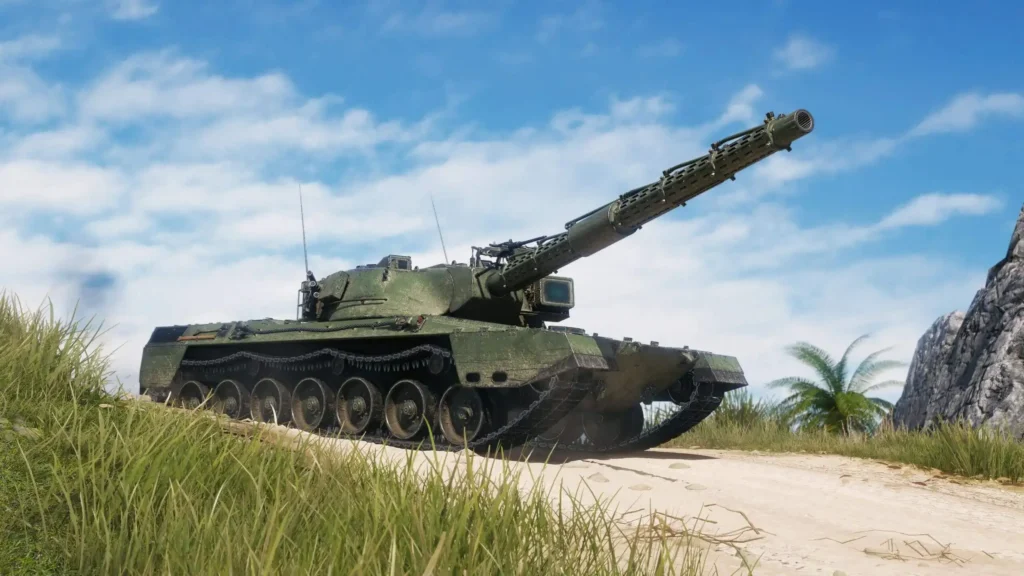
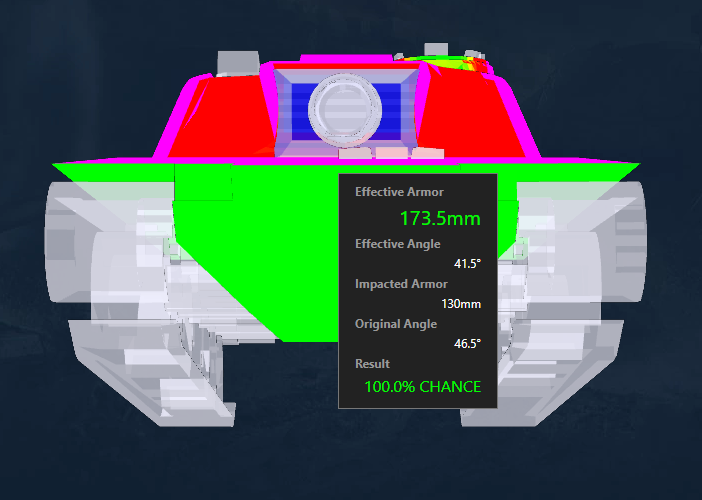
Limited-Rotation Turret: 60-Degree Arc
The Headshaker features a limited-rotation turret with specific tactical implications:
60-Degree Firing Arc: The turret can traverse 60 degrees total (presumably 30 degrees to each side), creating a 60-degree frontal arc of fire. This is significantly more flexible than fixed-gun TDs but far more restrictive than full-rotation turrets.
Vulnerability to Flanking: The 60-degree limitation creates significant blind spots. Aggressive light tanks and fast mediums can exploit these angles, forcing hull rotation that wastes time and exposes weaker side armor.
Brawling Advantage: In close-range brawls where enemies are directly ahead, the limited arc matters less. The turret provides enough flexibility to track targets without constant hull adjustments.
Compared to Fixed-Gun TDs: The Headshaker offers more flexibility than the Tortoise or AT-15, but less than turreted alternatives. It occupies a middle ground requiring different positioning skills.
This characteristic fundamentally shapes how the Headshaker must be played—you’re neither fixed-gun nor fully-turreted, creating unique positioning considerations.
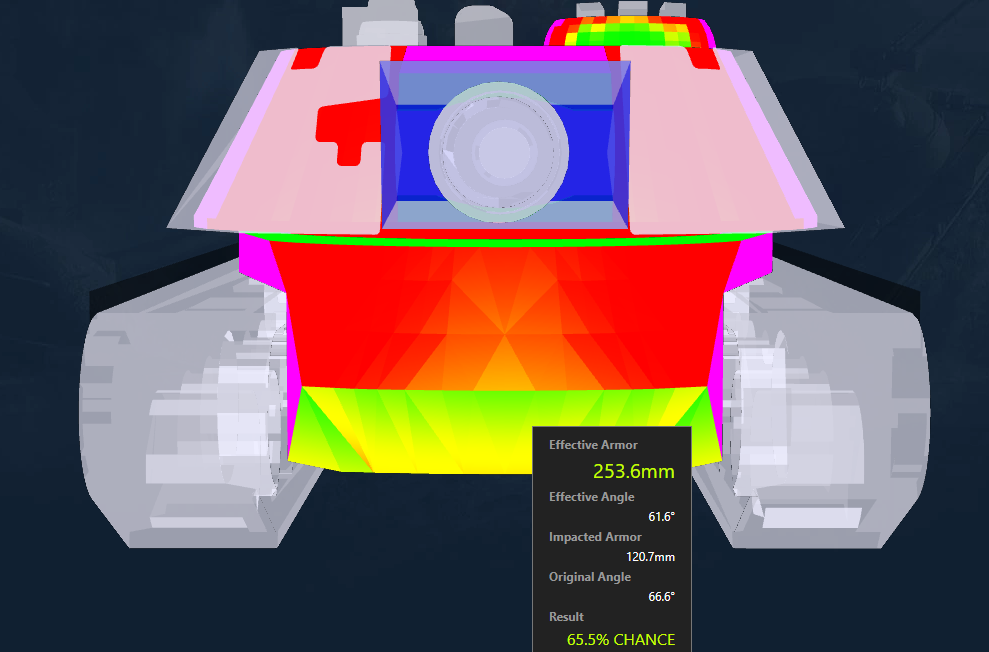
Solid Frontal Armor: Brawling Capability
The Headshaker brings substantial frontal protection:
Solid Frontal Armor: The frontal armor is described as “solid,” suggesting meaningful protection that can bounce shots from same-tier opponents when properly positioned. This armor enables the aggressive close-range gameplay that British TDs are known for.
Brawling Enabler: Combined with 720 HP alpha damage and reasonable reload, the frontal armor allows the Headshaker to engage in close-range confrontations. You can trade shots with confidence, knowing your armor provides protection while you reload.
Gun Depression Concerns: Community discussion notes “soviet gun depression,” suggesting the Headshaker may have limited gun depression despite being British. One commenter sarcastically notes this “must mean it has no frontal weak spots. surely”—implying poor gun depression often correlates with stronger frontal armor profiles.
Armor-Dependent Tactics: The solid frontal armor encourages positioning where enemies must shoot your strongest armor while you aim HESH at their weak spots or side armor.
The armor doesn’t make the Headshaker invincible, but provides the protection necessary to execute close-range tactics that would be suicidal in paper-armored TDs.
High DPM: 12.9-Second Reload
The Headshaker brings impressive damage output:
12.9-Second Reload: The reload time is remarkably fast for a gun delivering capable of 720 HP per shot with HESH penetration. This reload enables sustained pressure that most high-alpha TDs cannot match.
Solid DPM: The combination of 600 HP alpha and 12.9-second reload creates a great DPM foundation for this tank. Maybe it doesn’t have the level of DPM of the Tortoise, but it makes trading a lot easier with almost 50% higher alpha damage.
This reload time is crucial to the “versatile” classification—it enables sustained combat effectiveness that pure alpha-focused TDs cannot maintain.
Mobility: Adequate Repositioning
The Headshaker offers moderate mobility:
37 km/h Top Speed: The maximum forward speed is described as “not stellar” but adequate for changing lines in battle. This isn’t racing speed, but it’s sufficient for tactical repositioning as the battle evolves.
Line-Changing Capability: The mobility specifically enables changing battle lines—relocating from one flank to another as tactical situations demand. You won’t arrive first to any position, but you can adapt to shifting battles.
Heavy TD Characteristics: The 37 km/h speed is typical for heavily armored tank destroyers at Tier IX, balancing armor and firepower against strategic mobility.
Deliberate Movement: The mobility suggests careful, planned repositioning rather than rapid flanking. Choose positions deliberately and relocate when necessary, not constantly.
The mobility ensures the Headshaker remains relevant throughout battles without enabling the rapid flanking gameplay that would contradict the brawling TD role.
Tactical Considerations
The Headshaker’s unusual combination of features creates specific tactical opportunities:
Dual-Role Flexibility: The gun cooling system genuinely enables dual-role capability. Brawl without cooling when enemies are close, or invest time in double aiming for long-range precision. This flexibility is the Headshaker’s defining characteristic.
HESH Target Selection: The 220mm penetration demands intelligent target selection. Prioritize lightly armored opponents, targets showing side armor, or specific weak spots on heavily armored tanks.
Arc Management: Constantly managing the 60-degree firing arc becomes essential. Position your hull to maximize coverage of likely engagement angles while maintaining escape routes.
Armor Utilization: The solid frontal armor enables aggressive positioning that would be suicidal in paper TDs. Face enemies directly, let them shoot your strongest armor, and deliver 720 HP responses.,
Playstyle Implications
The Headshaker rewards commanders who embrace versatility:
Adapt to Range: Adjust tactics based on engagement distance. Close range favors immediate brawling. Long range demands investing in gun cooling for accuracy. Mid-range requires judgment about which approach suits the situation.
Position with Purpose: Every position must consider both the 60-degree firing arc and frontal armor orientation. Place your hull to cover anticipated threats while maintaining offensive capability.
Shot Patience: The 220mm HESH penetration punishes hasty shots against heavy armor. Wait for weak spots, side shots, or favorable targets rather than wasting shells on impenetrable armor.
DPM Maximization: The 12.9-second reload rewards maintaining aggressive positioning that enables frequent shooting. Dead time where you can’t shoot wastes the high-DPM potential.
Commanders looking to master the Headshaker should consider:
- Learning when to invest in double aiming versus firing immediately
- Identifying which targets suit 220mm HESH penetration
- Managing the 60-degree firing arc through hull positioning
- Using solid frontal armor to enable aggressive close-range positioning
- Leveraging high DPM through sustained engagement rather than hit-and-run
- Relocating between battle lines as tactical situations evolve
- Avoiding positions where poor gun depression becomes a liability
- Targeting weak spots or lightly armored opponents to maximize HESH effectiveness
Community Reception
Initial community reactions to the Headshaker reveal diverse perspectives:
Fun Potential: Some players immediately recognize the potential: “This looks super fun.”
Tank Factory Criticism: Others criticize the pace of new tank releases: “What a fuck? Five tanks every month? This is game or tank factory???” suggesting frustration with constant new content.
XM-57 Comparison: Community members draw comparisons to the American XM-57, noting similarities in the limited-rotation turret and heavy-hitting gun combination.
ChatGPT Tanks: Cynical players comment on modern tank designs: “I’m also shaking my Head the whole Time when i see all these ChatGPT Tanks…” implying new designs feel algorithmically generated rather than historically grounded.
Gun Depression Concerns: Players note the apparently limited gun depression despite British origin: “soviet gun depression must mean it has no frontal weak spots. surely” sarcastically suggesting poor depression often accompanies strong frontal armor.
Collector Appeal: Some view it as feeding collector needs rather than filling gameplay gaps: “They must be feeding a need for collectors. No point otherwise.”
What Sets the Headshaker Apart
The Headshaker occupies unprecedented territory:
True Versatile TD: Unlike TDs optimized for either brawling or sniping, the Headshaker genuinely excels at both through the gun cooling mechanic.
HESH-Focused British TD: While Britain has HESH-capable vehicles, the Headshaker appears designed specifically around HESH as primary ammunition rather than an option.
60-Degree Limited Turret: The specific 60-degree arc creates a middle ground between fixed-gun and full-turret that requires distinct positioning skills.
High-Alpha, High-DPM Combination: Rarely do 720 HP guns reload in just 12.9 seconds. This combination creates both immediate impact and sustained pressure.
Gun Cooling on British TD: The cooling mechanic expands to a new nation and vehicle class, demonstrating Wargaming’s willingness to spread innovative mechanics beyond their original implementations.
What’s Next?
As a Supertest vehicle, the Headshaker’s characteristics remain subject to adjustment:
Key questions for testing include:
- Is the 720 HP HESH with 220mm penetration properly balanced?
- Does the gun cooling system adequately compensate for base accuracy?
- Will the 60-degree firing arc prove too restrictive or adequately flexible?
- How does the solid frontal armor perform against current high-penetration meta?
- Is the 12.9-second reload too fast for 720 HP alpha damage?
- Will this be a tech tree vehicle, premium, or reward tank?
- How does the limited gun depression impact effective positioning options?
Final Thoughts
The Headshaker represents ambitious design—combining characteristics that normally don’t coexist to create genuine versatility rather than jack-of-all-trades mediocrity. The gun cooling system transforms a heavy-hitting HESH gun into a precision instrument when needed, while the combination of solid frontal armor and high DPM enables sustained close-range brawling.
For commanders who appreciate tactical flexibility and enjoy adapting to battlefield circumstances rather than executing predetermined strategies, the Headshaker offers an intriguing package. The requirement to manage gun cooling, HESH penetration limitations, limited firing arc, and armor positioning creates a high skill ceiling that rewards mastery.
However, the Headshaker won’t suit everyone. Players who prefer specialized excellence over versatility, or those frustrated by HESH penetration mechanics, will find the Headshaker’s compromises unpalatable. The limited gun depression may also frustrate players accustomed to British gun handling advantages.
Whether you’re excited about Britain’s versatile tank destroyer or skeptical about another unconventional design, the Headshaker represents Wargaming’s continued experimentation with combining mechanics in novel ways. If the gun cooling system proves as effective for enabling dual-role capability as intended, the Headshaker could become a beloved vehicle that rewards intelligent, adaptive play. If not, it risks being another curiosity that fails to find its competitive niche.to find its place in the competitive Tier X medium landscape.